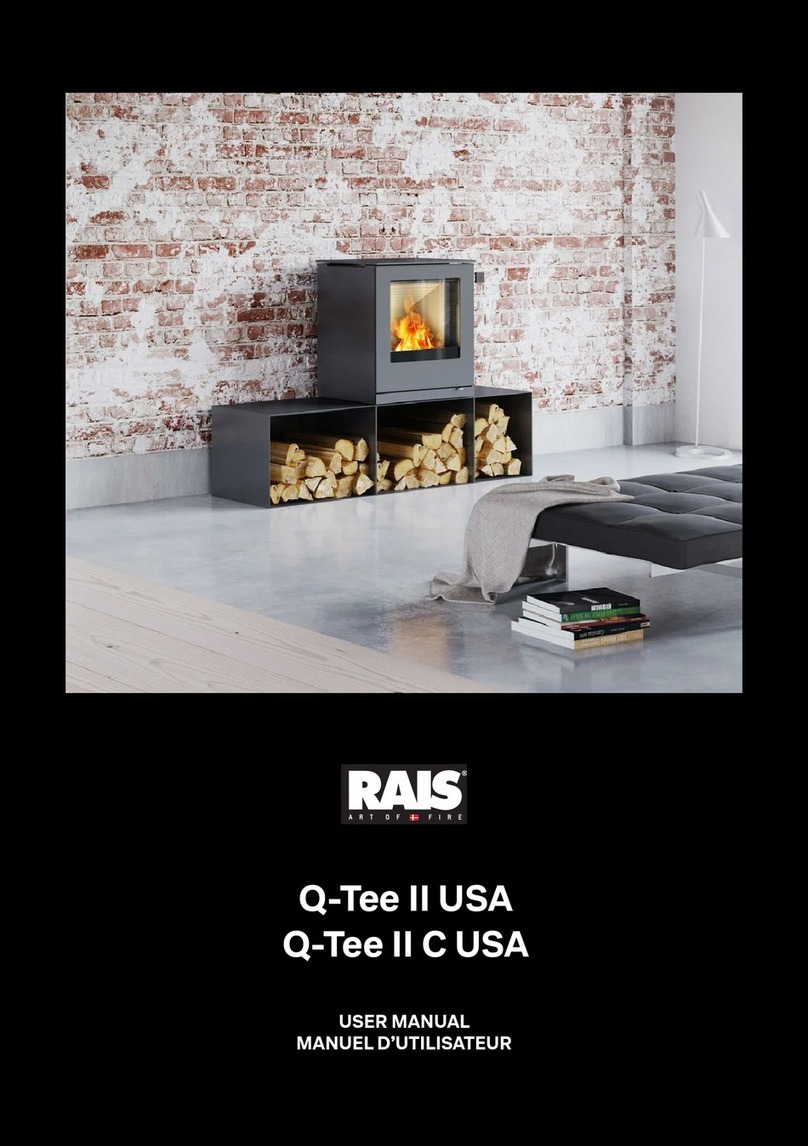
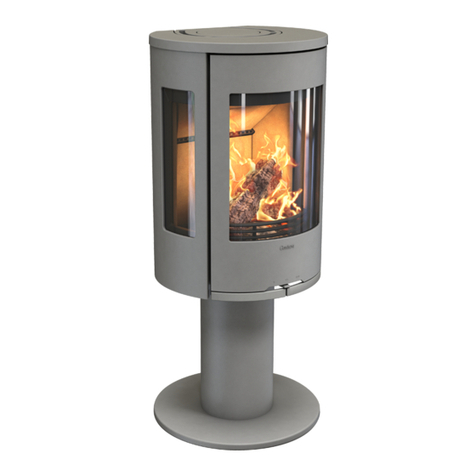
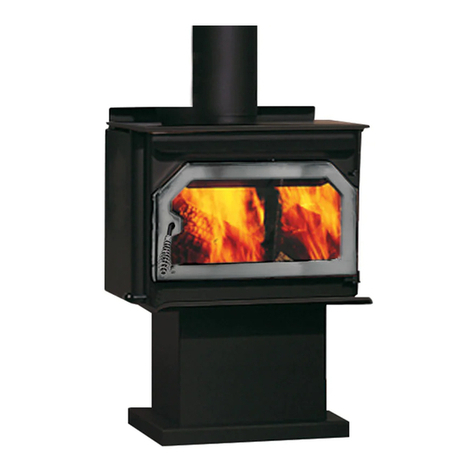
RAIS Q-Tee II INSERT USA Series User manual

USER MANUAL /
MANUAL D’UTILISATION
Q-Tee II INSERT USA

RECYCLING:
The oven is wrapped in packaging that is recyclable.
This must be disposed of according to national rules
regarding the disposal of waste.
The glass can not be reused.
The glass should be discarded along with the residual
waste from ceramics and porcelain.
Pyrex glass has a higher melting temperature and
therefore can not be reused.
If discarded you make an important positive contribution
to the environment.
FIRE ENVIRONMENTALLY FRIENDLY!
5 Eco-friendly advice for sensible heating
- common sense both environmentally and economically.
1. Effective lighting. Use small pieces of wood (r tree) and a
suitable re lighter, for example parafned wood wool/saw-
dust. Open the air damper, so plenty of air is fed to the stove
and the gases from the heated wood can burn rapidly.
2. Light the re with only little wood at a time - this gives the
best combustion. Remember plenty of air for every time new
wood is added.
3. When the ames are diminished, adjust the air damper so
that the air supply is reduced.
4. When only glowing embers remain, air ow can be reduced
further, so heating demand is just covered. With a lower
air supply the charcoal will burn slower and the heat loss
through the chimney is reduced.
5. Use only dry wood - ie. wood with a humidity of 15 to 20%.
We cannot be held responsible for any misprints

3
Q-Tee II INSERT USA
: #0138WN016S, 0138WS016E
: 0
: 10-12-2020
US
OMNI report no.
Revision
Date (DMY)
INTRODUCTION ................................................ 4
WARRANTY ..................................................... 4
SPECIFICATIONS ............................................... 5
WARNING ...................................................6
CONVECTION ................................................... 6
GLASS AND REPLACEMENT OF GLASS ..........................6
INSTALLATION .................................................. 7
DIMENSIONAL DRAWINGS .....................................8
SPACE REQUIREMENTS ......................................10
MINIMUM DISTANCES TO CUMBUSTIBLE MATERIAL ................11
ASSEMBLY INSTRUCTIONS ...................................... 12
FLOOR PROTECTION.........................................14
REMOVAL OF THE FIREPLACE FOR INSPECTION .................15
CHANGE OF CHIMNEY CONNECTION ...........................16
LABEL / NAMETAG ...........................................17
FIREWOOD .................................................... 19
DRYING AND STORING.......................................19
ADJUSTING THE COMBUSTION AIR.............................20
USING THE STOVE ............................................. 21
ADJUSTING THE AIR CONTROL ................................. 21
CONTROL ..................................................22
FIRST FIRE .................................................... 22
LIGHTING AND STOKING ........................................ 23
FUEL CAUTION ..............................................25
CARE AND MAINTENANCE ...................................... 25
MAINTAINING THE INSTALLATION ................................. 26
CLEANING THE SMOKE/BAFFLE SYSTEM ......................... 27
DISPOSAL OF ASHES.........................................28
TROUBLE SHOOTING .......................................... 29
SPARE PARTS.................................................. 30

4
US
Introduction
Congratulations on the purchase of your new RAIS wood burning stove.
A RAIS wood burning stove is more than just a source of heat, it is a symbol of the
emphasis you put on decorating your home with superiorly designed high-quality prod-
ucts.
PLEASE READ THIS ENTIRE MANUAL BEFORE YOU INSTALL AND USE YOUR NEW
RAIS STOVE. FAILURE TO FOLLOW INSTRUCTIONS MAY RESULT IN PROPERTY
DAMAGE, BODILY INJURY, OR EVEN DEATH. SAVE THIS MANUAL AND KEEP IT
HANDY FOR EASY REFERRAL.
“DO NOT INSTALL IN A MOBILE HOME”
“WARNING: Do not over fire. If the stove top or chimney connector pipe glow
red, you are over firing”.
“Warning: Do not use other, than the specified original Rais components!
Safety and environmental testing
The Stove have been tested by OMNI-Test Laboratories, Inc. 13327 NE Airport Way,
Portland, OR 97230 USA and are listed to UL 1482-2011 and ULC-S628-93. It is also
EPA certified..
For future reference, please write down the production number of your RAIS wood
burning stove here. The number must be stated in all inquiries or complaints concern-
ing this product.
Warranty
We offer a five-year warranty on your RAIS stove. The warranty covers any defects in
materials or workmanship. However, it does not cover damage from misuse or neglect,
and the glass, gaskets and firebricks are not covered either. Warranties are void if the
unit is used to burn any materials other than wood or not operated in accordance with
this owner’s manual
Distributor:
Date:

5
US
Rais Q-Tee II INSERT USA
Weight of Stove 333 lbs (151 kg)
Stove exterior: Width/depth/height
(inches) 24,5 / 15 / 25,7
Firebox interior Width/depth/height
(inches) 17.5 / 10.9 / 10.4
Heating capacity at -20°C/-4°F App. 100 m² / 1100 Square Feet
Recommended amount of wood
when fueling (kg) wood: 2-3 logs
of wood of app. 25-33cm 1,8(kg) / 4(lbs)
Intermittent operation: Refuelling should be undertaken
within 60 minutes.
Flue gas mass flow: 5,2 grams per second
Flue gas temperature: 263°C / 505°F
listed stainless chimney liner: 6” (15 cm)
Chimney pipe - class A, UL-103 HT: 6” (15 cm)
Optimal thermal output : 22 kBTU (6,5kW)
Min./Max. output (kW): 10 - 27 kBTU (3 - 8kW)
Minimum stove draft pressure at
above output: 0.048”WC (12 Pa)
Tested EPA emission particulate
rate: 0.9 g/hr
Specifications:
U.S. ENVIRONMENTAL PROTECTION AGENCY Certified to comply with 2020 par-
ticulate emission standards using crib wood. 0.9 g/hr, Method 28R
This wood heater needs periodic inspection and repair for proper operation. It is against
federal regulations to operate this wood heater in a manner inconsistent with operat-
ing instructions in this manual.
This wood heater has a manufacturer-set minimum low burn rate that must not be
altered. It is against federal regulations to alter this setting or otherwise operate this
wood heater in a manner inconsistent with operating instructions in this manual.

6
US
Convection
All RAIS stoves are convection stoves, which means that the sides of the stove never get
too hot. Convection works by pulling cold air into the system at the base of the stove
and up through the convection duct that is located along the combustion chamber of
the stove. The heated air is released from the top of the stove, creating rapid air circula-
tion in the room.
Warning:
CHILDREN AND ADULTS SHOULD BE ALERTED TO THE HAZARDS OF HIGH
SURFACE TEMPERATURES AND SHOULD STAY AWAY TO AVOID BURNS OR
CLOTHING IGNITION.
YOUNG CHILDREN SHOULD BE CAREFULLY SUPERVISED WHEN THEY ARE IN THE
SAME ROOM AS THE APPLIANCE. TODDLERS, YOUNG CHILDREN AND OTHERS
MAY BE SUSCEPTIBLE TO ACCIDENTAL CONTACT BURNS. A PHYSICAL BARRIER IS
RECOMMENDED IF THERE ARE AT-RISK INDIVIDUALS IN THE HOUSE. TO RESTRICT
ACCESS TO A FIREPLACE, INSTALL AN ADJUSTABLE SAFETY GATE TO KEEP TODD-
LERS, YOUNG CHILDREN AND OTHER AT-RISK INDIVIDUALS OUT OF THE ROOM
AND AWAY FROM HOT SURFACES.
Glass and replacement of glass.
All RAIS stoves supplied with Robax® glass in the door. Robax® glass is a ceramic glass
type suitable for stoves. The glass is installed from RAIS as an integral part of the door
and stove.
Inspect the glass for cracks prior to the first fire.
Abuse may cause damage to the glass and door.
Do not strike the door or glass nor slam the door
Do not build the fire close to the glass or opening.
Do not use the stove if the glass is broken - contact your local authorized dealer.
In case of broken glass during use of stove - let the stove slowly burn the remaining
firewood under supervision. Do not close the chimney baffle if installed. Contact you
local authorized dealer
The glass is supplied as an integral part of the door for spare part. The Robax® glass
may only be replaced by genuine spare parts from RAIS. Do not use substitute material.
Replacement of the glass as separate component is only for authorized personnel.

7
US
Installation
Precautions and Specifications
IF THIS STOVE IS NOT INSTALLED PROPERLY, A HOME FIRE MAY RESULT. TO REDUCE
THE RISK, PLEASE CAREFULLY FOLLOW THE DIRECTIONS FOR INSTALLATION.
Before installation, remember to consult your local building inspector or fire marshal
to determine the need to obtain a permit. Also enquire about restrictions and installa-
tion inspection requirements in your area. If utilizing an existing chimney, it is recom-
mended that a professional mason or stove installer do a complete check-up of the
chimney, liner, and flue beforehand.
In order for the stove to work and draw properly, sufficient air supply is important. Be
especially aware of any mechanical fans (e.g. kitchen or bathroom exhaust systems)
that may affect the proper draw.
Do not use grates, andirons, or other fuel support methods. Build fire directly on
hearth.
Do not connect this stove to a chimney flue or air distribution duct or any system serv-
ing another appliance.
This fireplace insert must be installed with a continuous liner of 6” diameter extending
from the fireplace insert to the top of the chimney. The chimney liner must conform to
the class 3 requirements of CAN/ULC-S635, Standard for Lining Systems for Existing
Masonry or Factory-Built Chimneys and Vents, or CAN/ULC-S640, Standard for Lining
Systems for New Masonry Chimneys.
The existing fireplace valves MUST be locked in the open position.
Please ensure that there is easy access to the chimney cleanout door.
Do NOT connect this fireplace insert to a chimney serving another appliance!

8
A-A
A
A
Q-Tee II INSERT USA
Classic model
8296550
0 [0 in]
111 [4.37 in]
476 [18.74 in]
640 [25.197 in]
0 [0 in]
310 [12.205 in]
620 [24.409 in]
n
145 [
n
5.709 in]
n
175 [
n
6.89 in]
Knock out
Knock out
0 [0 in]
310 [12.205 in]
620 [24.409 in]
0 [0 in]
112,5 [4.429 in]
380 [14.961 in]
n153,52 [n6.044 in]
409 [16.102 in]
402 [15.827 in]
0 [0 in]
58 [2.283 in]
65 [2.559 in]
188,5 [7.421 in]
540 [21.26 in]
603 [23.74 in]
610 [24.016 in]
666 [26.22 in]
209 [8.226 in]
159 [6.26 in]
n
145 [
n
5.709 in]
US

9
A-A
A
A
Q-Tee II INSERT USA
Glass model
8296551
0 [0 in]
111 [4.37 in]
476 [18.74 in]
640 [25.197 in]
0 [0 in]
310 [12.205 in]
620 [24.409 in]
0 [0 in]
112,5 [4.429 in]
380 [14.961 in]
n153,52 [n6.044 in]
409 [16.102 in]
351,5 [13.839 in]
0 [0 in]
58 [2.283 in]
68 [2.677 in]
543 [21.378 in]
600 [23.622 in]
610 [24.016 in]
666 [26.22 in]
n175 [n6.89 in]
n
145 [
n
5.709 in]
Knock out
Knock out
0 [0 in]
310 [12.205 in]
620 [24.409 in]
208,95 [8.226 in]
159 [6.26 in]
n
145 [
n
5.709 in]
US

10
Established:
Designer: Project manager:
Format:
Approved:
Drawing no.:Revision:Project:
Drawing name:
INDUSTRIVEJ 20, 9900 FREDERIKSHAVN, DENMARK
Phone +45 98 47 90 33 - Fax +45 98 47 92 91
E-mail: info@rais.dk - Homepage: www.rais.dk
Corrections:
D M Y
ksj
Minimum space for Q-Tee II INSERT
16-11-2020 A3 Space requirements
Q-Tee II
INSERT USA
US
Space requirements
This insert requires a free space of minimum 26”(660,4mm) in height, 15.5“
(393,7mm) in depth and with a width of 25” (635mm) to funktion propperbly, and
allow for convection air cirkulation. The insert will expand acording to the temperature
when it heats up, therefore there need to be some free space around the insert.

11
Established:
Designer: Project manager:
Format:
Approved:
Drawing no.:Revision:Project:
Drawing name:
INDUSTRIVEJ 20, 9900 FREDERIKSHAVN, DENMARK
Phone +45 98 47 90 33 - Fax +45 98 47 92 91
E-mail: info@rais.dk - Homepage: www.rais.dk
Corrections:
D M Y
ksj
Rais Q-Tee II Insert USA - Build in
13-11-2020 A3 Rais Q-Tee II Insert
USA - Build in
Q-Tee II
INSERT USA
Mantel
US
Maximum Mantel Depth - 12 Inch
(305mm)
Hearth Extension
Minimum distances to cumbustible material.
Distance to adjacent sidewall from door 12.25” (311 mm)
Distance to floor from door >9.5” (241mm) R=0
Distance to floor from door <9.5” (241mm) R=1.4
Distance to Ceiling from door 56.5” (1435mm)
Floor protection in front of the door US 16” CAN 18” (1435mm)
Trim depth ¾” (19mm)
Fascia or Trim

12
A
A
US
Assembly Instructions
Although the Insert comes assembled, it has to be mounted into the fireplace.
1. First remove the lower baffle plate by lifting it up in one side and then down in
the other side, then pulling it out. Remove the upper baffle plate by pushing
the back of the plate up, tilt it and take it out. Remove the steel smoke chicane
by lifting it up and take it out.
Steel smoke chicane
Upper baffle plate
Lower baffle plate

13
A
A
US
2. Connect the flue collar to the chimney or liner. place the insert in the fireplace.
3. The insert can then be placed and centered in the fireplace or built-in
opening. To level the insert, use the 4 leveling screws situated under the
firebox. Important! At least ½” (1cm) space should be left between insert
and the opening.
4. Now the stovepipe (flexible or solid) can be attached to the insert. Reach up
through the insert and pull the flue collar into the opening and scure it to the
insert.
5. Finally, remount the baffle plates and chicane in reverse
order.
Insure that there is a secure and airtight connection between
the liner and the chimney.
These holes in the inserts convection box
can be used to fix the insert in place. Open
the door to acces the holes.

14
US
Floor protection.
If the floor is combustible, the stove must be placed on a non-combustible plate such
as steel, glass or stone. The floor protection plate must extend 16” in front of the stove
door in the US (40.6cm) and 18” (45.7cm) in Canada, 8” (20cm) beyond the sides of
the fuel-loading door. The floor protection is required to have thermal protection R=1.4
unless the door is position > 9.5” above the floor, then the thermal protection can be
R=0
Make sure that the floor and the sub-floor of the room in which the stove is installed is
designed to carry the extra weight of the stove. The floor protector plate must be made
of a non-combustible material.

15
US
Removal of the fireplace for inspection.
In case of an inspection of the fireplace or fireplace insert it might be necessary to
remove the insert from the fireplace.
in this case you should follow the stpes on page 12 for removing the baffles and
smoke chicane from the insert and loosen the flue collar from the insert.
the insert can now be pulled out of the fireplace.

16
US
IfthIs stove Is not Installed properly,
ahome fIre may result. toreduce
thIs rIsk, please follow the dIrectIons
for InstallatIon carefully.
Change of chimney connection
The stove is delivered ready for top outlet, but may be changed to back outlet in the
following way:
Strike out the knock out plate at the rear of stove.
Remove the baffle plate and smoke chikane.
Remove the blanking plate (3 M6 nuts) and its sealing.
Mount the blanking plate on upper flue outlet hole - be
sure to place the sealing correctly.
It is all screwed together with the 3 M6 nuts.
Mount the baffle plate and smoke chikane in reverse
order.
Sample photos
Mount the flue collar on back flue outlet hole using three
M6x20 cylinder screws and M6 nuts.

17
Clearances to combustible surfaces
all distances are minimum distances! FLOOR PROTECTOR
See further floor protection requirements at bottom of this label.
Floor protection for
Canada: 18" (45 cm)
from unit to front of floor protector.
U.S. ENVIRONMENTAL PROTECTION AGENCY Certified to comply
with 2020 particulate emission standards using crib wood. 0.9
g/hr, Method 28R
MINIMUM CLEARANCE
DOOR TO SIDE WALL 12.25"/260mm
CEILING FROM DOOR 56.5"/mm
FRONT WALL / FURNISHING 36"/915mm
DOOR TO FLOOR (R=0) 9.5"/241mm
DOOR TO FLOOR (R=1.4) 0"/0mm
Écartement minimum
PORTE À MUR LATÉRAL 12.25"/260mm
PLAFOND DE LA PORTE 56.5"/mm
MUR AVANT / MEUBLE 36"/915mm
PORTE AU SOL (R = 0) 9.5"/241mm
PORTE AU SOL (R = 1,4) 0"/0mm
FLOOR PROTECTION:
Floor protection must be non-combustible material extending to the front
and sides from door opening.
Replace glass with only Rais authorized dealer supplied ceramic glass
** Not Tested - NFPA Guidelines in USA, CAN/CSA B365-M91 in Canada
** Non testé - NFPA Guidelines au USA, CAN/CSA B365-M91 au Canada
La protection de sol doit être au moins de 3/8 inch matériel non combustible
placé sous le foyer s'étendant vers l'avant, les côtés les ouvertures et
l'arriére comme induqué.
Manufactured by:
RAIS A/S
Industrivej 20, DK-9900 Frederikshavn, Denmark
Model: Q-Tee II INSERT USA
Solid Fuel Room Heater
Tested to:
UL 1482-2011
ULC-S628-93 (R 2016)
For Use With Solid Wood Fuel Only
Model
Modéle
Date of manufacture Month
Date of fabrication Mois
Year
Année
Serial no.
N° de série
Report No. #0138WN016S
#0138WS016E
Made in Denmark
Fabriqué au Danemark
This wood heater needs periodic inspection and repair for proper operation.
Consult the owner's manual for further information. It is against federal
regulations to operate this wood heater in a manner inconsistent with the
operating instructions in the owner's manual.
8
8
US 16"
CAN 18"
36
12.2512.25
56.5
> 9.5 (R=0)
< 9.5 (R=1.4)
US
Label

18
CAUTION:
HOT WHILE IN OPERATION-DO NOT TOUCH
KEEP CHILDREN AND CLOTHING AWAY-
CONTACT MAY CAUSE SKIN BURNS.
SEE NAMEPLATE AND INSTRUCTIONS.
KEEP FURNISHINGS AND OTHER COMBUSTIBLE
MATERIALS A CONSIDERABLE DISTANCE AWY
FROM THE APPLIANCE.
Do not overfire - if heater or chimney
connector glows, you are overfiring.
DO NOT REMOVE THIS LABEL / NE PAS ENLEVER CETTE ÉTIQUETTE
ATTENTION:
CHAUD PENDANT LE FONCTIONNEMENT - NE
PAS TOUCHER ECARTE LES ENFANTS ET
LES VETEMENTS- LE CONTACT PEU CAUSER
DES BRULURES. CONSULTE LA PLAQUE ET
LES INSTRUCTIONS. TENIR LES MEUBLES ET
AUTRES MATIERES COMBUSTIBLES A
GRANDE DISTANCE DE LAPPAREIL.
Évitez de surshauffer-si le feu ou la cheminée
rougeoie, vois surchauffez.
TO PREVENT HOUSE FIRES
Contact local Building or Fire officials about restrictions and installation inspection in your
area.
Install and use only in accordance with manufacture's installation and operating
instructions and local codes.
In absence of any local codes, installation must meet minimum requirements of NFPA 221
in USA and B365 in Canada.
Refer to manufacture's instruction and local codes for precautions required for passing
chimney through a combustible wall or ceiling.
Inspect and clean chimney system frequently in accordance with manufacture's instruction.
Do not connect this stove to a chimney flue serving another appliance.
Do not use grate or elevate fire.
Build wood fire directly on hearth.
Flue connector pipe must be 6 inch diameter, listed stainless chimney liner.
Chimeney must be factory built 6" diameter Class "A" 103HT, or masonry.
TO PREVENT CREOSOTE FIRES
Inspect and clean chimney frequently - Under certain conditions
of use, creosote buildup may occur rapidly.
Do not use other fuels than Fire wood.
CAUTION: Fully open combustion air control before opening the
fuel feed door.
CAUTION: Only operate the wood heater with the doors closed.
POUR EVITER LES INCENDIES DOMESTIQUES
Contactez les Autorités des Bâtiments et des pompiers concemant
les restrictions et inspections d'installation dans votre région.
Insallez et utilisez cet appareil uniquement en respactant les instructions d'installation et
d'utilisation du fabriquant.
Respectez aussi les réglementations locales.
En l'absence de réglementations locales, l'installation doit respecter les normes
minimums de NFPA 211 aux USA et B365 au Canada.
Référez-vous aux instructions du fabricant et réglement locaux concernant les
précautions nécessaires á prendre pour le passage de la cheminiée á travers une paroi
ou un plafond combustible.
Inspectez et nettoyez le systéme de cheminée fréquemment selon
les instructions du fabricant.
Ne connectez pas ce poêle á un conduit de cheminée utilisée
par un autre appareil.
N'utilisez pas de grille et ne faites pas monter le feu.
Établissez le feu de bois directement dans L'âtre
Le tuyau de connexion au conduit doit avoir un diamétre de 6 inch,
doublure de cheminée en acier inoxydable répertoriée.
La cheminée doit être une fabrication de 6" de diametre Class "A" 103 HT, ou en
maconnerie.
POR EVITER FEUX DE CREOSOTE
Inspectez et nettoyez la chemiée réguliérement - Sous certaines condition d'emploi, la
créosote peut s'accumuler rapidement.
Ne pas utiliser d'autres combustibles que le bois.
AVIS: Ouvrez complétement le contrôle d'air de combustion avant d'ouvrir la porte du
foyer.
AVIS: Seulement se servir du poële portes fermees.
US

19
US
Firewood
Only burn wood that has been seasoned for at least one full year (two years is better).
If the wood has not been seasoned or dried, energy will be lost in evaporating the wa-
ter held in the wood. Furthermore, condensation or creosote might occur in the stove
and pipe when damp wood is burnt.
Freshly cut wood contains approx. 60-70% water and is completely unsuited for burn-
ing.
Log size should be about 2” (5 cm) less than the width of the firebox
NEVER burn trash (plastIc and other types of artIfIcIal materIals emIt
harmful gases), drIftwood, treated or paInted wood, artIfIcIal logs or
non-seasoned wood.
never burn fuels other than specIfIed!
burnIng charcoal for example, contaIns the rIsk of generatIng carbon
monoxIde hazards
All types of wood heat equally per pound; however, the density of wood is not the
same as is shown in the table below, where the combustible value of wood dried for
two years with a moisture of 15-20% is taken into account. See table to the left.
Drying and storage
Wood to be used for burning in a stove should be dried for two years to ensure optimal
burning.
Here are some storage tips:
• Cut and split the wood before storing.
• Keep the woodpile in a dry sunny place, protected from the rain. Do not cover the
pile with plastic, because that prevents the wood from drying properly.
• Stack the wood with enough space between the rows to ensure good air circulation.
• Bring the logs inside the house two-three days prior to use.
Wood type Dry wood
kg/m³
In comparison
to beech
Beech and oak 580 100 %
Ash 570 98 %
Maple 540 93 %
Birch 510 88 %
Mountain pine 480 83 %
Fir 390 67 %
Poplar 380 65 %
donot store solId fuel wIthIn
space heater InstallatIon
clearances or wIthIn the space
requIred for chargIng and
ash removal.

20
US
Adjusting the combustion air
All RAIS stoves are equipped with an easy-to-use handle for adjusting the air control.
For the various positions of the control please see the following illustrations. To ensure
proper combustion process it is very important to supply the correct quantity of air at
the right time and place. The adjustment range made from factory may not be altered
for increasing firing for any reason.
Primary air is defined as combustion air for burning the mass of wood and stimulates
production of volatile gases.
Secondary air is used to burn off the gases at high temperatures (above 1,000°F/540°C)
and to keep the glass free of soot. The secondary air is let through the air control be-
neath the combustion chamber and is heated through the side channels, which is then
directed to the glass. The warm air runs along the glass, keeping it free of soot.
At the very back of the combustion chamber there is a tertiary channel at the top that
helps to combust the remaining gases.
When positioning the air control between Pos. 1 and 2 optimum utilization of the
energy contents of the wood is obtained, because of sufficient oxygen for combustion.
When the flames burn bright and yellow, the control has been adjusted correctly. Find-
ing the correct position takes some trial and error, but is easy to find.
Never close the air control completely when using the stove. A typical error is to close
the control too soon, because the heat gets too intense. This results in the appearance
of a dark cloud of smoke from the chimney and that means the energy value of the
wood is not being used properly.
It is important for proper control of the fire that the instructions in the manual are fol-
lowed and the stove door normally is kept closed. It is also necessary to keep the seals
in a good condition.
This manual suits for next models
2
Table of contents
Languages:
Other RAIS Wood Stove manuals

RAIS
RAIS attika Q-Tee II User manual

RAIS
RAIS 500 User manual

RAIS
RAIS attika NEXO 100 GAS User manual

RAIS
RAIS Q-TEE User manual

RAIS
RAIS Riva User manual

RAIS
RAIS Attika Q-TEE Series User manual

RAIS
RAIS Malta User manual

RAIS
RAIS VIVA User manual

RAIS
RAIS 800 Parts list manual

RAIS
RAIS 2:1 Parts list manual
Popular Wood Stove manuals by other brands

Lincar
Lincar 149A Series Using instructions and maintenance

HearthStone
HearthStone hase lima 8150 owner's manual

BuckMaster
BuckMaster 94NC Operation & installation manual

Esse
Esse 105 instruction manual

Ashley
Ashley BEC95 Installation & operation manual

HASE
HASE LIMA iQ Translation of the original operating instructions