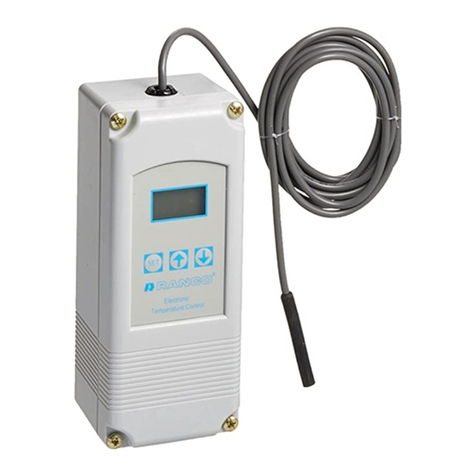
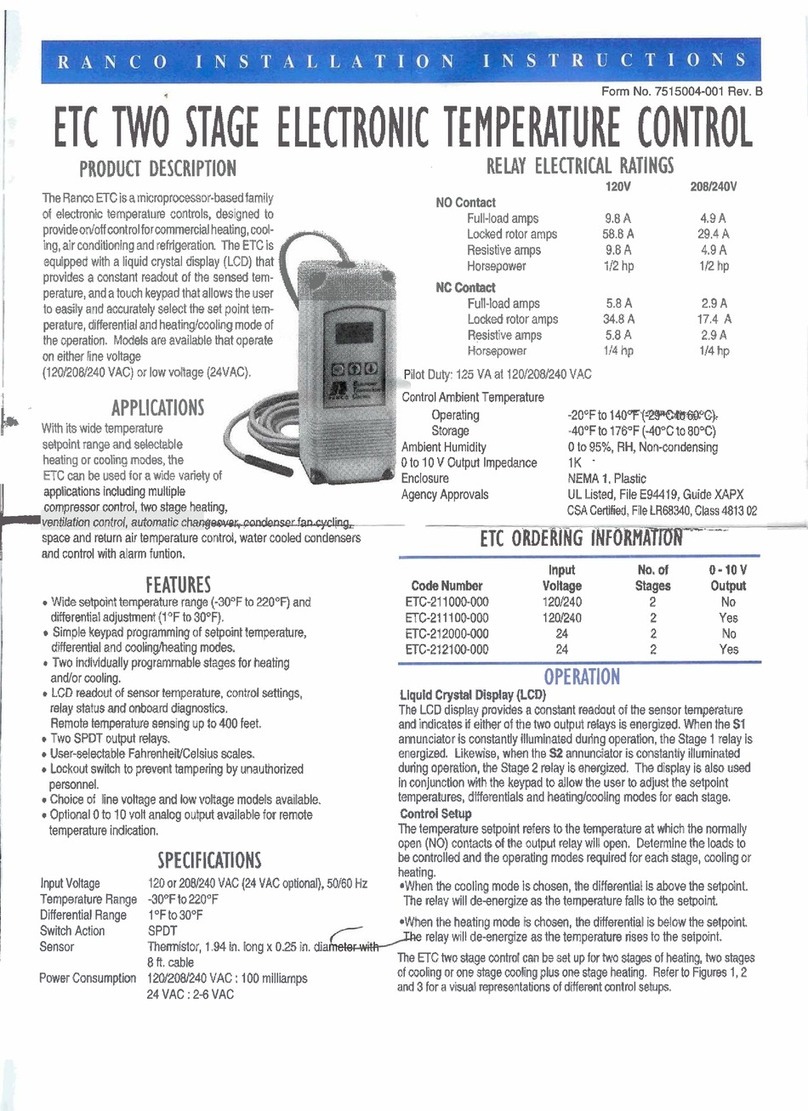
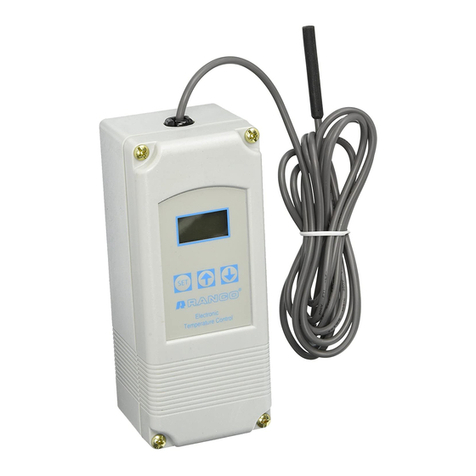
Ranco ETC-111000 User manual

D71
ETC COMMERCIAL TEMPERATURE CONTROLS
RANCO ETC
COMMERCIAL
TEMPERATURE
CONTROLS
The Ranco ETC is a microprocessor-based family of temperature controls
designed to provide on/off control for commercial heating, cooling, air condi-
tioning and refrigeration applications. With its wide temperature range, one
and two stage capability, selectable heating/cooling modes and multi-voltage
input, the ETC is one of the most versatile temperature controls available.
DIGITAL DISPLAY
Unlike many electronic controls, the ETC is simple to install and set up. One
finger is all you need to program it. The standard digital display and keypad
allow the user to adjust the temperature settings with 1° resolution. Setpoint
temperature, differential and mode of operation (heating or cooling) can all be
selected using the keypad and display.
When not in the programming mode, the display gives a constant readout of
the sensor temperature. Annunciators on the liquid crystal display also indi-
cate when the relay is energized.
CHOICE OF ONE OR TWO STAGE MODELS
The ETC line includes both one and two stage models. On two stage con-
trols, each stage can be set independently thus eliminating the bothersome
task of calculating interstage temperatures. And two stage models can be set
up with overlapping heating or cooling stages.
REMOTE TEMPERATURE SENSING
The ETC is capable of remote temperature sensing up to 400 feet away from
the control when using standard 22 gauge sensor wire.
BUILT-IN SAFETY
Every ETC model is equipped with diagnostic programs that check for hard-
ware, software or system problems and display different error codes to indi-
cate where the trouble is.
The ETC also has a keypad lockout switch to prevent tampering with the
control settings by unauthorized personnel. The switch, which is located
inside the enclosure, can be used to disable the keypad function.
OPTIONAL ANALOG OUTPUT
ETC models are available with a 0 to 10 volt analog output that can be used
for remote temperature indication or as input to a central monitoring system.
This signal is a linear representation of the sensor temperature with 0 volt
–30°F and 10 volts = 220°F.
ETC-111000
SPECIFICATIONS
Temperature setpoint range –30° to 220°F
Differential range 1°F to 30°F
Input power requirements 120 or 208/240 VAC (24 VAC optional)
Sensor Thermistor, 2" long x 1/4" dia. with 8' cable
Control Ambient Temperatures
Operating –20°F to 140°F
Storage –40°F to 176°F
Ambient humidity 0 to 95% RH, non-condensing
Enclosure NEMA 1, plastic (NEMA 4X optional)
Dimensions NEMA 1 models, 6.52" high x 2.7" wide x 2.48" deep
NEMA 4X models, 7.84" high x 2.7" wide x 2.48" deep
0 to 10 V output impedance 1 K ohms
Agency Approvals UL listed, file E94419, Guide XAPX
CSA certified, file LR68340. class 4813 02
Switch action SPDT
RELAY OUTPUT RATINGS - NO (NC): ONE STAGE TWO STAGE
120V 208/240V 120V 208/240V
Full load amps 16 (5.8) A 8 (2.9) A 9.8 (5.8) A 4.0 (2.9) A
Locked rotor amps 96 (34.8) A 48 (17.4) A 58.8 (34.8) A 29.4 (17.4) A
Resistive amps 15 (5.8) A 8 (2.9) A 9.8 (5.8) A 4.9 (2.9) A
Horsepower 1 (1/4) HP 1 (1/4) HP 1/2 (1/4) HP 1/2 (1/4) HP
Pilot duty 125VA at 120/208/240 VAC
ORDERING DATA
UNI-LINE NUMBER INPUT 0 TO 10 VOLT
ORDER NO. OF STAGES ENCLOSURE VOLTAGE OUTPUT
ETC-111000 NO
ETC-111100 YES
ETC-112000 NO
ETC-112100 YES
ETC-141000 NEMA 4 NO
ETC-211000
ETC-211100 YES
ETC-212000 NO
ETC-212100 YES
ETC-241000 NEMA 4 120/208/240 VAC NO
ONE
TWO NEMA 1
NEMA 1 120/208/240 VAC
120/208/240 VAC
24 VAC
24 VAC
NO

RANCO INSTALLATION INSTRU CTIONS
HC ~INGlE HAGE ElECTRONIC TEMPERATURE CONTROL
PRODUCT DESCRIPTION
The Ranco ETC is a microprocessor-based
family of electronic temperature controls, de-
signed to provide on/off control for commercial
heating, cooling, air conditioning and refrigera-
tion. The ETC is equipped with a liquid crystal
display (LCD) that provides a constant readout
ofthe sensed temperature, and a touch keypad
that allows the user to easily and accurately
select the set point temperature, differential and
heating/cooling mode of the operation. Models
are available that operate on either line voltage
(120/208/240 VAG) or low voltage (24VAC).
With its wide temperature
setpoint range and selectable
heating or cooling modes, the
ETC can be used for a wide variety of
applications including refrigerated display
cases, walk-.inand reach-inr~frigerators,mHk coolers, refrigerated
warehouses, chillers, beefan1f-rreverage coolers, tank heating, space
and retum air temperature control and condenser fan cycling.
'Wide setpoint temperature range (-30°F to 220°F) and
differential adjustment (1°F to 30°F).
'Simple keypad programming of setpoint temperature,
differential and coolinglheating modes.
.LCD readout of sensor temperature, control settings,
relay status and onboard diagnostics.
•Remote temperature sensing up to 400 feet.
.SPDT output relay.
'User-selectable Fahrenheit/Celsius scales.
.Lockout switch to prevent tampering by unauthorized
personnel.
'Choice of line voltage and low voltage models available.
'Optional 0 to 10 volt analog outputavaHabla for remote
temperature indication.
InputVoltage
Temperature Range
DifferentialRange
SwitchAction
Sensor
120or 208/240 VAC (24 VAC optional),
50160
Hz
-30~t0220~
1°Fto 30°F
SPOT
Thermistor, 1.94 in. long x 0.25 in. diameterwith
8
ft.
cable
120/208/240VAC: 100 Milliamps
24 VAC: 2 - 6 VA
Relay Electrical Ratings 120V 20S/240V
NO Contact
Full-load amps 16A 8A
Locked rotor amps 96A 48A
Resistive amps 15A 8A
Horsepower 1 hp 1 hp
NC Contact
Full-load amps 5.8A 2.9A
Locked rotor amps 34.8 A 17.4 A
Resistive amps 5.8A 2.9A
Horsepower 1/4 hp 1/4 hp
Pilot Duty: 125 VA at 120/208/240 VAC
Control Ambient Temperature
Operating
Storage
Ambient Humidity
o
to 10 V Output Impedance
Enclosure
Agency Approvals
-20~ to 140°F (-29°C to 6D°G)
-40~ to 176°F (-40ce to 80°G)
o
to 95%, RH, Non-condensing
1K
NEMA 1, Plastic
UL Listed, File E94419, Guide XAPX
CSACertified,FHeLR68340,Class481302
Input No. of 0·10 V
Code Number Voltage Stages Output
ETC-111000-000 120/240 1 No
ETC-111100-000 120/240 1 Yes
ETC-112000-000 24 1 No
ETC-112100-000 24
1
Yes
OPERATION
Liquid Crystal Display (LCD)
The LCD display provides a constant readout of the sensor temperature and
indicates if the output relay is energized. When the S1 annunciator is
constantly illuminated during operation, the relay is energized. The display is
alsoused inconjunction with the keypad toallow the usertoadjustthe setpoint
temperature, differential and heating/cooling modes.
Control Setup
The temperature setpoint refers tothe temperature atwhich the normally open
(NO) contacts of the output relay will open. Determine the load
(5)
to be
controlled and the operating mode required, cooling or heating. Refer to
Figure 1 for a visual representation.
'When the cooling mode is chosen, the differential is above the setpoint.
The relay will de-energize as the temperature falls to the setpoint.
'When the heating mode is chosen, the differential is below the setpoint.
The relay will de-energize as the temperature rises to the setpoint.

(+)
l
ON
=
ENERGIZED
l
OFF
=
DE-ENERGIZED
ON 0
'n
."
m
:D
m
z
-l
OFF
'i>
COOLING
MODE
HEATING
MODE
~ OFF
."
m
:D
m
~
'i>
r
ON
Ftgure 1: Setpoint and Differential Settings. Diagram indicates relay
on and off points in either the heating or cooling modes.
Proaramming Steps and Display
Thel:TC canDe programmed in four simple steps using the LCD display and
the three keys on the face of the control.
Step 1- To start programming, press the SET key once to access the
Fahrenheit/Celsius mode. The display will show the current
status, either F for degrees Fahrenheit or C for degrees Celsius.
Then press either the up
t
or down • arrow key to toggle
between the F or C designation.
Step 2- Press the SET key again to access the setpoint. The LCD
will display the current setpoint and the S1 annunciator will be
blinking on and off to indicate that the control is in the setpoint
mode. Then press either the up
t
key to increase or the down •
"-c;;_ct<eytO"deerease-tne setpointto the desired temperature.
Step 3- Press the SET key again to access the differential. The LCDwili
display the current differential and the OfF 1 annunciator will be
blinking on and off to indicate that the control is in the differential
mode. TheIl press either the 4>
t
key to increase or the down •
key to decrease the differential to the desired setting.
Step 4- Press the SET key again to access the cooling or heating mode.
The LCD will display the current mode, either C1 for cooling or
H1 for heating. TheIl press either the up
t
or down • key to
toggle between the C1 or H1 designation. Press the SET key
once more and programming is complete.
Step
Annunciator Description
For C Fahrenheit or Celsius Scale
2S1 (blinking) Setpoint Temperature
3DIF 1 (blinking) Differential Temperature
4
C1/H1
Cooling or Heating Mode
NOTE: The ETC will automatically end programming if no keys are
depressed for a period of thirty seconds. Any settings that have been input
to the control will be accepted at that point.
All control settings are retained in non-volatile memory if power to ETC is
interrupted for any reason. Re-programming is not necessary after power
outages or disconnects unless different control settings are required.
Lockout Switch
The ETC is provided with a lockout switch to
prevent
tampering byunautho-
rizedpersonnel. When placed inthe LOCK position, the keypad isdisabled
and nochanges to the settings can be made. When placed inthe UNLOCK
position, the keypad will function nonnally.
To access the lockout switch, disconnect the power supply and open the
control. The switch
is
located onthe inside cover about 2 inches
above
the
bottom. (see Figure 2). To disable the keypad, slide the switch to the left
LOCK position. To enable the keypad, slide the switch to the right
UNLOCK position. All ETC controls are shipped with this switch in the
UNLOCK position.
......-.
LOCK UNLOCK
lOCKOUT: LOCK UNLOCK
RELAY RATINGS N.OJN.C.
DISPLAY CODES
VAC 120 2081240 F FAHRENHEIT
lRA 96/34.8 48/17.4 C CELSIUS
FLA 16/5.8 8/2.9 H1 HEAT STAGE 1
RES A 15/5.8 8/2.9 C1 COOL STAGE 1
PILOT DUTY125VA
EP PROBE FAilURE
OUT OF RANGE
f
TEMP IND
&
EE EEPROM FAILURE
E1 IMPROPER KEY
•• . REG EQUIP 52N8 E2 MEMORY ERROR
USE COPPER
CONDUCTORS ONLY
•
•
TROUBLESHOOTING ERROR MESSAGES
Display Messages
E1 - Appears when either the up
t
or down • key is pressed when
not in the programming mode.
To correct: Ifthe E1 message appears
even
when no keys are
being pressed, replace the control.
E2 - Appears if the control settings are not properly stored in memory.
To correct: Check all settings and correct if necessary.
EP - Appears when the probe is open, shorted or sensing a tempera-
ture that is out of range.
To correct: Check to see if the sensed temperature is out of
range. If not, check for probe damage by comparing it to a
known ambient temperature between -30°F and 220°F. Replace
the probe if necessary.
EE - Appears if the EEPROM data has been corrupted.
To correct: This condition cannot be field repaired. Replace
the control. .
CL - Appears if calibration mode has been entered.
To correct:
Remove
power to the control for at least
five
seconds. Reapply power. If the CL message still appears,
replace the control.

IMPORTANT
1. All ErC series controls are designed as operating controls only. If
an operating control failure could result in personal injury or loss of
property, a separate safety control and
lor
alann should be installed.
2. The schematic drawings and other information included in these
installation instructions are for the purpose of illustration and general
reference only.
3. These instructions do not expand, reduce, modify or alter the Ranco
Terms in anv way; and no warranty or remedy in
favor
of the customer
or any other person arises out of these instructions.
CONTROL MOUNTING
Mount the ETC to a wall or any flat surface using a combination of any two
or more of the slotted holes located on the back of the control case. The
control's components are not position sensitive,but should be mounted so
that they can be easily wired and adjusted.
Avoid excessive
conditions of
moisture, dirt, and
corrosive
atmosphere.
4. Ranco ErC controls have been approved by Underwriter's Laboratories
as UL listed;
however
approval does not extend to their use for any
otherpurpose. Ranco assumes no responsibility for any unconventional
application of its control unless such application has been approved in
writing by Ranco.
5. It is the responsibility of the installer and the user to assure that his or
its application and use of all Ranco products are in compliance with all
federal, state and local requirements, including, without any limitation,
all requirements imposed under the National Electric Code and any
applicable building codes.
The ErC has provisions for
1/2
inch conduit connections. The conduit hub
should be secured to the conduit before securing the hub to the plastic
housing of the control. When using the conduit entry inthe rear of the case,
a standard plug should be inserted into the conduit hole in the bottom.
Caution should be exercised not to damage the control circuit board or
wiring when installing a conduit connector.
ANALOG OUTPUT 0
(OPTIONAL)
CJ
I
I
i
-1°·63
-1.15-
--2.48--
KNOCK-ooT FOR 0.50 DIA
CONDUrrTRADE SIZE

General
• .1IIiiIg ••••• aDDI
"II
NaIiooaI8edri:
Code
and local
• ThedI1
e.i:di3
·.ml
IDJStI'd
exr.:eed
1he
I'll8Drun
raIII'rJ
cI~ ~
(see
SpeciicatioctS).
• Use oopper cmiJc::torn ooty.
• 8edricaJ Jeads should not be taut; allow slack for
temperature change and vibration.
Input and Output Wiring
For
typical wiring diagrams, refer to Rgures 4, 5 and 6. All connections are
made to the power (lower) circuit board. When using the 24
V G
powered
models, the 24
V G
input lines must enter through the sidewall of the case.
Refer to figure 3 for location of the entry hole.
FlQure 7 for wiring.
Analog Output
ETG models are available with an optional
0
to
10
volt analog output. This
signal is a linear representation of the sensor temperature with
0
volts
=
-30°F
and
10
volts
=
220°F.
See figure
8
for wiring information and figure
3
for
location of the entry hole. The reference for this output is designated by the
' •• symbol on the wiring diagram. The output signal is designated by the
"+.
symbol.
o
•
120 VOL
LOAD
o
•
Figure 5: Typical Wiring Diagram for 240VAC Power Input and
Line Voltage Switching.
240VAC
OR
120VAC
240VAC
LOAD OR
120VAC
Figure 6: Different VoIttge to Control and Different Voltage Load.
240 VOLT
LOAD
o
•

SENSOR MOUNTING
For space sensing, mount the sensor where it will be unaffected
by heat/cool discharge or radiated heat sources. Spot sensing
requires the sensor to be in good contact with the surface being
"'<re'il~.
';' m,~Vt:lh ~ -u'Vtffi;rffi% Vl'omrm:>J~
senslng.
1m
143
158
176
194
212
230
10,810
7,464
5,200
3,774
2,753
2,036
1,531
Ranco North America
8115 U.S. Rt. 42 North
Plain City Ohio 43064
Figure 10:
Resistance vs Temperature of 1309007-044. Sensor including 8 foot cable.
~
An Invensys Company

Replacement Sensor - Order
Part No. 1309001-044
The 1309007-044 sensor is a negative temperature coefficient
(NTC) thermistor sensor. The sensor resistance decreases with
temperature increase. It is .25 x 1.94 long with 8 feet #22 AWG
cable. The thermistor has a reference resistance of 30,000 ohms
at
770f (25OC).
IMPORTANT
The schematic drawings and other information induded in these instruc-
tions are forthe purpose of illustration andgeoern.l reference only. Ranco
assumes no responsibility for any uncooventionaJ application of this
control, unless such application has been approved in writing by Ranco.
Deg.c. Deg.F.
RES. Nom.
-40 -40
1,010,000
-30 -22
531,000
-20
-4
291,200
-10 14 166,000
0 32 97,960
10
50
59,700
20
68
37,470
25
77
30,000
30 86 24,170
40 104 15,980
50 122 10,810
60 140 7,464
70 158 5,200
80 176 3,774
90 194 2,753
100 212 2,036
110 230 1,531
Figure 10:
Resistance
vs
Temperature of 1309007-044. Sensor including 8 foot cable.
Ranco North America
8115 U.S. Rt. 42 North
Plain City Ohio 43064
~
An Invensys Company
This manual suits for next models
9
Table of contents
Other Ranco Temperature Controllers manuals