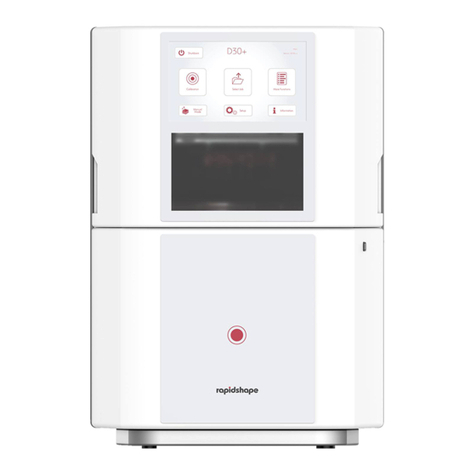
Rapid Shape D50+ Quick guide

D50+ 3D Printing System
P50+ | SHERAprint 50
Translation of the Original Operating Instructions
Rapid Shape GmbH │Römerstraße 21 │71296 Heimsheim │Germany
Phone +49 (0)7033 309 878 0 │info@rapidshape.de │www.rapidshape.de
Revision: 1 (15.02.2022) │DOCR000438
EN

Operating Instructions D50+ | P50+ | SHERAprint 50
Rapid Shape GmbH │DOCR000438
2│96
In General
These operating instructions enable the safe and efficient use of the 3D
Printing System. The operating instructions are part of the product and
must be kept accessible to the personnel in its immediate vicinity at all
times.
Personnel must carefully read and understand these instructions before
starting any work. Compliance with the safety instructions and handling
instructions specified in this manual is the prerequisite for safe working
practices.
In addition, the local health and safety regulations and general safety
regulations apply to the area of application of the machine.
Redistribution and duplication of this document, utilization and
communication of its contents are strictly prohibited unless expressly
permitted. Violations oblige to compensation.
After the editorial deadline of this documentation, the product may
have changed. We expressly reserve the right to make any changes to
the product.
The original operating instructions were created in German.
Our general terms and conditions apply.
©All rights belong to Rapid Shape GmbH.
These instructions are valid for the following models:
–D50+
–P50+
–SHERAprint 50
Rapid Shape Customer Service
Phone:
+49 (0)7033 309 878-42
Email:
service@rapidshape.de

Operating Instructions D50+ | P50+ | SHERAprint 50
3│96
Rapid Shape GmbH │DOCR000438
Table of Contents
1Safety............................................................................... 7
1.1 Symbols in this Manual ................................................7
1.2 Intended Use ..............................................................9
1.2.1 Digital Workflow ....................................................9
1.3 Safety Devices...........................................................10
1.3.1 Protective Hoods ..................................................10
1.3.2 Hood Switch ........................................................10
1.3.3 Knife Protection Device .........................................11
1.4 Attached Safety Markings...........................................12
1.5 Residual Risks ...........................................................13
1.5.1 Electrical Current .................................................13
1.5.2 Mechanical Dangers ............................................14
1.5.3 UV Radiation .......................................................14
1.5.4 Chemical Dangers ...............................................15
1.5.5 Danger due to Hot Surfaces ..................................15
1.5.6 Danger of Material Damage .................................15
1.6 Personnel Requirements.............................................17
1.7 Personal Protective Equipment....................................18
1.8 Environmental Protection ...........................................18
2Overview........................................................................ 19
2.1 Machine Assembly & Operating Elements ...................19
2.2 Serial Plate ...............................................................22
3Transport & Storage ......................................................... 23
3.1 Transporting the Machine ..........................................23
3.2 Unpacking the Machine.............................................24
3.3 Scope of Delivery ......................................................25
3.4 Storing the Machine ..................................................25
4Installation...................................................................... 26
4.1 Setting Up ................................................................26
4.1.1 Requirements for the Installation Location...............26
4.1.2 Setting Up the Machine ........................................26
4.1.3 Aligning the Machine ...........................................27
4.2 Connecting the Machine............................................29
4.2.1 Setting Up the Wi-Fi Connection ...........................30
4.2.2 Connecting the Machine to other Devices (Intelligent
Connectivity)........................................................30
5Emergency Shutdown ....................................................... 31
6Preparations ................................................................... 32
6.1 Required Accessories .................................................32
6.2 Print Accessories .......................................................32
6.3 IT Requirements ........................................................32
6.4 Netfabb ...................................................................33

Operating Instructions D50+ | P50+ | SHERAprint 50
Rapid Shape GmbH │DOCR000438
4│96
7Operation ...................................................................... 34
7.1 Switching On the Machine .........................................34
7.1.1 Switching On the Machine for the First Time...........34
7.1.2 Switching On the Machine in Daytime Mode ..........35
7.2 Menu Overview ........................................................36
7.3 Verifying the Machine Status ......................................36
7.4 Opening & Closing the Machine ................................37
7.4.1 Opening & Closing the Machine with the Foot Sensor
..........................................................................37
7.4.2 Opening & Closing the Machine manually .............37
7.4.3 Automatic Hood Closing ......................................38
7.5 Making General Settings in the Customer Menu ..........39
7.5.1 Hide Warnings (Reservoir inserted).........................39
7.5.2 Disable Automatic Updates ...................................39
7.5.3 Enable Automatic Part Separation..........................40
7.5.4 Show Detailed Printing Screen ...............................40
7.5.5 Intelligent Connectivity..........................................40
7.5.6 Disable Mixing.....................................................41
7.5.7 Disable Automatic Hood.......................................41
7.5.8 Disable Hood Assistant .........................................41
7.5.9 Enable Automatic Refill .........................................41
7.5.10 Move Jobs in Queue on complete .........................42
7.5.11 Maximum Jobs in Basket.......................................42
7.5.12 Offset Part Detection ............................................42
7.6 Preparing the Machine for Printing (Start of the Day) ....43
7.6.1 Checking the individual Components for Cleanliness
..........................................................................43
7.6.2 Inserting the Build Platform....................................44
7.6.3 Inserting the Knife Drip Guard & the Knife ..............45
7.6.4 Inserting the Material Reservoir..............................47
7.6.5 Inserting the Collection Basket...............................48
7.6.6 Connecting the Hose (Automatic Refill) ..................48
7.7 Setting Up & Administrating the Automatic Separation
Function...................................................................49
7.7.1 Operation with Automatic Separation Function .......49
7.7.2 Operation without Automatic Separation Function ..50
7.8 Printing Jobs .............................................................51
7.8.1 Starting the Print Job.............................................51
7.8.2 Switching the Print View ........................................52
7.8.3 Pausing Jobs & Ending Them Prematurely ..............53
7.8.4 Side Note: Integrated Heating Function..................54
7.9 Refilling Printing Material ...........................................56
7.9.1 Refilling Printing Material Manually........................56
7.9.2 Automatic Refill: Refilling the Printing Material
Automatically.......................................................57

Operating Instructions D50+ | P50+ | SHERAprint 50
5│96
Rapid Shape GmbH │DOCR000438
7.9.3 Automatic Refill: Replacing the Material Bottle (empty
> full) .................................................................59
7.9.4 Automatic Refill: Re-Pumping Printing Material
Manually .............................................................60
7.10 Removing Jobs..........................................................61
7.10.1 Removing Jobs with the Automatic Separation
Function..............................................................61
7.10.2 Removing Jobs without Automatic Separation Function
(Manually) ...........................................................62
7.11 Post-Processing Jobs .................................................63
7.11.1 Cleaning Jobs......................................................63
7.11.2 Post-Curing Jobs..................................................64
7.12 Checking your Jobs...................................................64
7.13 Changing Printing Material ........................................65
7.14 Machine Follow-Up (End of Day)................................66
8Decommissioning ............................................................ 67
8.1 Switching Off the Machine .........................................67
8.1.1 Switching Off the Machine in Daytime Mode ..........67
8.1.2 Switching Off the Machine for a Prolonged Period of
Time (> 1 Week) .................................................67
8.2 Shutting Down the Machine for a Long Period of Time (>
1 Month) ..................................................................67
9Troubleshooting .............................................................. 68
10 Cleaning & Maintenance .................................................. 69
10.1 Overview of the Cleaning & Maintenance Work ..........69
10.1.1 Cleaning the Protective Glass................................70
10.1.2 Cleaning the Build Platform ..................................71
10.1.3 Cleaning the Knife ...............................................73
10.1.4 Cleaning the Knife Drip Guard..............................75
10.1.5 Cleaning the Material Reservoir.............................76
10.1.6 Cleaning the Collection Basket..............................78
10.1.7 Calibrating the Exposure Unit (One-Point Calibration)
..........................................................................79
10.1.8 Checking the Separation Unit................................81
10.1.9 Checking the Refill Unit ........................................82
10.1.10 Checking & Adjusting the Parallelism of the Build
Platform ..............................................................83
10.1.11 Performing Automatic Reservoir Cleaning (Clean
Reservoir) ............................................................86
10.1.12 Cleaning the Hose ...............................................88
10.1.13 Changing the Knife ..............................................91
10.1.14 Changing the Hose ..............................................93
11 Disassembly & Disposal.................................................... 94
11.1 Disassemble the Machine ..........................................94
11.2 Dispose of the Machine .............................................95
12 Technical Details ............................................................. 96

Operating Instructions D50+ | P50+ | SHERAprint 50
Rapid Shape GmbH │DOCR000438
6│96
12.1 Operating Data ........................................................96
12.2 Dimensions & Weights...............................................96
12.3 Connections .............................................................96
12.4 Serial Plate ...............................................................96

Operating Instructions D50+ | P50+ | SHERAprint 50
7│96
Rapid Shape GmbH │DOCR000438
1Safety
1.1 Symbols in this Manual
The safety instructions in this manual are marked with symbols.
The safety instructions are introduced by signal words that express the
extent of the hazard.
DAN GER !
This combination of symbol and signal word indicates
an imminently dangerous situation which may lead to
death or severe injury if not avoided.
WARNING!
This combination of symbol and signal word indicates a
potentially dangerous situation which may lead to death
or severe injury if not avoided.
CAUTION!
This combination of symbol and signal word indicates a
potentially dangerous situation which may lead to minor
or slight injuries if not avoided.
NO TE!
This combination of symbol and signal word indicates a
potentially dangerous situation which may lead to
material damage if not avoided.
NO TE!
This combination of symbol and signal word indicates a
potentially dangerous situation which, if eye protection
(UV goggles) is not worn, may result in eye damage.
NO TE!
This combination of symbol and signal word indicates a
potentially dangerous situation which, if protective
gloves are not worn, may lead to hand injuries.
E NV IRO NME NT AL PRO TE C TI ON !
This combination of symbol and signal word indicates
potential dangers to the environment.

Operating Instructions D50+ | P50+ | SHERAprint 50
Rapid Shape GmbH │DOCR000438
8│96
Special Safety Instructions
In order to draw attention to particular dangers, the following symbols
are used in safety notices:
Warning: Dangerous electrical voltage
Warning: Hand injuries
Warning: UV radiation
Warning: Pointed objects
Warning: Hot surfaces
Tips & Recommendations
This symbol highlights tips and recommendations, as
well as information for efficient and trouble-free
operation.

Operating Instructions D50+ | P50+ | SHERAprint 50
9│96
Rapid Shape GmbH │DOCR000438
1.2 Intended Use
The 3D Printing System is designed for printing three dimensional
objects with wavelength and DLP suitable printing materials (flash point
> 80°C) in additive production (DLP processing). The digital workflow
is to be observed (→Chapter 1.2.1).
The printing system is designed for temperature-controlled interiors
(→Chapter 12). Proper use requires compliance with all information in
this manual.
Any use going beyond the intended use or otherwise is deemed to be
improper. The operator is exclusively liable for any resulting damage.
Use contrary to the intended use includes, but is not limited to the
following actions:
–Operation within potentially explosive areas
–Operation with explosion-hazardous printing materials
–Outdoor operation
–Operation in tropical climates
–Operation in wet, damp rooms
–Operation without sufficient instruction
–Operation without material reservoir
–Operation without build platform
–Operation without mandatory safety equipment
–Operation with non-approved spare parts
–Operation with defective or modified safety devices
–Operation with printing materials not suited for wavelength and
DLP process
–Removing or modifying attached safety markings
–Improper conversions, modifications, repairs, and maintenance
1.2.1 Digital Workflow
1
Creation of
3D Data
2
Processing
the 3D Data
3
Preparation
of 3D Data
for Printing
System
4
Printing of
the 3D Part
5
Post-
Processing
6
Usage of the
3D Part
The 3D Printing System described in these operating instructions is part
of the digital workflow and is used in steps 3 and 4.

Operating Instructions D50+ | P50+ | SHERAprint 50
Rapid Shape GmbH │DOCR000438
10 │96
1.3 Safety Devices
WARNING!
Danger with non-functioning or dismantled safety
devices!
Safety devices serve to ensure safety during operation
and are not allowed to be removed, changed or
bridged. Improperly functioning or removed safety
devices can lead to injuries.
–Safety equipment is not allowed to be removed,
changed or bridged.
–All safety devices need to be checked for
functioning each time the machine is turned on.
–If the safety devices are not functioning correctly,
the operation must be stopped immediately.
Defective safety devices need to be repaired or
replaced immediately.
The machine is equipped with the following safety devices:
–Safety device 1: Protective hoods →Chapter 1.3.1
–Safety device 2: Hood switch →Chapter 1.3.2
–Safety device 3: Knife protection device →Chapter 1.3.3
1.3.1 Protective Hoods
The protective hoods on the printer protect against direct contact with
the live electrical equipment of the printer. They are not allowed to be
removed during operation.
Check that all safety covers are firmly attached and completely closed.
1.3.2 Hood Switch
When the upper hood is opened, the separation function (ASM
function, Automatic Separation Module) is automatically deactivated if
it is activated. If the hood is opened during the separation process, the
process is stopped immediately and paused until the hood is closed
again and the safety warning on the touch display has been
acknowledged.
All other functions including the z-axis movement and exposure process
remain active and are not interrupted.
We do not recommend opening the upper hood during
the separation process, since the immediate stop to the
process can negatively impact the separation result.

Operating Instructions D50+ | P50+ | SHERAprint 50
11 │96
Rapid Shape GmbH │DOCR000438
1.3.3 Knife Protection Device
When the knife protection device of the separation function (ASM
function, Automatic Separation Module) is opened, the z-axis and
ASM-axis are stopped. If the knife protection device is opened during
the printing process, it is stopped immediately and paused until the
knife protection device is closed again and the safety warning on the
touch display has been acknowledged.
The separation function is also deactivated. →Chapter 1.3.2
We do not recommend opening the knife protection
device during the printing process, since the immediate
stop to the process can negatively impact the print
result.

Operating Instructions D50+ | P50+ | SHERAprint 50
Rapid Shape GmbH │DOCR000438
12 │96
1.4 Attached Safety Markings
WARNING!
Danger from illegible signs!
Over time, labels and signs may become dirty or
otherwise unrecognisable, so that dangers cannot be
detected, and necessary operating instructions cannot
be followed. Thereby a risk of injury arises.
–All safety, warning and operating instructions
must always be in a legible state.
–Damaged labels and signs must be renewed.
The following labels and signs are in the work area. They refer to their
immediate environment.
Live Components
The areas marked with this symbol can be live. Work in
these areas may only be carried out by qualified
electricians.
Hand Injuries
The build area of the machine marked with this symbol
consists of moving parts among others. Work in the build
area of the machine may only be carried out with the
machine in an inactive state. There is a danger of hand
injuries.
UV Radiation
Working in the area of the machine marked with this sign
may result in exposure to UV radiation. Work in this area
may only be carried out when wearing UV protection
goggles.
Hot Surfaces
Hot air fans marked with this sign can heat up and cause
hot surfaces on the fan housing. These surfaces are not
allowed to be touched when hot.
UV Protective Goggles
It is recommended to wear protective goggles to protect
the eyes from direct UV radiation.

Operating Instructions D50+ | P50+ | SHERAprint 50
13 │96
Rapid Shape GmbH │DOCR000438
1.5 Residual Risks
The machine is designed and manufactured according to the state of
the art and according to current safety requirements. Nevertheless,
residual risks remain, which require prudent action. The following lists
the residual risks and the resulting behavior and measures.
1.5.1 Electrical Current
DAN GER !
Danger to life due to electric current!
Incorrect connection, insulation faults, foreign objects
(dust, liquid due to inappropriate installation
environment) or lack of grounding can lead to housing
parts being live. There is an imminent danger of
electrocution in the event of contact with live parts.
–Work on the electrical equipment may only be
carried out by qualified electricians and in
compliance with the relevant safety and VDE
regulations.
–Machines with damage to the power cord,
insulation or lack of earthing must be
disconnected from the mains immediately.
Repairs are to be made immediately.
–Before starting work on active parts of the
electrical equipment and the operating material,
a de-energized state must be established and
ensured for the duration of the work.
–Fuses must never be bypassed or put out of
operation.
–Connect the mains plug to the nearest and
correctly grounded socket to the machine.
–Only operate the machine with the mains voltage
specified for the machine.
–The mains plug must be freely accessible at all
times. The machine is completely disconnected
from the mains in case of an emergency by
pulling out the mains plug. (→Chapter 5)
–Disconnect the machine from the mains during
longer absences and during heavy weather.
–Keep moisture away from live parts. This may
lead to short circuiting.

Operating Instructions D50+ | P50+ | SHERAprint 50
Rapid Shape GmbH │DOCR000438
14 │96
1.5.2 Mechanical Dangers
CAUTION!
Risk of injury due to moving parts!
The machine consists in part of accessible moving parts
which can cause minor hand injuries from crushing and
getting caught.
–The safety devices (→Chapter 1.3) are not
allowed to be removed, changed or bridged.
–The machine is only allowed to be operated with
the protective hoods closed. During the printing
process and the manual procedure for the build
platform, no fingers or hands are allowed to be
inserted into the build area of the machine.
CAUTION!
Risk of injury due to sharp objects!
The knife on the separation unit has a sharp edge that
can cause slight hand injuries through direct contact.
–The edge should never be touched directly.
Only hold the knife by the knurled nuts and with
the blade away from your body.
1.5.3 UV Radiation
The closer you are to the source of radiation, the more critical the
radiation can be that is emitted by the exposure unit. You should
therefore avoid looking into the UV radiation for an extended period at
build area height. Never look directly into the exposure unit lens!
According to the International Commission on Non-Ionizing Radiation
Protection (ICNIRP), looking into the UV light with unprotected eyes at
the height of the build area for 1.3 hours without reaching the limit
dose in not critical. We nevertheless recommend complying with the
protective measures listed below.
CAUTION!
Risk of injury from UV radiation!
The printing process, as well as the calibration of the
exposure unit, take place under the influence of UV
radiation. UV radiation can cause eye and skin damage
in the case of prolonged and direct exposure and when
protective equipment is not worn.
–The machine is only allowed to be operated with
the protective hoods closed.
–While calibrating the exposure unit, the
protective equipment prescribed has to be worn.
It is recommended to wear UV protective goggles
whenever working on the machine.

Operating Instructions D50+ | P50+ | SHERAprint 50
15 │96
Rapid Shape GmbH │DOCR000438
1.5.4 Chemical Dangers
WARNING!
Risk of injury due to harmful materials!
The chemical materials required for the production and
post-processing of 3D print matter can release harmful
vapours and cause dizziness and irritation of the
respiratory tract. Direct skin contact may cause skin
irritation.
–It is necessary to provide sufficient fresh air.
–Wear appropriate protective clothing and carry
out the work with ventilation if necessary.
–Comply with the dosing instructions from the
respective manufacturer.
–Please take note of the safety data sheets for the
respective materials.
1.5.5 Danger due to Hot Surfaces
CAUTION!
Risk of injury due to hot surfaces!
The hot air fans in the machine can heat up during
operation and cause hot surfaces on the fan housing.
–The hot air fans are not allowed to be touched
when hot.
1.5.6 Danger of Material Damage
NO TE!
Material damage due to overheating!
Too high ambient temperatures and a disabled air
outlet may lead to an overheating of the overall system.
–The air outlet must never be covered.
–Maintain the specified ambient temperature.
(→Chapter 12.1)
–Never install the machine in a closed cabinet.
–Keep a minimum distance of 50 cm behind the
machine so that the heat generated can be
dissipated without hindrance.

Operating Instructions D50+ | P50+ | SHERAprint 50
Rapid Shape GmbH │DOCR000438
16 │96
NO TE!
Material damage due to environmental conditions!
Separate environmental conditions may result in
property damage to the machine.
–Protect the machine from moisture, dripping
water and splashing water.
–Protect the machine from dust in excessive
quantities.
–Protect the machine from heat and direct
sunlight.
–Keep open flames away from the machine.
–Do not place objects filled with liquids (such as
drinks) in the immediate vicinity of the machine.

Operating Instructions D50+ | P50+ | SHERAprint 50
17 │96
Rapid Shape GmbH │DOCR000438
1.6 Personnel Requirements
WARNING!
Risk of injury in case of inadequate qualification of
personnel!
If unqualified personnel carry out work on the machine,
dangers arise which can cause injuries and material
damage.
–All activities must be carried out by qualified
personnel only.
Operator
The operator is the person who operates the machine for commercial
or economic purposes or loans it to a third party for operation and
bears legal product responsibility during the operation for the
protection of the user, the personnel or third parties.
The operator has been trained by the manufacturer in handling the
machine and the necessary accessories and can recognize possible
dangers independently and avoid hazards.
Operator Obligations
The operator is obliged to
–read these operating instructions fully before using the system for
the first time.
–to ensure that all persons working with the machine have read
and fully understood the contents of these operating instructions.
–provide these operating instructions for the personnel at a fixed
location near the machine.
–regularly inform all persons who work with the machine about
the current general accident protection guidelines. The operator
must ensure that precautionary safety measures at work are
respected.
–inspect first aid facilities and fire protection regularly and to keep
them up to date.
–provide the prescribed safety equipment to all persons working
with the machine.
–check all safety devices and safety equipment regularly for their
functionality.
Qualified Electricians
Due to their professional training, knowledge, and experience as well
as knowledge of the relevant standards and regulations, electricians
are able to carry out work on electrical systems and to recognize and
avoid possible dangers independently. The qualified electrician has
been specially trained in the working environment in which he or she is
active.
Impaired Persons & Trainees
Only persons who can be expected to perform their work reliably are
eligible as qualified personnel. People whose response capacity has
been affected, e.g., through drugs, alcohol, or medication, may not
work on the machine.
Personnel who are being trained, instructed, taught, or undergoing
general apprenticeships should only be allowed to work on the
machine under the constant supervision of the operator.

Operating Instructions D50+ | P50+ | SHERAprint 50
Rapid Shape GmbH │DOCR000438
18 │96
1.7 Personal Protective Equipment
Personal protective equipment helps protect people from negative
impacts on their safety and health.
Personnel must wear personal protective equipment while working on
and with the machine, as referred to in the individual sections of this
manual.
The personal protective equipment must be provided by the operator
and must be checked for function before starting work on the machine.
The following describes the personal protective equipment.
UV Protective Goggles
Wearing UV goggles protects the eyes from harmful
UV radiation.
Protective Gloves
Wearing protective gloves protects the skin from contact
with skin damaging materials.
Other
We recommend tying up long open hair and wearing under a hair
protector.
1.8 Environmental Protection
E NV IRO NME NT AL PRO TE C TI ON !
Danger to the environment through incorrect disposal
of materials!
Incorrect disposal of printing materials and cleaning
agents can cause significant damage to the
environment.
–Please dispose of all consumables as intended in
accordance with the locally applicable waste
disposal regulations. When doing so, observe the
safety data sheets of the respective materials.

Operating Instructions D50+ | P50+ | SHERAprint 50
19 │96
Rapid Shape GmbH │DOCR000438
2Overview
2.1 Machine Assembly & Operating Elements
Figure 1: Machine overview, front & back
1
Frame
10
Middle hood
2
Upper hood, protective hood
11
Air outlet
3
Touch display
12
Ethernet connection
4
Hood handle
13
USB port
5
USB port
14
Main switch (Toggle switch)
6
Emergency stop button
15
Power connection
7
Power on button
16
Castor without arrester
8
Castor with arrester
9
Foot sensor

Operating Instructions D50+ | P50+ | SHERAprint 50
Rapid Shape GmbH │DOCR000438
20 │96
Figure 2: Machine overview, build area
17
Collection basket
23
Hot air fan (heating function)
18
Material reservoir
24
Knife protection device
19
Reference plate
25
(Knife-)Drip guard
20
Spirit levels
21
Hose holder
22
Side cover (ASM)
This manual suits for next models
2
Table of contents
Other Rapid Shape 3D Printer manuals