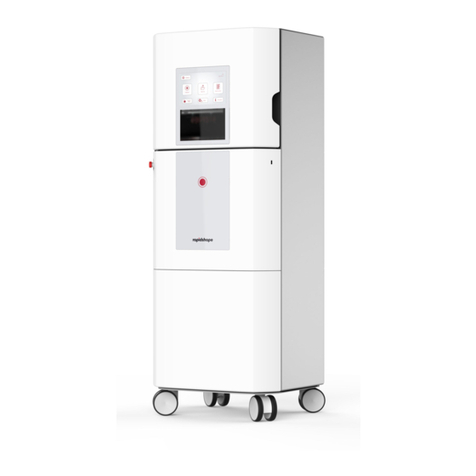
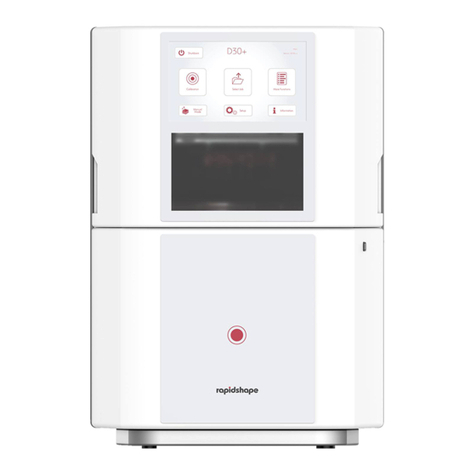
Rapid Shape 3Demax User manual

3Demax
D20+
P20+
SheraPrint 20
These operating instructions must be read and understood before operating the machine.
Rapid Shape GmbH │Roemerstr. 21 │71296 Heimsheim │Germany
Phone +49 (0)7033 309 878 0 │Fax +49 (0)7033 309 878 40 │www.rapidshape.de
DOCR000225
English Version of the German Original Operating Instructions

Contents
1Safety information.........................................................................................................................4
1.1 Symbols..................................................................................................................................................................4
1.2 Safety instructions..................................................................................................................................................5
2General Information ......................................................................................................................8
2.1 Conformity declaration ..........................................................................................................................................8
2.2 Area of application of the operating instructions..................................................................................................8
2.3 Intended use ..........................................................................................................................................................8
2.4 Duties - operator (the operating company)/ person working on the machine (machine operator) .....................9
3Technical data .............................................................................................................................10
3.1 Conversion / spare parts / repair.........................................................................................................................10
3.2 Delivery scope......................................................................................................................................................10
3.3 Components.........................................................................................................................................................11
4Transport ....................................................................................................................................12
4.1 General instructions.............................................................................................................................................12
4.2 Transport damage................................................................................................................................................12
5Preparations................................................................................................................................12
5.1 Requirements for the installation site .................................................................................................................12
5.2 Additional absolutely needed equipment............................................................................................................13
5.3 Materials ..............................................................................................................................................................13
5.4 IT requirements....................................................................................................................................................14
5.4.1 PC hardware ......................................................................................................................................................14
5.4.2 PC software .......................................................................................................................................................14
5.4.3 IP address ..........................................................................................................................................................14
5.4.4 Internet access / TeamViewer port...................................................................................................................14
6Getting started ............................................................................................................................15
6.1 Unpacking the machine .......................................................................................................................................15
6.2 Setting up the machine ........................................................................................................................................15
6.3 Connecting up the machine .................................................................................................................................15
6.4 Starting the machine............................................................................................................................................16
6.5 Opening / closing the machine ............................................................................................................................16
6.6 Printing the first test job ......................................................................................................................................16
6.7 Netfabb software .................................................................................................................................................18
6.7.1 Installation.........................................................................................................................................................18
6.7.2 Opening netfabb ...............................................................................................................................................18
6.7.3 Creating machine workspace ............................................................................................................................18
6.7.4 Selecting a workflow .........................................................................................................................................19
6.7.5 Adding/ changing a machine.............................................................................................................................19
6.7.6 Adding a material ..............................................................................................................................................20
6.7.7 Settings..............................................................................................................................................................22
6.7.8 Loading components .........................................................................................................................................22
6.7.9 Positioning components....................................................................................................................................23
6.7.10 Checking supports .............................................................................................................................................23

6.7.11 Slicing ................................................................................................................................................................24
6.7.12 Transferring printing data via network .............................................................................................................25
6.7.13 Transferring printing data via USB stick ............................................................................................................25
7Operation....................................................................................................................................26
7.1 Preparing the material reservoir and building platform......................................................................................26
7.1.1 Preparing the material reservoir.......................................................................................................................26
7.1.2 Preparing an empty material reservoir .............................................................................................................26
7.1.3 Preparing a building platform ...........................................................................................................................27
7.2 Inserting material reservoir / building platform ..................................................................................................27
7.3 Starting a job........................................................................................................................................................27
7.4 Removing the print job ........................................................................................................................................28
7.5 Cleaning the component......................................................................................................................................29
7.6 Post-curing ...........................................................................................................................................................30
7.7 Menu "Calibration“ (LED calibration)...................................................................................................................30
7.8 Menu "Info" .........................................................................................................................................................31
7.9 Menu "More Functions“ ......................................................................................................................................31
7.9.1 Verifying/setting parallelism .............................................................................................................................31
7.9.2 Cleaning the reservoir off particles ...................................................................................................................32
7.10 Menu „Show Image“ ............................................................................................................................................33
7.11 Menu „Settings"...................................................................................................................................................33
8Cleaning and maintenance...........................................................................................................34
8.1 Cleaning................................................................................................................................................................34
8.1.1 Cleaning the building platform..........................................................................................................................34
8.1.2 Cleaning the material reservoir.........................................................................................................................34
8.2 Regular maintenance by the customer................................................................................................................35
8.2.1 Care before every print job ...............................................................................................................................35
8.2.2 Daily maintenance.............................................................................................................................................35
8.2.3 Weekly maintenance.........................................................................................................................................35
8.3 Maintenance by the manufacturer ......................................................................................................................35
9Service ........................................................................................................................................36
10 Final decommissioning.................................................................................................................36
10.1 Shutting down the machine.................................................................................................................................36
10.2 Storage.................................................................................................................................................................36
11 Disposal.......................................................................................................................................36
11.1.1 Disassembly.......................................................................................................................................................37
11.2 Dispose.................................................................................................................................................................37

Safety information
Rapid Shape Operating Instructions
DOCR000225
Page 4/ 37
1Safety information
1.1 Symbols
These operating instructions contain information which must be observed for your own personal safety as
well as to avoid material damage. The instructions comprise the following explanations according to
degree of risk.
Danger
Non-observance leads to serious injury or even death. High risk of hazard.
Warning
Non-observance can lead to serious injury or even death. Medium risk of hazard.
Caution
Can lead to minor or moderately serious injuries. Low risk of hazard.
Caution
Non-observance of the precautionary measures can lead to material damage of the
equipment as well as the environment.
Attention
Indicates important information concerning the operation of the product or the respective
work stage.
Instruction
It is essential to wear UV protective goggles.
Instruction
It is essential to wear protective gloves.

Safety information
Rapid Shape Operating Instructions
DOCR000225
Page 5/ 37
1.2 Safety instructions
Only specially trained personnel are permitted to perform/execute work with/on a Rapid Shape machine.
For further information on the topic of training, please consult the Rapid Shape Support Team.
Rapid Shape is not liable for damage of any kind resulting from incorrect use or from the actions of non-
authorized personnel.
Risk of electric shock
Danger
Danger to life from electric current!
Work at the machine’s electrical equipment may only be performed by qualified personnel.
The respective safety and VDE requirements need to be observed. Improper installation can
cause material damage and personal injury for which the installer is liable.
Faulty connection, insulation faults, foreign objects (dust, liquid due to improper installation environment) or
lack of grounding can cause housing parts to carry voltage. When touching live parts, there is a danger to life
from electric shock. Therefore:
•Work at the machine’s electrical equipment may only be performed by qualified
personnel.
•Devices with damaged power cable, damaged insulation and/or lack of grounding need
to be separated from the power network (removing the mains plug) and be repaired by
qualified personnel before putting into operation again.
•Keep humidity away from live parts. This may cause a short circuit.
•Before working at live parts of the electrical equipment and operating material,
establish a voltage-free condition and ensure that this condition will be kept for the
duration of the work.
•Never bypass or disable fuses.
•Connect the power cable to the socket closest to the machine.
•Only operate the machine with the supply voltage intended for the machine.
•Only connect the machine to a proper earthed socket.
•The mains plug must be freely accessible at all times. In case of an emergency, a
complete separation of the machine is effected by unplugging the mains plug.
•In the event of prolonged absence or bad weather, always switch off the machine at
the main switch and separate it from the power supply by unplugging the mains plug.

Safety information
Rapid Shape Operating Instructions
DOCR000225
Page 6/ 37
Warning against dangerous UV radiation
Caution
Danger of injury from UV radiation!
Printing and calibration take place under the influence of UV radiation. UV radiation can
cause permanent damage to eyes and skin if exposed for a long time without suitable
protective equipment.
Therefore, during printing and calibration, work at the machine may only be performed
when wearing UV protection goggles.
•Printing process should be carried out when the protective hood is mainly closed.
•During calibration of the exposure unit, the UV protection goggles, supplied in the
scope of delivery, must be worn.
•The material reservoir may only be used when it’s filled with sufficient amount of
material.
•It’s recommended to wear the UV protection goggles during any operation at the
machine.
Warning against hand-related injuries
Caution
Danger of injury to hands due to moving parts!
The machine consists of accessible moving parts which can cause light hand injuries from
bruising and trapping. There is a risk of bruising and trapping due to moving of the building
platform. Only personnel instructed in the machine may operate the machine.
For this reason, the respective warnings must be observed and adhered to when working at the machine.
•During printing process and manual moving of the building platform, no fingers or
hands are allowed to be located in or inserted into the machine.
Warning against environmental influences
Caution
The machine’s electrical as well as mechanical components are only configured for certain
environmental influences. Non-observance of the prescribed environmental conditions can
cause damages to the machine.
For this reason, the respective warnings must be observed and adhered to before commissioning and
during operation.
•Protect the machine against humidity, dripping water and splash water.
•Do not place any filled objects, such as drinks for example, in the immediate vicinity of
the machine.

Safety information
Rapid Shape Operating Instructions
DOCR000225
Page 7/ 37
•Do not position the machine near heating.
•Do not expose the machine to direct sunlight.
•Do not operate the machine in damp rooms.
•Only use the machine in temperate climates and not tropical climates.
•Do no place any open flames, such as candles for example, on top or near the machine.
Warning against overheating
Caution
The machine’s electrical as well as mechanical components are only configured for a certain
ambient temperature.
For this reason, the respective warnings must be observed and adhered to before commissioning and
during operation.
•Never install the machine in a cupboard or shelf unit with insufficient ventilation.
•Never cover the ventilation vents of the machine.
•Maintain a distance of at least 200mm on every side so that the generated heat can
dissipate.
Warnings against dangerous substances
Warning
Chemicals required for the manufacture, maintenance and care must be handled correctly
and under observance of the relevant regulations and instructions for use applicable to
them.
For this reason, the handling of these chemicals must be carried out properly and in compliance with the
applicable regulations and instructions for use. The manufacturer’s specifications must be observed.
•Read the safety data sheet of the manufacturer!
•It’s recommended to wear suitable protective clothing. (UV protection goggles,
protective gloves, if necessary other protective clothing)
•The metering stipulations of the manufacturer must be observed.
Warning against harmful vapors
Warning
The materials used for printing can emit vapors which irritate the respiratory paths and/or
can lead to dizziness.
For this reason, when working with the printing materials, respective protective clothing must be worn.
A sufficient fresh air supply has to be assured.

General Information
Rapid Shape Operating Instructions
DOCR000225
Page 8/ 37
•Read the safety data sheet of the manufacturer!
•It’s recommended to wear suitable protective clothing. (breathing protection, if
necessary other protective clothing)
2General Information
2.1 Conformity declaration
With the EC conformity declaration accompanying the machine, the manufacturer, Rapid Shape GmbH,
declares that the designated machine was developed, constructed and produced in accordance with the
relevant directives and their standards.
2.2 Area of application of the operating instructions
These operating instructions are valid for the following machines:
Machine
Type
3D printer system
3Demax
D20+
P20+
Sheraprint 20
2.3 Intended use
The Rapid Shape 3D printer system is intended for printing of three-dimensional objects with printing
materials designed for the respective wavelength and the DLP method in additive manufacturing method.
The specified digital workflow (see below) must be observed. Work at the machine without permission and
sufficient instruction is forbidden.
The printer system is to be used in a tempered indoor area (installation conditions see technical details –
chapter 3) and in compliance with the prohibition-, warning- and mandatory signs attached to the machine as
well as the regulations and safety instructions described in this manual.
Only printing materials which are suited for the respective wavelength and the DLP printing method, and
which have a flash point of >80°C, are allowed to be used.
Operating the machine within explosive atmospheres, using explosive printing materials, operating the
machine outdoors or in wet areas or without UV protection goggles as well as non-observance of the
operating instructions is forbidden.
The operator is liable for damages resulting from the non-compliance of the intended use and the
prohibition-, warning- and mandatory signs only. If the machine is to be used in a manner not specified by the
manufacturer, the protection supported by the machine may be affected in a negative way.

General Information
Rapid Shape Operating Instructions
DOCR000225
Page 9/ 37
Digital workflow (schematic representation):
These operating instructions detail the process up to stage 3 and 4. Stage 1, 2, 5 and 6 as well as the
photosensitive print materials for stage 4 are not covered by the delivery scope of the 3D printing system, but
can all be acquired from Rapid Shape or its partners. Should you have any queries, please contact our sales
team.
2.4 Duties - operator (the operating company)/ person working on the machine
(machine operator)
It is essential to observe the instructions given in these operating instructions
-It is essential to observe the fundamental safety instructions in order to assure perfect as
well as safe operation of the machine.
-These operating instructions contain all the important information required for a safe
operation of the machine.
-All persons that operate/work on this machine must have read and understood these
operating instructions.
Responsibility of the operator (the operating company)
The operating company is obliged to
-to instruct the person working on the machine in its operation.
-inform the person working on the machine about safety in the workplace as well as the
generally applicable accident prevention regulations.
-to provide the person working on the machine with the operating instructions.
-A brief cleaning of the machine must be undertaken after every printing operation. See
Chapter 8.
Responsibility of the person working on the machine (the machine operator)
Persons who operate this machine are obliged to
-observe safety in the workplace as well as the generally applicable accident prevention
regulations.
-to observe and follow the instructions and safety information given in these operating
instructions.
We accept no liability for machine damage or injury to the operating personnel if these operating instructions
are not observed.
1) Generation of
the 3D data
2) Processing of
the 3D data
(optional)
3) Preparation of
the 3D data for the
printer system
4) Print of the 3
dimensional
component 5) Post-processing 6) Use of the
component

Technical data
Rapid Shape Operating Instructions
DOCR000225
Page 10 / 37
3Technical data
Description
Dimensions (WxHxD)
335x541x349mm (closed)
335x779x349mm (opened)
Weight
27kg
Ambient temperature
+15 to +40°C
Air humidity
max. 70%
Storage
In dry and tempered rooms (-15°C to +70°C)
Sound pressure level*1)
< 46 dB (A)
Calibration value
Set point low: 10,1 W/m² (tolerance -0,1/+0,4 W/m²)
Set point high: 20,1 W/m² (tolerance -0,1/+0,9 W/m²)
Wavelength
385nm
Interface electrics
100-240V AC, 50/60Hz, 180W
Interface ethernet
10/100 Mbit/s
Interface media
USB-Ports USB 2.0
All values are approximate.
*1) In accordance with DIN EN ISO 11201:2010-10
3.1 Conversion / spare parts / repair
Every technical alteration of whatever kind to the machine is forbidden. Only trained Rapid Shape GmbH
personnel are permitted to carry out repairs to the machine. If repair is required, please contact the Rapid
Shape Service.
3.2 Delivery scope
Quantity
Article
1
3D printer system
1
Starter kit
Optional
Accessories pack ( is offered and sold separately)
The starter kit contains tools and consumption parts required for operating the machine (please consult the
offer for details).

Technical data
Rapid Shape Operating Instructions
DOCR000225
Page 11 / 37
3.3 Components
Figure 1
Figure 2
1
Display
2
USB connection
3
100-240V connection incl. main switch
4
Ethernet connection
5
USB connection
2
1
3
4
5

Transport
Rapid Shape Operating Instructions
DOCR000225
Page 12 / 37
4Transport
Caution
Non-observance of the precautionary measures can lead to material damage of the
equipment as well as the environment.
Caution
Loading and unloading, as well as positioning/setting up the machine, may only be
performed by qualified personnel. Always lift and transport the machine in twos. When
using lifting devices, the lifting device’s weight must comply with the weight of the machine
(see technical details –chapter 3). The requirements of the machine’s installation site must
be observed.
4.1 General instructions
The machine may only be transported in the packaging supplied and with sufficient protection against tilting
over.
Store the transport packaging for future use (change of location, maintenance, repair etc.). Returns without
original transport packaging cannot be accepted.
4.2 Transport damage
After receipt of the delivery carefully check the transport packaging as well as the product supplied for any
damage that could have occurred during transport. Transport damage is to be reported to the forwarding
agent and Rapid Shape immediately.
5Preparations
5.1 Requirements for the installation site
In order to ensure a smooth and trouble-free operation of the 3D printer system, please observe the
following stipulations for the machine’s installation site:
-Set up in a room separated from other permanent work
-Set up only in a dust-free area
Beware of milling dust
-A sufficient supply of fresh air is to be assured in the room
In this respect, also always observe the stipulations of the respective material manufacturers (safety data sheet)
-The machine as well as the materials are to be protected from exposure to direct sunlight
-The room is to be equipped with UV-protected lighting
-Windows are to be UV protected / shaded or fitted with UV protective film
-A strong foundation for setting up the machine
-Room requires LAN network and internet connection for service purposes
-Optional: Room with fresh water supply and sink unit

Preparations
Rapid Shape Operating Instructions
DOCR000225
Page 13 / 37
-Optional: Room with compressed air supply
-Optional: Set up in a temperature-controlled room with constant temperature ±2°C (optimal)
In this respect, also always observe the stipulations of the respective material manufacturers
5.2 Additional absolutely needed equipment
In order to ensure a smooth and trouble-free operation of the 3D printer system, the following items are
required:
-PC for generating the printing data (see chapter 5.4)
-Post exposure unit for hardening the components
In this respect, also always observe the stipulations of the respective material manufacturers!
Observe safety data sheets!
Observe biocompatibility requirements!
-Isopropanol or ethanol (at least 10l)
In this respect, also always observe the stipulations of the respective material manufacturer!
Observe safety data sheets!
Observe biocompatibility requirements!
-Disposable gloves in different sizes
-Standard glass cleaner (streak-free)
-Roll for paper toweling
-Waste containers for paper toweling (sealable to prevent odor)
-Closable, light-proof cabinet for material reservoirs and material containers.
-Table workplace measuring approx. 100 cm in width to remove the components from the platform as
well as to carry out any post-processing
-Optional: Protective gas supply with corresponding gas fixtures for the post exposure unit
In this respect, also always observe the stipulations of the respective material manufacturer!
Observe safety data sheets!
Observe biocompatibility requirements!
-Optional: Ultrasound cleaning unit. For several materials with several cleaning containers as required
In this respect, also always observe the stipulations of the respective material manufacturer!
Observe safety data sheets!
Observe biocompatibility requirements!
-Optional: Table-magnifier lamp
-Optional: Compressed air supply with compressed air pistol, incl. upstream pressure reducer to 2 bar
5.3 Materials
Current information on materials as well as safety data sheets can be obtained directly from the material
manufacturers. As regards Rapid Shape materials, our contact details are as follows:
Company name:
Rapid Shape GmbH
Address:
Römerstraße 21
Town:
71296 Heimsheim
Telephone:
+49 (0) 7033 309878-0
Fax:
+49 (0) 7033 309878-40
Internet:
http://www.rapidshape.de
Email:
service@rapidshape.de

Preparations
Rapid Shape Operating Instructions
DOCR000225
Page 14 / 37
5.4 IT requirements
A computer is required to generate the print data for the machine. The following points are to be observed in
this respect.
5.4.1 PC hardware
In order to use the slicing software from netfabb, you require a computer that fulfils the following
requirements:
-Computer for CAD design, nesting and slicing
Quad core CPU (Intel Core i5 or i7) @ 2.50 GHz
At least 4GB main memory (8GB recommended)
1GB+ free hard disc memory
Windows 7 32-bit/64-bit or higher
LAN connection
Internet connection
-Network connection between computer and machine
(e.g. via router)
5.4.2 PC software
The following software must be installed on the computer intended for use.
-Operating system Windows 7 32-bit / 64-bit (optional) or higher
-TeamViewer Host (as from version 10)
-netfabb Rapid Shape Version (delivered on the USB stick)
For more information on the software used:
-http://www.microsoft.com
Here you can obtain information on the operating system used
-http://www.teamviewer.com
Here you can obtain information on trouble-shooting or the latest updates for TeamViewer.
-http://www.microsoft.com
Here you can obtain all information required for the slicing software netfabb.
5.4.3 IP address
The default setting for the system is DHCP (dynamic IP address).
Should a static IP address be used, this can be set in the menu under "Settings"
(see Chapter 7.10).
Should you require details of your IP address please contact your administrator.
5.4.4 Internet access / TeamViewer port
-The computer to be used for netfabb requires internet access in order to obtain
regular software updates and material libraries
-Moreover, this computer requires approval to use the TeamViewer program so
that, if required, the service team can access the computer.

Getting started
Rapid Shape Operating Instructions
DOCR000225
Page 15 / 37
6Getting started
Before putting into operation it is essential to have read in full and understood the chapter Safety
information. Should there be any queries or uncertainties, please immediately contact the Rapid Shape
Service Team.
6.1 Unpacking the machine
Caution
Note the transport instructions described in chapter 4.
(1) Grip the machine with both hands and carefully remove the machine out of the
packaging. Attention: Do not grip the machine at the movable protective hood!
6.2 Setting up the machine
Caution
Note the requirements for the installation site described in chapters 1.2 and 5.
A setting up of the machine may only be performed by qualified personnel.
When transporting the machine, ensure that no material reservoir is inserted in the
machine and that the protective hood has been closed properly.
(1) Position the machine onto a stable ground.
(2) When positioning the machine at its definite installation site, the machine has to be
positioned fully onto its four feet in order to prevent the machine from external
vibration influences.
6.3 Connecting up the machine
Danger
Non-observance leads to serious injury or even death. High risk of hazard.
Danger
Danger to life from electric current!
Work at the machine’s electrical equipment may only be performed by qualified personnel.
The respective safety and VDE requirements need to be observed. Improper installation can
cause material damage and personal injury for which the installer is liable. (see chapter 1.2,
Risk of electric shock)
(1) Connect the mains plug at the machine’s rear side. Avoid tripping hazards due to cables
lying around.
(2) Optional: Connect the network cable at the machine’s rear side.
Internet connection required to obtain optimal support.

Getting started
Rapid Shape Operating Instructions
DOCR000225
Page 16 / 37
6.4 Starting the machine
Caution
Danger of injury to hands due to moving parts!
The machine consists of accessible moving parts which can cause light hand injuries from
bruising and trapping. There is a risk of bruising and trapping due to moving of the building
platform. Only personnel instructed in the machine may operate the machine.
(1) If open, close the protective hood.
(2) Switch on the machine at the main switch on the machine’s rear side.
(3) The machine starts up:
-The display indicates „starting machine“.
-The z-axis carries out a reference run towards the upper end position
(Attention: risk of bruising and trapping).
-The operating system starts up.
-The operating panel starts up.
6.5 Opening / closing the machine
Caution
Danger of injury to hands due to moving parts!
The machine consists of accessible moving parts which can cause light hand injuries from
bruising and trapping. There is a risk of bruising and trapping due to moving of the building
platform. Only personnel instructed in the machine may operate the machine.
The machine is equipped with a protective hood which can be opened and closed manually.
(1) Press the hood upwards (opening) / downwards (closing) at the lateral gripping areas.
6.6 Printing the first test job
Caution
Danger of injury from UV radiation!
Printing takes place under the influence of UV radiation. UV radiation can cause permanent
damage to eyes and skin if exposed for a long time without suitable protective equipment.
Therefore, during printing, work at the machine may only be performed when wearing UV
protection goggles.
•Printing process should be carried out when the protective hood is mainly closed.
•The material reservoir may only be used when it’s filled with sufficient amount of
material.
•It’s recommended to wear the UV protection goggles during any operation at the
machine.

Getting started
Rapid Shape Operating Instructions
DOCR000225
Page 17 / 37
Caution
Danger of injury to hands due to moving parts!
The machine consists of accessible moving parts which can cause light hand injuries from
bruising and trapping. There is a risk of bruising and trapping due to moving of the building
platform. Only personnel instructed in the machine may operate the machine.
•During printing process, no fingers or hands are allowed to be located in or inserted
into the machine.
After the machine has been started up, the main menu will be displayed.
(1) Fill in the required amount of material into the material reservoir. Pay attention to
the maximum filling level (approx. 10-15mm. measured from the reservoir’s
bottom).
(2) Open the machine.
(3) Insert the filled material reservoir into the machine.
(4) Insert a fully cleaned building platform into the machine and fix it.
(5) In order to start your job, select:
“Start Job” →„More Functions“ →press AUSWAHL →„Testjob“ →„My first
job“→„Start Job“
While the job is being printed, you can already carry on with further setting up of the digital
workflow. Once the print job has been completed, please check the result. Should you find
that the print result deviates from the desired result, please contact the Service Team.

Getting started
Rapid Shape Operating Instructions
DOCR000225
Page 18 / 37
6.7 Netfabb software
The following sections provide a brief overview of the netfabb software. However, we
would like to point out that this is just one small part of netfabb. Should you require a more
detailed explanation, please consult the netfabb operating manual:
—callable after installation in the netfabb program directory
—or under http://www.netfabb.com
The software netfabb is required for preparing and sending the print jobs to your 3D print
system.
6.7.1 Installation
Install the netfabb version provided on the USB stick supplied. Please pay attention to the installation
instructions on the USB stick, these provide instructions and may also include adjustments.
6.7.2 Opening netfabb
(1) Open netfabb.
(2) The starting page will be opened
automatically.
Figure 3
6.7.3 Creating machine workspace
(1) Click on the button “Load machine
workspace” (see action bar)
(2) Select your printer and confirm
your selection by pressing “OK”.
Tip: If you have selected your printer, you
- can add your selection to the favorites
list by right-click (add to favorite, the
favorites will always appear at the top of
the list).
- can set the selected machine workplace
as starting workspace (start with
netfabb). This workspace will be
Figure 4

Getting started
Rapid Shape Operating Instructions
DOCR000225
Page 19 / 37
automatically loaded when starting
netfabb.
(3) The machine workspace will be loaded.
(This will take some seconds.)
(4) The loaded machine workspace will be
displayed.
Figure 5
6.7.4 Selecting a workflow
A workflow describes the procedure of preparing and printing the 3D data. Depending on the netfabb version,
different kind of workflows can be selected.
coDiagnostiX
For printing jobs which have been created with the software coDiagnostiX, the additional tab “coDiagnostiX”
can be used. The tab enables to load the printing jobs directly from the source software and to position them
onto Surgical Guide Platforms in netfabb.
6.7.5 Adding/ changing a machine
If you are using netfabb for the first time or you have received a new machine, you have to add your machine
in netfabb:
(1) Click on the button “…“ right to the display
area of the machine type.
(2) The machine library will be opened and
already entered machines will be
displayed.
(3) Adding a machine: In order to add a
machine, click on the button “Add
machine”.
(4) Edit machine: In order to edit an already
existing machine, click on the button “Edit
machine”.
(5) Fill in the gaps with your machine’s data or
edit the already entered data:
—Machine name: freely selectable
—Machine type: select
—Scaling XY: see USB stick
—IP Address: enter (only required in
combination with a network)
—Username: freely selectable (factory
setting: rapid)
—Password: freely selectable (factory
setting: shape)
Figure 6
Figure 7

Getting started
Rapid Shape Operating Instructions
DOCR000225
Page 20 / 37
—Optical Correction (only applicable at
machines with optical correction): enter;
The values of the optical correction
are adapted to your machine. Click on
the button “change” and select the
folder (USB stick) where the file has
been saved. Copy the values by
double clicking.
(6) Save your changes by clicking on the
button “OK”.
Figure 8
Figure 9
Only those machine types can be added and adjusted which are selected in the current
active machine workspace. (see chapter 6.7.3)
6.7.6 Adding a material
If you are using netfabb for the first time or you have received a new machine/material, you have to add a
new material in netfabb:
(1) Click on the button “…“ right to the display
area of the material.
(2) The machine library will be opened and
already entered materials will be
displayed.
(3) Adding a material: In order to add a
material, click on the button “Add new”.
—Name: freely selectable (Note: A
material name can be set only once.)
—Machine type: select
—Material: select
—Parameter set: select
—Layersize: select
Note: The smaller the layersize is, the more
precise the print result will be (at longer
printing time).
(4) Edit material: In order to edit an already
existing material, click on the button
“Edit”.
(5) In order to edit the material parameters,
e.g. for testing purposes, the following
parameters can be adjusted (may vary
depending on the material type):
Object properties:
—Overcure: prolongs/shortens the
exposure time
—Support Width: only for two-
Figure 10
This manual suits for next models
3
Table of contents
Other Rapid Shape 3D Printer manuals