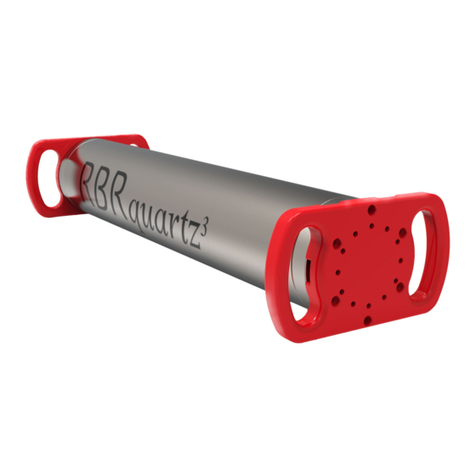
RBR RBRSolo 3 User manual

rbr-global.com
USER GUIDE
RUSKIN

RBR#0006106revG
2
1 Table of Contents
1Table of Contents ..................................................................................................... 2
2 Ruskin ........................................................................................................................ 5
3 Revision history......................................................................................................... 6
4 Warranty statement .................................................................................................. 7
5 Introduction .............................................................................................................. 8
6 Installation ................................................................................................................ 9
6.1 Install Ruskin on a PC...................................................................................................................... 9
6.2 Install Ruskin on a Mac ................................................................................................................... 9
6.3 Update Ruskin............................................................................................................................... 10
6.4 Uninstall Ruskin ............................................................................................................................ 11
7 Provide your feedback............................................................................................ 12
8 Quick start ............................................................................................................... 14
8.1 Deploy an instrument ................................................................................................................... 14
8.2 Batteries ........................................................................................................................................ 15
8.3 Simulating an RBRsolo/duet ........................................................................................................ 16
8.4 View information about a logger.................................................................................................. 16
8.5 Recover an instrument and download data ................................................................................ 17
9 Configure a logger...................................................................................................18
9.1 Autonomy engine.......................................................................................................................... 18
9.1.1 When to replace the batteries ......................................................................................................................................18
9.1.2 Predicting battery life ...................................................................................................................................................19
9.2 Scheduling a RBRsolo/duet.......................................................................................................... 19
9.3 Stop logging .................................................................................................................................. 20
9.4 Tides and waves............................................................................................................................ 21
9.4.1 Tides..............................................................................................................................................................................21
9.4.2 Waves.............................................................................................................................................................................22
9.4.3 |wave deployment planning.........................................................................................................................................24
|wave logger positioning...............................................................................................................................................25
9.5 Autoranging and fixed gain .......................................................................................................... 26

RBR#0006106revG
3
9.6 Derived channel parameters ........................................................................................................ 27
9.7 Deployment................................................................................................................................... 27
9.8 Automatic tasks............................................................................................................................. 28
9.8.1 Auto-Download .............................................................................................................................................................28
9.8.2 Auto-Stop ......................................................................................................................................................................29
9.8.3 Auto-Deploy...................................................................................................................................................................29
10 Download ................................................................................................................ 30
10.1 Download data from the logger ................................................................................................... 30
10.2 File naming convention ................................................................................................................ 30
11 Calibration tab ........................................................................................................ 31
12 Update firmware ..................................................................................................... 32
13 Datasets................................................................................................................... 35
13.1 Open a stored dataset .................................................................................................................. 35
13.2 Analysis.......................................................................................................................................... 35
13.2.1 Analysis tab ...................................................................................................................................................................35
Cursor tab......................................................................................................................................................................35
Calibration tab ..............................................................................................................................................................37
13.3 Overview........................................................................................................................................ 37
13.4 Channels........................................................................................................................................ 38
13.4.1 Information tab ............................................................................................................................................................. 38
13.4.2 Calibration Tab..............................................................................................................................................................38
13.4.3 Parameters tab..............................................................................................................................................................39
13.5 File info .......................................................................................................................................... 40
13.6 Plot view ........................................................................................................................................ 41
13.6.1 Thumbnail view.............................................................................................................................................................42
13.6.2 Live data ........................................................................................................................................................................42
13.6.3 Plot Tools.......................................................................................................................................................................42
Dataset toolbar .............................................................................................................................................................42
Live plot toolbar............................................................................................................................................................42
Tools for datasets and live data ...................................................................................................................................43
Tools for live data..........................................................................................................................................................46
13.6.4 Shortcuts / Controls......................................................................................................................................................46
13.7 Exporting datasets ........................................................................................................................ 47

RBR#0006106revG
4
14 User calibration....................................................................................................... 49
14.1 N-Point calibration........................................................................................................................ 49
14.2 Oxyguard DO calibration .............................................................................................................. 49
14.3 Turbidity calibration ..................................................................................................................... 51
14.3.1 Two-point calibration ................................................................................................................................................... 52
14.3.2 One-point calibration ...................................................................................................................................................54
14.4 RBRcoda T.ODO - User calibration ............................................................................................... 56
14.4.1 Collecting a calibration file...........................................................................................................................................57
14.4.2 Performing a calibration...............................................................................................................................................57
14.4.3 Creating a calibration region........................................................................................................................................58
14.4.4 Plateau creation............................................................................................................................................................59
Automatic ......................................................................................................................................................................59
Manual ...........................................................................................................................................................................60
14.4.5 Plateau deletion ...........................................................................................................................................................61
14.4.6 Reference data entry.....................................................................................................................................................62
Automatic ......................................................................................................................................................................62
Manual ...........................................................................................................................................................................63
Saving coefficients ........................................................................................................................................................64
15 Preferences.............................................................................................................. 65
15.1 Specify location for data files ....................................................................................................... 65
15.2 Specify location for realtime data files ........................................................................................ 65
15.3 Specify location for log files ......................................................................................................... 65
15.4 Specify Language selection.......................................................................................................... 66
15.5 Using advanced sampling controls.............................................................................................. 66
15.6 Using advanced calibration controls ........................................................................................... 66
15.7 Derived channels RBRsolo/duet................................................................................................... 67
15.7.1 Depth channel ............................................................................................................................................................... 67
15.7.2 Dissolved Oxygen concentration.................................................................................................................................68
15.8 Specifying plotting preferences ................................................................................................... 68
15.8.1 Channel visibility tab ....................................................................................................................................................69
15.8.2 Channel colours tab......................................................................................................................................................70

RBR#0006106revG
– 5
•
•
•
•
•
2 Ruskin
Ruskin is the RBR software that manages your RBR loggers to provide all the data necessary to do your work. Ruskin
provides a graphical user interface that makes using the loggers easy. You can use Ruskin to do the following:
configure, schedule and enable multiple loggers
download data after logging
graphically view data sets
export data in various formats
change the calibration coefficients for your logger
Ruskin can be used on PC and Mac.

RBR#0006106revG
– 6
3 Revision history
Revision No. Release Date Notes
1.0 01-Sep-2012 Original
2.0 01-Oct-2014 Adding RBRsolo D and DO and RBRduet
support
B 12-Sept-2017 Final revision for compact loggers
D 12-Dec-2018 Updated installation details, updated
screenshots, added auto-deploy features
E 13-Mar-2019 Updated plotting information, firmware
upgrades, and screenshots
F 06-Jun-2019 Updated introduction, updated
screenshots
G 04-May-2020 Updated screenshots, RBRcoda T.ODO
customer calibration, and removal of
Logger hardware

RBR#0006106revG
– 7
4 Warranty statement
All data loggers manufactured by RBR Ltd. are warranted against defects in workmanship or original parts and
materials for one year. Third party sensors (not manufactured by RBR) are limited to the warranty provided by the
original manufacturer.
Units suffering from such defects will be repaired or replaced at the discretion of RBR Ltd., provided that the problem
has appeared during normal use of the instrument for the purpose intended by us. The liability of RBR Ltd. extends only
to the replacement cost of the instrument. The customer will bear all costs of shipment to us for repair; all other costs,
including return shipment, will be borne by RBR Ltd.
This warranty does not cover consumables or normal wear and tear, nor does it cover damage caused by negligent use
or mishandling. Attempted modification or repair of any unit without the prior consent of RBR Ltd. will immediately
void any warranty in force.
Users are expected to maintain a regular program of calibration.
We reserve the right to grant or refuse warranty repairs at our discretion if we consider that there are reasonable
grounds for doing so.

RBR#0006106revG
– 8
5 Introduction
This document introduces you to Ruskin and helps you to use it effectively from the start. It is specifically written for the
RBRsolo3and RBRduet3loggers - our smallest one and two channel loggers.
You can access the Ruskin User Guide on the USB data stick provided when you purchase a logger, from the Help menu
in Ruskin, and on the RBR web site, atwww.rbr-global.com.
Release notes are automatically displayed each time you install an updated version of Ruskin. The most recent release
notes are also available from the Help menu in Ruskin.For informationabout operating and maintaining your data
logger, see theLogger Hardware section. It helps explain how to change the battery and change desiccant, including
other useful information, such as inspecting and replacing O-rings.

RBR#0006106revG
– 9
•
•
•
•
•
1.
2.
3.
4.
5.
1.
2.
3.
4.
6 Installation
6.1 Install Ruskin on a PC
You can install Ruskin on a PC that runs the Windows 7, 8, 8.1, or 10 operating system.
The minimum requirements for Ruskin are:
OS = Windows 7
Processor speed = 1.4GHz
RAM required = 2GB
Display resolution = 1024x768 recommended
HDD space for installation = 500MB
Steps
Connect the data stick included with your instrument to a USB port.
Navigate to the folder Ruskin Installation and double click on the file RuskinSetup.exe.
Follow the installation wizard. By default, Ruskin will be installed to C:\RBR.
The logger uses a USB interface to communicate with Ruskin.
At the end of the installation, a prompt will appear asking, "Would you like to install the logger driver
at this time?"
Click Yesto install the drivers.
A shortcut to Ruskin appears on the desktop and in a Start menu folder called Ruskin.
6.2 Install Ruskin on a Mac
You can install Ruskin on a Mac running OS X 10.12 (Sierra) or later.
Steps
Insert the USB data stick in the appropriate USB port.
Navigate to the folder OSX and double click on the file Ruskin.dmg.
When the disk image window opens, drag the Ruskin icon into the applications directory and wait for
the copy to complete.
To open Ruskin for the first time navigate to your applications directory, locate Ruskin, right click on
the icon, and select Open.
You may need to run the setup application as an administrator to install the driver correctly.
Please note that the most recent version of Ruskin can be found at https://rbr-global.com/products/software

RBR#0006106revG
– 10
5. The dialogue box shown below will prompt you to authorize the opening of Ruskin.
An application named Ruskinappears in the Applications folder.
You may want to drag the Ruskin.app application to the Dock.
6.3 Update Ruskin
To take advantage of new features and bug fixes, ensure that you are using the most recent version of Ruskin.
It is not necessary to uninstall an older version of Ruskin before installing a newer version. The installation program
deletes the older files before installing the newer ones. It does not delete any Ruskin data files or log files.
The most recent version of Ruskin is always available on the RBR website (www.rbr-global.com). However, if you
already have an older version of Ruskin installed, Ruskin automatically notifies you that a newer version is available
when you start Ruskin. You can check to see if a new version is available from within Ruskin navigating to the menuHel
p> Check for updates.If you have a broadband connection, we recommend that you follow the installation
instructions that appear on your computer. Otherwise, request a USB stick from RBR.
It may be required that you navigate to System Preferences > Security & privacy to allow apps downloaded
from “Anywhere” to complete the installation.
Although you can specify a different folder for the working directory for the software, we recommend that you
use the defaultApplicationsfolder.
If you do not have a broadband connection and/or are unable to install the Ruskin updates, update
notifications are available via email. To receive these notifications, send an email to: [email protected]
subject: "Ruskin update request".

RBR#0006106revG
– 11
6.4 Uninstall Ruskin
If you no longer need to manage RBR instruments from your computer, you can uninstall Ruskin.
It is not necessary to uninstall an older version of Ruskin before installing a newer version. The installation program
deletes the older files before installing the newer ones. For more information, seeUpdate Ruskin.
Windows7, 8, 8.1, or 10
Go to Start > Control Panel > Programs, and under Programs and Features, click Uninstall a program. In the list,
locate Ruskin – click Ruskinto highlight it, and then click Uninstall.
OS X 10.5 or later
Move the Ruskin application from Applications to the Trash.
Removing Ruskin will not delete your data files or your diagnostic logs.

RBR#0006106revG
– 12
•
•
1.
2.
3.
4.
7 Provide your feedback
You can get in touch with RBR in several different ways:
Send us an email. For a technical question, write to[email protected]. For general inquiries,
use[email protected].
Send us a bug report from within Ruskin itself. Use the Help menu > Comment on Ruskin.
This allows you to include the diagnostic logs, and any other files (RSK datasets, screenshots) that will
help us reproduce the problem and help you as quickly as possible.
Steps
From the Help menu, click Comment on Ruskin.
The Feedback to RBR dialog box appears.
Enter your identification information, for example, email address and name, and then summarize your
comments.
Provide a detailed description and add any attachments, if required.
Click Submitto submit the report.

RBR#0006106revG
– 13

RBR#0006106revG
– 14
•
•
•
•
•
•
•
8 Quick start
8.1 Deploy an instrument
Before you begin using your RBR loggers, you may want to experiment with the simulated loggers that are included in
Ruskin. For instructions on simulating a logger, see Simulating an RBRsolo/duet.
When you are ready to use your own RBR loggers, we recommend that you follow the following steps to ensure that you
measure exactly what you want on the first attempt.
Steps
To establish communication between the RBRsolo3or RBRduet3and a computer, open the instrument
(see Opening and closing the logger) and remove the housing. There is a USB-C connector located on
the back side of the logger. The supplied interface USB-C cable is plugged into this connector and the
other end is attached to the USB port on your computer.
The logger should appear in theNavigatorview after a few seconds.
If you are using the logger for the first time, you can use either the default preferences or specify your
preferences to apply to all your loggers. For more information, seePreferences.You can change these
preferences at any time.
Click the logger that you want to use. Ensure that it contains the sensors you expect to find on the
logger by viewing theInformationtab in thePropertiesview on the right side of the Ruskin window.
For more information, seeView information about a logger.
If you want to see live data sampled every few seconds but not saved, select the fetching ( )button in the toolbar
located above thePlot view. The Plot view is located at the bottom of the Ruskin window.
If you want to view or modify calibration coefficients, click theCalibrationtab. For more information,
seeCalibration tab.
Click theConfigurationtab > Samplingsection to schedule the logger to take samples when and as
often as you want within the limits of your logger.
For more information, see Scheduling a RBRsolo/duet.
Ruskin prevents you from enabling a schedule that exceeds the memory capacity of the logger. Ruskin also shows the
estimated battery usage required to use your logger as scheduled. You should seriously consider this information
before you enable the schedule.
If you want to download data, click theDownloadbutton from theConfiguration tab to download all
the data saved since your schedule was enabled. For more information, see Download.The focus
changes to the new dataset in the Navigator view, and the static data appears in the Plot view. You
You must specify your preferences regarding these features before you enable the schedule. For more
information, see Configure a logger.

RBR#0006106revG
– 15
can now export the downloaded data to a file in Excel or text. You can also save the image as a PDF or
PNG file for viewing outside Ruskin.
8.2 Batteries
RBR dataloggers can use most chemistries of AA battery.
We estimate the deployment time based on a capacity calculated from the nominal voltage and miliamp hours.
Name Chemistry Model Voltage (V) mAh
Lithium thionyl
chloride
LiSOCL2Tadiran TL-4903S 3.7 2400
Lithium Li-FeS2Energizer L91AA 1.5 3500
Alkaline Zn-MnO2Rayovac AL-AA 1.5 2500
Li-ion LiNiMnCo BatterySpace
LC14500
3.6 750
NiMH NiMH Duracell
DX1500B4N
1.2 2400
Lithium thionyl chloride batteries are only recommended for T, D, T.D, and C.T.D instruments. Sensors with
high in rush current will not work correctly on this type of battery.
The different chemistries affect the deployment time, so ensure you have selected the appropriate battery
chemistry in the power section of the configuration tab when using theautonomy engine to get the most
accurate deployment estimate.
Mixing batteries of different chemistries, brands, and age will reduce performance and potentially damage the
instrument. Batteries that are not matched properly can become overheated, causing them to leak and
potentially explode.

RBR#0006106revG
– 16
1.
2.
3.
4.
8.3 Simulating an RBRsolo/duet
Ruskin can simulate most logger types that RBR produces, including the RBRsolo3and RBRduet3. We recommend that
you experiment with your type of simulated logger before enabling a schedule for your actual RBR logger. This practice
will probably save you time in the long run by ensuring you are familiar with the options available.
Steps
From theInstrumentsmenu, clickSimulate instrument. The Configure Simulated Instrument dialog
box appears.
Under Logger type, select the CompactInstrumentstaband select the appropriate options.
ClickOK. The simulated logger appears under Instruments in the Navigator window.
Click the new simulated logger. You can work with this logger the same way as you would a real RBR
logger,including: configuring, calibrating, logging, and downloading data. Multiple loggers, both real
and simulated, are listed in your Navigator window.
8.4 View information about a logger
You can view static information about a logger at any time as follows:
In the Navigator view, click the appropriate logger.
TheInformationtab in thePropertieswindow on the right side of Ruskin identifies the logger. Its general information
such as model, serial number, generation, firmware version, battery status, and the channels.
If you want to remove a simulated logger, right-click it and clickRemove simulated instrument. You can also
use the Instruments menu.

RBR#0006106revG
– 17
•
•
•
•
•
•
8.5 Recover an instrument and download data
When the deployment is complete recover your instrument and follow these steps to download your data.
Steps
Start Ruskin
Carefully open the loggerby unscrewing the pressure housing
Insert the USB-C connector into the logger and connect cable to your computer
The logger appears in the navigator window and select the Configuration tab and select
Download...(seeDownload)
Save the file to a preferred location
Evaluate your data (seeAnalysis)
Flooded loggers may be under pressure and opening a logger may be dangerous - take precautions when
opening a logger

RBR#0006106revG
– 18
9 Configure a logger
Before you enable a logger schedule, you can configure the logger to suit your requirements.
The instructions to configure a |tide or |wave logger are different than the standard loggers and can be found inTides
and waves.
If your logger schedule is already enabled when you decide to change the configuration you must stop running the
schedule, make your changes, and enable the schedule again. However, any data stored so far on the logger will be lost.
TheConfigurationtab contains theEnable,andUse last setupbuttons. When you clickEnable, the logger setup
parameters are stored to the logger and the schedule is enabled.
Use last setupis intended for configuring multiple loggers using the same schedule. For example, to set up three |tide
loggers with exactly the same parameters, set one logger up and enable it; connect the second and third logger and
when you clickUse last setupbutton, these two loggers will be set up with the same parameters as the first logger. This
includes the logger clock time, startand end logging times, sampling period (or rate), gating condition, and tide or wave
sampling parameters for |tide or |wave loggers.
9.1 Autonomy engine
The estimated battery life for the selected deployment is shown in Ruskin's Autonomy Engine in the Configuration tab:
9.1.1 When to replace the batteries
Compared to the cost of deployment, the cost of a new set of batteries is close to negligible. We highly recommend that
the batteries be replaced before every deployment unless there is no doubt that they have sufficient capacity.
Battery voltage does not decrease linearly and is therefore not an accurate indicator of battery capacity. However, if the
logger software indicates a yellow or red battery icon on the setup screen, the batteries should be replaced.
You can preserve the data by downloading it to a file before you enable the schedule again.
When in doubt, replace the batteries.

RBR#0006106revG
– 19
1.
2.
3.
4.
9.1.2 Predicting battery life
Battery life prediction is a complicated issue. In RBR loggers, battery life is a strong function of the type of logger, the
type and number of sensors attached, the sampling scheme (sampling period and the use of: thresholding, real-time
data collection and averaging), and the temperature of the water during the deployment. Manufacturers' data for the
batteries do not provide information that can be directly related to way the batteries are used in RBR loggers.
The Ruskin software calculates the expected battery usage (in mA hours - mAh) for the logger during setup . The
nominal capacity of each type of battery is described in the batteries section and is given in mAh at room temperature.
The software will warn the user if the expected battery usage for a particular deployment scenario is approaching the
theoretical potential mAh. The software will not prevent a logger from being started even if a warning is given. In tests
at RBR Ltd. of multiple examples of various brands of batteries at 6°C, all examples were able to provide the threshold
capacity defined in our batteries section. The user should view these predictions and further de-rate the batteries if the
expected deployment is in cold water.
RBR continues to characterize battery life in its loggers and will continue to improve the battery life calculator in future
versions of Ruskin.
9.2 Scheduling a RBRsolo/duet
You can schedule your RBRsolo3or RBRduet3to start at a specified time and sampling rate. Ruskin indicates any
unattainable conditions in the defined schedule at the bottom of the Configuration tab, and the Enable button is
grayed out.
Steps
Connect your loggerlocally to the computer's USB port. The logger should appear in the Navigator
view after a few seconds.
While the logger you want is highlighted in the Navigator view, click the Configuration tab in the
Properties view.
Click eitherUTC syncto synchronize the logger with Coordinated Universal Time, orLocal syncto
synchronize the logger with your local PC clock.
In theStartboxes, specify the date and time that you want to start running the schedule or select
theNowcheckbox to populate the current date and time.

RBR#0006106revG
– 20
5.
6.
7.
8.
9.
•
•
•
•
Specify the interval between samples using the Speedoption. If the Rate box is not selected you have
the ability to set the sampling interval in units of seconds. The Rate option allows you to select
between 2,4,8,16,24 and 32 Hz frequencies.
An estimated end logging is shown at the bottom of the Configuration tab based on the sampling
interval set. Check to ensure this date is beyond the end date of your planned deployment. The green
and red bars next to the End date shows whether memory or battery is the limiting factor for the
deployment. For the above instrument, it can log for 16.1 days based on memory, with a further 24.2
days of battery capacity remaining.
If the logger you are scheduling has had a fresh battery inserted, select theFresh batterybox. Ruskin
has the capability to calculate the remaining battery life available for a used battery based on the
number of samples that have been taken. The RBRsolo3and RBRduet3keep track of the number of
previously stored samples to determine the battery use. Selecting anddeselectingthe Fresh Battery
checkbox allows you to see the difference between a fresh battery and a used battery.
To enable the logger to start sampling immediately or in the future clickEnable. A message appears
informing you that the memory will be erased.
SelectCancelif you need to download the previously sampled data or pressErase and enable
loggingto enable the logger.
9.3 Stop logging
Logging stops on its own when one of the following occurs:
The end logging time is reached.
The gating condition is no longer met.
The power is removed or depleted.
The logger memory is filled.
To manually stop the logger, highlight the logger in the navigator,click theConfigurationtab and selectStop logging.
If you select and then clear theNowcheckbox, you can then manually modify the current date and time
instead of the original values.
All profiling loggers (known as |fast) have the ability to sample faster than 2Hz. For example |fast32
loggers sample at rates of 2,4,8,16,24 or 32Hz. All |tide loggers can average at rates of 2,4,8 or 16Hz. All |
wave loggers can sample at rates of 2,4,8 or 16Hz
If you select theFresh batterybox and enable the logger the previously stored sample count is reset. In
this case, it is assumed that a fresh battery is installed.
This manual suits for next models
1
Table of contents
Other RBR Measuring Instrument manuals