- -
8
MENU DESCRIPTION
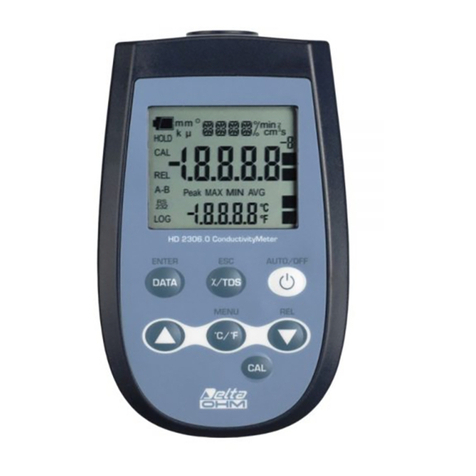
To access to the menu press the MENU key: the first item will display. Press ENTER to go to the
following items. To modify the item displayed, use the arrow keys (and ). The current value is
confirmed by pressing the ENTER key and the display moves on to the next parameter. If pressing
ESC the setting is cancelled.
To exit the menu, press the MENU key at any time.
The menu items are listed in this order:
1. BAUD_RATE RS232: indicates the frequency used for the serial RS232 communication with
the PC. Values from 1200 to 38400 baud. Use the arrows to modify this parameter and
confirm using ENTER. The communication between instrument and PC (or serial port
printer) only works if the instrument and PC baud rates are the same. If the USB
connection is used this parameter value is automatically set (please see the details on page
20).
2. SMPL ID – MEA = RST (Sample ID – press MEAS to reset). The measured sample ID
(Sample ID) is an automatically increased progressive number associated to the MEAS
function: to each new sample obtained using the MEAS key is associated an ID number
shown in the printout and in the downloaded data together with date, time and measured
value. This number is assigned to each measurement and is increased, from the previous
number, only when the measurement is printed or logged. It does not change if the same
measurement is printed more than once: in this way it is possible to print multiple labels,
concerning an unique measurement, with the same identification code.
To set the value of the first sample, select the menu item “SMPL ID –MEA = RST, set the
desired number using the arrows and confirm with ENTER. To reset the ID value, select the
menu item “SMPL ID –MEA = RST, press the MEAS key and confirm with ENTER.
3. DISP_LAY LOG (“Display stored data”): the message is scrolled in the comment line. By
using the arrows and the data stored with the MEM key are displayed. Per each datum
memory location m001, m002, …, measured value and ID code are shown.
4. CONFIRM DUMP ALL MEA? (“Confirm full memory data dump?”). This command allows
sending all the data contained in the instrument’s memory to the PC. Select YES using the
arrow and press ENTER to download all the data. Select NO (default) and confirm with
ENTER to go to the next step without downloading the data.
5. CONFIRM ERAS ALL MEA? (“Confirm full memory erase?”). This command allows
clearing all the data contained in the instrument’s memory. Use the arrow to select
“YES” and confirm with ENTER. To go to the next step without erasing, select NO and
confirm with ENTER.
6. LAST CAL m/d h/m (Last calibration date month/day hour/minutes) reports the date of the
last calibration made by the user. This item cannot be modified.
7. ACTUAL USER (Current user): displays the currently registered user (see the chapter “User
Management” on page 10). This item cannot be modified.
8. CAL EXP TOTA DAY (Calibration validity number of days): sets the calibration validity
number of days. When the validity period has expired, upon turning on the “CAL
EXPIRED” blinking message appears; the calibration data are still used. The “Expired
calibration” message is indicated in the printout. Enter “Number of days” = 0 to disable this
feature. This parameter can be changed only by an user registered as "Administrator" (see
the chapter “User Management” on page 10).


