INSTALLATION AND SET UP
Now that you've chosen a stereo location, it's time to hook
it up.
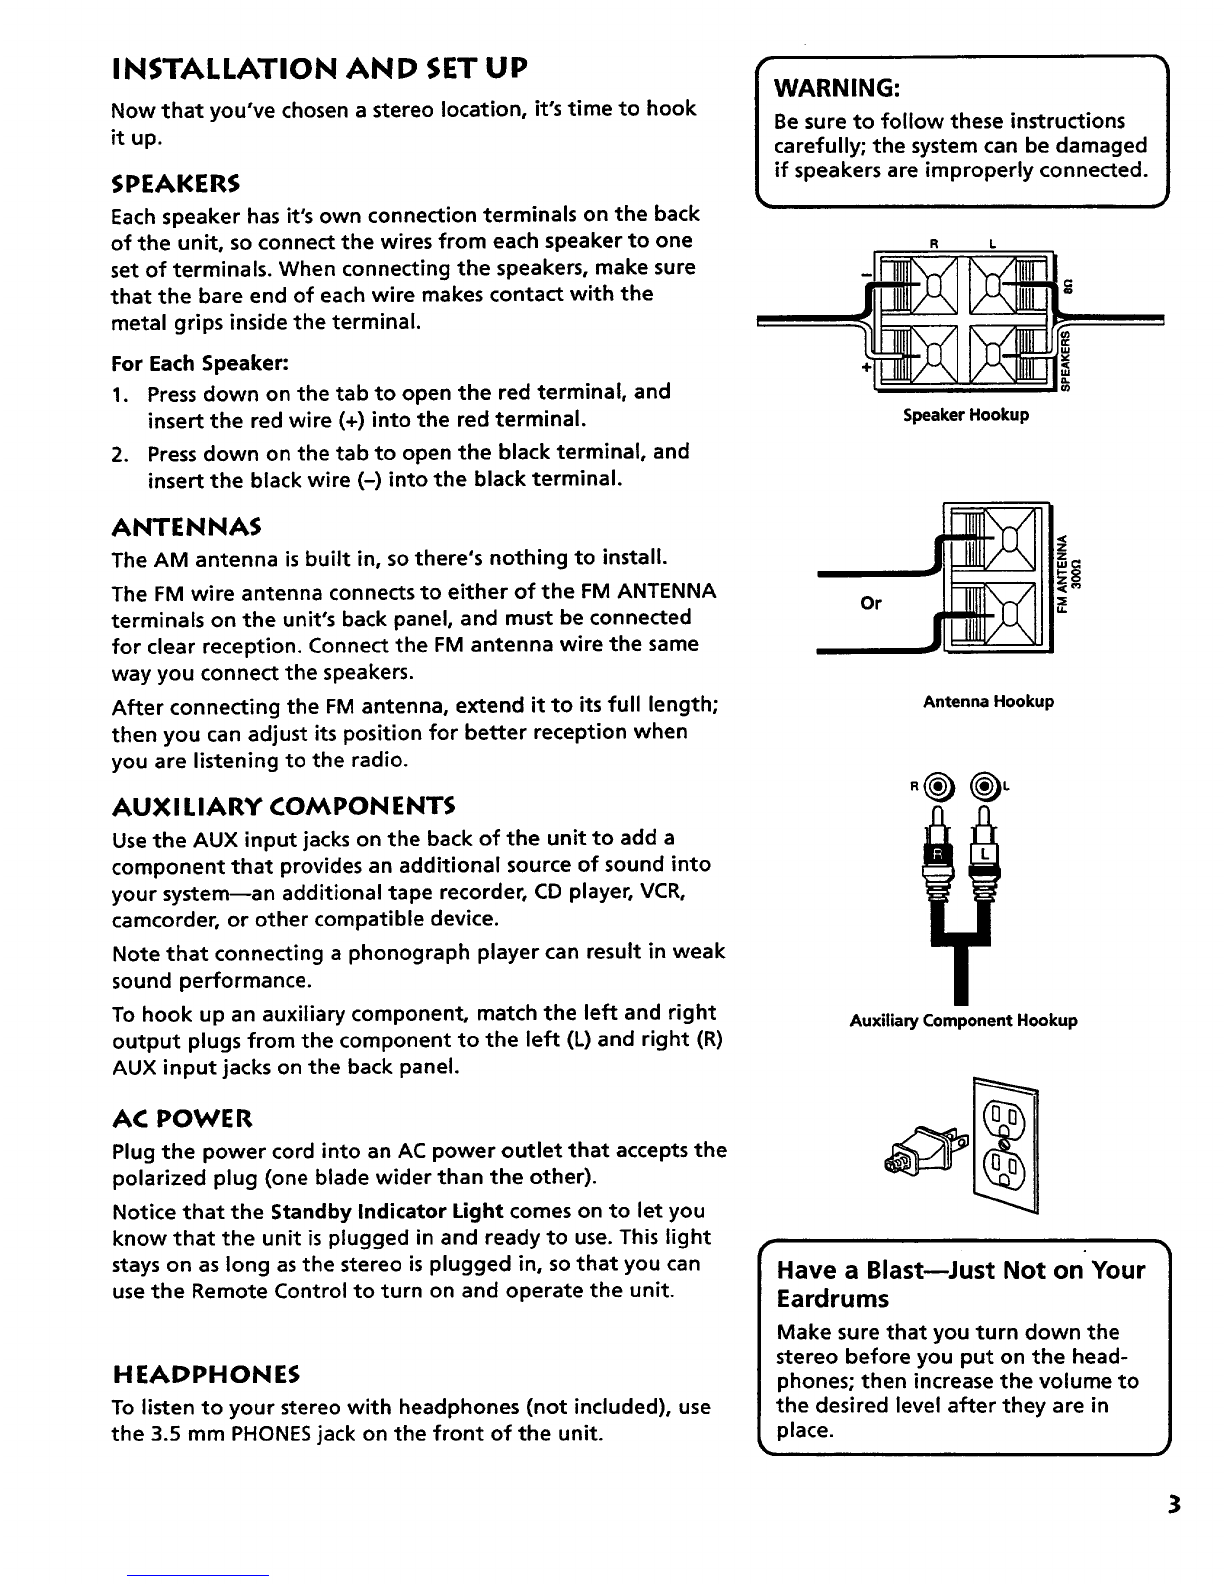
SPEAKERS
Each speaker has it's own connection terminals on the back
of the unit, so connect the wires from each speaker to one
set of terminals. When connecting the speakers, make sure
that the bare end of each wire makes contact with the
metal grips inside the terminal.
For Each Speaker:
1. Press down on the tab to open the red terminal, and
insert the red wire (+) into the red terminal.
2. Press down on the tab to open the black terminal, and
insert the black wire (-) into the black terminal.
ANTENNAS
The AM antenna is built in, so there's nothing to install.
The FM wire antenna connects to either of the FM ANTENNA
terminals on the unit's back panel, and must be connected
for clear reception. Connect the FM antenna wire the same
way you connect the speakers.
After connecting the FM antenna, extend it to its full length;
then you can adjust its position for better reception when
you are listening to the radio.
AUX I LIA RY COM PO N ENTS
Use the AUX input jacks on the back of the unit to add a
component that provides an additional source of sound into
your system--an additional tape recorder, CD player, VCR,
camcorder, or other compatible device.
Note that connecting a phonograph player can result in weak
sound performance.
To hook up an auxiliary component, match the left and right
output plugs from the component to the left (L) and right (R)
AUX input jacks on the back panel.
AC POWER
Plug the power cord into an AC power outlet that accepts the
polarized plug (one blade wider than the other).
Notice that the Standby Indicator Light comes on to let you
know that the unit is plugged in and ready to use. This light
stays on as long as the stereo is plugged in, so that you can
use the Remote Control to turn on and operate the unit.
HEADPHONES
To listen to your stereo with headphones (not included), use
the 3.5 mm PHONES jack on the front of the unit.
IWARNING: 1
Be sure to follow these instructions
carefully; the system can be damaged
if speakers are improperly connected.
R L
Speaker Hookup
Or
z_
Z
,,=
Antenna Hookup
Auxiliary Component Hookup
Have a Blast--Just Not on Your
Eardrums
Make sure that you turn down the
stereo before you put on the head-
phones; then increase the volume to
the desired level after they are in
place.
3