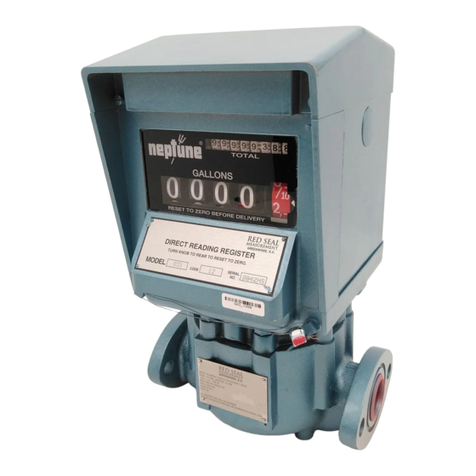
Red Seal Measurement neptune MP Operating instructions

M-150
Rev. D
MP Oscillating Piston Flowmeters:
1/2” Type MP
1” Type MP
2” Type MP
3” Type MP
Operating and Maintenance Manual for
MP Oscillating Piston Flowmeter
Sold & Serviced By:
Don Johns, Inc.
701 N. Raddant Rd.
Batavia, IL 60510
Ph: (630) 454-4700
www.donjohns.com


TABLE OF CONTENTS
DESCRIPTION PAGE
General Information .....................................................................................1
Installation ....................................................................................................1
Calibration .......................................................................................................2
Register Maintenance......................................................................................3
Pulsmate Electronic Register ..........................................................................3
800 Series Register.........................................................................................4
1” MP w/Double Trip Auto-Stop Valve .............................................................5
2” MP w/Single Trip & Double Trip Auto-Stop Valve .................................... 6-8
3” MP......................................................................................................... 9-13
600 Series Register.......................................................................................14
Operational Checks.......................................................................................15
Gear Train Maintenance ................................................................................15
Cleaning the Flowmeter.................................................................................16
General Maintenance ....................................................................................17
Troubleshooting.............................................................................................18


GENERAL INFORMATION
This manual is intended to be a guide for the proper operation and maintenance
of the 1/2”, 1”, 2” and 3” MP Flowmeters and accessories, as described in Form
TS-150.
The MP Flowmeter is a carefully designed owmeter based on the tried and
true oscillating piston principle and incorporates the very best materials and
design features available. In the MP Flowmeter, an oscillating piston is contained
within a rugged main housing which also serves as the measuring chamber. This
approach simplies the design and minimizes owmeter maintenance.
The oscillatory motion of the piston rotates a drive arm which is part of a
magnetic drive assembly contained within the cover of the owmeter. The rotation
of the magnet in this assembly causes rotation of a similar magnet in either an
external gear train or in a totalizer register.
Various readout options and accessories are available.
INSTALLATION
Please review the following installation guidelines carefully before installing
your owmeter. Afterwards, if you have questions or concerns, please contact
your local RSM distributor for assistance.
STRAINER
Plan the installation in such a way as to allow a strainer to be coupled directly
to the inlet of the owmeter. Where this is not possible, any piping before the
owmeter should be thoroughly cleaned out. The use of at least a 40 mesh
strainer is required to validate the warranty.
Be careful to allow room for easy removal of the strainer basket.
AIR/AIR RELEASE
The presence of air in the system can cause overspeeding and damage to the
owmeter. Air will also cause the register to over record. The use of an air release
will assist in preventing these problems. Also, the use of a venting valve will aid in
preventing air related problems during start-up of ow.
Air releases cannot be supplied for all liquids, but where an air release valve
is used, it should be installed in a position as close as possible to the inlet of the
owmeter. This will insure the removal of the greatest amount of air from the liquid
before metering.
VALVES
The metering system should be furnished with and controlled by a shut-off
valve on the downstream side of the owmeter to insure that the piping and
the owmeter are lled at all times. A valve is needed to operate ow to avoid
overspeeding in most installations.
CONNECTIONS/PIPING
Use pipe compound sparingly on male threads only.
A bypass connection installed around the owmeter should be monitored
frequently since the valve in such a bypass may eventually leak, work open, or
be left open.
GENERAL MAINTENANCE
INSTALLATION
Before Installing the Flowmeter
Piping
1/2”, 1”, 2” AND 3” MP FLOWMETERS
Page 1

When Installing
Cleaning the Strainer
CALIBRATION
Erratic Registration
Consistent Over- or
Under-Registration
Secure the connecting piping rmly to prevent strain on the owmeter casing. Use
self-aligning couplings and expansion joints in long piping runs to allow for expansion
and contraction caused by temperature changes.
Provide the metering system with means for pressure and relief or escape of
trapped liquid caused by temperature expansion. Pressure build-up can be eliminated
by the use of valves equipped with pressure relief at selected sections of line that
may be blocked between valves. If the owmeter is to be operated under extremes of
environment (dirt, dust, water, freezing, etc.) an enclosure or other protection should
be provided.
Thoroughly clean system and all piping, especially on the inlet side of the owmeter.
When possible, install a length of pipe (spool-piece) in place of the owmeter and ush
out the piping thoroughly before the owmeter is installed. The majority of service calls
on new installations are eliminated if these directions are followed.
Connect the owmeter so that its inlet and outlet are correctly located. (These are
clearly marked.) Do not install the owmeter backwards. Should it be necessary to
change the direction in which the register will face, turn it as described under “Register
Maintenance.”
When the installation is still new, clean the strainer frequently. After the system has
had a chance to be thoroughly ushed out, only periodic cleaning is necessary.
CALIBRATION
When checking the calibration of the owmeter, use a calibrated test measure of
sufcient size that the owmeter will operate at a normal ow rate for at least one
(1) minute. For checking this owmeter, use a 10 gallon volumetric test measure of
approved design (for 1/2” meter) or use a 100 or 300 gallon volumetric test measure of
approved design (a container with a conical upper portion terminating in a long narrow
neck that is tted with a sight gauge.)
Erratic registration is an indication of trouble in the system, and is usually caused
by air or dirt in the measuring chamber. Do not try to correct this by recalibrating the
owmeter, but rst check for the presence of air in the line; then, if the trouble has not
been found, clean the owmeter as directed.
Over-registration is an indication of air, whereas under-registration is generally
caused by dirt or pipe scale in the measuring chamber, by the liquid bypassing the
owmeter in some manner, or by a damaged or worn internal mechanism.
Consistent over-registration or under-registration indicates need for recalibration.
See Form TSG-310 for recalibration procedures. These forms can be obtained from
your nearest RSM distributor, or contact RSM, Inc., 1310 Emerald Road, Greenwood,
SC 29646.
Page 2

REGISTER MAINTENANCE
PULSMATE ELECTRONIC
REGISTER
Removing the Pulsmate from the
Meter
MAINTENANCE
REGISTER MAINTENANCE
Register parts are such that only minor eld repairs are advisable. When
a register is in need of extensive service or repair other than that for which
instruction is given here, it is recommended that the register be returned to the
nearest RSM distributor for repair. If a replacement register is needed, be sure to
specify the exact model of the register replaced as well as the change gears in
the register. See parts lists, forms: P-390 and P-300.
PULSMATE ELECTRONIC REGISTER
1/2” MP METER:
Remove the set screw from the Pulsmate and twist the register 1/8“ turn counter
clockwise to release the retaining spring. The Pulsmate is now free and can be
withdrawn from the meter cover. The Pulsmate can be remounted in any one of 4
positions at 90º intervals on the meter cover.
1”-3” MP METER:
The Pulsmate is xed to the meter cover by 2 clamp rings secured by 4 bolts. To
remove the register from the meter, loosen the screws and disengage the clamp
rings from the groove in the Pulsmate body. The Pulsmate can be positioned at
any angle prior to clamping to the meter cover.
PULSMATE MAINTENANCE
The only scheduled maintenance for the PULSMATE register is periodic
replacement of the battery.
Battery Replacement:
The PULSMATE has a battery monitor feature that illuminates when the lithium
battery voltage approaches its end of life. A descriptor “BAT”, illuminates when
the battery voltage falls below this predetermined value. The low battery detector
operates correctly with all power options.
The battery should be replaced within several weeks of the rst occurrence
of low battery warning, “BAT”. Left unattended, the unit may become
inaccurate, cease to operate or loose setup information or malfunction.
For additional Pulsmate Electronic Register information, see form M-302. This
form can be obtained from your nearest RSM distributor, or by contacting RSM,
Inc.
Page 3

800 SERIES REGISTER
To Remove Register From
Flowmeter
To Clean Register Masks
TO ROTATE THE REGISTER
Figure 1
800 SERIES REGISTER
Loosen the two clamp screws on lower front of the register. Lift the register off. On
Auto-Stop models the valve linkage must rst be disconnected. (Remove cotter pin
and washer at valve end.)
When one register is removed and another substituted, (1) Check the number of
teeth on the change gears. They must be the same as the gears on the old register
and on the same respective spindles. The number of teeth is stamped on each
gear. To remove these gears, close the split end of the spindle with a pair of pliers and
pull off the gear. After putting on a gear, spread the end of the spindle slightly. (2) If a
gear shifter ins installed, make sure that the position is the same on the new register
as on the old one. Each hole is lettered for convenience.
Register masks are made of plastic and require special treatment. Instructions for
cleaning are given below:
If the mask becomes soiled with grease and oil, solvents for these substances,
such as kerosene or naphtha, may be used to remove dirt. However, sprays that are
commonly employed in cleaning glass windshields must not be used as cleaners.
A water solution of nonabrasive soap is recommended for washing grease, oil or
dirt from the mask. It is then cleaned by rubbing gently with a soft cloth, in a manner
similar to cleaning window glass, rinsing the mask in clean water, and nally drying.
Scouring cleanser and similar material must not be used in cleaning the mask, since
they contain abrasives that scratch the surface.
The use of solvents, such as acetone, ethyl acetate, benzene and ethylene
dichloride to brighten the surface of the mask is never recommended since these
substances soften the surface of the plastic.
Note: Large magnetic drive assembly accompanies 800 series register.
TO ROTATE REGISTER (1” & 2” MP)
When the owmeter is assembled as a Left Hand assembly and it is desired to
change it to a Right Hand assembly, or vice versa, proceed as follows:
Page 4

1. Remove cotter pins (E) from valve linkage.
2. Unscrew the outside register link lock nut (P) and remove connecting rod
(G).
3. Remove register link (N), rotate 1/2 turn and reassemble onto register as
described in appropriate valve adjustment instructions (Page 6).
4. Loosen two clamp screws on lower front of register up and turn register
180º.
5. Remove four handle housing assembly hex screws (C) and remove
handle housing assembly from valve.
6. Remove valve handle set screw (B) and slide handle off bushing.
Remove two cam retaining screws (not shown). Remove shaft seal
plug (D). Disassemble valve operating shaft and valve operating cam.
Reassemble valve operating shaft and install valve operating cam in
the reverse direction. Reinstall two cam retaining screws and shaft seal
plug. Reinstall housing assembly with valve operating cam acting on pilot
rod. Secure with four hex screws (C). Reassemble valve handle (A) on
knurled knob in position as shown for specic assembly.
After completing the above instructions, the valve linkage must be adjusted
in accordance with the procedure for the specic type valve as outlined on the
following pages.
1” MP FLOWMETER WITH SINGLE TRIP AND DOUBLE
TRIP AUTO-STOP VALVE
Note: Before any adjustment of the Double Trip or Single Trip Auto-Stop Valve
is made, be sure that the Auto-Stop setting wheels indicate a quantity, other than
zero, to insure that the trip mechanism of the register is in proper position.
To Adjust Double Trip Valve Linkage With Valve At Outlet of Flowmeter
(See Figure 2)
1. Depress the emergency stop button on the register and turn the shaft (O)
clockwise (as viewed from rear of register.)
2. Assemble register link (N) on knurled knob in position as shown for
specic assembly. (See Figure 2). Arm should move an equal distance
each side of vertical center line (M) (Angle x=x).
3. Assemble one nut (P) on connecting rod (G) and the other end of the
connecting rod to the center hole in handle (A) using washers and cotter
pins (E).
4. Open valve all the way. Turn shaft (O) counter clockwise to latch up
mechanism. With valve held open, tighten nut (P) against register arm
link. Then assemble and tighten second nut at (P).
5. Depress the emergency stop button and allow the valve to close. At this
point the linkage between the valve and the register must be free. If it is
not, the above adjustments must be rechecked.
6. Set the register to deliver the minimum quantity and open the valve to run
product through the owmeter.
7. After the initial trip occurs the valve should close to the intermediate ow
position. This rate will vary depending on product metered. If the valve
closes too far, or all the way, adjust nuts (P) to provide additional rod
length.
1” MP FLOWMETER WITH
SINGLE TRIP AND DOUBLE TRIP
AUTO-STOP VALVE
Adjustment of 1” Double Trip
Auto-Stop Valve
Page 5

8. It is sometimes necessary to change the position of the handle. This can be
done by loosening handle screw (B) and repositioning the handle as follows:
If the register mechanism will not latch up, position the handle further toward
the register. If the valve will not close, the handle may be positioned away
from the register. Fine adjustments may be made by changing the effective
length of connecting rod (G) utilizing nuts (P). The rod length (G) may also be
varied by positioning the end of the rod in the upper or lower holes in the valve
handle.
9. The Auto-Stop strip adjusting screw should be near its mid-position. (Also see
page 14 “To Adjust the Tripping Point,”)
2” MP FLOWMETERS WITH SINGLE TRIP
AND DOUBLE TRIP AUTO-STOP VALVES
In determining whether the metering unit is a Right Hand or Left Hand Assembly, the
position of the outlet of the owmeter as the operator faces the front of the register, is
the governing factor.
When the owmeter is assembled as a Left Hand Assembly and it is desired to
change it to a Right Hand assembly, or vice versa, proceed as follows:
1. Remove clevis pin (E) from valve linkage.
2. Unscrew the outside register link lock nut
(P) and remove connecting rod (G) and
clevis (F) as a unit.
3. Remove register link (N), rotate 1/2
turn and reassemble onto register as
described in appropriate valve adjustment
instructions. (Pages 7 & 8.)
4. Loosen two clamp screws on lower front
of register, lift register up and turn register
180º.
5. Remove operating shaft cap screw (C) on
both sides.
6. Interchange connecting rod arm (H)
and valve operating handle (A). The connecting rod arm must be assembled
with notches (J and K) in specic relationship. (See item 3 of valve adjustment
instructions for details regarding position of notches.)
7. Reassemble operating shaft cap screws (C).
Figure 2
2” MP FLOWMETERS WITH
SINGLE TRIP AND DOUBLE
TRIP AUTO-STOP VALVES
To Rotate the Register
Figure 3
Page 6

8. Remove valve handle stop set screw (B) and screw into holes on opposite
side of valve.
After completing the above instructions, the valve linkage must be adjusted
in accordance with the procedure, for the specic type valve (i.e. Double Trip or
Single Trip) as outlined on pages 7 & 8.
Note: Before any adjustment of the Double Trip or Single Trip Auto-Stop Valve
is made, be sure that the Auto-Stop setting wheels indicate a quantity, other than
zero, to insure that the trip mechanism of the register is in proper position.
1. Depress the emergency stop button on the register and turn the shaft (O)
clockwise (as viewed from the rear of the register).
2. Assemble register arm (N) on knurled knob in position as shown for
specic assembly. (See Figure 4). Arm should move an equal distance
each side of vertical center line (M) (Angle x=x).
3. Assemble valve arm (H) as shown for specic assembly. On the right
hand assembly there must be one notch between the cast mark (K) on
the valve arm and the cast mark (J) on the stop plate (J and K). On the
left hand assembly these cast marks must be in line.
4. Assemble one nut (P) on connecting rod (G) and assemble clevis to the
other end of the connecting rod a distance of 1”.
5. Insert end of connecting rod through register arm link and assemble
clevis (F) to valve arm (H) using upper hold. (See Figure 4). Insert clevis
pin (E).
6. Open valve all the way. The opening of the valve is stopped by the set
screw (B) which should project approximately 1/8” below the lug holding
it. Turn shaft (O) counter clockwise to latch up mechanism. With valve
held open, tighten nut (P) against register arm link. Then assemble and
tighten second nut at (P).
7. Depress the emergency stop button and allow the valve to close. At this
point the linkage between the valve and the register must be free. If it is
not, the above adjustments must be rechecked.
8. Set the register to deliver the minimum quantity and open the valve to run
product through the owmeter.
9. After the initial trip occurs the valve should close to the intermediate ow
position. This rate will vary depending on product metered. If the valve
closes too far, or all the way, unscrew clevis (F) on rod (G) to hold valve
open further. If the rate of ow is too fast during the intermediate position,
turn the clevis onto the rod to allow the valve to close further. It should not
be necessary to turn more than one turn in either direction.
10. It is sometimes necessary to change the position of set screw (B) if the
clevis has been readjusted. If the register mechanism will not latch up,
unscrew the set screw to allow the valve to open further. If the connecting
rod (G) is under compression, when the valve is held all the way open,
turn the set screw down to relieve the pressure on the register.
11. The Auto-Stop trip adjusting screw should be near its mid-position. If a
small adjustment of this screw will not permit the register to shut off “on
the mark,” it is usually possible to correct this by a slight adjustment of the
clevis (F). This will move the main valve nearer to or further away from its
seat during the intermediate ow and thereby change the amount of time
needed for the valve to fully close at the last trip. (Also see page 14, “To
Adjust the Tripping Point.”)
Adjustment of Auto-Stop Valve
To Adjust Double Trip Valve
Linkage with Valve at Outlet of
Flowmeter
Page 7

Note: If it is difcult to obtain proper rate of ow during intermediate trip position and
still have register latch up fully, check Auto-Stop valve to ensure that it is opening all
the way. Check valve by removing set screw (B) and clevis (F) from valve arm; open
valve as far as possible. The distance between lug on arm and lug on stop plate must
be made more than 1/4”.
Note: Before any adjustment of the Double Trip or Single Trip Auto-Stop Valve is
made, be sure that the Auto-Stop setting wheels indicate a quantity, other than zero, to
insure that the trip mechanism of the register is in proper position.
1. Depress the emergency stop button on the register and turn the shaft (O)
clockwise.
2. Assemble register link (N) on knurled knob in position as shown for specic
assembly. (See Figure 5). Arm should move an equal distance each side of
vertical center line (M) (Angle x=x).
3. Assemble valve arm (H) as shown for specic assembly. On the right hand
assembly there must be two notches between the cast mark (K) on the valve
arm and the cast mark (J) on the stop plate (J and K). On the left hand assembly
there must be one notch between marks (J above K).
4. Assemble one nut (P) on connecting rod (G) and assemble clevis to the other
end of the connecting rod a distance of 1”.
5. Insert end of connecting rod through register arm link and assemble clevis (F)
to valve arm (H) using lower hole (Y). Insert clevis pin (E).
6. Open valve all the way. The opening of the valve is stopped by the set screw
(B) which should project approximately 1/8” below the lug holding it. Turn shaft
(O) counter clockwise to latch up mechanism. With valve held open, tighten nut
(P) against register arm link. Then assemble and tighten second nut at (P).
7. Depress the emergency stop button and allow the valve to close. At this point
the linkage between the valve and the register must be free. If it is not, the
above adjustments should be rechecked.
Figure 4
To Adjust Single Trip Valve
Linkage
Page 8

TO ROTATE THE REGISTER (3” MP)
Remove the register from the owmeter. Two studs and two threaded holes will
be seen on the top of the gear train. To turn the register 90º transfer the studs to
the empty holes. To turn the register 180º, do not change the location of these
studs. Replace register in the desired position and tighten the screws at the front
of the register.
When the owmeter is assembled as a Right Hand Assembly (outlet and valve
assembly to the right as you face the register dial) and it is desired to change to
a Left Hand Assembly (outlet and valve assembly to the left as you face the dial),
proceed as follows:
1. Disconnect the connecting rod at “G” by removing cotter pin, washer, and
clevis pin.
2. Remove the outside connecting rod nut at “F”.
3. Remove the register.
4. Remove the auto-stop valve and reposition on alternate ange connection
at other side of owmeter.
5. Replace the register to face in the desired position.
6. Remove connecting link arm on register and reassemble it so that it is in
upward position, as indicated by dotted lines on Fig. 6 Arm should be in
extreme clockwise position when emergency button is depressed.
7. Remove the valve handle and connecting rod arm from valve by removing
screws at “N.”
8. Exchange the valve handle and the connecting rod arm; the connecting
rod arm is to be assembled to the valve with locating marks on arm and
stop plate in proper relation as indicated in Figure 6.
Figure 5
TO ROTATE THE REGISTER
Non Preset Models
Preset Models
Page 9

To Adjust the Valve
Connecting Rod
Figure 6
To Set the Preset Mechanism
To Stop in Emergency
9. Check engagement of connecting rod in clevis; tis should be approximately 1”.
Attach connecting rod; do not tighten the nuts at “F.”
10. Turn connecting link arm on register to its maximum counter-clockwise, full
latched open position. Hold valve open and tighten two nuts at “F” on connecting
rod. Depress emergency stop button at front of register and let valve close.
Check dimension “A”: which should be from 1” to 1-1/2”. If this distance is not
correct, change position of the connecting link arm on the knurled hub until this
distance is obtained. Repeat step 10.
11. Insert set screw “S” in bracket at handle side of valve and adjust so that the
valve latches full open but that the connecting rod remains loose when valve is
held in its maximum full open position. Tighten nut on set screw.
12. Adjust intermediate rate of ow.
13. On Double Trip Valve clevis should be mounted in the top hole on the connecting
rod arm. On Single Trip clevis should be mounted in the lower hole on the
connecting rod arm.
The valve connecting rod is in adjustment when it is loose, both when the valve is
completely closed and when the valve is held wide open manually. If it should for any
reason get out of adjustment, proceed as follows:
Loosen set screw “S”, then tighten until the valve will latch full open but the connecting
rod remains loose when valve is held in its maximum full open position. Tighten nut on
set screw.
Press the setting buttons inward until the desired quantity is noted on the preset
wheels.
Pushing the red emergency stop button will trip the valve. After it has bee used the
mechanism may be set for a new ture or the delivery may be completed automatically
as originally set by re-opening the valve except if the ow has been stopped with 40
gallons or less remaining. In this case, the delivery can be completed by manually
holding the valve partially open.
Page 10

Registers are shipped from the factory with the Preset mechanism adjusted to trip
correctly at the normal rates of ow. If due to a change in the speed of closing of the
valve or for any reasons the Preset does not trip off at the correct point, the trip point
may be adjusted as follows:
If the valve is closing “off the mark,” either late (over-delivery) or early (under-
delivery), adjust the clevis (see Fig. 6) in half-turn increments to bring the trip point to
the zero mark. For right-hand assemblies, turn the clevis to lengthen the connecting
rod when the trip point is early, or turn to shorten if the trip point is late. For left-hand
assemblies turn in the opposite direction. Continue this procedure until the nal trip
is on or close to the zero mark. The set-screw “S” (Fig. 6) must also be readjusted
as described in “To Adjust the Valve Connecting Rod.” The intermediate ow rate will
be satisfactory when the nal trip is adjusted, as described.
Further adjustment of the trip point is possible, but is not recommended for normal
applications. The following procedure should be used only when very exact setting
of the nal trip is necessary.
Adjust the clevis, as described above,
and proceed as follows:
Remove the trip adjusting screw
located in the lower right corner of the
register from housing (See Fig. 7). Insert
a narrow blade (3/16”) screwdriver
until it engages the slotted head of the
adjusting screw. One turn of this screw
will change the tripping point about one-
quarter of one-tenth gallon.
If the preset trips before reaching the
zero mark (late), turn counter-clockwise.
Do not turn off the adjusting screw
more than 1-1/2 turns in either direction
from the initial position or past a point
where a resistance to further turning of
the screw is felt.
If the trip point is not on zero after
1-1/2 turns, return the adjusting screw
to its original position and turn the clevis
a half turn in the appropriate direction.
Then repeat the trip screw adjustment
procedure.
OPERATING AND MAINTENANCE INSTRUCTIONS
FOR AUTO-STOP VALVE (3” MP)
The 3” Type 1 Auto-Stop Valve is designed to be used with the 800 Series Register
on MP Flowmeters. The use of this valve makes it possible to obtain accurate cut-off
without subjecting the owmeter and pipes to undue shock pressure.
To Adjust the Tripping Point
Figure 7
OPERATING AND MAINTENANCE
INSTRUCTIONS FOR AUTO-STOP
VALVE
General Information
Figure 7
OPERATING KNOB
Page 11

OPERATION
With the main valve and the pilot valve closed, the inlet pressure and the spring keep
the valve closed. To open the valve, the handle is lifted, lifting the pilot valve off its seat.
Inlet pressure within the cylinder is dissipated through the pilot valve to the outlet, so
that a difference in pressure exists between top and bottom of the piston. This pressure
differential will open the main valve.
To close the valve, the handle is released and the spring closes the pilot valve. Inlet
pressure is admitted into the cylinder through a needle valve, and the main valve will
move to its intermediate position, determined by the position of the pilot valve.
In operation, the rst trip will occur with 40 gallons still to be delivered. The valve
should reach its intermediate position with between 10 and 20 gallons still remaining to
be delivered. This will depend largely on eld conditions but may be adjusted by means
of the needle valve (see below “To Adjust Rate of Closing of Valve from its Full Open
Position to the Intermediate Position.”) The rate of ow through the valve when in its
intermediate position should not exceed 50 gpm. (To adjust intermediate rate of ow
see below.) This rate is controlled in the valve and will very, depending on such eld
conditions as pressure, etc. It is important that the needle valve be adjusted so that the
valve reaches its intermediate position before the nal trip takes place. The nal trip
may be adjusted as shown on page 10, Figure 6.
1. Set register setting wheels for 100 gallons and open valve. After rst trip occurs
(40 gallons remaining) valve closes to the intermediate position. To hold valve
in its intermediate position index thousand wheel one number; this is done by
pushing left hand preset button.
2. Remove cotter pin, washer, and clavis pin at “G” (Figure 6, page 10) and adjust
clevis by screwing off until a mere leak is passing through the valve. Turn clevis
eight turns to shorten the length of the connecting rod assembly.
3. Check intermediate rate of ow. If the intermediate rate of ow exceeds 50
gallons per minute, lengthen connecting rod assembly until an intermediate
rate of ow 50 gallons per minute or less is obtained.
4. Tighten clevis lock nut.
5. Readjust set screw “S” as outlined on page 10, under heading “To adjust the
Valve Connecting Rod.”
Remove seal screw (28). To make the valve close faster, turn needle valve at (N)
counter-clockwise. To make the valve close slower, turn needle valve clockwise. Valve
is in correct adjustment when intermediate position of valve is reached with between
10 and 20 gallons still remaining to be delivered. Replace seal screw. Check nal trip.
OPERATION
To Adjust Intermediate Rate
of Flow
To Adjust Rate of Closing
of Valve from its Full Open
Position to the Intermediate
Position
Figure 8
Page 12

1. To disassemble valve, remove cover (43) from end of valve. (Refer to
gure 9).
2. Remove cylinder retaining screw (25), seal screw (28) and needle valve
(27).
3. Using a 5/8” bolt, screwed loosely into tapped hole in end of cylinder (38),
pull cylinder and piston assembly through end of valve body.
4. By removing 2 screws (34), piston assembly may be removed from
cylinder. (Caution: Depress the piston to remove spring tension from
screw). Pilot valve and spring are loose and care must be taken that they
are not damaged or lost.
5. Remove the four screws (39. This will release the throttling ring. Valve disc
may now be replaced.
1. Clean all parts thoroughly.
2. Replace valve disc and reassemble throttling ring to position with four
screws (39). Screws must be tightened so that metal to metal contact
takes place between the piston and throttling ring.
3. Place pilot valve over rod and assemble spring in position over pilot valve
and post in cylinder. By locating piston ring so that the two extensions on
either side of cylinder will tend to force the piston ring into its slot, slight
pressure will force the piston assembly into the cylinder. Two screws (34)
may now be put in position. Care must be taken that these screws enter
the cast slots on either side of piston to prevent turning of piston within
cylinder.
4. Complete piston and cylinder assembly may now be reinserted into the
valve body. Care must be taken when installing this unit so that the piston
guides are not bent, which happens if the piston is cocked in the cylinder.
To prevent this, it is best to see that the piston is out all the way, resting
against the two screws (34). Care must also be taken to make sure that
before placing cylinder retaining screw in position, the needle valve hole in
the cylinder lines up with the proper hole in the valve body. This is shown
by the word “adjust” on the outside of casting. The retaining screw (25)
may be reinstalled and needle valve and seal screw installed.
5. Replace “O” ring cover gasket and cover.
6. Connect to register and adjust links (Fig. 6).
7. Adjust rate of closing (see page 12).
To Disassemble Valve
Figure 9
To Reassemble Valve
Page 13

1. This may be caused by worn “O” ring (19). To replace, remove screw (10),
connecting rod arm, handle and stop plate (14). Then knock out drive pin (15).
In doing this be sure that shaft is supported so that it will not be bent. Remove
four screws and pull out shaft bearing bracket (20.1).
2. A new “O” ring (19) may now be installed. While bearing is removed, inspect
shaft to be sure it is smooth and free of nicks and the “O” ring groove is clean.
3. Replace shaft bearing and assemble other parts in order removed.
Remove cover of valve and then the valve mechanism, then the piston and cylinder
assembly. Inspect the valve disc for dirt or nicks. If valve disc (33) needs replacing, valve
may be disassembled and new disc installed. While valve is apart, pilot valve (32) should
be inspected and replaced, if necessary.
ALL MODELS
The owmeter is shipped from the factory with Auto-Stop mechanism adjusted to trip
correctly at maximum rates of ow while the owmeter is measuring a non viscous liquid.
Trip adjustment after nal installation may be necessary due to differing ow rate and/
or viscosity.
If the Auto-Stop does not trip off at the correct mark due to a change in the speed of
closing of the valve, different rates of ow, or any other reason, the adjustment is made
as follows:
Remove the screw located in the lower right corner of the front housing. Insert a
medium-sized screw driver into this hole until it engages the slotted head of an adjusting
screw. One turn of this screw will change the tripping point abut one-quarter of one
graduation of the rst wheel.
If the Auto-Stop trips before reaching the zero mark, turn the adjusting screw in a
clockwise direction.
If the Auto-Stop trips after the zero mark, turn the adjusting screw in a counter-
clockwise direction.
In some instances on Double Trip Valves an adjustment of the valve linkage may be
required in order to have the Auto-Stop at the correct point. (See page 7).
600 SERIES REGISTER
Register parts are such that only minor eld repairs are advisable. When a register is
in need of repair or service other than that for which instruction is given here, it should
be returned to a RSM authorized distributor. Maintenance of the register is limited to
cleaning and to those operations which will locate the sources of possible troubles
without removing the register from the owmeter.
Remove the four register mounting screws. Rotate to the desired position and reinstall
screws.
1) Remove the two cover plate screws (#1).
2) Push in reset knob and partially reset to retain shaft in reset position (#2).
If Leakage Occurs Around
Valve Shaft
If Main Valve Does Not Shut
Off Tight
ALL MODELS
To Adjust the Tripping Point
600 SERIES REGISTER
Repair of Register
To Rotate the Register
To Remove Housing from
Mechanism
Page 14

3) Remove reset knob screw (#3) and four screws on bottom plate (#4).
4) Pull out on reset knob to disengage knob from shaft.
5) Loosen and slide housing to knob end and remove. Caution is advised in
removal of housing to avoid scraping visible wheels.
6) Reset shaft can be turned to normal position.
Regularly clean the housing to remove accumulations of dirt and grease, food
products or chemical deposits. CAUTION: Use only mild detergents and water to
clean the register window. Do not use abrasives or spray type cleaners, or solvents
and thinners which may soften or cloud the plastic window.
1) Remove the housing from the mechanism.
2) Blow out the dirt with compressed air. Do not use brushes.
Note: Large magnetic drive assembly accompanies the 600 series register.
OPERATIONAL CHECKS
Two general operational checks are performed on all Registers: calibration and
reset mechanism operation.
1) CALIBRATION CHECK - Check the calibration of the Register and
recalibrate, if necessary. While pumping liquid through the owmeter
during calibration, observe that the register wheels and totalizer wheels
advance properly, that registration is consistent and not erratic, and that
the wheels are not discolored or defaced.
2) RESET MECHANISM CHECK - Check the resetting of the Register by
pushing on and rotating the reset knob clockwise (as viewed from the
right) to its stop, and releasing it. Note that the register wheels index to
read 0000.0 on the 1” & 2” and 00000 on the 3”, and that they align in a
straight line. Note that the shutter swings freely to mask the wheels as they
rotate, and drops completely when resetting is complete. (Note: Does not
apply to 1/2” MP.)
GEAR TRAIN MAINTENANCE
This gear train is constructed in such a way that the actual gear train may be
removed from the housing for general cleaning by removing the screws through
the gear train top plate. An RSM distributor can provide replacement gear trains if
required, but proper cleaning and lubrication of the gears and shafts can greatly
extend the useful life of the gear train. We recommend removing dirty grease or
accumulation with a suitable solvent applied by a brush and relubricating with light
grease applied to the gear shafts and bearings.
Cleaning
To Clean the Register
Figure 10
OPERATIONAL CHECKS
General
GEAR TRAIN MAINTENANCE
800 Series Register
600 Series Register
Page 15

Replacement gear trains and related parts should be ordered from the parts list, for
P150.
CLEANING THE FLOWMETER
Due to the simple design of this owmeter, there are very few internal parts to the
owmeter. There are not parts that would normally require maintenance or replacement,
but periodic cleaning and inspection are recommended to lengthen the owmeter’s
useful life.
Since there is no separate measuring chamber, simply remove the eight main case
bolts and remove the cover assembly. Carefully remove the specially encapsulated “O”
ring from its groove for cleaning and re-use. With the cover removed, the piston may be
easily lifted out for inspection and wiping clean. Check the control roller to see that it ts
closely but rotates easily on the chamber pin. Also check to see that the diaphragm and
seal pin t snugly in their positions. Clean by wiping with a soft, lint free rag all interior
surfaces of the chamber area.
1. Maincase
2. Piston Assembly
3. Control Roller
4. Magnetic Drive Assembly
5. Cover
To inspect the magnetic drive assembly, remove the hex socket screws which
attach the seal plate to the cover. Then, using needle nose pliers or other suitable
tool, remove the retaining ring which holds the magnetic drive assembly in position.
Remove the magnetic drive assembly and inspect for excessive wear of the shaft or
bearing by observing the “wobble” of the shaft. If more than .020” of wobble is noticed,
the assembly should be replaced. Also notice the wear on the magnet insert curved
surface. Carefully wipe all parts and make sure the assembly rotates easily before
reinstalling in the cover.
CLEANING THE FLOWMETER
To Clean Measuring
Chamber Area
Figure 11
To Inspect the Magnetic
Drive Assembly
Page 16
Table of contents
Other Red Seal Measurement Measuring Instrument manuals