Reedy Quasar 610 User manual

AC/DC CHARGER
#610
SPECIFICATIONS
Input
120VAC or 12VDC
Output
4-8 cell (4.8V – 9.6V)
Battery capacity
50mah-5000mah
Charging rate
0.5amp – 6.5amp
Threshold
30mV
Case size
6.00” x 4.00” x 2.00”
• The Quasar is a versatile charger, which will charge both Ni-CD
and Ni-MH battery packs.
• The charge rate is adjustable from 0.5 amp to 6.5 amp, allowing
it to be used for charging packs with capacities ranging from
50mah to 5000mah.
• Quasar also has the option of either 120VAC input power or
12VDC input power.
• The Quasar charger may be used to charge 4-8 cell battery packs.
QUICK-START
INSTRUCTIONS
1Plug the power cord into
the charger.
2Plug the power cord into
the power source.
3Select the charge rate.
4Connect the battery pack
to the charger.
5Push the Start button.
6When the Completed light
glows, remove the battery
pack.
Includes:
• Charger system.
• Power cord for 120V AC.
• Large alligator clips for 12V DC.
• Direct-connect plug for battery pack.
• Alligator clip adapter for battery
pack connection.

CHARGER OPERATION
To avoid overheating, never place charger and/or battery pack in direct sun light while charging.
DETERMINETHETYPE OF INPUT POWERYOUWILL BE USING
• If using 120VAC then read the two steps of the 120VAC section following.
• If 12VDC then read the two steps of the 12VDC section below.
WARNING!
Turn the knob to set the charge rate in amps.
For 12VDC operation, connect
the DC adapter cord’s plug to the
plug connected to the rear of the
charger.
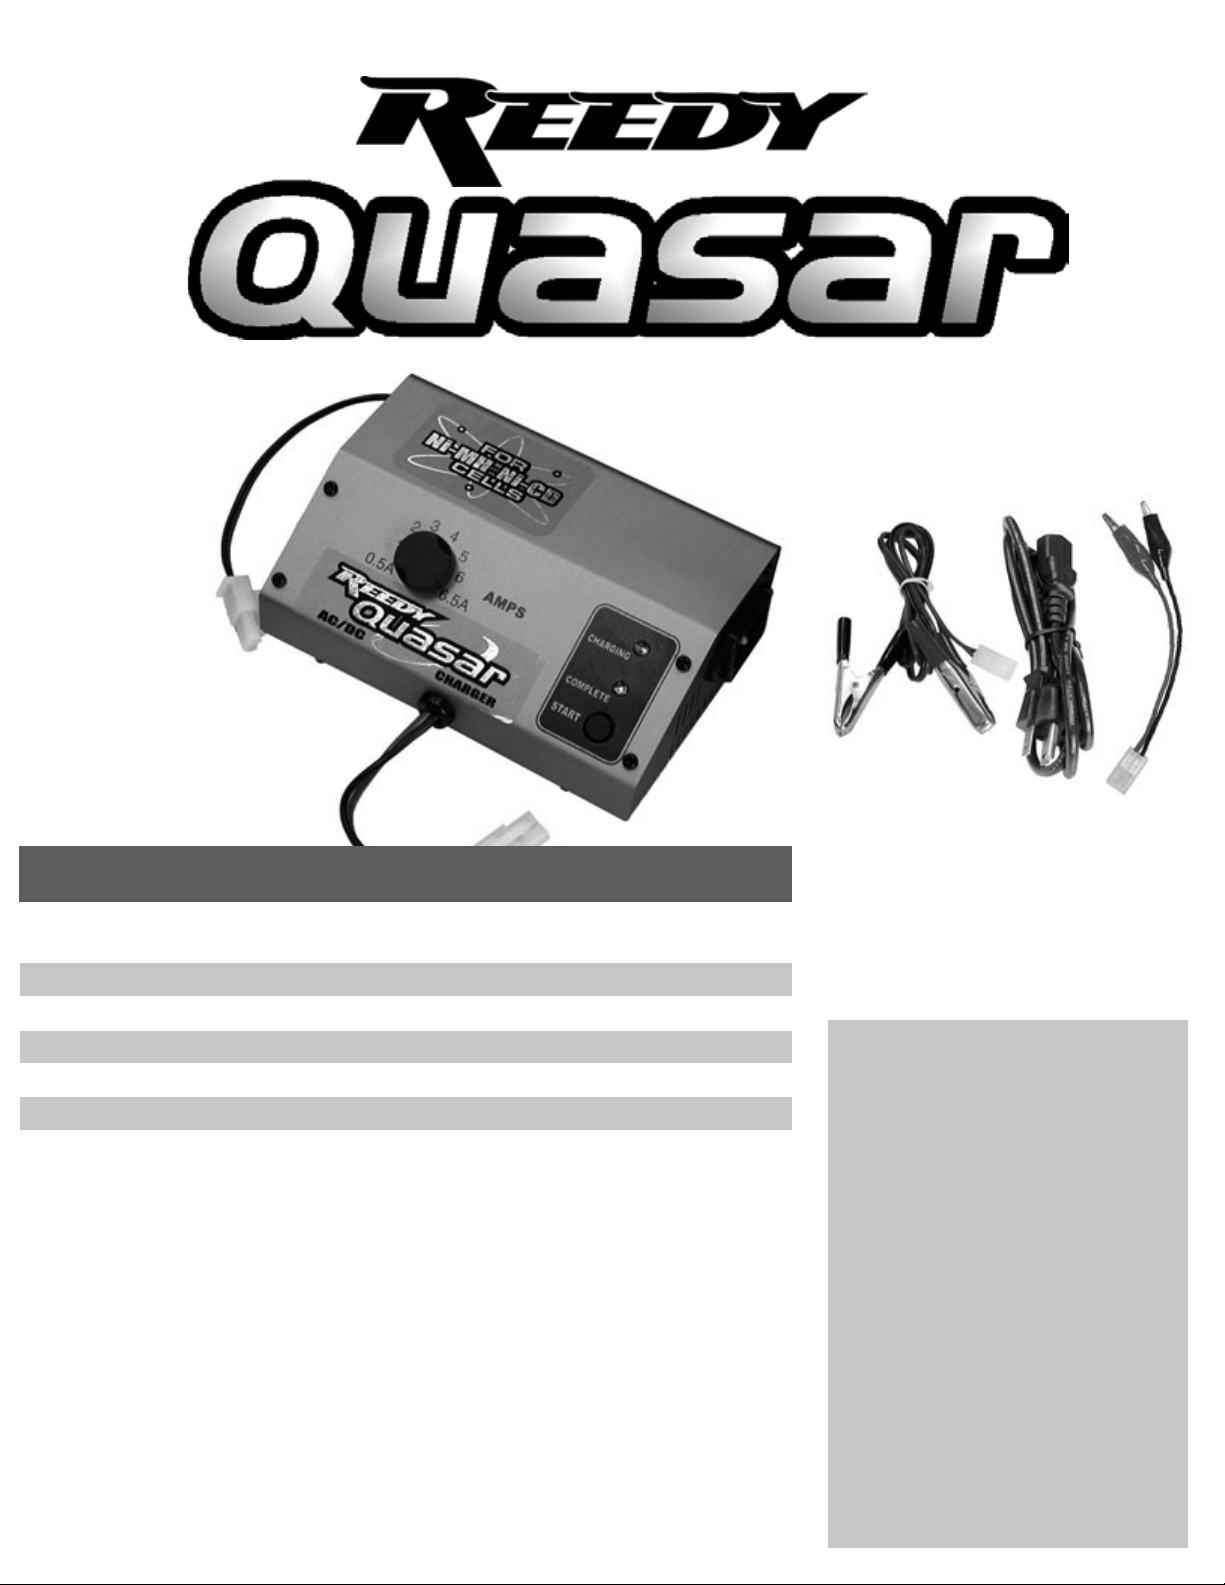
Left: DC adapter cord.
Middle: AC cord.
Right: Alligator clip adapter
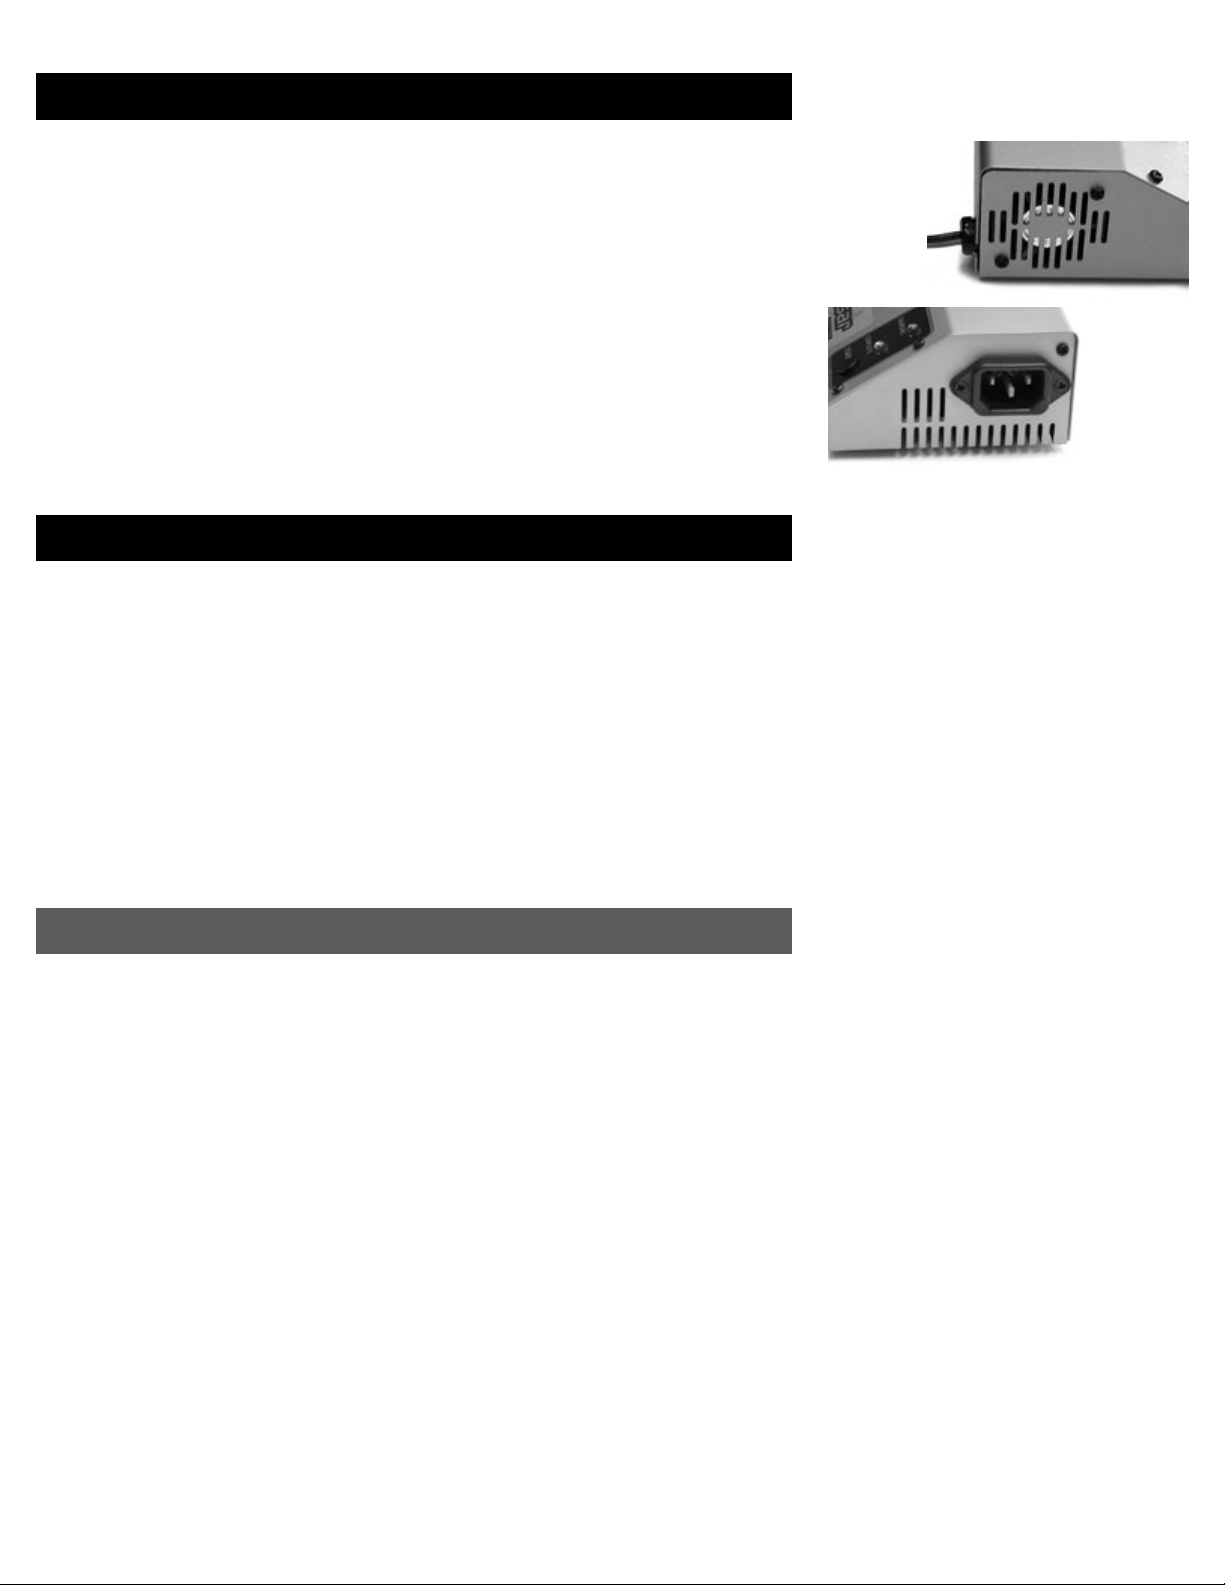
• Plug the AC cord into the input socket
located on the side of the charger.
The male plug on the cord
should not be plugged into the AC source
while connecting to the charger.
Go to step 2 at right.
2 Hook up the unit to your
charging source
• Insert the DC adapter cord’s female plug into
the male DC input plug exiting the rear of the
charger.
When using a lead acid
battery, such as a car or motorcycle battery,
as a power source, care must be taken as it
may generate explosive gases during charg-
ing operation. To prevent this danger always
unplug the DC adapter cord from the charger
before disconnecting the alligator clips from
the battery.
Go to step 2 at right.
WARNING!
WARNING!
3 Select the charge rate
Using the charge rate chart below, select the proper recommended charge rate for the battery you
will be charging. Turn the charge rate knob to the selected setting.
CHARGE RATE CHART
under 500mah 0.5amp
500mah-1100mah 1.0amp
1200mah-1600mah 3amp
1700mah-5000mah 4amp
Printed on every battery label will
be a series of numbers followed
by “mah.” This number will
indicate which charge rate to use.
Using a charge rate higher than
recommended in above chart
may damage your batteries.
• The power source must be a minimum of
12VDC and a maximum of 13.8VDC. If a
power supply is used, a minimum of 7 amps
output is required. The red wire alligator clip
should be connected to the positive (+) on the
12VDC source and the black wire alligator clip
connected to the (-) negative side.
The red and green panel lights should not be
on at this time.
Go to step 3 below.
• Plug the male plug on the AC cord into the
AC source.
The red and green panel lights should not be
on at this time.
Go to step 3 below.
1 Plug the power cord into
the charger
IF USING 120VAC
IF USING 12VDC
2 Hook up the unit to your
charging source
1 Plug the power cord into
the charger
For 120VAC operation,
use the plug shown.
2

CHARGING
Battery pack must be in discharged condition before starting charge cycle. Failure
to do this can result in damage to battery and/or charger.
4Connect the battery pack to be charged to the charging cord
located at the front of the charger
You may use either the female connector attached to the end of the charging cord
or the optional alligator clip adapter supplied with the charger.
Plugging in/hooking up backward may severely damage the charger.
Before using the standard plug first make sure the polarity on the plug is the same
as your battery pack. The red wire on the charger cord output cord is positive and
the black wire is negative.
When using the optional alligator clip adapter always connect the red alligator clip
to the positive on the battery pack and the black alligator clip to the negative on
the battery pack.
The red LED should now be blinking.
If the red LED is not blinking, disconnect the battery and check all connections to
make sure they are connected according to the directions.
Check the charge rate setting to make sure it is set to the proper rate for your
battery pack. See charge rate chart to the left.
5Push the Start button to start charging
The red LED should now be glowing continuously.
The battery will now charge at the selected rate until the automatic Delta Peak
Detection circuit senses that the pack is fully charged at which time the charger
will shut off.
As a precautionary act
y
ou should check your battery pack during
charging for overheating. If the cells become hot to the touch there is something
wrong and the pack should be disconnected from the charger.
When charging
250mah, or less, batteries, the temperature should be monitored during charging
and as soon as the temperature exceeds ambient temperature the battery pack
should be disconnected from the charger to prevent over charging.
The early versions of Ni-MH batteries tend to false peak during the first ten minutes
of the charging cycle. If you are charging this type of battery pack, it is recom-
mended you monitor the charge during the first ten minutes. If the charger shuts
off during that period and the pack is at room temperature, push the Start button to
resume charging.
6When the Completed light glows, remove the battery pack.
The red Charging LED should now be off and the green Complete LED should
be on when the pack is charged.
Both LEDs should go off when you remove the battery pack.
WARNING!
WARNING!
Connect your battery
pack to this plug.
When using the alligator clip adapter,
connect the red to the positive on the battery
pack and black to the negative.
WARNING!
After connecting the
battery, the red
Charging LED should
glow continually after
pushing Start.
When the green
Complete LED is on,
charging is finished.
3

WARNING
ASSOCIATED ELECTRICS, INC. AND REEDY MODIFIEDS HAVE NO CONTROL OVER THE USE AND
APPLICATION OF THIS PRODUCT AND SHALL NOT BE LIABLE FOR ANY PROPERTY DAMAGE OR
PERSONAL INJURY RESULTING FROM THE FAILURE TO FOLLOW THESE INSTRUCTIONS OR
IMPROPER USE OF THE PRODUCT.
DO NOT PLACE ANYTHING NEXT TO THE CHARGER THAT WILL BLOCK THE FREE FLOW OF AIR
TO THE COOLING FAN AND AIR FLOW SLOTS.
NOT MEANT FOR USE BY ANYONE WITHOUT ADULT SUPERVISION.
THIS CHARGER WILL CHARGE Ni-CD OR Ni-MH BATTERIES ONLY. DO NOT ATTEMPT TO
CHARGE ANY OTHER TYPE OF BATTERY, SUCH AS ALKALINE, LITHIUM, ETC.
USE ONLY WITH BATTERIES THAT ARE NO MORE THAN TWO YEARS OLD AND IN GOOD
CONDITION.
LIMITED WARRANTY
ASSOCIATED ELECTRICS, INC. AND REEDY MODIFIEDS WARRANTS THIS CHARGER TO BE FREE
OF ANY DEFECTS IN MATERIAL OR RESULTING FROM WORKSMANSHIP FOR A PERIOD OF
NINETY DAYS FROM DATE OF PURCHASE.
WARRANTY DOES NOT COVER:
•
DAMAGE DONE BY INCORRECT CONNECTING OF INPUT OR OUTPUT POWER CORDS.
•
DAMAGE CAUSED BY EXCEEDING RECOMMENDED INPUT VOLTAGE.
•
DAMAGE CAUSED BY EXECESSIVE OR ABUSIVE USE.
•
DAMAGE CAUSED BY CHARGING MORE THAM RECOMMENDED NUMBER OF CELLS.
•
DAMAGE CAUSED BY ANY MODIFICATIONS TO INPUT OR OUTPUT POWER CABLES.
•
DAMAGE CAUSED BY ANY LIQUID OR FOREIGN MATERIAL ENTERING INTERIOR OF
CHARGER.
REPAIRS
All warranty work must be accompanied by a dated, itemized sales reciept.
Shipping charges are not covered by warranty and will be charged by COD on returned product.
(Credit card preferred to eliminate COD charges—we do not ship by US Mail.)
Repair fee after 90 day warranty period will be $90.00. Payment must accompany item
returned for repair.
Include a short summary of problem and include a daytime phone number and e-mail address.
Units under warranty, found to be faulty, will be fixed free of charge. Owners of units under
warranty found to be free of any faults will be charged a fee of $20.00 to cover handling,
shipping, and testing.
Mail all warranty and repair work to:
Associated Electrics
Customer Service
3585 Cadillac Ave.
Costa Mesa, Ca. 92626
USA
Do not block the vents or fan opening.
4
Other Reedy Batteries Charger manuals