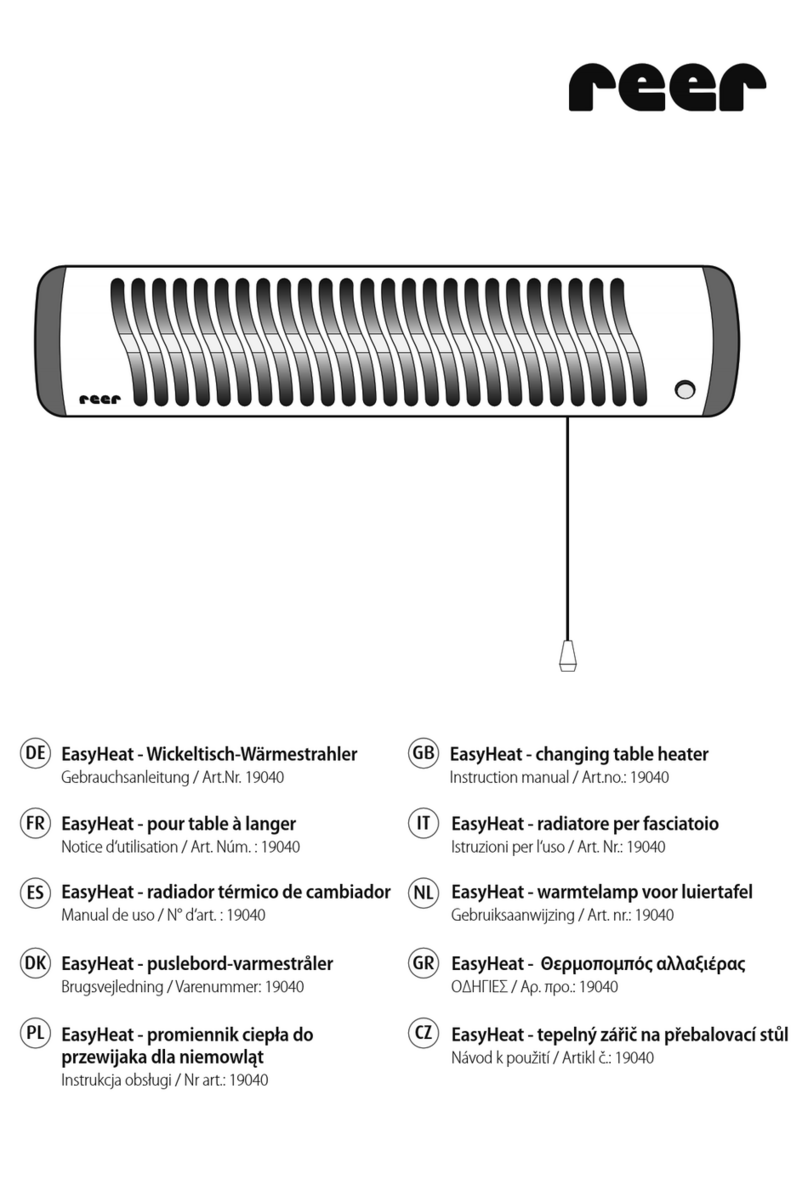
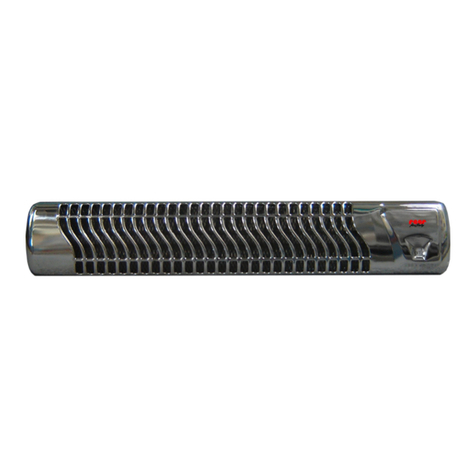
Reer 1911 User manual

TYP: 1911 / 1912
Gebrauchsanleitung
WICHTIG:
Gebrauchsanweisung aufmerksam durchlesen
und für spätere Anfragen aufbewahren.
Hinweise und Anleitung unter:
www.wickeltisch-heizstrahler.de
230-50Hz
300/600W
D

Unser Wickeltisch-Heizstrahler erzeugt behagliche Sofortwärme im Bereich von Wickel-
tischen. Er dient aber auch zur schnellen Erwärmung von Badezimmern, Hobbyräumen,
Dielen, geschützten Terrassen und Balkonen.
WICHTIGE HINWEISE:
- Bitte lesen Sie vor Inbetriebnahme die Betriebsanleitung aufmerksam durch.
- Bei Verwendung als Wickeltisch-Strahler darf das Gerät nie ohne Aufsicht benutzt
werden.
- Die maximale Bestrahlungsdauer darf 15 Minuten nicht überschreiten.
- Der Bestrahlungsabstand von 100 cm vom Heizstrahler zum Tisch ist
unbedingt einzuhalten.
- Vermeiden Sie zusätzliche Wärmeeinstrahlung, wie z.B. Sonnenlicht oder
zusätzliche Strahlungsquellen, denn dadurch kann die Körpertemperatur Ihres
Babys ansteigen.
- Kleinkinder mit erhöhter Temperatur dürfen nicht bestrahlt werden. Es besteht
die Gefahr der Körperüberhitzung.
- Das Schutzgitter bei Betrieb nicht berühren.
- Schliessen Sie keine automatische Zeitschaltuhr an das Gerät an, welche den
Heizstrahler automatisch einschaltet, da ein Brandrisiko besteht.
Achtung: Das Gerät ist auch nach dem Ausschalten noch heiß.
Wickeltisch-Heizstrahler nicht abdecken! Es besteht Brandgefahr.
MONTAGE:
• Der Wickeltisch-Heizstrahler darf nur
ortsfest und waagrecht an einer Wand
montiert werden.
Deckenanbringung ist nicht zulässig.
• Die in Abb.1 angegebenen Mindest-
abstände zu Wänden, Decken und
Fußböden müssen eingehalten werden.
• Mindestabstand von 65 cm zu brenn-
baren Materialien, wie Textilien, Holz usw.
einhalten. Es besteht Brandgefahr!
• Der Wickeltisch-Heizstrahler darf nicht
unterhalb einer Steckdose montiert werden.
Typ:1912
Der Heizstrahler verfügt über eine AUTOMATISCHE ABSCHALT-TECHNIK.
D.h. das Gerät schaltet sich automatisch nach 10 min. Betriebsdauer aus.
Bei Stromausfall oder einer defekten Sicherung startet die Abschaltautomatik, wenn der
Schalter auf EIN steht, automatisch für weitere 10 Minuten. Kontrollieren Sie immer ob sich
das Gerät nach Gebrauch oder Ablauf der Abschaltzeit in der Schalterstellung
AUS/0 befi ndet.
2
• Der Wickeltisch-Heizstrahler darf nur
ortsfest und waagrecht an einer Wand
montiert werden.
Deckenanbringung ist nicht zulässig.
• Die in Abb.1 angegebenen Mindest-
abstände zu Wänden, Decken und
Fußböden müssen eingehalten werden.
Mindestabstand von 65 cm zu brenn-
baren Materialien, wie Textilien, Holz usw.
einhalten. Es besteht Brandgefahr!
• Der Wickeltisch-Heizstrahler darf nicht
unterhalb einer Steckdose montiert werden.
Boden
Decke
Mindestabstand
vom Tisch
Abb.1
35cm
20cm 20cm
160cm
100cm
Seitenwand
Wickeltisch

a) Unter Berücksichtigung der Mindestabstände
(Abb.1, Seite 2) die Dübelbohrungen der variablen
Wandhalterungen anzeichnen, Dübel setzen und
anschrauben (Achten Sie auf die Position der
Fixierschraube. Sie muss oben sein) (Abb.2).
Der Minimum Abstand zwischen den Wandhalterungen
beträgt 12cm, der Maximum Abstand 40cm.
So können Sie genau in den Fugen der Fließen bohren.
3
Abb.3
Abb.2
b) Den Heizstrahler mittig an die
Wandhalterung stecken (Abb.3).
Das Gerät hat eine stufenlose Winkel-
verstellung (Abb.5). Einfach in die
gewünschte Position drehen und
mittels der beiden Fixierschrauben
fi xieren (Abb.4).
Abb.4
Abb.4
Abb.5
Das Gerät muss zu den
Halterungen mittig gestellt sein
(d.H. gleicher Abstand links und
rechts) (Abb.6).
Die Fixierschrauben (Abb4)
müssen fest sein um sicher zu
gehen, dass das Gerät nicht aus
den Halterungen fällt.
Abb.6
Abb.6

INBETRIEBNAHME:
Schalterstellung: 0 AUS
1 300W – rote LED leuchtet (Modell 1912)
2 600W – rote LED leuchtet (Modell 1912)
ACHTUNG:
Sie sollten das Gerät vor dem ersten Gebrauch bei guter Raumlüftung für ca. 10 min in
Betrieb nehmen. Bei der ersten Inbetriebnahme kann es zu Geruchsbildung führen.
Das Gerät während und einige Zeit nach Gebrauch NICHT berühren! (HITZEAUSSTRAHLUNG)
Netzstecker in die Steckdose stecken. Das Gerät ist jetzt betriebsbereit.
Achtung: Zuleitung nicht über das Gerät führen!
• Bei Installationen in Bade- oder Duschräumen sind die Vorschriften des
örtlichen EVU zu beachten. Der Strahler muß so positioniert werden, dass der
Zugschalter nicht von der Badewanne oder Dusche aus angefasst werden kann.
• Das Gerät darf nicht über der Badewanne montiert werden!
Dieses Gerät ist nicht dafür bestimmt, durch Personen (einschließlich Kinder) mit einge-
schränkten physischen, sensorischen oder geistigen Fähigkeiten oder mangels Erfahrung
und/oder mangels Wissen benutzt zu werden, es sei denn, sie werden durch eine für ihre
Sicherheit zuständige Person beaufsichtigt oder erhielten von ihr Anweisungen, wie das Gerät
zu benutzen ist.
Kinder sollten beaufsichtigt werden, um sicherzustellen, dass sie nicht mit dem Gerät spielen.
REINIGUNG:
Bevor Sie mit der Reinigung beginnen, überzeugen Sie sich davon, dass das Gerät ausge-
schaltet und abgekühlt ist (Netzstecker ziehen). Die Oberfläche mit einem trockenen oder
leicht angefeuchteten Tuch reinigen. Den Reflektor und Heizstab nur von einem Fachmann
reinigen lassen.
REPARATUR:
Reparaturen am Gerät dürfen nur von einem Fachmann durchgeführt werden.
4

TECHNISCHE DATEN:
Nennspannung: 230 V
Leistung: 300/600 W
Montageart: Netzleitung
Schutzklasse: 1
Strahlungsbereich: 90°
Infrarotstrahlung und Temperaturverteilung nach
Medizinproduktstandard (IEC601-2-21) geprüft
Garantie
Dieses Gerät ist aus einwandfreiem Material und mit großer Sorgfalt hergestellt worden.
Die Firma Reer übernimmt daher eine Garantie von 2 Jahren ab Verkaufsdatum für alle
Material- und Fabrikationsfehler. Sollte sich dennoch ein derartiger Fehler einstellen, dann
füllen Sie bitte den gelben Garantieschein aus und wenden sich an Ihren Händler.
Kein Garantieanspruch besteht, wenn:
- das Gerät nicht sachgemäß benutzt wird
- die Anlage an falsche Spannung angeschlossen wird
- unbefugte Eingriffe vorgenommen werden
- der Garantieschein nicht ordnungsgemäß ausgefüllt ist
(Kassenbeleg bitte auch nicht vergessen)
REER GmbH, Riedwiesenstrasse 7, 71229 Leonberg, Germany
- - - - - - - - - - - - - - - - - - - - - - - - - - - - - - - - - - - - - - - - - - - - - -
Typ: 1911 / 1912
Verkaufsdatum:
Stempel und Unterschrift des Händlers:
5

Radiant heater for changing unit
TYP: 1911 / 1912
User Manual
Important :
Please read user manual carefully
and keep it for further reference.
Tips and instructions under:
www.wickeltisch-heizstrahler.de
GB
230-50Hz
300/600W

Our changing unit radiant heater provides comforting direct heat in the area of changing units.
It is also suitable for quick heating of bathrooms, hobby rooms, hallways, sheltered patios and
balconies though.
Important remarks :
• Please read the user manual carefully before putting it in use.
• If the radiant heater is used above a changing unit the device is never to be used
without supervision.
• The maximum irradiating duration must not exceed 15 minutes.
• Avoid additional warmth such as sunrays or other irradiating sources as the body
temperature of your baby can consequently go up very high.
• Young infants with increased temperatures are not allowed to be irradiated.
Danger of body overheating exists.
• Do not cover the radiant heater! Danger of fi re exists.
• Do not touch the protecting grid during operation.
• Do not use this heater with a programmer, timer or any other device that switches the
heater on automatically, since a fi re risk exists if the heater is covered or positioned
incorrectly.
Warning: it can still be hot after switching off.
The irradiation distance of 100 cm between child and changing unit radiant
heater must be kept.
Assembly:
• The radiant heater is only allowed to be
assembled at a permanent place on the
wall and in horizontal position.
It is not allowed to be attached to the
ceiling.as shown in Fig. 1 must be obeyed.
• The minimum distances to walls,
ceilings and fl oors as shown in
Fig. 1 must be obeyed.
• Keep a minimum distance of 65 cm to
infl ammable materials such as textiles,
wood etc. Danger of fi re exists!
• The radiant heater is not allowed to be
fi xed underneath a socket.
Typ:1912
The heater has a build-in automatic cut off function, i.e. the heater cuts off
automatically after 10 minutes.
In the event of a power failure or with defective fuses, automatic shutdown will automatically
be started for additional 10 minutes if the switch is in ON position. After use or expiration of
the turn-off time, please make sure the switch is in OFF/0 position.
7
• The radiant heater is only allowed to be
assembled at a permanent place on the
wall and in horizontal position.
It is not allowed to be attached to the
ceiling.as shown in Fig. 1 must be obeyed.
• The minimum distances to walls,
ceilings and fl oors as shown in
Fig. 1 must be obeyed.
• Keep a minimum distance of 65 cm to
infl ammable materials such as textiles,
wood etc. Danger of fi re exists!
• The radiant heater is not allowed to be
fi xed underneath a socket.
35cm
20cm 20cm
160cm
100cm
ceiling
Fig.1
sidewall
changing unit
floor
minimum distance
to table

8
a) Mark dowel positions of the variable wall holders
under consideration of the minimum clearances
(Fig.1, page 2). Insert dowels and tighten. (Please mind
the positions of the locating screw. They are to be used
for the upper holes) (Fig.2).The minimum clearance
between the wall holders is 12cm, the maximum
clearance is 40cm. Thus, it is possible to drill into the
gaps between the tiles.
Fig.3
Fig.2
b) Put the radiant heater onto the wall
holder (Fig.3). The device is provided
with a variable angle adjustment (Fig.5).
Simply place the device into the position
desired and tighten by means of the two
locating screws (Fig.4).
Fig.4
Fig.4
Fig.5
The device must be centrically
positioned towards the holders
(i.e. same distance on the left
and on the right) (Fig.6).
The locating screws (Fig. 4)
must be tightly screwed in to
ensure that the device does not
fall out of the holders.
Fig.6
Fig.6

STARTING UP:
Switch setting: 0 OFF
1 300W The red LED glows (Typ 1912)
2 600W The red LED glows (Typ 1912)
Caution:
You should start up the device before the first use with a good ventilation of the room of
approx. 10 minutes. During the first start-up the device could cause odor accumulation.
DO NOT TOUCH the radiant heater during and shortly after use! (HEAT RADIATION)
Plug the heater into the socket-the heater is now ready for use
Caution: Do not place the power cord over the radiant heater!
• The local electrical regulations (EVU) must be complied with when installing the heater in
bathrooms and shower rooms. The heater must be positioned so that the pull switch
cannot be directly touched from the bathtub or shower.
• Device must not be installed above bathtub!
The device should not be used by children or people having physical, sensory or mental
limitations. People having insufficient experience and/or knowledge should be supervised and
instructed in order to guarantee the secure use of the device.
-Children playing with the device
Cleaning:
Before cleaning is begun, please ensure that the device is
switched off and cooled down (draw the plug).
Clean the surface with a dry or damp cloth.
The reflector and heating bar can only be cleaned by an expert.
Repair:
The device may only be repaired by an expert.
9

Technical details :
Mains voltage : 230 V
Power : 300/600 W
Type of assembly: power plug in socket or fixed connection
Protection class: 1
Irradiating angle : 90°
Infrared radiation and temperature distribution proofed
according to the standard for medical products (IEC601-2-21)
Guarantee
This device has been produced with intact material and the utmost care. Therefore Reer
grants a guarantee period of 2 years after date of purchase against defective materials and
workmanship. In the unlikely event that you are confronted with such a defect, you should
complete the yellow warranty card and contact your dealer.
Warranty cannot be granted if:
- the device is used improperly and not for its intended purpose
- the device is connected to wrong mains voltage
- unauthorised repairs are made
- the warranty card is improperly completed.
(Do not forget to attach your sales slip.)
REER GmbH, Riedwiesenstrasse 7, 71229 Leonberg, Germany
- - - - - - - - - - - - - - - - - - - - - - - - - - - - - - - - - - - - - - - - - - - - - -
Type: 1911 / Type: 1912
Date of purchase:
Stamp and signature of dealer:
10

TABLE A LANGER CHAUFFANTE
TYP: 1911 / 1912
Manuel
Important :
Lisez le manuel de près
et gardez-le pour des demandes à venir.
www.wickeltisch-heizstrahler.de
F
230-50Hz
300/600W

Notre radiateur de chauffage pour la table à langer produit immédiatement une chaleur
agréable aux environs des tables à langer. Il sert aussi au échauffement rapide des salles de
bains, salles de loisirs, des vestibules, des terrasses protégées et des balcons.
Renseignements importants:
• Avant d’utiliser l’appareil lisez le manuel de près.
• En l’utilisant pour la table à langer, l’appareil ne doit jamais être utilisé sans
surveillance.
• La durée maximale de l’irradiation ne doit pas excéder 15 minutes.
• Evitez une irradiation de chaleur additionnelle, comme p.ex. la lumière de la soleil ou
autres sources de l’irradiation, car la température de votre enfant peut augmenter
beaucoup par cela.
• Des petits enfants avec une température plus élevée ne doivent pas être irradiés. Il
existe le danger d’une surchauffe du corps.
• Ne couvrez pas le radiateur de chauffage pour la table à langer !
Il existe le danger de feu.
• En l’utilisant ne touchez pas la grille de protection.
Attention : Elle est encore chaude après être arrêtée.
Observez absolument une distance de 100 cm entre l’enfant et le radiateur de
chauffage pour la table à langer.
Montage:
• Le radiateur de chauffage pour la table
à langer doit seulement être monté
fixement et horizontalement dans le
mur. Le montage dans le plafond n’est
pas permis.
• Des écarts minimums aux murs, aux
plafonds et aux sols, comme vous
pouvez voir à la figure 1, doivent être
observés.
• Observez un écart minimum de 65 cm
aux matériaux inflammables comme des
textiles, du bois, etc. Il existe le danger du feu.
• Le radiateur de chauffage pour la table
à langer ne doit pas être monté au dessous d’une prise de courant.
Typ:1912
Le radiateur chauffant a un interrupteur automatique, c‘est à dire que le radiateur se
couper après 10 minutes.
En cas de panne de courant ou d‘un fusible en panne, l‘automatisme de déclenchement
démarre automatiquement pour d’autres 10 minutes quand l’interrupteur est ACTIVE.
Contrôlez toujours si l’appareil se trouve en position d’interrupteur DECLENCHE/0 après
l’usage ou après la fin de l’intervalle de déclenchement.
12
35cm
20cm 20cm
160cm
100cm
Fig.1
Plafond
Ecart minimum
du table
Mur
Le radiateur de chauffage
pour la table à langer
Sol
Le radiateur de chauffage
pour la table à langer

13
a) Notez l‘emplacement des chevilles de fi xation en
respectant les distances minimales autorisées (Fig.1, page 2).
Insérez les chevilles et serrez. (Veuillez noter les
emplacements des vis de positionnement. Ces dernières
devront être utilisées pour les trous supérieurs) (Fig.2).
La distance minimale entre les soutiens est de 12 cm,
la distance maximale de 40 cm. Il est ainsi possible de
percer des trous dans les espaces qui séparent les plaques.
Fig.3
Fig.2
b) Placez le radiateur sur son soutien
mural (Fig.3). Il est possible d‘ajuster
l‘angle de fi xation de l‘appareil. (Fig.5).
Placez simplement l‘appareil dans la
position désirée et serrez à l‘aide de
deux vis. (Fig.4)..
Fig.4
Fig.4
L’appareil doit être positionné au
centre des éléments de soutien.
(la distance doit être la même à
gauche et à droite) (Fig.6).
Les vis (Fig. 4) doivent être
fermement serrées afi n de
s’assurer que l’appareil ne
peut se détacher et tomber.
Fig.6
Fig.6
Fig.5

MISE EN SERVICE :
Position de l`interrupteur : 0 DECLENCHEE
1 300W L’indicateur à DEL est au rouge (Typ 1912)
2 600W L’indicateur à DEL est au rouge (Typ 1912)
ATTENTION:
Cet appareil ne doit pas être utilisé par les enfants ou par toute personne victime de
troubles physiques, sensoriels ou mentaux. Toute personne possédant une expérience et/
ou une connaissance insuffisante doit être supervisée et guidée de manière à garantir une
utilisation sécurisée de cet appareil.-Les enfants jouant avec l‘appareil
Vous devez mettre en service l’appareil dans un local bien aéré pour environ 10 minutes
avant le premier usage. En effet la première mise en service de l’appareil peut causer la
formation d’odeurs.
Ne touchez pas l’appareil en l’utilisant et quelque temps plus tard! (Irradiation de la chaleur)
Mettez la fiche de contact dans la prise de courant. L’appareil est maintenant prêt à être mis
en service.
Attention : Ne conduisez pas le câble d’amenée au dessus de l’appareil!
• Chez installations à la salle de bains ou de douche, on doit observer les règles de
l’entreprise de l’alimentation en énergie locale. Le radiateur doit être installé en cette
façon qu’on ne peut pas toucher l’interrupteur à tirette de la baignoire ou de la douche.
• L’appareil ne doit pas être monte au-dessus de la baignoire !
Nettoyage:
Avant de commencer avec le nettoyage assurez-vous, que l’appareil est mis hors circuit et
qu’il est rafraîchi (Retirer la fiche du secteur.).
Nettoyez la surface avec un chiffon sec ou légèrement mouillé.
Laissez nettoyer le réflecteur et le tube de chauffage seulement par un spécialiste
Réparation:
Les réparations à l’appareil doivent être exécutées seulement par un spécialiste.
14

Dates techniques :
Voltage nominal : 230 V
Puissance : 300/600 W
Mode de montage : Fil du secteur ou raccord fixe
Classe de protection : 1
Portée d’émission : 90°
Ondes infrarouges et distribution de la température
contrôlées selon le standard des produits médicaux (IEC601-2-21)
Garantie :
Cet appareil est fabriqué d’un matériel sans aucun défaut et avec grand soin. La firme
Reer se port garant de 2 ans à la date de vente pour toutes les fautes de matériel et de la
fabrication. S’il y a quand même une telle faute, remplissez s.v.p. le formulaire de garantie
jaune et adressez-vous à votre marchand ou envoyez l’appareil.
Il n’y a pas de droit de garantie si :
- l’appareil n’est pas utilisé adéquat.
- l’appareil est raccordé à un voltage faut.
- qn a mis la main dans l’appareil sans autorisation.
- le formulaire de garantie n’est pas rempli en bonne forme.
(N’oubliez pas la pièce de caisse s.v.p.)
REER GmbH, Riedwiesenstrasse 7, 71229 Leonberg, German
- - - - - - - - - - - - - - - - - - - - - - - - - - - - - - - - - - - - - - - - - - - - - -
Type: 1911 / Type: 1912
Date de vente:
Timbre et signature du marchand :
15

RADIATORE PER FASCIATOIO
TYP: 1911 / 1912
ISTRUZIONI DI USO
Importante:
Legga attentamente le istruzioni di uso
e le custodisca per eventuali domande
www.wickeltisch-heizstrahler.de
I
230-50Hz
300/600W

Il nostro riscaldatore di fasciatoio produce un calore immediato sopra il fasciatoio.
Ma anche serve per riscaldare pronto il bagno, la stanzer per hobby, l´atrio,
la terrazza chiusa e il balcone.
Avvisi importanti:
• Legga per favore le istruzioni di uso prima di mettere in funzione l´apparecchio.
• Mentre l´apparecchio si usa per riscaldare il fasciatoio, non sia mai senza
supervisione.
• La durazione massima dell´uso non deve oltrepassare 15 minuti.
• Eviti riscaldamento extra, come p.e. luce del sole o un radiatore, altrimenti la
temperatura di corpo del bimbo potrebbe aumentare troppo.
• Se il bimbo ha febbre o temperatura alta, non bisogna esporsi al riscaldatore: c´è il
rischio di surriscaldamento.
• Mai coprisca il riscaldatore: c´è il rischio di un incendio
• Non tocchi la grata di protezione mentre l´apparecchio sia in funzione.
Attenzione: la grata rimane calda dopo di spegnere.
Tra il riscaldatore e il fasciatoio bisogna guardare una distanza minima di 100
centimentri.
Montaggio:
• l riscaldatore di fasciatoio soltanto
deve essere montato in posizione
orizzontale e nella parete– non si
permette il montaggio nel soffitto.
• Si devono rispettare le distanze
minime con le pareti, il soffitto e il
pavimento come si indica in fig. 1.
• Distanza minima di 65 cm. con materiali
infiammabili, come tessuti, legno ecc.!
C´è il rischio di un incendio
• Non si deve montare sotto una
spina elettrica.
Typ:1912
L‘emettitore del heating ha una COMMUTAZIONE AUTOMATICA FUORI DI TECNOLOGIA.
L‘apparecchiatura si commuta automaticamente dopo 10 min.
In caso d’interruzione della corrente elettrica o di un interruttore di sicurezza difettoso, per
altri 10 minuti si avvia l‘automatismo di spegnimento, se l‘interruttore risulta ACCCESO.
Controlli sempre se l‘apparecchiatura dopo l‘uso o dopo il decorso dell‘intervallo di
spegnimento si trova nella posizione dell‘interruttore SPENTO/0.
17
35cm
20cm 20cm
160cm
100cm
Fig.1
soffitto
istanza minima
della tabella
parete
pavimento
fasciatoior

a) Considerando le distanze minime, (immagine1, pagina 2)
segnare i fori dei tasselli dei supporti variabili a parete,
inserire i tasselli e avvitarli (fare attenzione alla posizione
della vite di fi ssaggio. Deve essere sopra) (immagine 2).
La distanza minima tra i supporti a parete ammonta a 12cm,
quella massima a 40cm. In questo modo Lei riesce a
forare esattamente le fughe delle piastrelle.
immagine.3
immagine.2
b) Fissare il radiatore sul supporto a
parete (immagine 3). L’apparecchio
ha una regolazione dell’angolo priva
di livelli (immagine 5). Girare
semplicemente nella posizione giusta
e fi ssare con le due viti di fi ssaggio
(immagine 4).
immagine.4
immagine.5
L’apparecchiatura va posizionata sul
punto intermedio dei supporti (ossia:
stessa distanza a sinistra e a destra)
(immagine 6).
Le viti di fi ssaggio (immagine 4)
devono essere fi sse per assicurarsi
che l’apparecchiatura non cada
dai supporti.
immagine.6
immagine.6
18
immagine.4

ATTIVAZIONE:
Posizione dell‘interruttore : 0 SPENTA
1 300W Il LED lampeggia in rosso (Typ 1912)
2 600W Il LED lampeggia in rosso (Typ 1912)
ATTENZIONE:
L’apparecchiatura non può essere usato da bambini o da persone con limitazioni fisiche,
sensoriali o mentali. Inoltre promuovere l’uso sicuro dell’apparecchiatura da parte di
persone con mancanza di esperienza e/o conoscenze insufficienti in presenza di una
persona che le sorvegli e le istruisca. -Bambini che giocano con l’apparecchiatura.
Deve mettere in funzione l’apparecchiatura in un locale ben arieggiato per ca. 10 minuti
prima del primo uso. Infatti, la sua prima messa in funzione potrebbe causare la formazione
di odori.
Non tocchi l´appareccio durante la funzione e poco dopo (CALORE)
Connettere l´appareccio – si può mettere in servizi.
Attenzione:
Si assicuri che il cavo non abbia contatto con il riscaldatore.
• Installando nel bagno o presso alla doccia si devono rispetare le norme vigenti regionali.
Il riscaldatore deve essere in una posizione di modo che l´interruttore non sia alla portata
dalla vasca di bagno o la doccia
• L’apparecchio non va montato sopra la vasca da bagno!
PULIZIONE:
Prima di pulire l ápparecchio si assicuri che sia spento e freddo. Lo sconnetta.
Pulisca la superficie con un panno secco o leggermente bagnato.
Lasci la pulizione del reflettore e del serpentino bollitore a un esperto della materia.
RIPARAZIONI:
Soltanto un tecnico deve fare riparazioni dell´apparecchio.
19

DATI TECNICI:
Voltagio: 230 V
Potenza: 300/600 W
Forma de montaggio: mendiante cavo o fisso
Categoria di sicurezza: 1
Angulo de radiazione: 90°
Raggi infrarossi e distribuzione della temperatura controllati
secondo lo standard dei prodotti medici (IEC601-2-21)
Garantia
Questo apparecchio è fatto di un material di prima classe e con molta accuratezza. Per
questo la ditta Reer si sommette a una garantia di 3 anni a partire dalla data di compra
per tutti i defetti di materiale e fabricazione. Nel caso di un defetto, p.f. riempia la carta di
garantia e si diriga al negoziante.
Non c´è garantia se:
- l´appareccio non è stato utilizzato appropriatamente
- il voltaggio era sbagliato
- si sono fatti ingranamenti inautorizzati
- la carta di garantia non è riempita di forma giusta.
Non dimentichi lo scontrino!
Reer GmbH, Riedwiesenstraße 7, 71229 Leonberg, German
- - - - - - - - - - - - - - - - - - - - - - - - - - - - - - - - - - - - - - - - - - - - - -
Typ: 1911 / 1912
Data de compra:
Timbro e firma del negoziante:
20
This manual suits for next models
1
Table of contents
Languages:
Other Reer Heater manuals
Popular Heater manuals by other brands

Scarlett
Scarlett Comfort SC-FH211S instruction manual

EUROLAMP
EUROLAMP LX-1602 instructions

tempio
tempio TP368 user manual

Lasco
Lasco CC13650 operating manual

CONVECTAIR
CONVECTAIR DIVA 7647 Installation & operation instructions

TriangleTube
TriangleTube Phase III HM Series Installation and maintenance manual

Harbor Freight Tools
Harbor Freight Tools 60525 Owner's manual & safety instructions

EINHELL
EINHELL KH 500 Original operating instructions

Amerec
Amerec T1.7 Installation and service instructions

Vornado
Vornado TouchStone 600 owner's guide

ARDES
ARDES AR4R07M Instructions for use

Truma
Truma Combi operating instructions