manuals.online logo
Brands
  1. Home
  2. •
  3. Brands
  4. •
  5. Regency
  6. •
  7. Indoor Fireplace
  8. •
  9. Regency Classic i2450 User manual

Regency Classic i2450 User manual

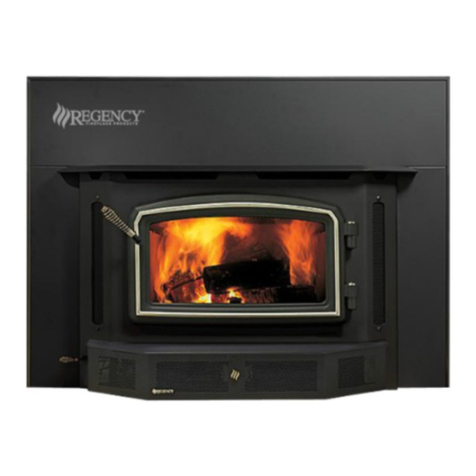
I2450M Classic®Wood Fireplace Insert | 1
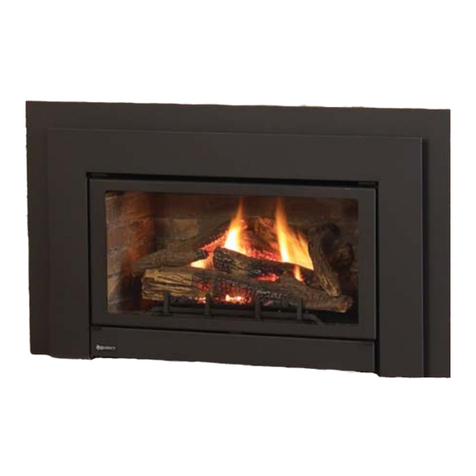
I2450M Regency Classic™Wood Fireplace Insert
DIMENSIONS WITH STANDARD FLUE ADAPTOR
35"
890mm
31 1
8
"
792mm
75
8
"
192mm
10 7
8
"
276mm
11 1
4
"
284mm
23 1
4
"
591mm
21 3
8
"
542mm
20 3
4
"
526mm
55
8
"
141mm
17"
433mm
53
8
"
137mm
20 3
4
"
528mm
22"
558mm
**From back of faceplate (not shown) to fuel door open-
ing 7" (178mm)
Model i2450
Cordwood BTU’s 75,000 BTU’s
Emissions (grams/hr) EPA Certied 1.4 grams/hr
Eciency (EPA HHV)* 67%
Eciency (EPA LHV) 72%
Flue Size 6" (152mm)
US Biomass Tax Rebate Eligible No
Maximum Log Size 18” (457 mm)
Firebox Size 2.3 cu.ft.
Note: *US Biomass Tax Rebate eligibility is based on the HHV value
being greater than or equal to 75%.
2 | I2450M Classic®Wood Fireplace Insert
CLEARANCES
Clearance diagram for installations
Side and Top facing is a maximum of 1-1/2" (38mm)thick.
MASONRY AND FACTORY BUILT FIREPLACES
The minimum required clearances to combustible materials when installed into a masonry or factory built replace are listed below.
*Floor Protection
Floor thermal insulation/protection with a R value of 2.8 is required if the unit is raised 0 - 3"
(0-76mm) (measured from the bottom of the appliance).
Thermal oor protection is not required when unit is raiser greater than 3" (76mm) (measured
from the bottom of the appliance).
Please check to ensure that your oor protection and hearth will meet the standards for clearance
to combustibles. Your hearth extension must be made from a non-combustible material. Extending
16" for US and 18" for Canada—measured from the fuel loading door.
Side View
12" (305mm) Mantel
3-1/2" (89mm) Mantel
22-1/2"
(572mm)
17-1/4"
(438mm)
2
0
12 64
810
2
0
12
6
16
4
14
8
18
10
Top of
Unit
20
22
24
Clearances are critical.
**Mantel can be installed anywhere in shaded area
or higher using the above scale.
Note: Ensure the paint that is used on
the mantel and the facing is "heat
resistant" or the paint may discolour.
Unit
I2500
Adjacent
Side Wall
(to Side)
A
Mantle **
(to Top of
Unit)
B
Top
Facing
(to Top of
Unit)
C
Side
Facing
D
Minimum
Hearth
Extension*
E
Minimum
Hearth Side
Extension*
F
To Top of Unit
G
12" (305mm) 17-1/4"(438mm)
for 3-1/2"(89mm)
mantel
16" (406mm) 1/2"(13mm)
to side surround
16" (406mm) USA 8" (203mm) 20" (508mm)
18"(457mm) Canada
22-1/2"(572mm)
for 12" (305mm)
mantel
WOOD INSERT
SPECIFICATIONS
Your replace opening requires the following
minimum sizes:
Height: 21.5"
Width: 25"
Depth: 17"
Two faceplates are available to seal the replace
opening:
Standard Oversize
40" W x 30" H 48" W x 33" H
I2450M Classic®Wood Fireplace Insert | 3
CHIMNEY SPECIFICATIONS
Before installing, check and clean your chimney
system thoroughly. If in doubt about its condition,
seek professional advice. Your Regency Insert is
designed for installation into a masonry replace
that is constructed in accordance with the
requirements of "The Standard for Chimneys,
Fireplaces, Vents, and Solid Fuel Burning
Appliance", N.F.P.A. 211, the National Building
Code of Canada, or the applicable local code
requirements.
The appliance, when installed, must be electrically
grounded in accordance with local codes or, in
the absence of local codes, with the National
Electrical Code, ANSI/NFPA 70, or the Canadian
Electrical code, CSA C22.1.
Regency Inserts are designed to use either a
5.5" (140mm) or 6" (152mm) ue.
INSTALLATION INTO A
MASONRY FIREPLACE
Regency Inserts are constructed with the highest
quality materials and assembled under strict quality
control procedures that insure years of trouble free
and reliable performance.
It is important that you read this manual thoroughly
and fully understand the safe installation and
operating procedures. The more you understand
the way your Regency Insert operates, the more
enjoyment you will experience from knowing that
your unit is operating at peak performance.
BEFORE INSTALLING
YOUR INSERT
1. Please read this entire manual before you
install and use your new wood insert. Failure
to follow instructions may result in property
damage, bodily injury or even death. Install
and use only in accordance with manufacturer’s
installation and operating instructions.
2. Check your local building codes - Building
Inspection Department. You may require a
permit before installing your insert. Be aware
that local codes and regulations may
override some items in the manual.
WARNING: Careless installation is the
major cause of safety hazard. Check all
local building and safety codes before
installation of unit.
3. Notify your home insurance company that
you plan to install a replace insert or hearth
heater.
4. Your replace insert is heavy and requires two
or more people to move it safely. The insert
can be badly damaged by mishandling.
5. If your existing replace damper control will
become inaccessible once you have installed
your Regency Insert, you should either remove
or secure it in the open position.
6. Inspect your replace and chimney prior to
installing your insert to determine that it is
free from cracks, loose mortar or other signs
of damage. If repairs are required, they should
be completed before installing your insert. Do
not remove bricks or mortar from your masonry
replace.
7. Do not connect the insert to a chimney
system servicing another appliance or
an air distribution duct.
When referencing installation or connection
to masonry replaces or chimneys, the
masonry construction must or shall be code
complying.
In Canada this replace insert must be
installed with a continuous chimney liner
of 5.5" (140 mm) or 6" (152 mm) diameter
extending from the replace insert to the
top of the chimney. The chimney liner
must conform to the Class 3 requirements
of CAN/ULC-S635 or CAN/ULC-S640,
Standard for Lining Systems for New
Masonry Chimneys.
Draft is the force which moves air from the
appliance up through the chimney. The amount
of draft in your chimney depends on the length of
the chimney, local geography, nearby obstructions
and other factors. Too much draft may cause
excessive temperatures in the appliance and
may cause damage. An uncontrollable burn or
excessive temperature indicates excessive draft.
Inadequate draft may cause back pung into the
room and plugging of the chimney. Inadequate
draft will cause the appliance to leak smoke
into the room through appliance and chimney
connector joints. Ensure the heater is installed
in areas that are not too close to neighbors or
in valleys that would cause unhealthy air quality
or nuisance conditions.
OPTIONAL FLUE CONNECTOR
KIT
The Straight Flue Adaptor (Part #846-504)
shown here, may be used to produce a secure
connection between your ue connector and the
insert collar. Detailed installation instructions are
included with the kit.
The following may also be purchased separately
if required to complete the install:
846-506 6" Flue Adapter 30 degree
846-508 6" Flue Adapter 45 degree
948-412/P 6" Flue Oset Adapter (osets back 4")
846-527 Flue Connector Kit
Straight adaptor shown with
ue connector kit
In the U.S.A., a 5.5 inch (140 mm) or 6
inch (152 mm) diameter, stainless steel,
full height chimney liner that meets type
HT (21000F) requirements per UL 1777
must be installed. The full liner must be
attached to the insert ue collar and to
the top of the existing masonry chimney.
4 | I2450M Classic®Wood Fireplace Insert
WARNING: This replace may have been
altered to accommodate an insert. It must be
returned to its original condition before use as
a solid fuel burning replace.
1. When installed in a factory built replace, a
full stainless steel rigid or exible ue liner is
mandatory, for both safety and performance
purposes. When a ue or liner is in use, the
insert is able to breathe better by allowing
a greater draft to be created. The greater
draft can decrease problems such as, dicult
start-ups, smoking out the door, and dirty
glass.
2. In order to position the ue liner, the existing
rain cap must be removed from your chimney
system. In most cases the ue damper
should also be removed to allow passage
of the liner.
3. In most cases opening the existing spark
screens fully should give enough room for
the insert installation. If it does not, remove
and store.
4. If the oor of your replace is below the
level of the replace opening, adjust the
insert's levelling bolts to accommodate the
dierence. When additional shimming is
required, use non-combustible masonry or
steel shims.
5. Measure approximately the alignment of the
ue liner with the position of the smoke outlet
hole on the insert to check for possible oset.
If an oset is required, use the appropriate
oset adaptor in your installation.
INSTALLATION INTO A
FACTORY BUILT FIREPLACE
Regency inserts are constructed with the highest
quality materials and assembled under strict quality
control procedures that ensure years of trouble free
and reliable performance.
It is important that you read this manual thoroughly
and fully understand the installation and operating
procedures. Failure to follow instructions may result
in property damage, bodily injury or even death. The
more you understand the way your Regency Insert
operates, the more enjoyment you will experience
from knowing that your unit is operating at peak
performance.
DRAFT
Draft is the force which moves air from the
appliance up through the chimney. The amount of
draft in your chimney depends on the length of the
chimney, local geography, nearby obstructions
and other factors. Too much draft may cause
excessive temperatures in the appliance and
may cause damage. An uncontrollable burn or
excessive temperature indicates excessive draft.
Inadequate draft may cause back pung into the
room and plugging of the chimney. Inadequate
draft will cause the appliance to leak smoke
into the room through appliance and chimney
connector joints. Ensure the heater is installed
in areas that are not too close to neighbors or
in valleys that would cause unhealthy air quality
or nuisance conditions.
Requirements for Installing
Solid-fuel Inserts in Factory-built
Fireplaces
1. A permit may be required for installations, nal
approval is contingent of the authority having
local jurisdiction. Consult insurance carrier,
local building, re ocials or authorities ha-
ving jurisdiction about restrictions, installation
inspection, and permits.
2. Inspect the existing replace and chimney for
any damage or aws such as burnouts, metal
or refectory warping.
3. Inspection to a minimum of NFPA 211 Level
II is recommended. All repairs must be made
prior to installing an insert. The replace must
be structurally sound and be able to support
the weight of the solid-fuel insert.
4. The factory-built chimney must be listed per UL
127 or ULC 610-M87 for all installations. Install
thermal protection as per this appliance listing
requirements.
5. A full height 5.5 inch (140 mm) or 6 inch (152
mm) diameter stainless steel full height listed
chimney liner must be installed meeting type
HT (2100oF) requirements per UL 1777 (USA)
or ULC S635 with ''0'' clearance to masonry
(Canada). The full liner must be attached to the
insert ue collar and to the top of the existing
chimney.
6. The ue liner top support attachment must not
reduce the air ow for the existing air-cooled
chimney system. Reinstall original factory-built
chimney cap only.
7. To prevent room air passage to the chimney
cavity of the replace, seal either the damper
area around the chimney liner or the insert
surround. Circulating air chamber (i.e. in a steel
replace liner or metal hearth circulatory) may
not be blocked. The air ow within and around
the replace shall not be altered, blocked by
the installation of the insert (i.e. not louvers or
cooling air inlet or outlet ports may be blocked
by the insert or the insert surround).
8. Means must be provided for removal of the
insert to clean the chimney ue.
9. Inserts that project in front of the replace
must be supplied with appropriate supporting
means.
WARNING
Fire Risk.
When lining air-cooled factory-built
chimneys:
- Run chimney liner approved to
UL 1777 Type HT requirements
(2100oF)
- Reinstall original factory-built
chimney cap ONLY
- DO NOT block cooling air openings
in chimney
- Blocking cooling air will overheat
the chimney
ALTERING THE FIREPLACE
The following modications of factory-built replaces
are permissible:
The following parts may be
removed:
Damper Smoke Shelf or Bae
Ember Catches Fire Grate
Viewing Screen/
Curtain Doors
- The replace must be altered. Cutting any sheet
metal parts of the replace in which the replace
insert is to be installed is prohibited, except that the
damper may be removed to accomodate a direct-
connect starter pipe or chimney liner.
- External trim pieces which do not aect the
operation of the replace may be removed providing
they can be stored on or within the replace for
reassembly if the insert is removed.
- The permanent metal warning label provided in
the component pack must be attached to the back
of the replace, with screws or nails, stating that the
replace may have been altered to accomodate the
insert, and must be returned to original condition
for use as a conventional replace.
- If the hearth extension is lower than the replace
opening, the portion of the insert extending onto
the hearth must be supported.
- Manufacturer designed adjustable support kit can
be ordered from your dealer.
- Final approval of this installation type is contingent
upon the authority having jurisdiction.
10. Installer must mechanically attach the supplied
label to the inside of the rebox of the replace
into which the insert is installed.
This manual suits for next models

1

Other Regency Indoor Fireplace manuals

Regency I43-NG1 Quick start guide

Regency

Regency I43-NG1 Quick start guide

Regency I3100 Installation instructions

Regency

Regency I3100 Installation instructions

Regency H2100 Quick start guide

Regency

Regency H2100 Quick start guide

Regency PG36D-NG Quick start guide

Regency

Regency PG36D-NG Quick start guide

Regency City Series Operating manual

Regency

Regency City Series Operating manual

Regency P33S-NG Quick start guide

Regency

Regency P33S-NG Quick start guide

Regency P42-LP3 Quick start guide

Regency

Regency P42-LP3 Quick start guide

Regency City CV60E-1 Quick start guide

Regency

Regency City CV60E-1 Quick start guide

Regency P36-NG Quick start guide

Regency

Regency P36-NG Quick start guide

Regency P33-LP3 Quick start guide

Regency

Regency P33-LP3 Quick start guide

Regency Gem54 Quick start guide

Regency

Regency Gem54 Quick start guide

Regency Excalibur P90E Zero Quick start guide

Regency

Regency Excalibur P90E Zero Quick start guide

Regency H2100 User manual

Regency

Regency H2100 User manual

Regency City Series CB40E Series Datasheet

Regency

Regency City Series CB40E Series Datasheet

Regency R12 User manual

Regency

Regency R12 User manual

Regency P33-NG4 Quick start guide

Regency

Regency P33-NG4 Quick start guide

Regency Horizon HZ42-NG Quick start guide

Regency

Regency Horizon HZ42-NG Quick start guide

Regency Liberty LRI6E-NG11 Quick start guide

Regency

Regency Liberty LRI6E-NG11 Quick start guide

Regency Sunrise P33S-NG4 Quick start guide

Regency

Regency Sunrise P33S-NG4 Quick start guide

Regency ACC40LENG Quick start guide

Regency

Regency ACC40LENG Quick start guide

Regency Cardinia F150B-1 Quick start guide

Regency

Regency Cardinia F150B-1 Quick start guide

Regency PG36NG3-R User manual

Regency

Regency PG36NG3-R User manual

Regency City CB72EPV-LP Quick start guide

Regency

Regency City CB72EPV-LP Quick start guide

Regency U24-NG and Owner's manual

Regency

Regency U24-NG and Owner's manual

Popular Indoor Fireplace manuals by other brands

kozy heat CSK-34-G Installation and operation manual

kozy heat

kozy heat CSK-34-G Installation and operation manual

Twin-Star International ClassicFlame 23IRM7490-W500 manual

Twin-Star International

Twin-Star International ClassicFlame 23IRM7490-W500 manual

Northline Express EXHAUSTO RS 9 Applications manual

Northline Express

Northline Express EXHAUSTO RS 9 Applications manual

Jøtul 3 USA Installation and operating instructions

Jøtul

Jøtul 3 USA Installation and operating instructions

IronStrike Legacy C260 Installation and operation manual

IronStrike

IronStrike Legacy C260 Installation and operation manual

Sylvania SBM907-42FBK instruction manual

Sylvania

Sylvania SBM907-42FBK instruction manual

Astria MontebelloSTTEN installation instructions

Astria

Astria MontebelloSTTEN installation instructions

Kovan Eko line user manual

Kovan

Kovan Eko line user manual

Outdoor Lifestyles VOFB36-T owner's manual

Outdoor Lifestyles

Outdoor Lifestyles VOFB36-T owner's manual

Thermocet Trimline Tunnel 100 Operating and installation instructions

Thermocet

Thermocet Trimline Tunnel 100 Operating and installation instructions

Jøtul F 162 Installation and operating instructions

Jøtul

Jøtul F 162 Installation and operating instructions

Contura C 35T-Lag Installation instruction

Contura

Contura C 35T-Lag Installation instruction

New Buck Corporation FP-BR-10-ZC owner's manual

New Buck Corporation

New Buck Corporation FP-BR-10-ZC owner's manual

Security Chimneys Bis Nova Installation and operation instructions

Security Chimneys

Security Chimneys Bis Nova Installation and operation instructions

FMI (V)BFBF36 series OWNER'S OPERATION AND INSTALLATION MANUAL

FMI

FMI (V)BFBF36 series OWNER'S OPERATION AND INSTALLATION MANUAL

HearthStone Morgan 8470 owner's manual

HearthStone

HearthStone Morgan 8470 owner's manual

Valor Legend G3 738 NGK owner's manual

Valor

Valor Legend G3 738 NGK owner's manual

Cheminees Philippe RADIANTE 1200DF user manual

Cheminees Philippe

Cheminees Philippe RADIANTE 1200DF user manual

manuals.online logo
manuals.online logoBrands
  • About & Mission
  • Contact us
  • Privacy Policy
  • Terms and Conditions

Copyright 2025 Manuals.Online. All Rights Reserved.