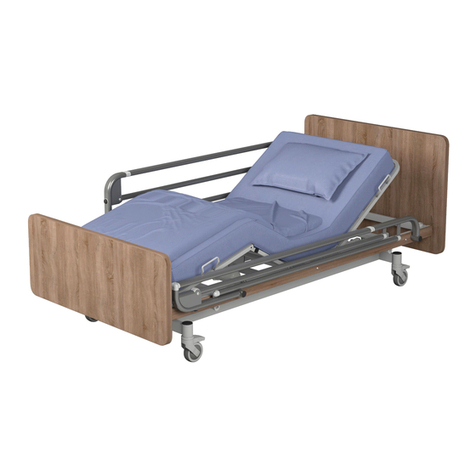
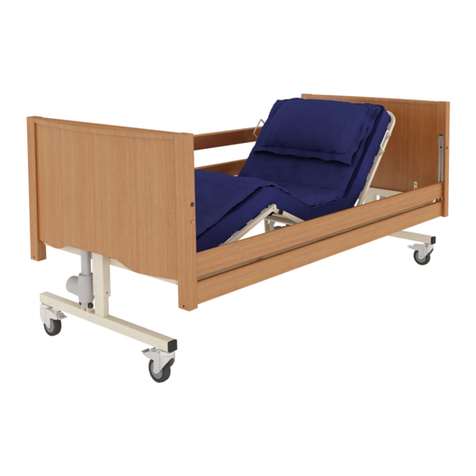
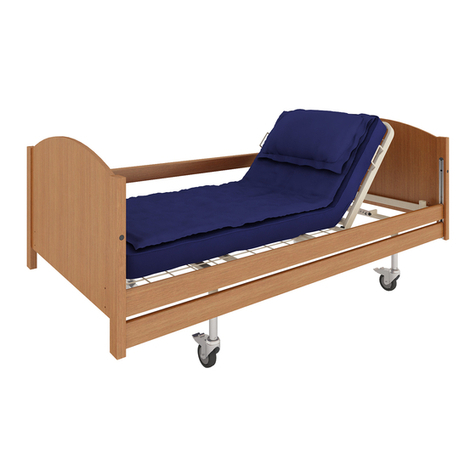
Rehabed TAURUS 2 User manual


2

3
Table of contents
1. INTRODUCTION......................................4
1.1. CONTACT .......................................... 4
1.2. WHAT THE INSTRUCTION MANUAL IS
ABOUT?.......................................................... 4
1.3. GENERAL INFORMATION....................... 5
1.4. APPLICATION...................................... 5
1.5. CONTRAINDICATIONS........................... 6
2. WARNINGS AND CAUTIONS ...................7
2.1. WARNINGS AND CAUTIONS................... 7
3. TRANSPORT AND STORAGE..................11
4. SYMBOLS AND MARKINGS ...................14
5. COMPONENT PARTS ............................16
5.1. LIST OF COMPONENTS OF THE BED ....... 16
6. ASSEMBLY OF THE BED AND
PREPARATION FOR USE ...........................17
6.1. DISASSEMBLY FROM THE TRANSPORT
STAND.......................................................... 17
6.2. ASSEMBLY OF THE BED ....................... 18
6.3. CONNECTION OF THE ELECTRICAL SYSTEM
................................................................... 19
6.4. ASSEMBLY OF WOODEN SIDE RAILS....... 22
6.4.1. SIDE RAILS AND MATTRESSES .... 25
6.4.2. SIDE RAIL SAFETY .................... 25
6.5. FITTING RATCHET.............................. 26
6.6. CHECKING THE BED............................ 27
7. TRAINING.............................................28
8. FIRST USE.............................................29
8.1. GENERAL SAFETY............................... 30
8.2. PREPARATION FOR COMMISSIONING .... 30
8.3. BRAKE SYSTEM ................................. 31
8.4. SIDE RAILS AND MATTRESS.................. 32
8.4.1. HEIGHT OF THE MATTRESS ........ 33
8.4.2. USE OF SIDE RAILS ................... 33
8.5. ELECTRICAL CONTROL.........................34
8.5.1. LOCATION OF THE HANDSET.......36
8.5.2. OPERATION OF 10-BUTTON AND 9-
BUTTON HANDSETS .........................................36
8.5.3. LOCK FUNCTION OF THE HANDSET
...................................................................37
8.6. LEG SECTION.....................................38
8.7. STANDARD START WORK PROCEDURE....40
8.8. STANDARD END WORK PROCEDURE ......40
9. ASSEMBLY ONTO THE TRANSPORT
STAND .....................................................42
10. POWER FAILURES...............................45
10.1. EMERGENCY LOWERING THE BACK
SECTION AND THE LEG SECTION .........................45
11. DECONTAMINATION ..........................47
11.1. STEAM CLEANING............................48
12. MAINTENANCE AND INSPECTIONS .....49
12.1. GENERAL INSPECTION.......................49
12.2. SERVICE LIFE...................................51
12.3. FAULT FINDING ...............................51
13. DISPOSAL OF PARTS...........................53
14. ELECTROMAGNETIC COMPATIBILITY
(EMC) ......................................................54
15. SPECIFICATION...................................55
15.1. TECHNICAL DATA OF THE BED ............55
15.2. MAXIMUM LOAD.............................56
15.3. TECHNICAL DATA OF SIDE RAILS..........56
15.4. ELECTRICAL DATA ............................58
16. ACCESSORIES .....................................59
16.1. MATTRESS AND SIDE RAILS ................59
16.2. LIFTING POLE ..................................61
17. WARRANTY........................................63
17.1. WARRANTY CONDITIONS ..................63
18. REPAIRS AND MAINTENANCE
TREATMENTS...........................................64
19. NOTES................................................65

4
1. INTRODUCTION
Thank you for your trust and purchase of our product. Before using the bed, please
read this instruction manual carefully and make sure it is fully understood. In the case
of any doubts concerning the installation, use or maintenance of the bed, please
contact the seller or the manufacturer.
1.1. CONTACT
In order to get help with the installation, use or service of the product, as well as to
report an unexpected operation or to obtain any information regarding service,
warranty, sales or customer service concerning this product, please contact your
dealer, distributor or (in case of doubt) with Reha-Bed Sp. z o.o. at the following
address:
Reha-Bed Sp. z o.o.
Spacerowa 1 Street
41-253 Czeladź
Poland
In service matters (including spare parts):
phone: +48 519 842 766
phone: +48 (32) 346 00 33
Other issues:
phone: +48 (32) 346 00 33
www.rehabed.com.pl
Each serious incident connected with the device should be reported to
Reha-Bed Sp. z o.o. and the competent authority of the Member State, where the
device is used. Please provide the product serial number (LOT) in all correspondence.
You can find it on the identification labels, which are located on the outside of the
backrest section frame and the leg section frame, as well as on the bottom of each bed
ends.
In order to receive support outside of Poland, please contact the importer or the local
distribution company, which sold you the device.
1.2. WHAT THE INSTRUCTION MANUAL IS ABOUT?
This instruction manual applies to Taurus 2 beds with the possibility of electric control
of the back and leg sections.

5
All products are CE marked –in accordance with the EC Directive on medical devices
(2017/745 (MDR)).
1.3. GENERAL INFORMATION
▪4 separate sections (movable back and leg section)
▪Electrically controlled back and leg section position
▪Mechanical adjustment of the foot section
▪Auto contour – simultaneous adjustment of back and leg sections
▪Stepless electric adjustment of bed’s height and tilt: reverse-Trendelenburg
and Trendelenburg* (available for hospital environment and nursing homes)
▪Lockable handset (remote control)
▪Wooden side rails along the entire length of the mattress platform
▪Mattress platform filled with metal (standard) or wooden (optional) slats
▪Available LOW version with a reduced minimum and maximum height of the
mattress platform compared to the standard bed
▪Emergency power system (optional)
▪Possibility of disassembling into four separate parts stored and/or transported
on the transport stand (to aid storage and bed transportation)
▪Electrical system IPX4 rated – Splash resistant.
*If patient requirements are such that Trendelenburg functionality
is deemed to pose a potential risk a replacement handset can be
purchased with the Trendelenburg function removed –for details
contact with your local distributor or the manufacturer.
Reha-bed sp. z o.o. recommend the use of the standard 9-button
handset when the bed is being used in a domestic environment.
1.4. APPLICATION
The Taurus 2 bed has been designed to provide the user with optimal independence
and freedom whilst aiding the manual handling requirements of the carer. It is
operated with the use of a 9- or 10-button handset. It is intended for use in the
following environments:
▪In a domestic environment, where it is used to alleviate or compensate for
injuries, disabilities and diseases, and
▪In long-term care facilities, where medical care and health monitoring are
provided if required (e. g. nursing homes, rehabilitations centres, geriatric wards).
The bed significantly relieves a caregiver thanks to a fully electrically profiled platform
that enables to adjust the position to the user’s needs.
The bed is designed for users with a minimum height from 146 to 185 cm (when the
bed length extension is not fitted), BMI greater than 17 and a maximum weight up to
178 kg. The lower (or upper) age limit is not defined. The usability of the bed depends

6
on the physical size of the patient in relation to the various proportions and spaces
around the bed’s frame. The bed is not intended for patients weighting less than 40
kg.
The bed is intended for one person only!
The bed is designed to support the patient’s weight (as described above) while
sleeping or resting. It assists in the care and/or ensures comfort for the patient or
caregiver –when the bed is used in above described environments.
It is the carer’s responsibility to determine that the patient is both mentally and
physically capable of occupying the bed with minimal risk of personal injury.
▪A risk assessment must always be performed on the suitability
of the patient to the bed frame and any ancillary accessories.
▪If there are any doubts to use the product should be consulted
with a health care professional (e.g. physiotherapist, doctor).
Make sure the product is suitable for your condition or
dysfunction.
1.5. CONTRAINDICATIONS
The contraindications for using the Taurus 2 bed include:
▪Cervical or skeletal traction,
▪Unstable fractures of the spine –if the bed’s functions remain unlocked,
▪General fractures of the skeleton –if the bed’s selected functions remain
unlocked,
▪Level of mental development that makes it impossible to safely operate the
bed’s functions – if the bed functions remain unlocked,
▪Confusion, agitation or unstable emotional state of the patient –if side rails
are installed and/or they are in the highest position,
▪Inadequate height of the patient (below 146 cm or above 185 cm),
▪Inappropriate BMI of the patient (below 17),
▪Inadequate weight of the patient (less than 40 kg or more than 178 kg).
Consider the presence of other contraindications that are specific for the patient of
the care environment.

7
2. WARNINGS AND CAUTIONS
Warnings in this instruction manual indicate potential hazards,
disregard of which could lead to injury or death.
Cautions in this instruction manual identify potential hazards,
disregard of which could result in damage to the equipment.
2.1. WARNINGS AND CAUTIONS
▪READ THE INSTRUCTION MANUAL CAREFULLY before use or
installation.
▪THE USER IS OBLIGED TO FOLLOW THIS INSTRUCTION.
▪The bed is not suitable for children. If used by a child, ensure
that a risk assessment has been conducted –taking into
account the child’s proportions and the dimensions of the bed’s
frame.
▪The bed is not suitable for users with a height less than 146 cm
–in case of doubt, please contact the local distributor of
manufacturer.
▪The bed is not suitable for users weighting less than 40 kg –in
case of any doubt, please contact the local distributor of
manufacturer.
▪The bed is not suitable for users with a BMI less than 17 - in
case of any doubt, please contact the local distributor of
manufacturer.
▪Particular attention should be paid to the current cables –they
should not be located between moving parts of the back or leg
section, as well as between the bed lifting system –due to the
risk of failure due to pinching of cables.
▪All cables must be hung on the brackets provided for this
purpose, so that they do not rub and touch the floor.
▪Incorrect use of electrical equipment can be dangerous.
▪When installing external device cables around the bed, take
precautions to prevent them from being crushed, trapped or
damaged –damaged cables can pose a risk of electric shock
and/or fire.
▪The bed should be used in acceptance with its intended
purpose.
▪If you cannot plug the main power cable directly into a wall
socket, only the CE marked extension cables may be used.

8
▪If the product is connected to the power supply with an
extension cable, never overload the product by connecting
devices that exceed the maximum rating of the extension cable
–risk of fire.
▪Make sure that there are not many sockets under the frame –
liquids that may seep into such a socket during normal use of
the bed may pose electrical/fire hazard.
▪All electrical components that are a part of the bed and/or
related accessories, which are damaged, must be immediately
withdrawn from service and replaced –damaged electrical
components may present a risk of electric shock/fire.
▪The bed cannot be used if any parts are missing.
▪Before each use of the device, check and lock all four wheels.
▪Wheels should be locked/unlocked with the use of foot, not
with a hand.
▪There should not be obstacles (that would make its proper
operation or assembly difficult) in the place, where the bed is
used.
▪The bed should be adjusted and used on flat, horizontal
surfaces –all wheels ought to touch the ground.
▪Do not exceed the safe working load of the bed and lifting pole!
▪Side rails must be installed on both sides of the bed (also
against the wall).
▪If there is no supervision over the user (if such circumstances
exist), set the highest position of side rails on both sides of the
bed. They may be unblocked and lowered only by the
responsible person (caretaker or nurse).
▪Leaning on side rails may cause an accident!
▪If the side rails are damaged (bent, broken, cracked, etc.), they
must be replaced immediately due to the risk of an accident.
▪Leaning out of the bed may cause an accident!
▪Leaving limbs between moving parts of the bed may injured
them and cause an accident.
▪During adjustment and maintenance, make sure that any parts
of the body are not located in the zone of potential risk of injury
(movable parts: back and leg section, lifting system and side
rails).
▪During adjustment of the back or leg section, do not put your
hands between the mattress and the metal parts of the bed –
due to the risk of limb injuries!
▪Do not sit on raised calf, thigh and back sections.

9
▪In the case of the event of lifting pole’s deformation, it should
be immediately replaced with a new one.
▪Pulling out the plug from the socket is allowed only when you
hold the plug/adapter –do not pull the cable.
▪Do not leave the user in the Trendelenburg or reverse-
Trendelenburg position!
▪Lock the handset’s functions when the user should not change
the height and/or angle of the back or leg sections, or when
there are doubts concerning the patient’s ability to safety
control the functions of the bed.
▪The bed should be set to the lowest position if the user is left
unattended –in order to minimize the risk of injury from falling.
▪It is forbidden to open covers of actuators, control box and
power supply!
▪Remember that there is a risk of accident or damage to the bed
if product is repaired the on your own!
▪The bed is not intended for transporting the user. The
manufacturer enables to transport the bed with the user only
within the room for washing/cleaning or provide the access to
a patient. In such a case, special attention should be paid to
disconnect the bed from the power supply before transporting
the bed. The transport should be carried out in the lowest
position of the mattress platform, while maintaining the user’s
lying position.
▪Inspections, repairs and disinfections may only be carried out
by specially trained persons.
▪The maximum time of continuous operation of actuators is 2
minutes per 18 minutes of break. Failure to comply with the
operating time/ break time may result in permanent damage
to the actuator.
▪Standard height side rails enable to use mattresses with a
maximum height of 160 mm.
▪The use of accessories that have not been designed for use with
the bed is forbidden - a hazard could be introduced due to
product combination incompatibility.
▪The use of additional mechanical or electrical devices that are
not intended for use with the bed is unacceptable.
▪Side rails may only be used with a correct size mattress
(adequate for a given bed) –otherwise there is a risk of the user
entrapment.
▪In order to enable the disconnection of the bed and isolating
from the mains, ensure that the plug is accessible at all times.

10
▪Due to the small space under the bed, special attention should
be paid to young children, user limbs and other items around
the bed that could be trapped between the bed’s components
and injured or damaged.
▪Precautions are to be taken when routing cables from external
equipment around the bed to ensure that they do not become
crushed, trapped or damaged - damaged cables could pose a
risk of electrocution/fire.
▪Make sure that mains cable is plugged into a suitable power
source at all times.
▪Incorrect handling/positioning of the power cable may cause
its tangling and breaking, which may expose the cables (due to
damage to the insulation cover) and pose a risk of electric
shock.
▪Only original parts supplied by the manufacturer may be used.
▪It is forbidden to modify the bed’s frame without the consent
of the manufacturer –this poses a risk of danger.
▪Hold solid and massive parts of the bed’s frame during
transport!
▪The bed should be used and kept away from heat sources and
open flames (e. g. cigarettes, electric fire, heaters, etc.) –close
proximity could damage the electrical system and/or pose a fire
hazard.
▪If the bed is being used in conjunction with a hoist ensure the
under bed clearances are checked before lowering the bed to
minimum height - risk of frames clashing
▪The bed is to be installed and put in to service in accordance
with the information provided in these instructions for use.
▪ALL THE ABOVE-MENTIONED WARNINGS AND CAUTIONS
MUST BE STRICTLY OBSERVED.

11
3. TRANSPORT AND STORAGE
Observe the following instructions when transporting and storing the bed:
▪Store the bed on the transport stand to save space.
▪Always store the bed on a flat, level surface.
▪Set the bed to the minimum height.
▪Side rail parts (with the exception of wooden side rails) should be stored inside
aluminium channels located in the bed ends (or in a selected safe place).
▪Wheel brakes should be locked.
▪All profiled sections should be secured with the cable ties, tape, etc.
▪All electrical functions of the bed should be locked.
▪Make sure that all fasteners (such as screws, washers, plugs, etc.) are carefully
tightened and secured for transport.
▪The bed should be protected (e. g. with the use of foil) against the ingress of
liquids, dirt, dust, etc.
▪It is strictly forbidden to store beds on top of each other.
▪Do not store the bed on its side.
Environmental conditions:
Operational conditions
Transport/storage
conditions
Ambient temperature:
from +10ºC to +40°C
from -20°C to +50ºC
Humidity:
30% - 75%
30% - 75%
Atmospheric pressure:
from 800 to 1060 hPa
Altitude above sea level:
≤ 2000 m
≤ 2000 m
▪The bed is not intended for transporting the user. Do not
transport the bed along with the user between rooms –due to
the risk of injury to the user/caregiver. If the bed is transported
within the room with the user, a risk assessment should be
conducted in line with local health and safety rules in order to
ensure the safety of the user/personnel when moving the bed
–this depends on the situation and the bed’s load.
▪When transporting the bed on the transport stand, make sure
that a risk assessment has been conducted in acceptance with
local health and safety rules in order to reduce hazards, in
particular when transporting the device on sloped or uneven
surfaces.
▪The bed should not be transported on the transport stand in
the absence of screws or unsecured sections –the risk of bed’s
collapse.

12
▪In order to prevent the risk of cross contamination, when
removing the bed from its place of use by the end user, make
sure that all actions (connected with the bed) are carried out
with the use of disposable gloves. Next to, properly dispose the
glove, unless it can be verified that the bed and all accessories
have been properly disinfected and cleaned.
▪If the bed is removed from its place of use by the end user,
before handing the bed over for storage, make sure that the
bed has been cleaned and disinfected –in acceptance with your
local infection control rules and/or rules that are specified in
this instruction manual (see section 11).
▪If the bed has been transported/stored at a temperature close
to the minimum/maximum values determined above, it should
be left for a minimum of 2 hours in order to reach room
temperature before its connection to the power supply –
operation outside the recommended temperatures poses a risk
of damage to the electrical system.
▪Avoid exposing the bed to direct sunlight –direct sunlight may
damage the electrical system and/or cause bed’s colour fading
over time (including the fading of the bed’s labels).
▪Avoid placing the bed in a moisture rich environment –a long-
term exposure to moisture may damage the electrical system
and/or have a detrimental effect on parts of the bed’s frame.
▪Do not use side rails to transport the bed –the risk of damaging
side rails/bed’s frame.
▪Do not transport the bed over threshold –this may damage the
frame.
▪When using the bed’s functions, make sure that no furniture or
other things (such as a bedside table) are not an obstacle.
▪Make sure that the bed is positioned in an appropriate distance
from walls/other furniture in order to prevent the damage to
the equipment when operating the bed (especially when
working with a tilted mattress platform).
▪Cable tiles, etc. used for storage should be removed after
assembling the bed, before use –the frame may be damaged
in the event of their leaving.

13
▪Take special precautions concerning EMC. The bed should be
installed and put into operation in a manner described in
chapter 14.
▪The bed with an additional source of emergency power supply
is not intended to discharge batteries for a long time and it
should always be connected to the power supply during normal
use –complete discharge of batteries / accumulators may
reduce their performance.

14
4. SYMBOLS AND MARKINGS
The following symbols are observed on the beds:
Warning
Warning of the potential risk
Caution
Warning of potential damage to the product
Reference to the instruction manual - recommended
Failure to comply with the recommendation may cause a risk
Reference to the instruction manual - mandatory
Failure to comply with the recommendation may cause a risk
Maximum user weight
Refer to section 15.2
Safe working load
Refer to section 15.2
WEEE marking –placed on individual parts of electronic system
(Waste electrical and electronic equipment)
Application part (type B)
Application part: a part of the device that comes into physical contact with the patient
and/or user –in order to use it to perform its assigned functions (refer to section 0 for a list
of applied parts).
Type B: Applied parts complying with specific requirements for protection against electric
shock to IEC 60601-1.
Class II electrical appliance
The user is protected by at least two insulation layers against conductive elements (e. g.
power cable) –in case of noticing damage to the control unit or the power cables,
immediately disconnect the device from the power supply and immediately contact the
supplier or Reha-Bed Sp. z o.o.
Marking of the medical device
Determination of minimum physical requirements for adults
From the left: minimum patient weight, minimum patient height, minimum BMI value of
the patient
Information about the mattress can be found in the instruction manual
Refer to section 16.1
Warning –dynamic mattress
Dynamic mattresses must only be strapped to moving parts or bed’s frame

15
Electrical specification
Including storage and use conditions
Warning –removable side rail
Incompatible and improperly installed side rails may pose a risk of injury or death - see the
instruction manual
Total product weight on the transport stand
Heavy weight of the product - be careful when transporting on the transport stand and
assembly
Warning regarding the transport on the transport stand
The risk of loss of stability/overturning of the product - be careful when transporting the
product on the transport stand
Atmospheric pressure limit
Humidity limit
Temperature limit
Certification mark
Product meets the requirements of the EC Directive on medical devices (2017/745 (MDR))
Manufacturer data
DOM
Date of manufacturing
LOT
Serial number
Reference number
Product code

16
5. COMPONENT PARTS
5.1. LIST OF COMPONENTS OF THE BED
(The figure shows the Taurus2 bed with wooden side rails)
1. Bed end x2
2. Backrest section x1
3. Mattress side retainer x4
4. Leg section x1
5. Transport stand x2
6. Handset lock key x1
7. Handset x1
8. Side rail channel x4
9. Side rail x4
10. Braked castor x4
11. Control box/Backrest actuator x1
12. Leg rest actuator x1
13. Bed end actuator x2
14. Head section re-usable cable tie location x1
15. Leg section re-usable cable tie location x1
16. Allen key location ×1
▪During assembly/disassembly and operation works, pay special
attention to the risk of hands injury.
▪The bed cannot be used when there are missing parts.

17
6. ASSEMBLY OF THE BED AND PREPARATION FOR USE
6.1. DISASSEMBLY FROM THE TRANSPORT STAND
▪Make sure that you have read and fully understood the
instruction manual before the assembly of the bed.
▪Make sure that a risk assessment has been conducted in
acceptance with local health and safety regulations in order to
protect personnel from risks during assembly works.
▪Be especially careful when removing the bed from the transport
stand and assembling –due to the heavy weight of individual
elements.
▪The bed should be assembled by two persons.
▪Before starting the assembly, prepare the surface and
pay special attention to whether the possible
movement of the bed will not be difficult. Ensure the
surface is level.
▪Lock all 4 wheels.
▪Remove the clevis pin, ‘R’ clip and plastic spacer that
secure each transport stand to the leg section. These
parts will be required when assembling the bed
sections together.
▪The bed with wooden slats has 5 slats and bag with 10
plastic fixings for slats attached to the inside of leg
frame. Set them aside for further assembly.
▪Loosen the top grub screws with Allen Key supplied at
the head end of the backrest platform on both
transport stands.
▪Lift the leg section off the transport stands followed by
the head section and carefully place them flat on the
floor.
▪Loosen the bottom grub screws which secure the bed
end to the transport stand on one side only.
▪Pull the same bed end away from the transport stands
and place carefully against a wall or on the floor. If
placing against a wall ensure the castor brakes are
applied.
Note: when the transport stands are pulled away
neither bed end will be supported.
▪Now loosen the remaining screws on the transport
stands and carefully pull the other bed end away. The
bed has now been separated into its constituent parts.
Clevis pin, spacer, and ‘R’ clip
removal
Top grub screws on the
transport stand
Bottom grub screws on the
transport stand

18
6.2. ASSEMBLY OF THE BED
▪Prior to assembling the bed the backrest actuator
of the Taurus 2 must be removed and rotated 180°
to change the bed from transport to in use mode.
Ensure the mains cable is not in tension or
inappropriately entangled around the control box
after rotation.
Rotation of backrest actuator
▪Lying one of the bed ends flat on the floor, lift one
of the mattress platform halves and engage onto
the bed end. Adjust the position of the mattress
platform half if necessary to ensure it is located
centrally onto the bed end and the platform is
pushed fully up against the bed end. Tighten the
grub screws to lock into position. Note: If this
action is being undertaken by a single person
Reha-bed sp. z o.o. recommend that the castors
are braked before assembly commences.
▪Repeat for the remaining bed end and mattress
platform half.
Bed end and backrest section
assembled
Bed end and backrest assembled
▪Make sure that the holes on the side of the leg
section are in the centre of the mattress platform!
▪Release the brakes on the castors on both bed
ends.
▪Bring both halves of the bed together and align
each section so that the spigots in the backrest
section locate into the open tube ends in the leg
section. Now pull the two sections together. Once
complete check that the bed ends are still pushed
fully up against the bed ends.
▪Place the clevis pins through the holes by both
central joints with the head of the pin on the
outside of the bed. Place the plastic spacer over
the end of the pins and insert the ‘R’ clips from the
top of the bed through the hole in the pin and
tighten the two grub screws.
▪The bed with wooden slats has holes for self-
assembly of slats. Place fasteners at the both ends
of the slats and then attach them parallel to each
other in designated places (holes).
▪Cut off/remove the plastic retaining ties/Velcro
straps from the head and foot mattress platforms.
Bring assembled bed halves
together
Clevis pin, spacer, and R clip fitting
Wooden slats assembly

19
The bed must never be used if the grub screws and/or clevis pins
and associated ‘R’ clips are loose or missing - risk of bed collapse.
Also using bed without the wooden slats installed threatens with
danger of mattress collapsed.
▪Ensure all wraps/hooks and loop tape (or similar) securing any
of the sections in place are removed prior to operation -
damage to the frame could occur.
▪Ensure the backrest actuator is rotated in the direction shown
on first picture. Incorrect rotation could cause product damage.
6.3. CONNECTION OF THE ELECTRICAL SYSTEM
The bed is designed to be permanently connected to a power supply. The auxiliary
emergency power supply is available as an accessory to maintain the bed’s basic
functions for a specified period of time if mains power is not available (see section
10).
▪Before starting assembly works, check the condition of the power cable,
handset cable, actuator cables and batteries located in the control box (if
included in the set) and make sure that they are not damaged.
▪Next to, remove the retaining cable cover to the control box (screwdriver
required) and plug the actuator and handset cables into the control box as
shown in the control box label and the picture below.
Note: The plugs only fit into the ports in one orientation. Ensure the cables
are plugged fully into the control box.
Control box label and cable routing

20
▪Once all the cables are connected they are to
be secured in place by re- attaching the
supplied cable cover to the control box. If
removed, the battery cover is fastened into
place using the supplied screw.
▪The mains cable exiting the control unit should
now be connected to the power supply plug.
Take the 2 plugs and push them together,
ensuring the connection has been fully made
before plugging into the mains.
▪Drive the bed to its maximum height then
secure the actuator cables in the twist clips
under the mattress platform (refer to section
6.3.1). Ensure each bed end actuator cable has
enough free cable to allow full movement of
the actuator.
Plugging the bed into the mains
Fitting battery cover –Unscrew/screw
the battery cover into place by using the
screw provided
Fitting cable cover - Cable cover
unclips/clips into place
▪Ensure all cables, in particular the mains cable, are free from
moving parts and are not under excessive tension.
▪Make sure that none of the actuator and/or handset cables are
placed between moving parts of the bed and check that cables
are not tight (especially the main power cable when lifting the
bed up and down and/or backrest section control cable) to
avoid possible damages. Damaged cables pose a risk of electric
shock and/or fire.
▪The two bed ends are identical however plugging the
actuators into the correct ports is important to ensure the bed
ends operate as intended. Tilt function will not work as
intended if incorrectly connected.
▪Make sure that both actuators (high/low) are plugged into the
correct ports. If the Trendelenburg or reverse-Trendelenburg
function does not work as expected, the high/low actuators can
be connected in a wrong way.
▪Always disconnect the bed from the mains power supply prior
to connecting or disconnecting any cables to the control box.
Table of contents
Other Rehabed Medical Equipment manuals