Remington RM300-PH User manual

769-09053 / 00 08/13
Operator’s Manual
RM300-PH
Lithium-Ion
Battery-Powered Power Head
TABLE OF CONTENTS
Service . . . . . . . . . . . . . . . . . . . . . . . . . . . . . . . . . . . . . . . . . . . . . . .1
Safety . . . . . . . . . . . . . . . . . . . . . . . . . . . . . . . . . . . . . . . . . . . . . . .2
Know Your Unit . . . . . . . . . . . . . . . . . . . . . . . . . . . . . . . . . . . . . . . .5
Specifications . . . . . . . . . . . . . . . . . . . . . . . . . . . . . . . . . . . . . . . . .5
Assembly . . . . . . . . . . . . . . . . . . . . . . . . . . . . . . . . . . . . . . . . . . . . .6
Starting and Stopping . . . . . . . . . . . . . . . . . . . . . . . . . . . . . . . . . . .8
Operation . . . . . . . . . . . . . . . . . . . . . . . . . . . . . . . . . . . . . . . . . . . . .8
Maintenance . . . . . . . . . . . . . . . . . . . . . . . . . . . . . . . . . . . . . . . . . .9
Cleaning and Storage . . . . . . . . . . . . . . . . . . . . . . . . . . . . . . . . . .11
Troubleshooting . . . . . . . . . . . . . . . . . . . . . . . . . . . . . . . . . . . . . . .11
Warranty . . . . . . . . . . . . . . . . . . . . . . . . . . . . . . . . . . . . . . . . . . . .12
All information, illustrations, and specifications in this manual are based
on the latest product information available at the time of printing. We
reserve the right to make changes at any time without notice.
Copyright© 2013 MTD SOUTHWEST INC, All Rights Reserved.
DO NOT RETURN THIS UNIT TO THE RETAILER. PROOF OF
PURCHASE WILL BE REQUIRED FOR WARRANTY SERVICE.
For assistance regarding the assembly, controls, operation or
maintenance of the unit, please call the Customer Support Department
at 1-866-206-2707 in the United States or 1-877-696-5533 in Canada.
Additional information about the unit can be found on our website at
www.remingtonpowertools.com.
Please call the Customer Support Department for replacement
parts. When servicing, use only identical replacement parts.
SAVE THESE INSTRUCTIONS
SERVICE
For use with RM300-PK (RM36V2AH-A) Batteries
For use with RM300-CH (RM36VCGR-A) Battery Chargers
(Battery and Battery Charger Included)
IMPORTANT: Read this manual thoroughly before using this product. Follow all instructions.
BC

SAFETY WARNINGS FOR ELECTRIC UNITS
General Electric Safety
• Do not expose the unit to rain or wet conditions.
• Do not handle the unit with wet hands.
• Do not operate the unit in the rain, in wet conditions or on wet
surfaces.
• To reduce the risk of electric shock, avoid body contact with
grounded conductors, such as metal pipes or wire fences.
• Do not operate the unit in explosive atmospheres, such as in the
presence of flammable liquids, gases or dust.
• Only use this unit with RM300-PK (RM36V2AH-A) batteries. Only
charge RM300-PK (RM36V2AH-A) batteries with RM300-CH
(RM36VCGR-A) battery chargers. Only use RM300-CH
(RM36VCGR-A) battery chargers with RM300-PK (RM36V2AH-A)
batteries.
Battery and Battery Charger Safety
• A nameplate on the unit indicates the voltage used. Never
connect the unit to an AC voltage that differs from this voltage.
• An extension cord should not be used unless absolutely
necessary. Use of an improper extension cord could result in a
risk of fire, electric shock or electrocution.
• Do not use multiple extension cords.
• IMPORTANT SAFETY INSTRUCTIONS •
SAFETY
2
GENERAL SAFETY WARNINGS
• Read the instructions carefully. Be familiar with the controls and
proper use of the unit.
• Before using any attachment, read and understand the manual
that came with the attachment. Follow all safety information
contained within.
• Do not operate this unit when tired, ill or under the influence of
alcohol, drugs or medication.
• Children must not operate the unit. Teens must be accompanied
and guided by an adult.
• All guards and safety attachments must be installed properly
before operating the unit.
• Inspect the unit before use. Replace damaged parts. Make sure
all fasteners are in place and secure. Replace parts that are
cracked, chipped, or damaged in any way. Do not operate the
unit with loose or damaged parts.
• Be aware of risk of injury to the head, hands and feet.
• Carefully inspect the area before starting the unit. Remove
rocks, broken glass, nails, wire, string and other objects that
may be thrown or become entangled with the unit.
READ ALL INSTRUCTIONS BEFORE OPERATING • Clear the area of children, bystanders and pets; keep them
outside a 50-foot (15 m) radius, at a minimum. Even then, they are
still at risk from thrown objects. Encourage bystanders to wear
eye protection. If you are approached, stop the unit immediately.
SYMBOL MEANING
WARNING:Signals a SERIOUS hazard.
Failure to obey a safety WARNING signal CAN result in
serious injury to yourself or to others.
CAUTION:Signals a MODERATE hazard.
Failure to obey a safety CAUTION signal MAY result in
property damage or injury to yourself or to others.
The purpose of safety symbols is to attract your attention to
possible dangers. The safety symbols, and their explanations,
deserve your careful attention and understanding. The safety
warnings do not by themselves eliminate any danger. The
instructions or warnings they give are not substitutes for proper
accident prevention measures.
NOTE: Advises you of information or instructions vital to the
operation or maintenance of the equipment.
DANGER:Signals an EXTREME hazard.
Failure to obey a safety DANGER signal WILL result in
serious injury or death to yourself or to others.
Read the operator’s manual and follow all warnings and safety
instructions. Failure to do so can result in serious injury to the
operator and/or bystanders.
CALIFORNIA PROPOSITION 65
WARNING:This product contains a
chemical known to the State of California to cause cancer,
birth defects or other reproductive harm.
WARNING:When using the unit, all safety
rules must be followed. Please read these instructions
before operating the unit in order to ensure the safety of
the operator and any bystanders. Please keep these
instructions for later use.

3
MINIMUM WIRE SIZE FOR EXTENSION CORDS FOR
120 VOLT APPLIANCES USING 0-6 AMPS
Cord Length (ft.) 25
Wire Size (AWG) 18
FCC STATEMENT
NOTE: This equipment has been tested and found to comply with the
limits for a Class B digital device, pursuant to part 15 of the FCC
Rules. These limits are designed to provide reasonable protection
against harmful interference in a residential installation. This
equipment generates, uses and can radiate radio frequency
energy and, if not installed and used in accordance with the
instructions, may cause harmful interference to radio
communications. However, there is no guarantee that interference
will not occur in a particular installation. If this equipment does
cause harmful interference to radio or television reception, which
can be determined by turning the equipment off and on, the user
is encouraged to try to correct the interference by one or more
of the following measures:
— Reorient or relocate the receiving antenna.
— Increase the separation between the equipment and receiver.
— Connect the equipment into an outlet on a circuit different
from that to which the receiver is connected.
— Consult the dealer or an experienced radio/TV technician for help.
WHILE OPERATING
• Wear safety glasses or goggles that meet current ANSI / ISEA
Z87.1 standards and are marked as such. Wear ear/hearing
protection when operating this unit. Wear a face or dust mask if
the operation is dusty.
• Wear heavy long pants, boots, gloves and a long sleeve shirt. Do
not wear loose clothing, jewelry, short pants, sandals or go
barefoot. Secure hair above shoulder level.
• Adjust the handle to provide the best grip, if applicable.
• Make sure the attachment is not in contact with anything before
starting the unit.
• Use the unit only in daylight or good artificial light.
• Use the right tool. Only use this tool for its intended purpose.
• Always hold the unit with both hands when operating. Keep a
firm grip on both handles or grips.
• Do not overreach. Always keep proper footing and balance. Take
extra care when working on stairs, steep slopes or inclines. To
avoid serious injury, do not operate the unit while on a ladder or
a roof.
• Do not operate the unit on wet surfaces.
• Keep hands, face, and feet away from all moving parts. Do not
touch or try to stop moving parts.
• Do not operate the unit faster than the speed needed to do the
job. Do not run the unit at high speed when not in use.
• Do not force the unit. It will do a better, safer job when used at
the intended rate.
• Always stop the unit when operation is delayed or when walking
from one location to another.
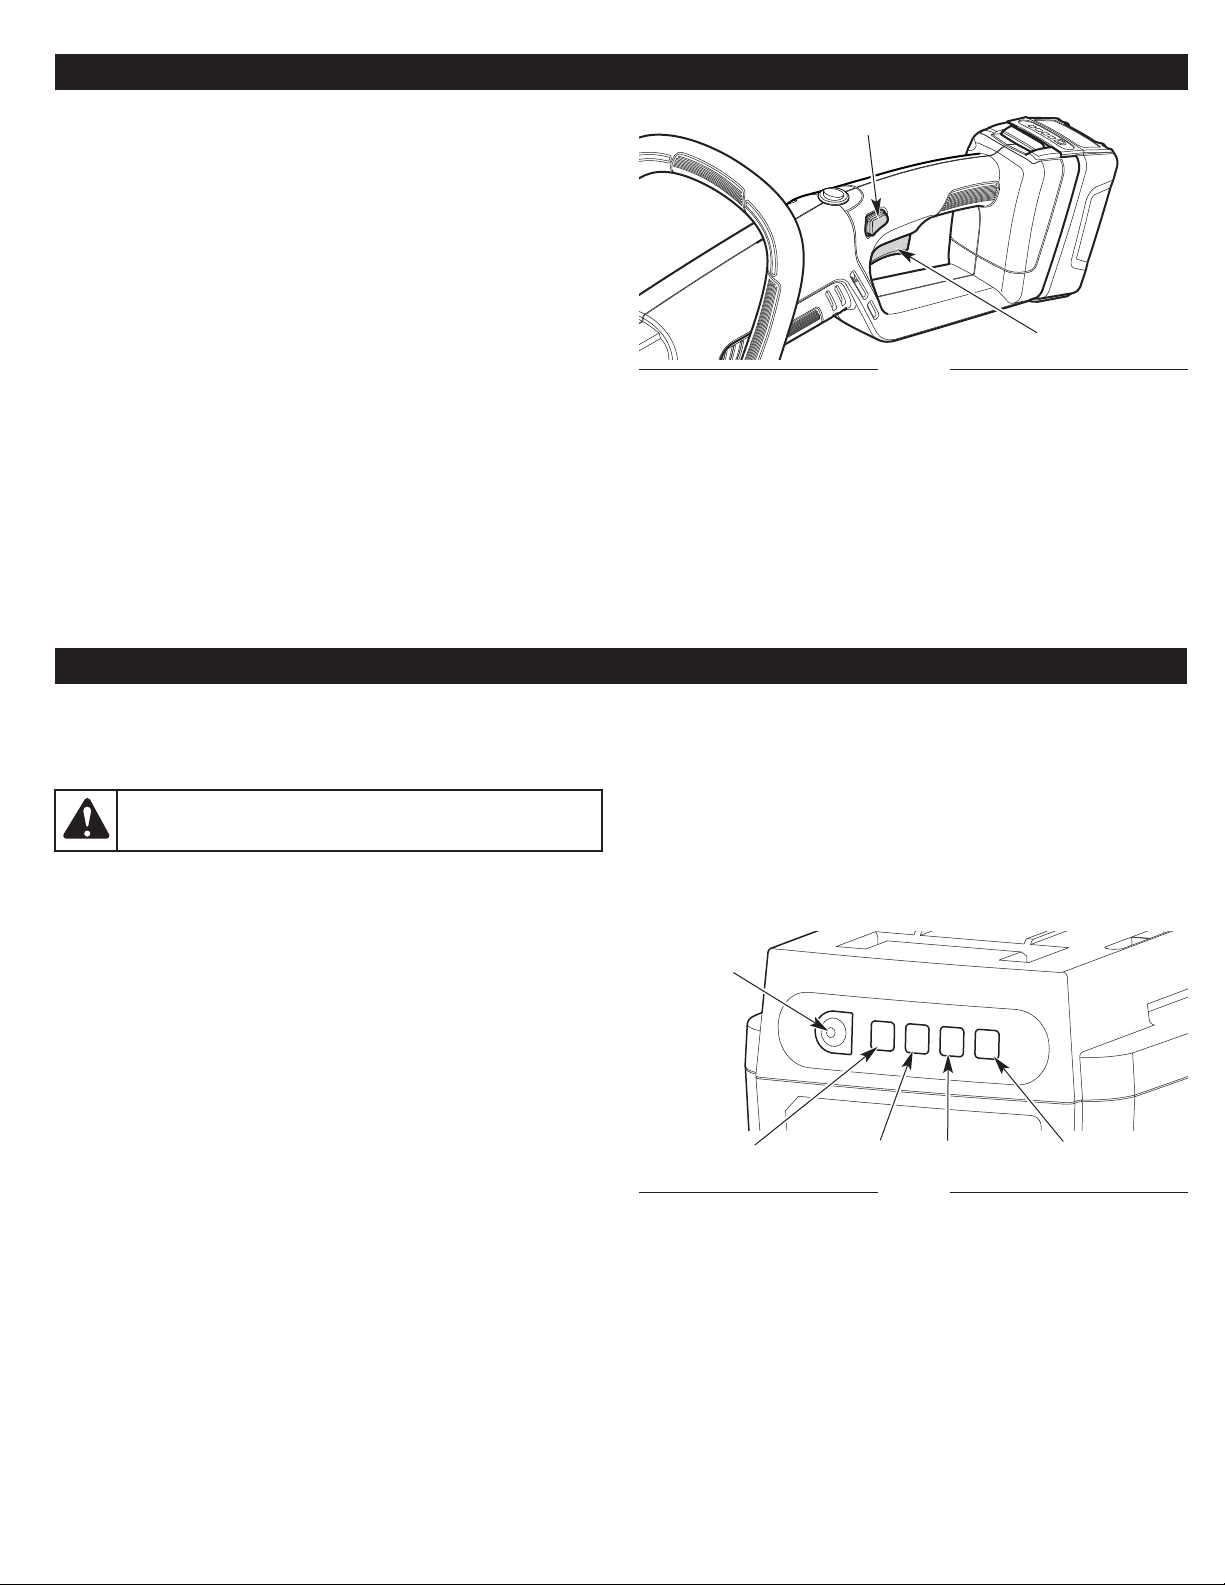
• Avoid starting the unit unintentionally. Make sure the lock-off
button is in the locked position before installing or removing the
battery. Never carry the unit with fingers on the throttle control.
• Remove the battery from the unit when it is not in use.
• Do not use the unit if the lock-off button and throttle control do
not start and stop the unit.
• If the unit strikes or becomes entangled with a foreign object,
stop the motor immediately, remove the battery and check for
damage. If damaged, do not restart or operate the unit until it is
repaired. Do not operate the unit with loose or damaged parts.
• Make sure the extension cord is heavy enough to carry the current
drawn by the unit. An undersized extension cord will cause a drop
in line voltage, resulting in a loss of power and overheating. If in
doubt, use the next heavier gauge cord. The smaller the gauge
number, the heavier the cord.
• Make sure the cords are in good condition. Inspect the power
cord and extension cord periodically. Look closely for
deterioration, cuts or cracks in the insulation. If a cord is
damaged in any manner while plugged in, disconnect the cord
from both the outlet and the unit. Do not use a damaged cord.
Damaged cords should be repaired or replaced.
• Do not abuse cords. Never pull or carry the unit by a cord. Keep
cords away from heat, oil, water, sharp edges, and moving
objects. Always grasp the plug when disconnecting a cord.
• Never modify a plug, cord or outlet in any way.
• Ground Fault Circuit Interrupter (GFCI) protection should be
provided on the circuit(s) or outlet(s) to be used with this unit.
For an extra measure of safety, use receptacles with built-in
GFCI protection.
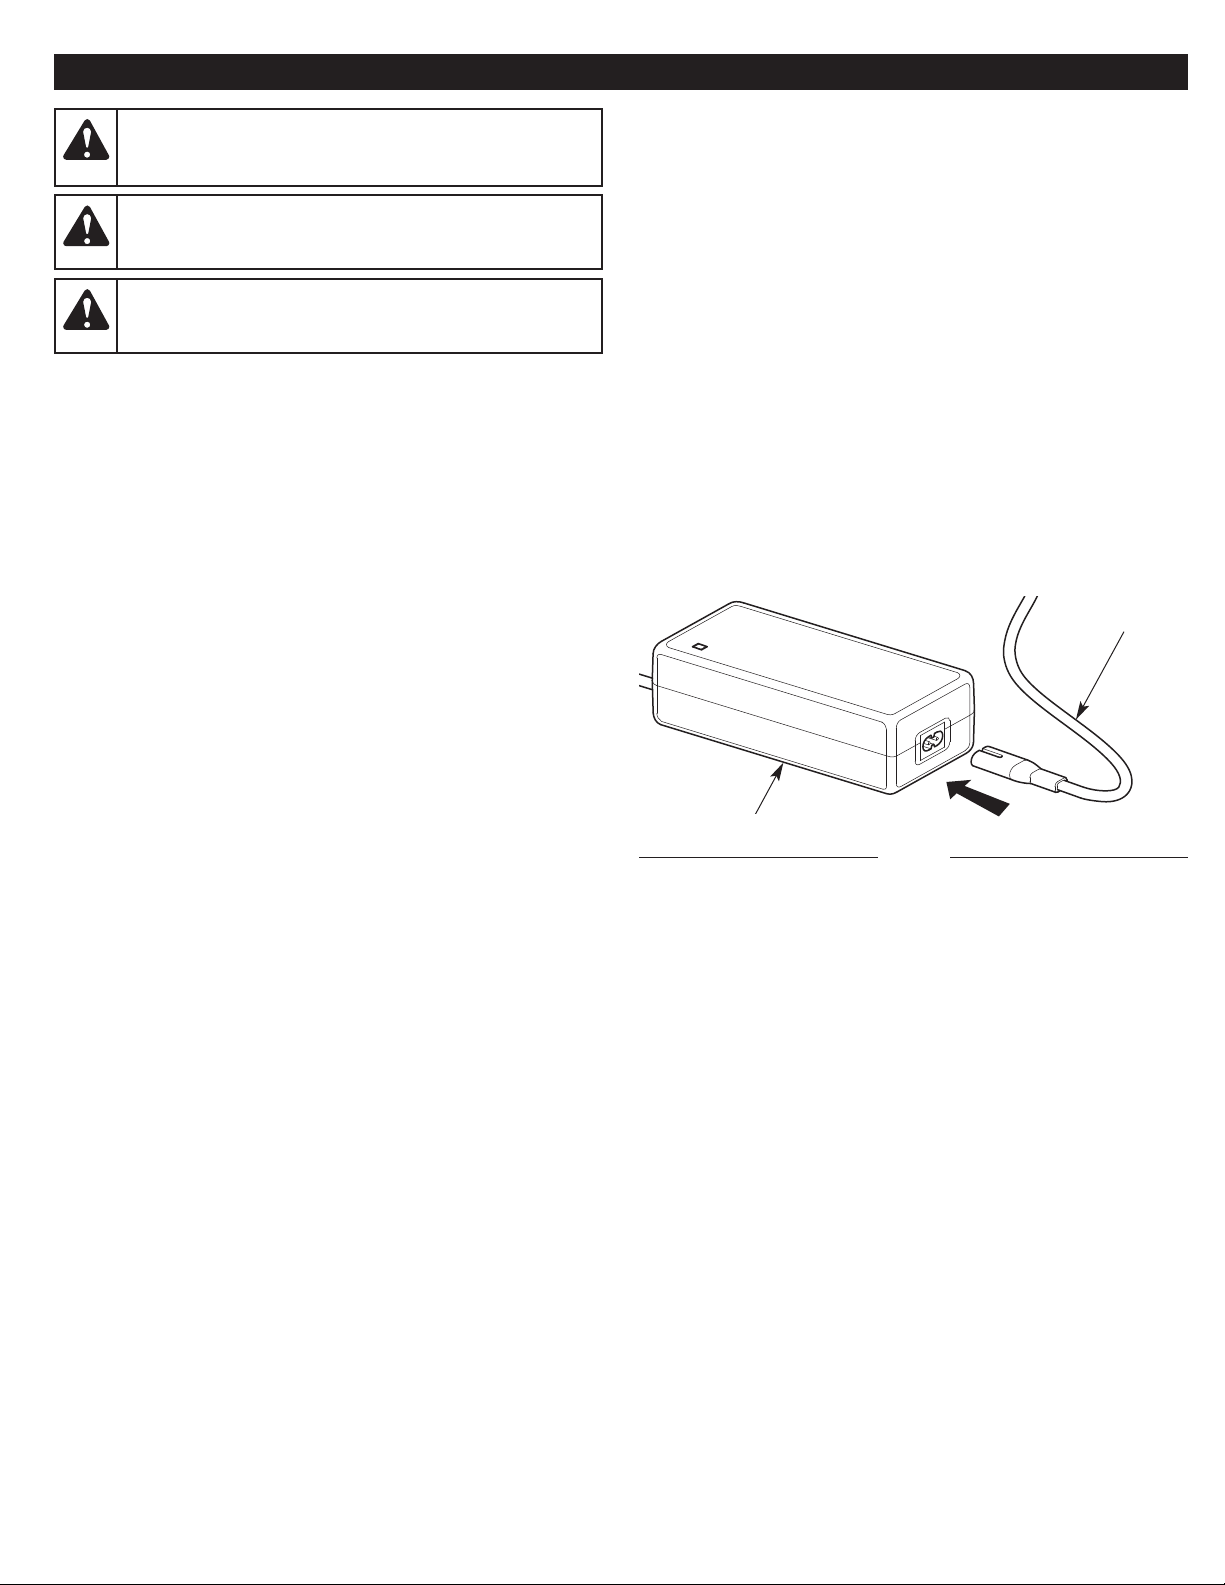
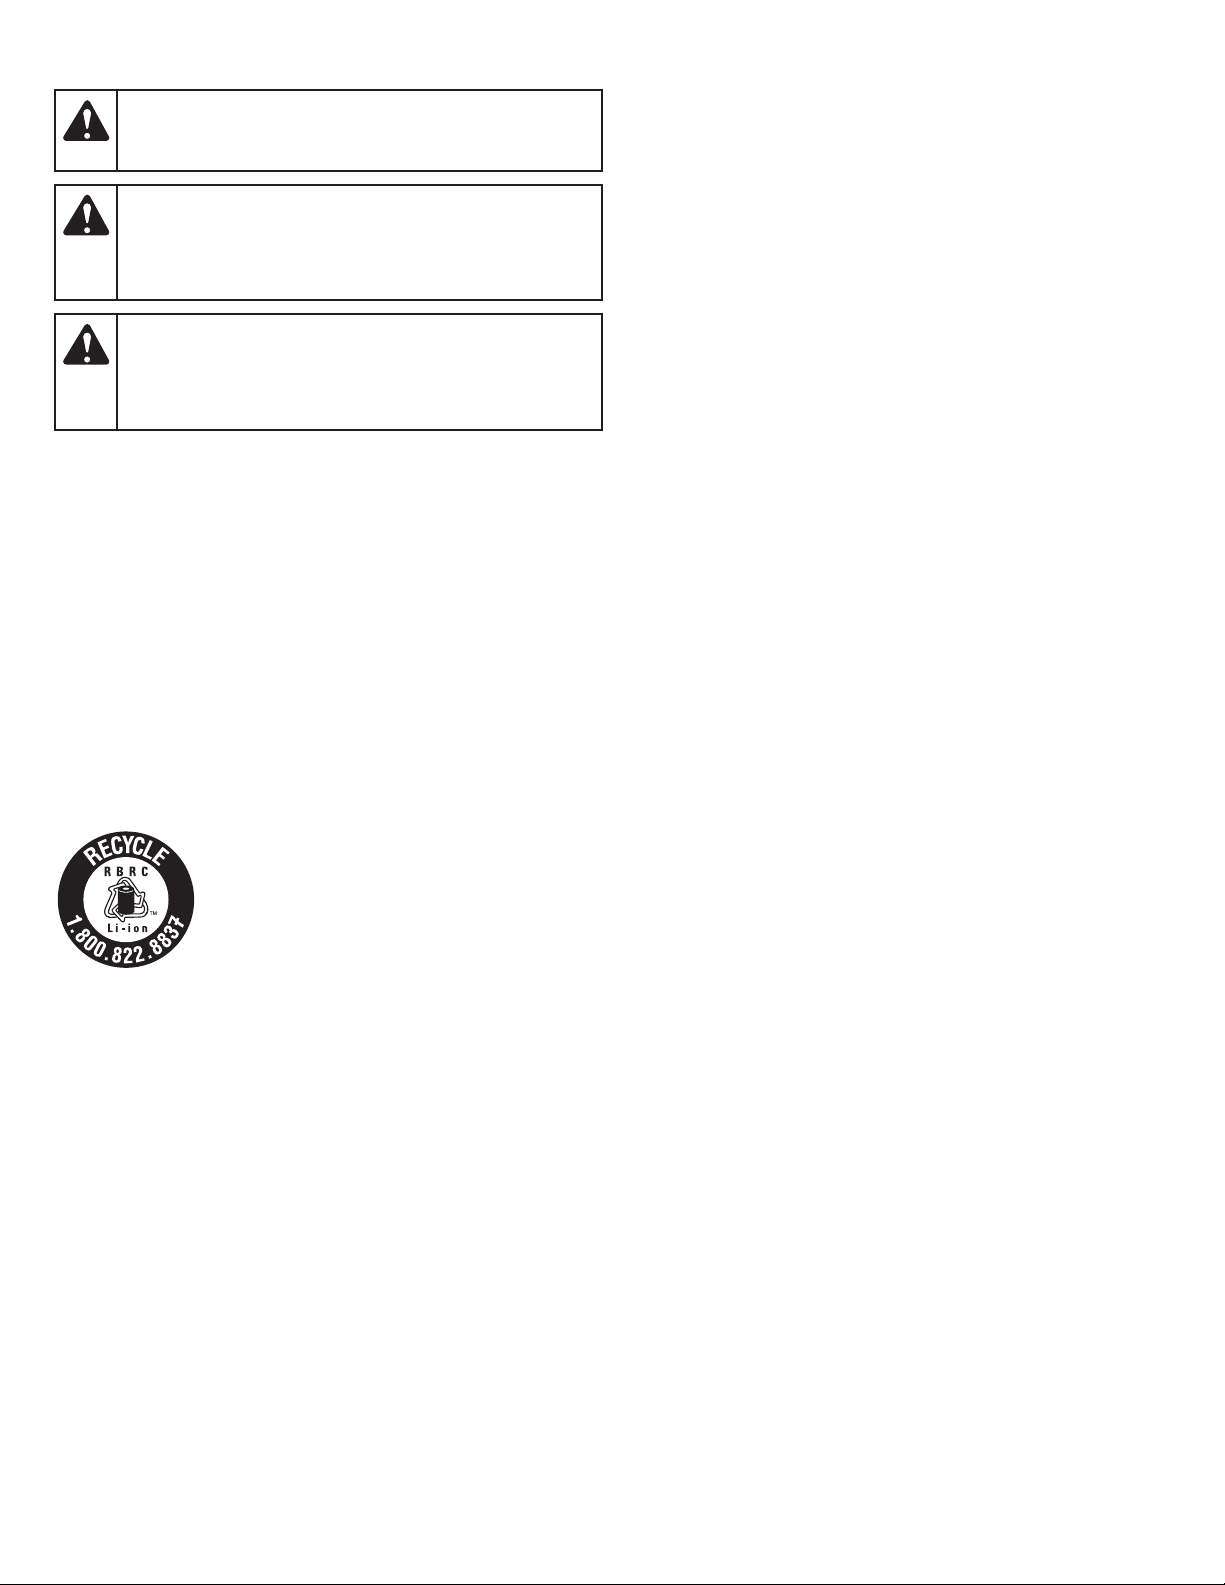
• Do not place the battery charger where cords might be stepped
on, tripped over or subjected to damage.
• Do not charge batteries in the rain or in wet conditions. Keep the
battery charger in a cool and dry area.
• Keep the battery charger away from all liquid.
• Do not allow small metal items or material such as steel wool,
aluminum foil or other foreign particles into the charger port.
• Do not probe the charger with conductive material. There is a
risk of electric shock.
• Do not cover the battery charger. The battery charger may
overheat.
• Do not allow the battery or battery charger to overheat. If they
are warm, allow them to cool down. Only charge batteries in
temperatures between 32° and 104° F (0° and 40° C).
• Always unplug the battery charger before cleaning it. Always
unplug the battery charger when it is not in use.
• Handle batteries with care. Do not short the battery with
conductive materials, such as rings, bracelets, keys, etc. Shorting
the battery may damage the battery or cause personal injury.
• When the battery is not in use, keep it away from small metal
objects, such as paper clips, coins, nails, etc. These items could
connect one terminal to another and short the battery.
• Do not attempt to charge a cracked or damaged battery.
WARNING:The battery may present a risk of
fire or chemical burn if mistreated. Do not disassemble,
overheat or incinerate the battery. The battery may develop a
small leak under extreme usage or temperature conditions.
If battery fluid contacts skin:
- Immediately wash the area with soap and water.
- Neutralize the battery fluid with a mild acid (lemon
juice, vinegar, etc.).
- Seek immediate medical attention.
If battery fluid gets in the eyes:
- Immediately flush the eyes with clean water for at
least 15 minutes.
- Seek immediate medical attention.
CAUTION:Changes or modifications not
expressly approved by the party responsible for compliance
could void the user's authority to operate the equipment.

4
OTHER SAFETY WARNINGS
• Maintain the unit with care.
• All service, other than the maintenance procedures described in this
manual, should be performed by an authorized service dealer.
• If the unit is not working as it should, has been dropped,
damaged, left outdoors or dropped into water, do not use the unit.
• Never remove, modify or make inoperative any safety device
furnished with the unit.
• Before inspecting, maintaining, cleaning, storing, transporting or
replacing any parts on the unit:
1. Stop the motor. Refer to Starting and Stopping.
2. Wait for all moving parts to stop.
3. Remove the battery.
4. Allow the unit to cool.
• Secure the unit while transporting.
• Store the unit in a dry place, secured or at a height to prevent
unauthorized use or damage. Keep the unit out of the reach of
children.
• Never douse or squirt the unit with water or any other liquid.
Avoid getting water in the motor and electrical connections.
Keep handles dry and clean (free from debris, oil and grease).
Clean the unit after each use. Refer to Cleaning and Storage. Do
not use solvents or strong detergents.
• Keep these instructions. Refer to them often and use them to
instruct other users. If you loan this unit to others, also loan
them these instructions.
SAVE THESE INSTRUCTIONS
• If the unit starts to vibrate abnormally, stop the motor, remove the
battery and allow the unit to cool. Then inspect the unit for the
cause of the vibration. Vibration is generally an indicator of trouble.
• Use only original equipment manufacturer (OEM) replacement
parts and accessories for this unit. These are available from your
authorized service dealer. Use of any other parts or accessories
could lead to serious injury to the user, or damage to the unit,
and void the warranty.
• Keep the unit clean. Carefully remove vegetation and other
debris that could block moving parts.
• SAFETY & INTERNATIONAL SYMBOLS •
This operator's manual describes safety and international symbols and pictographs that may appear on this product. Read the operator's
manual for complete safety, assembly, operating and maintenance and repair information.
SYMBOL MEANING SYMBOL MEANING
• SAFETY ALERT SYMBOL
Indicates danger, warning or caution. May be used in
conjunction with other symbols or pictographs.
• READ OPERATOR'S MANUAL
WARNING: Read the operator’s
manual(s) and follow all warnings and safety
instructions. Failure to do so can result in serious
injury to the operator and/or bystanders.
• WEAR EYE AND HEARING PROTECTION
WARNING:Thrown objects and loud
noise can cause severe eye injury and hearing loss.
Wear eye protection meeting current ANSI / ISEA
Z87.1 standards and ear protection when operating
this unit. Use a full face shield when needed.
• DO NOT USE IN THE RAIN
WARNING:Avoid dangerous
environments. Never operate the unit in the rain or in
damp or wet conditions. Moisture is a shock hazard.
• DOUBLE INSULATED
Two systems of insulation are provided instead of
grounding. There is no grounding provided and no
means of grounding should be added to the unit.

Front Handle
Rear Handle
Throttle Control
Battery
Lock-Off Button
LED
Charging Dock
Power Cord AC Adapter
Charge Meter Button
Charge Meter Lights
Battery Charger
Power Head
Power Control Button
5
KNOW YOUR UNIT
Several optional accessories may be used with this unit.
SPECIFICATIONS*
* All specifications are based on the latest product information available at the time of printing. We reserve the right to make changes at any
time without notice.
Motor Type . . . . . . . . . . . . . . . . . . . . . . . . . . . . . . . . . . . . . . . . . . . . . . . . . . . . . . . . . . . . . . . . . . . . . . . . . . . . . . . . . . . . . . . . . Direct Current (DC)
Motor Voltage. . . . . . . . . . . . . . . . . . . . . . . . . . . . . . . . . . . . . . . . . . . . . . . . . . . . . . . . . . . . . . . . . . . . . . . . . . . . . . . . . . . . . . . . . . . . . . up to 40 V
Approximate Unit Weight (without attachment and battery). . . . . . . . . . . . . . . . . . . . . . . . . . . . . . . . . . . . . . . . . . . . . . . . . 5 - 6 lbs. (2.3 - 2.7 kg)
Battery Type . . . . . . . . . . . . . . . . . . . . . . . . . . . . . . . . . . . . . . . . . . . . . . . . . . . . . . . . . . . . . . . . . . . . . . . . . . . . . . . . . . . . . . . . . . . . . . Lithium-Ion
Approximate Battery Weight . . . . . . . . . . . . . . . . . . . . . . . . . . . . . . . . . . . . . . . . . . . . . . . . . . . . . . . . . . . . . . . . . . . . . . . 1 - 1.5 lbs. (0.5 - 0.7 kg)
Optimum Charging Temperature . . . . . . . . . . . . . . . . . . . . . . . . . . . . . . . . . . . . . . . . . . . . . . . . . . . . . . . . . . . . . . . . . . 32° to 104° F (0° to 40° C)
Battery Charger Input . . . . . . . . . . . . . . . . . . . . . . . . . . . . . . . . . . . . . . . . . . . . . . . . . . . . . . . . . . . . . . . . . . . . . . . . . . . . . . . 120 V 60 Hz AC only
Battery Charger Output . . . . . . . . . . . . . . . . . . . . . . . . . . . . . . . . . . . . . . . . . . . . . . . . . . . . . . . . . . . . . . . . . . . . . . . . . . . . . . . . . . . up to 2 Amps
Battery Charger Weight . . . . . . . . . . . . . . . . . . . . . . . . . . . . . . . . . . . . . . . . . . . . . . . . . . . . . . . . . . . . . . . . . . . . . . . . . . . . . . . . . . 1.5 lbs. (0.7 kg)
NO ASSEMBLY TOOLS REQUIRED

6
ASSEMBLY
INSTALLING THE ATTACHMENT
Refer to the attachment operator’s manual for specific assembly
instructions.
WARNING: Only use RM300 series attachments with
this unit. Using other attachments could result in personal
injury and damage to the unit.
WARNING: To avoid serious personal injury and
damage to the unit, shut the unit off before removing or
installing an attachment.
WARNING: Before using any attachment, read and
understand the manual that came with the attachment.
Follow all safety information contained within.
ASSEMBLING THE BATTERY CHARGER
1. Plug the power cord into the AC adapter (Fig. 1).
NOTE: The battery charger can be mounted to a permanent surface,
such as a wall or work bench. Use mounting fasteners (not
included) capable of supporting the combined weight of the
battery and battery charger. Keep the AC adapter horizontal and
firmly supported. Do not allow the AC adapter to hang or dangle.
Fig. 1
Power Cord
AC Adapter

7
CHARGING THE BATTERY
NOTE: The battery is not shipped fully charged.
NOTE: Lithium-ion batteries will not develop a memory and may be
charged at any time.
For maximum run time, fully charge the battery before each use.
1. Plug the battery charger into an appropriate power outlet. The
LED (Fig. 2) will turn green after a few seconds. If the LED does
not illuminate, make sure the battery charger is securely
assembled and test the power outlet with another electric device.
NOTE: On the first use of the battery charger, the LED may take up
to 2 minutes to illuminate.
2. Insert the battery into the charging dock (Fig. 2). The LED will
either stay green, turn red, or blink red.
•Green: The battery is fully charged or incompletely connected
to the battery charger.
Check the battery charge level (refer to the battery operator’s
manual for complete instructions).
- If the battery is fully charged, proceed to step 3.
- If the battery is not fully charged, remove and then firmly
reinsert the battery into the charging dock. If the LED remains
green, remove the battery from the charging dock and unplug
the battery charger from the power outlet. Remove any debris
that may be present in the charging dock. Plug the battery
charger into the power outlet and insert the battery into the
charging dock. If the LED remains green, replace the battery
and battery charger.
•Red: The battery requires charging.
Charge the battery until the LED turns green.
•Blinking Red: The battery is experiencing temperature or
internal electrical issues.
Remove and then reinsert the battery into the charging dock. If
the LED continues to blink red, remove the battery from the
charging dock and unplug the battery charger from the power
outlet. Remove any debris that may be present in the charging
dock. Plug the battery charger into the power outlet and insert
the battery into the charging dock. If the LED continues to
blink red, remove the battery from the battery charger, allow it
to cool for 30 minutes, then reinsert the battery into the
charging dock. If the LED continues to blink red, replace the
battery and/or battery charger.
3. Once the battery is fully charged, remove it from the battery
charger. Optionally, the battery can be stored in the battery charger,
but the battery charger should be unplugged from the power outlet.
Fig. 2
Battery
LED
Charging Dock
INSTALLING AND REMOVING THE BATTERY
Installing the Battery
1. Grasp the rear handle firmly.
2. Push the battery into the battery port until the battery latch locks
into place (Fig. 3). The battery should slide into position and
“click.”
Removing the Battery
1. Grasp the rear handle firmly.
2. Push the battery latch away from the battery (Fig. 3).
3. Pull the battery out of the battery port (Fig. 3).
NOTE: It may require a strong pull to remove the battery.
WARNING: Avoid accidentally starting the unit. To avoid
serious injury, make sure the lock-off button is disengaged
before installing or removing the battery. Refer to Starting
and Stopping.
Fig. 3
Battery
Battery Latch
Rear Handle
Battery Port

8
STARTING AND STOPPING
STARTING INSTRUCTIONS
To prevent the motor from starting accidentally, the lock-off button
and throttle control must both be engaged to start the unit.
1. Install the battery. Refer to Installing the Battery.
2. Press and hold the lock-off button (Fig. 4).
3. While continuing to hold the lock-off button, squeeze and hold
the throttle control (Fig. 4).
4. Release the lock-off button, but continue to squeeze the throttle
control to the degree needed for operation.
STOPPING INSTRUCTIONS
1. Release the throttle control and wait for all moving parts to come
to a complete stop (Fig. 4).
Fig. 4
Lock-Off Button
Throttle Control
OPERATION
For specific, detailed instructions, refer to the Operation section of
the operator’s manual for the attachment used during operation.
WARNING: Do not expose power tools to rain or wet
conditions.
CHECKING THE BATTERY CHARGE LEVEL
Press the charge meter button on the battery. The number of lights
that illuminate will indicate the current charge level of the battery
(Fig. 5). If all four lights are dark, charge the battery before any
further use.
NOTE: While in use, lithium-ion batteries provide power with
minimal power fade. When the battery is fully discharged, it will
immediately cut power to the unit and require charging.
NOTE: The unit will automatically shut off power if the battery is
overloaded during heavy use. Once cooled, the unit will reset
itself. Follow these steps if an overload occurs:
1. Stop and then restart the unit. Refer to Starting and Stopping.
2. If necessary, remove the battery, allow it to cool for
approximately 1 minute and then reinstall the battery. Refer to
Installing and Removing the Battery.
Fig. 5
Charge Meter
Button
75% - 100%50% - 75%25% - 50%0% - 25%

9
HOLDING THE UNIT
• Hold the rear handle with one hand. Keep that arm slightly bent.
• Hold the front handle with the other hand. Keep that arm straight.
WARNING: Always wear eye, hearing, hand, foot and
body protection to reduce the risk of injury when operating
this unit.
USING THE POWER CONTROL BUTTON
The power control button allows the operator to switch between
Boost and Eco modes, as needed:
•Boost mode provides maximum power for tough jobs.
•Eco mode conserves energy for maximum run time. Eco mode
is appropriate for most jobs.
Press the power control button forward for Boost mode. Press the
power control button backward for Eco mode. The power control
button will stay in the mode selected without the need to hold the
button in place.
Fig. 6
Power Control Button
Boost Eco
MAINTENANCE
WARNING: To prevent serious injury, never perform
maintenance on the unit while it is running. Always remove
the battery to prevent the unit from starting accidentally.
Always allow the unit to cool before maintaining the unit.
Before maintaining the battery charger, always unplug it
from the power outlet.
MAINTAINING THE BATTERY CHARGER
• Keep the battery charger clean and clear of debris. Do not allow
foreign material into the charging dock or onto the terminals (Fig. 7).
Inspect the battery charger for foreign material before each use.
• Make sure the charger has not been shorted by debris. Inspect
the terminals for soot and signs of melting. Do not attempt to
use a shorted charger.
Fig. 7
Terminals
Charging Dock

10
DISPOSING OF DAMAGED OR WORN-OUT BATTERIES
To avoid personal injury and damage to the environment:
• Do not attempt to remove or destroy any of the battery
components. Do not open or mutilate the battery. If a leak
develops, released electrolytes are corrosive and toxic. Do not get
the solution in your eyes or on your skin, and do not swallow it.
• Do not dispose of the battery in the regular household trash.
• Do not dispose of the battery in a fire. The cell may explode.
• Do not dispose of the battery where it will become part of any
waste landfill or municipal solid waste stream.
• Cover the battery terminals with heavy-duty adhesive tape.
• Dispose of the battery according to local, state and federal
regulations.
• Dispose of the battery promptly.
WARNING: To prevent contamination of the environment,
contact your local waste disposal agency for specific
instructions before disposing of damaged or worn-out
lithium-ion batteries. Take batteries to a local recycling and/or
disposal center, certified for lithium-ion battery disposal.
WARNING: Do not use broken or cracked batteries,
even if there isn't leakage. Replace damaged or worn-out
batteries with new batteries. DO NOT ATTEMPT TO
REPAIR BATTERIES! Repair attempts may result in severe
personal injury, due to explosion or electrical shock.
WARNING: The following toxic and corrosive material is
used in this unit's battery:
LITHIUM-ION, a toxic material.
About Call2Recycle Battery Seals
Call2Recycle’s industry steward program helps
battery and product manufacturers fulfill recycling
requirements in the U.S. and Canada, including
compliance with extensive state, provincial and
federal regulations, such as the Mercury-
Containing and Rechargeable Battery Act (The
Battery Act). Call2Recycle®Licensees/Industry
Stewards, participating battery and product manufacturers and
marketers, purchase the rights to imprint the Call2Recycle Battery
Seals on their rechargeable batteries and products. When you see the
Call2Recycle Battery Seal, you can feel confident knowing that your
battery or product can be safely and responsibly recycled.
About Call2Recycle
Since 1994, Call2Recycle has diverted more than 75 million pounds
of rechargeable batteries from local landfills and established a
network of 30,000 recycling drop-off locations. More than 200 battery
and/or product manufacturers, Call2Recycle Industry Stewards,
have united to ensure that batteries are responsibly recycled when
they reach their end of life and fund the program that is operated by
Call2Recycle, Inc., a 501(c)4 nonprofit public service organization.
To locate the nearest recycling center, please call 1-800-822-8837.

11
CLEANING AND STORAGE
CLEANING
Use a small brush or clean, dry cloth to clean the outside of the unit,
battery and battery charger.
STORAGE
• Remove the battery from the unit.
• Allow the unit to cool.
• Thoroughly clean the unit and inspect it for any loose or
damaged parts. Replace damaged parts and tighten loose
screws, nuts or bolts.
• Lock up the unit to prevent unauthorized use or damage.
• Store the unit indoors, in a dry, well-ventilated area.
• Store the battery and battery charger in an area that is between
65 and 75˚ F (18 and 24˚ C).
• Always unplug the battery charger when it is not in use.
• Store the unit out of the reach of children.
• If the battery is left unused for more than two months, fully
charge the battery before use.
WARNING: To prevent serious injury, never clean the
unit while it is running. Always remove the battery to
prevent the unit from starting accidentally. Always allow the
unit to cool before cleaning the unit. Always unplug the
battery charger before cleaning the battery charger.
WARNING: To prevent serious injury, do not use water
to clean the unit, battery or battery charger. Do not use
strong detergents. Household cleaners that contain
aromatic oils such as pine and lemon, and solvents such
as kerosene, can damage plastic.
The battery charger is not plugged in Plug the battery charger into a 120V 60hz AC source
The battery charger is not firmly assembled Disconnect and then reassemble the battery charger. Refer to
Assembling the Battery Charger.
The battery is not fully inserted into the battery charger Remove and then reinsert the battery into the battery charger
completely
The battery is too hot Allow the battery to cool for 30 minutes before charging
The battery and/or battery charger are no longer functional Refer to the Warranty section for replacement information
TROUBLESHOOTING
The battery lacks sufficient charge Charge the battery completely
The battery is not installed correctly Remove and reinstall the battery
The lock-off button was not engaged Press and hold the lock-off button before squeezing the throttle
control
PROBLEM SOLUTION
The battery is not fully charged Charge the battery completely
The battery and/or battery charger are no longer functional Refer to the Warranty section for replacement information
THE BATTERY WILL NOT CHARGE
THE BATTERY DIES QUICKLY
THE MOTOR WILL NOT RUN

12
The limited warranty set forth below is given by Remington LLC (Remington) with respect to new merchandise purchased and used in the
United States, its possessions and territories.
Remington warrants this product against defects in material and workmanship for a period of two (2) years commencing on the date of
original purchase and will, at its option, repair or replace, free of charge, any part found to be defective in material or workmanship. This
limited warranty shall only apply if this product has been operated and maintained in accordance with the Operator’s Manual furnished with
the product, and has not been subject to misuse, abuse, commercial use, neglect, accident, improper maintenance, alteration, vandalism,
theft, fire, water or damage because of other peril or natural disaster. Damage resulting from the installation or use of any accessory or
attachment not approved by Remington for use with the product(s) covered by this manual will void your warranty as to any resulting
damage.
Standard Warranty Battery: Remington warrants this new battery and any parts thereof to be free from defects in material and
workmanship for a period of one (1) year from the date of first purchase from an authorized dealer provided the product has been maintained
and operated in accordance with Remington’s warnings and instructions.
HOW TO OBTAIN SERVICE: Warranty service is available, WITH PROOF OF PURCHASE THROUGH YOUR LOCAL AUTHORIZED SERVICE
DEALER. To locate the dealer in your area, visit our website at www.remingtonpowertools.com, check for a listing in the Yellow Pages, call
1-866-206-2707 in the United States or 1-877-696-5533 in Canada, or write to P.O. Box 361032, Cleveland, OH 44136. No product returned
directly to the factory will be accepted unless prior written permission has been extended by the Customer Service Department of Remington.
This limited warranty does not provide coverage in the following cases:
A. Tune-ups - Spark Plugs, Carburetor Adjustments, Filters
B. Wear items - Bump Knobs, Outer Spools, Cutting Line, Inner Reels, Starter Pulley, Starter Ropes, Drive Belts, Saw Chains, Guide Bars,
Cultivator Tines, Blades.
C. Remington does not extend any warranty for products sold or exported outside of the United States of America, its possessions and
territories, except those sold through Remington’s authorized channels of export distribution.
Remington reserves the right to change or improve the design of any Remington Product without assuming any obligation to modify any
product previously manufactured.
No implied warranty, including any implied warranty of merchantability or fitness for a particular purpose, applies after the
applicable period of express written warranty above as to the parts as identified. No other express warranty or guaranty, whether
written or oral, except as mentioned above, given by any person or entity, including a dealer or retailer, with respect to any product
shall bind Remington. During the period of the Warranty, the exclusive remedy is repair or replacement of the product as set forth
above. (Some states do not allow limitations on how long an implied warranty lasts, so the above limitation may not apply to you.)
The provisions as set forth in this Warranty provide the sole and exclusive remedy arising from the sales. Remington shall not be
liable for incidental or consequential loss or damages including, without limitation, expenses incurred for substitute or replacement
lawn care services, for transportation or for related expenses, or for rental expenses to temporarily replace a warranted product.
(Some states do not allow limitations on how long an implied warranty lasts, so the above limitation may not apply to you.)
In no event shall recovery of any kind be greater than the amount of the purchase price of the product sold. Alteration of the safety features
of the product shall void this Warranty. You assume the risk and liability for loss, damage, or injury to you and your property and/or to others
and their property arising out of the use or misuse or inability to use the product.
This limited warranty shall not extend to anyone other than the original purchaser, original lessee or the person for whom it was purchased
as a gift.
How State Law Relates to this Warranty: This warranty gives you specific legal rights, and you may also have other rights which vary from
state to state.
To locate your nearest service dealer, dial 1-866-206-2707 in the United States or 1-877-696-5533 in Canada.
REMINGTON LLC
P.O. Box 361032
Cleveland, OH 44136
MANUFACTURER’S LIMITED WARRANTY FOR:

769-09053 / 00 08/13
BC
Manuel de l'utilisateur
RM300-PH
Tête motorisée à batterie lithium-Ion
TABLE DES MATIÈRES
Service technique . . . . . . . . . . . . . . . . . . . . . . . . . . . . . . . . . . . . .13
Sécurité . . . . . . . . . . . . . . . . . . . . . . . . . . . . . . . . . . . . . . . . . . . . .14
Apprenez à connaître votre appareil . . . . . . . . . . . . . . . . . . . . . . .18
Caractéristiques . . . . . . . . . . . . . . . . . . . . . . . . . . . . . . . . . . . . . .18
Assemblage . . . . . . . . . . . . . . . . . . . . . . . . . . . . . . . . . . . . . . . . . .19
Mise en marche et arrêt . . . . . . . . . . . . . . . . . . . . . . . . . . . . . . . .21
Utilisation . . . . . . . . . . . . . . . . . . . . . . . . . . . . . . . . . . . . . . . . . . . .22
Entretien . . . . . . . . . . . . . . . . . . . . . . . . . . . . . . . . . . . . . . . . . . . .23
Nettoyage et rangement . . . . . . . . . . . . . . . . . . . . . . . . . . . . . . . .24
Dépannage . . . . . . . . . . . . . . . . . . . . . . . . . . . . . . . . . . . . . . . . . .25
Garantie . . . . . . . . . . . . . . . . . . . . . . . . . . . . . . . . . . . . . . . . . . . . .26
SERVICE TECHNIQUE
Pour une utilisation avec les batteries RM300-PK (RM36V2AH-A)
Pour une utilisation avec les chargeurs de batterie RM300-CH
(RM36VCGR-A)
(batterie et chargeur de batterie compris)
CONSERVEZ CES
INSTRUCTIONS
NE PAS RETOURNER CET APPAREIL À VOTRE
REVENDEUR. UNE PREUVE D'ACHAT SERA NÉCESSAIRE
POUR TOUTE RÉPARATION SOUS GARANTIE.
Pour obtenir de l'aide sur l'assemblage, les commandes, le
fonctionnement ou la maintenance de l'appareil, veuillez appeler le
service d'assistance à la clientèle au 1-866-206-2707 aux États-Unis ou
au 1-877-696-5533 au Canada. Des renseignements supplémentaires
sur l'appareil peuvent être trouvés sur notre site Web au
www.remingtonpowertools.com.
Veuillez appeler le service d'assistance à la clientèle pour les pièces
de rechange. Lors de l'entretien, utilisez uniquement des pièces de
rechange identiques.
Tous les renseignements contenus dans ce manuel reposent sur les
données les plus récentes disponibles au moment de l'impression.
Nous nous réservons le droit d'apporter des modifications aux
spécifications à tout moment, et ce, sans préavis.
Copyright© 2013 MTD SOUTHWEST INC, Tous droits réservés.
IMPORTANT : Lisez attentivement ce manuel avant d'utiliser ce produit. Respectez toutes les instructions.

14
AVERTISSEMENTS DE SÉCURITÉ CONCERNANT LES
UNITÉS ÉLECTRIQUES
Sécurité électrique générale
• N'exposez pas l'appareil à la pluie ou par temps humide.
• N'actionnez pas l'appareil avec les mains mouillées.
• N'utilisez pas l'appareil sous la pluie, par temps humide ou sur
des surfaces humides.
• CONSIGNES DE SÉCURITÉ IMPORTANTES •
CONSIGNES GÉNÉRALES DE SÉCURITÉ
• Lisez soigneusement ces instructions. Familiarisez-vous avec
les commandes et l'utilisation adéquate de l'appareil.
• Avant d'utiliser un accessoire, lire et comprendre le manuel livré
avec l'accessoire. Respectez toutes les consignes de sécurité
qu’il contient.
• Ne faites pas fonctionner cet appareil lorsque vous êtes fatigué,
malade ou sous l'influence d'alcool, de drogues ou de
médicaments.
• Les enfants ne doivent pas utiliser l'appareil. Les adolescents
doivent être accompagnés et guidés par un adulte.
• Tous les carters et dispositifs de sécurité doivent être
correctement installés avant l’utilisation de cet appareil.
LISEZ TOUTES LES INSTRUCTIONS AVANT L'UTILISATION • Inspectez l'appareil avant l'utilisation. Remplacez les pièces
endommagées. Assurez-vous que toutes les fixations sont en place
et bien serrées. Remplacez les pièces fissurées, ébréchées ou
endommagées d’une manière ou d’une autre. Ne faites pas
fonctionner l'appareil avec des pièces lâches ou endommagées.
• Vous devez être conscient des risques de blessures à la tête,
aux mains et aux pieds.
• Inspectez attentivement la zone de travail avant de démarrer
l’appareil. Retirez les pierres, le verre cassé, les clous, les fils, les
ficelles et autres objets qui peuvent être projetés ou s’enrouler
dans l’appareil.
• Éloignez les enfants, les passants et les animaux domestiques ;
ils doivent rester dans un rayon d’au moins 15 mètres (50 pieds).
Même à cette distance, il existe néanmoins un risque de
projectiles pour les personnes à proximité. Encouragez-les à
porter des lunettes de sécurité. Si quelqu’un s’approche de
vous, arrêtez immédiatement l’appareil.
AVERTISSEMENT :Lorsque vous
utilisez l'appareil, toutes les règles de sécurité doivent être
respectées. Afin d'assurer la sécurité de l'opérateur et de
tout passant, veuillez lire ces instructions avant d'utiliser
l'appareil. Veuillez garder ces instructions à des fins
d'utilisation ultérieure.
SÉCURITÉ
L'objectif des symboles de sécurité consiste à attirer votre
attention sur d'éventuels dangers. Les symboles de sécurité, et
leurs explications, méritent votre attention et compréhension. Les
consignes de sécurité n'éliminent pas d'eux-mêmes tous les
dangers. Les instructions ou avertissements qu'ils donnent ne
remplacent pas les mesures adéquates de prévention des accidents.
SYMBOLE SIGNIFICATION
AVERTISSEMENT :Signale un
danger SÉRIEUX.
Le non-respect d'un signal d'AVERTISSEMENT sur le plan
de la sécurité PEUT entraîner des blessures graves pour
vous ou pour autrui.
DANGER :Signale un danger EXTRÊME.
Le non-respect d'un signal de DANGER sur le plan de la
sécurité ENTRAÎNERA des blessures graves, voire la mort
pour vous ou pour autrui.
ATTENTION :indique un danger MODÉRÉ.
Le non-respect d’un symbole ATTENTION POURRAIT
provoquer des blessures ou des dommages des biens
de l’opérateur ou d’autres personnes.
REMARQUE : Vous donne des informations ou des instructions
vitales au fonctionnement ou à l'entretien du matériel.
Lisez le manuel de l'utilisateur et suivez tous les avertissements
et toutes les consignes de sécurité. Le non-respect de cette
procédure peut entraîner des blessures graves pour l'opérateur
ou les passants.
PROPOSITION 65 DE LA CALIFORNIE
AVERTISSEMENT :Ce produit
contient un composé chimique reconnu dans l'état de la
Californie comme produit pouvant provoquer des cancers
et des malformations congénitales et affecter l'appareil
reproducteur.

15
• Pour réduire le risque de décharge électrique, évitez tout contact
corporel avec des conducteurs de terre, comme les tuyaux
métalliques ou les grillages.
• N'utilisez pas l'appareil dans des atmosphères explosives, comme
en présence de liquides inflammables, de gaz ou de poussières.
• Utilisez uniquement cet appareil avec des batteries RM300-PK
(RM36V2AH-A). Chargez seulement les batteries RM300-PK
(RM36V2AH-A) avec les chargeurs de batterie RM300-CH
(RM36VCGR-A). Utilisez uniquement les chargeurs de batterie
RM300-CH (RM36VCGR-A) avec des batteries RM300-PK
(RM36V2AH-A).
Sécurité en matière de batterie et de chargeur de batterie
• Une plaque signalétique sur l'appareil indique la tension utilisée.
Ne branchez jamais l'appareil à une tension alternative qui
diffère de cette tension.
• Un cordon prolongateur ne devrait être utilisé qu'en cas
d'absolue nécessité. L'utilisation d'un cordon prolongateur
inadéquat peut entraîner un risque d'incendie, de décharge
électrique ou d'électrocution.
• N'utilisez pas plusieurs cordons prolongateurs.
• Assurez-vous que le cordon prolongateur est de calibre adéquat
pour le courant consommé par l'appareil. Un cordon à la
capacité insuffisante causerait une baisse de tension entraînant
une perte de puissance et une surchauffe. En cas de doute,
utilisez le cordon prolongateur du calibre supérieur. Plus le
chiffre est petit, plus le calibre est élevé.
• Assurez-vous que les cordons prolongateurs sont en bon état.
Inspectez régulièrement le fil d'alimentation et le cordon
prolongateur. Observez attentivement toute détérioration, coupure
ou fissure de l'isolation. Si un cordon est endommagé de quelque
manière que ce soit tout en étant branché, débranchez-le de la prise
et de l'appareil. N'utilisez pas un cordon endommagé. Les
cordons endommagés doivent être réparés ou remplacés.
• Ne pas abuser des cordons. Ne tirez ni ne transportez jamais
l'appareil par le cordon. Gardez les cordons à l'écart de la chaleur,
de l'huile, de l'eau, des objets tranchants et des objets en
mouvement. Saisissez toujours la fiche pour débrancher le cordon.
• Ne modifiez jamais une fiche, un cordon ou une prise en aucune
façon.
• La protection du disjoncteur de fuite à la terre doit être prévue
sur les circuits ou sur les prises pour être utilisée avec cet
appareil. Par mesure de sécurité supplémentaire, utilisez des
prises avec une protection de disjoncteur de fuite à la terre intégrée.
• Ne placez pas le chargeur de batterie de manière à éviter qu'il
soit possible de marcher sur le cordon, de trébucher dessus, ou
de l'endommager.
• Ne chargez pas la batterie sous la pluie ou par temps humide.
Gardez le chargeur de batterie dans un endroit frais et sec.
• Gardez le chargeur de batterie à l'écart de tout liquide.
• Ne laissez pas de petits objets métalliques ou de matériaux tels
que la laine d'acier, le papier d'aluminium ou d'autres particules
étrangères pénétrer dans le port du chargeur.
• Ne sondez pas le chargeur avec un matériau conducteur. Il y a
un risque de décharge électrique.
• Ne couvrez pas le chargeur de batterie. Le chargeur de batterie
peut surchauffer.
• Ne laissez pas la batterie ou le chargeur de batterie surchauffer.
S'ils sont chauds, laissez-les refroidir. Ne chargez les batteries dans
des températures comprises entre 0 °C et 40 °C (32 ° et 104 °F).
• Débranchez toujours le chargeur avant de le nettoyer. Débranchez
toujours le chargeur de batterie quand il n'est pas utilisé.
• Manipulez les batteries avec soin. Ne court-circuitez pas avec
des matériaux conducteurs tels que bagues, bracelets, clés, etc.
Le court-circuitage de la batterie peut l'endommager ou
provoquer des blessures.
• Lorsque la batterie n'est pas en cours d'utilisation, tenez-la
éloignée des petits objets métalliques tels que les trombones,
les pièces de monnaie, les clous, etc. Ces articles pourraient
connecter un terminal à un autre et les court-circuiter.
• N'essayez pas de charger une batterie fissurée ou endommagée.
CALIBRE MINIMAL DES CORDONS PROLONGATEURS
D'APPAREILS DE 120 VOLTS UTILISANT DE 0 À 6
AMPÈRES
Longueur du cordon (pieds) 25
Calibre du cordon (AWG) 18
AVERTISSEMENT :La batterie
peut présenter un risque d'incendie ou de brûlure chimique
si elle est mal manipulée. Ne démontez, chauffez ou
incinérez pas la batterie. La batterie peut développer une
petite fuite lors d'utilisation ou de conditions de
température extrêmes.
Si du liquide à batterie entre en contact avec la peau :
- Lavez immédiatement la zone touchée avec de l'eau
et du savon.
- Neutralisez le liquide à batterie avec un acide doux
(jus de citron, vinaigre, etc.).
- Consultez immédiatement un médecin.
Si du liquide à batterie pénètre dans les yeux :
- Rincez immédiatement les yeux avec de l'eau propre,
et ce, pendant au moins 15 minutes.
- Consultez immédiatement un médecin.
DÉCLARATION DE LA FCC
REMARQUE : Cet équipement a été testé et s'est avéré conforme
aux limites pour un appareil numérique de classe B,
conformément à la partie 15 des règles de la FCC. Ces limites sont
conçues pour fournir une protection raisonnable contre les
interférences nuisibles dans une installation résidentielle. Cet
équipement génère, utilise et peut émettre des fréquences radio
et, s'il n'est pas installé et utilisé conformément aux instructions, il
peut causer des interférences nuisibles pour les communications
radio. Cependant, il n'existe aucune garantie que des interférences
ne se produiront pas dans une installation particulière. Si cet
équipement provoque des interférences nuisibles à la réception
radio ou télévisuelle, ce qui peut être déterminé en l'éteignant et le
rallumant, l'utilisateur est encouragé à essayer de corriger
l'interférence par une ou plusieurs des mesures suivantes :
— Réorientez ou déplacez l'antenne de réception.
— Augmentez la distance entre le matériel et le récepteur.
— Connectez le matériel à une sortie sur un circuit différent de
celui sur lequel est branché le récepteur.
— Consultez le revendeur ou un technicien radio/télévision
expérimenté.
ATTENTION :Les changements ou
modifications non expressément approuvés par la partie
responsable de la conformité pourraient annuler l'autorité
de l'utilisateur à utiliser l'équipement.

16
LORS DU FONCTIONNEMENT
• Portez des lunettes de sécurité conformes aux normes ANSI / ISEA
Z87.1 en vigueur et marquées comme telles. Portez une protection
auditive pendant l’utilisation de cet appareil. Portez un masque
facial ou antipoussière si l’opération est poussiéreuse.
• Portez un pantalon long et épais, des bottes, des gants et une
chemise à manches longues. Ne portez pas des vêtements
amples, des bijoux, un pantalon court, des sandales et ne travaillez
pas pieds nus. Attachez vos cheveux au-dessus des épaules.
• Ajustez la poignée pour procurer une meilleure prise, le cas échéant.
• Assurez-vous que l'accessoire n'est pas en contact avec quoi
que ce soit avant de démarrer l'appareil.
• Utilisez l'appareil uniquement à la lumière du jour ou sous un
bon éclairage artificiel.
• Utilisez le bon outil. N'utilisez cet outil que pour son usage prévu.
• Tenez toujours l’appareil à deux mains lorsqu’il est en marche.
Tenez fermement les deux anses ou poignées.
• Ne vous penchez pas trop en avant. Conservez toujours une
position stable et un bon équilibre. Redoublez de prudence
lorsque vous travaillez dans des escaliers, des pentes ou des
rampes abruptes. Pour éviter les blessures graves, n'utilisez pas
l'appareil lorsque vous vous trouvez sur une échelle ou un toit.
• N'actionnez pas l'appareil sur des surfaces mouillées.
• Éloignez vos mains, votre visage et vos pieds des pièces
mobiles. Ne touchez pas ou n’essayez pas d’arrêter des pièces
en mouvement.
• N’utilisez pas l’appareil à une vitesse supérieure à celle
nécessaire pour réaliser le travail. Ne faites pas fonctionner
l’appareil à haute vitesse quand vous ne l’utilisez pas.
• Ne forcez pas l’appareil. Il sera plus efficace et plus sûr si vous
l’utilisez à la vitesse pour laquelle il a été conçu.
• Arrêtez toujours l’appareil quand le travail est interrompu ou
quand vous vous déplacez d'un endroit à un autre.
• Évitez de démarrer l'unité involontairement. Assurez-vous que le
bouton de verrouillage est en position verrouillée avant
d'installer ou d'enlever la batterie. Ne transportez jamais
l'appareil alors que vos doigts se trouvent sur la manette des gaz.
• Retirez la batterie de l’appareil lorsqu’il n’est pas utilisé.
• Ne pas utiliser l'appareil si le bouton de verrouillage et la manette
des gaz ne permettent pas de dmarrer et d'arrêter l'appareil.
• Si l’appareil frappe un objet étranger, ou s’y empêtre, arrêtez
immédiatement le moteur, retirez la batterie et vérifiez s’il y a des
dommages. S’il est endommagé, ne redémarrez pas ni n’utilisez
l’appareil jusqu’à ce qu’il soit réparé. N’utilisez pas l’appareil
quand des pièces sont desserrées ou endommagées.
• Si l’appareil commence à vibrer anormalement, arrêtez le
moteur, enlevez la batterie et laissez l’appareil refroidir. Ensuite,
inspectez l’appareil pour trouver la raison de la vibration. Les
vibrations indiquent en général un problème.
• Utilisez uniquement des pièces de rechange d'équipement
d'origine et des accessoires pour cet appareil provenant des
équipementiers. Ils sont disponibles auprès d'ateliers de
réparations agréés. L'utilisation de toute autre pièce ou de tout
autre accessoire peut entraîner des blessures sérieuses à
l'opérateur ou endommager l'appareil et annuler la garantie.
• L’appareil doit rester propre. Retirez avec précaution la végétation
et autres débris qui pourraient bloquer les pièces mobiles.
AUTRES AVERTISSEMENTS DE SÉCURITÉ
• Maintenez l'unité avec soin.
• Toutes les réparations, autres que les procédures de
maintenance décrites dans ce manuel, doivent être effectuées
par un centre de réparations agréé.
• Si l'appareil ne fonctionne pas comme il se doit, a été endommagé,
laissé à l'extérieur ou s'il est tombé dans l'eau, ne l'utilisez pas.
• Ne retirez, modifiez ou rendez jamais inopérant tout dispositif de
sécurité fourni avec l'appareil.
• Avant une inspection, un entretien, un nettoyage, un entreposage,
un transport ou le remplacement d’une pièce de l’appareil :
1. Arrêtez le moteur. Consultez les sections Mise en marche et Arrêt.
2. Attendez que toutes les pièces mobiles s’arrêtent.
3. Enlevez la batterie.
4. Laissez l'appareil refroidir.
• Fixez bien l'appareil pendant le transport.
• Rangez l'appareil dans un endroit sec, sécurisé ou à une hauteur
permettant d'éviter toute utilisation ou tout dommage
indésirable. Laissez l'appareil hors de la portée des enfants.
• N'arrosez jamais l'appareil avec de l'eau ou tout autre liquide.
Évitez que de l'eau ne pénètre dans le moteur ou dans les
connexions électriques. Gardez les poignées sèches et propres
(sans débris, huile et graisse). Nettoyez l'appareil après chaque
utilisation. Reportez-vous à Nettoyage et rangement. N'utilisez
pas de solvants ou de détergents puissants.
• Conservez ces instructions. Consultez-les souvent et utilisez-les
pour expliquer le fonctionnement aux autres utilisateurs. Si vous
prêtez cet appareil à d'autres, prêtez-leur aussi ces instructions.
CONSERVEZ CES
INSTRUCTIONS

17
SYMBOLE SIGNIFICATION SYMBOLE SIGNIFICATION
• SYMBOLE D'AVERTISSEMENT DE SÉCURITÉ
Indique un danger, un avertissement ou une mise en
garde. Peut être utilisé en conjonction avec d'autres
symboles ou pictogrammes.
• LIRE LE MANUEL DE L'UTILISATEUR
AVERTISSEMENT : Lisez le
manuel de l'utilisateur et suivez tous les avertissements
et toutes les consignes de sécurité. Le non-respect de
cette procédure peut entraîner des blessures graves
pour l'opérateur ou les passants.
• PORTEZ DES PROTECTIONS AUDITIVES ET
OCULAIRES
AVERTISSEMENT :La
projection d’objets et les bruits forts peuvent provoquer
des blessures oculaires graves et une perte auditive.
Portez une protection oculaire conforme aux normes
ANSI / ISEA Z87.1 en vigueur, ainsi qu’une protection
auditive pendant l’utilisation de cet appareil. Utilisez un
écran facial complet dès que nécessaire.
• N'UTILISEZ PAS L'APPAREIL SOUS LA PLUIE
AVERTISSEMENT :Évitez les
environnements dangereux. N'utilisez jamais l'appareil
sous la pluie ou par temps humide. L'humidité
constitue un risque d'électrocution.
• DOUBLE ISOLATION
Deux systèmes d'isolation sont fournis au lieu d'une
mise à la terre. Il n'y a pas de mise à la terre fournie et
aucun moyen de mise à la terre ne doit être ajouté à
l'appareil.
• SYMBOLES DE SÉCURITÉ ET SYMBOLES INTERNATIONAUX •
Ce manuel de l'utilisateur décrit les symboles de sécurité et les pictogrammes internationaux pouvant apparaître sur ce produit. Lisez le
manuel de l'opérateur pour connaître l'intégralité des renseignements en matière de sécurité, d'assemblage, de fonctionnement, ainsi que de
maintenance et de réparation.

18
Poignée avant
Poignée arrière
Manette des gaz
Batterie
Bouton de
verrouillage
DÉL
Station de recharge
Cordon
d'alimentation Adaptateur
secteur
Bouton indicateur
de charge
Témoins indicateur
de charge
Chargeur de batterie
Tête motorisée
Bouton de commande
de l'alimentation
Plusieurs accessoires optionnels peuvent être utilisés avec cet appareil.
Type de moteur. . . . . . . . . . . . . . . . . . . . . . . . . . . . . . . . . . . . . . . . . . . . . . . . . . . . . . . . . . . . . . . . . . . . . . . . . . . . . . . . . . . . Courant continu (CC)
Tension du moteur . . . . . . . . . . . . . . . . . . . . . . . . . . . . . . . . . . . . . . . . . . . . . . . . . . . . . . . . . . . . . . . . . . . . . . . . . . . . . . . . . . . . . . . . jusqu'à 40 V
Poids approximatif (Sans accesssoire et batterie) . . . . . . . . . . . . . . . . . . . . . . . . . . . . . . . . . . . . . . . . . . . . . . . . . . . . . . 2,3 à 2,7 kg (5 à 6 livres)
Type de batterie . . . . . . . . . . . . . . . . . . . . . . . . . . . . . . . . . . . . . . . . . . . . . . . . . . . . . . . . . . . . . . . . . . . . . . . . . . . . . . . . . . . . . . . . . . . Lithium-Ion
Poids approximatif de la batterie. . . . . . . . . . . . . . . . . . . . . . . . . . . . . . . . . . . . . . . . . . . . . . . . . . . . . . . . . . . . . . . . . . 0,5 à 0,7 kg (1 à 1,5 livres)
Température de charge optimale. . . . . . . . . . . . . . . . . . . . . . . . . . . . . . . . . . . . . . . . . . . . . . . . . . . . . . . . . . . . . . . . . . . . 0° à 40° C (32° à 104° F)
Entrée du chargeur de batterie . . . . . . . . . . . . . . . . . . . . . . . . . . . . . . . . . . . . . . . . . . . . . . . . . . . . . . . . . . . . . . . . . 120 V 60 Hz c.a. uniquement
Sortie du chargeur de batterie . . . . . . . . . . . . . . . . . . . . . . . . . . . . . . . . . . . . . . . . . . . . . . . . . . . . . . . . . . . . . . . . . . . . . . . . . . jusqu'à 2 ampères
Poids du chargeur de batterie . . . . . . . . . . . . . . . . . . . . . . . . . . . . . . . . . . . . . . . . . . . . . . . . . . . . . . . . . . . . . . . . . . . . . . . . . . . . 0,7 kg (1,5 livres)
CARACTÉRISTIQUES*
* Toutes les caractéristiques reposent sur les dernières informations disponibles sur le produit au moment de l’impression de ce manuel.
Nous nous réservons le droit d’apporter à tout instant des modifications, sans préavis.
APPRENEZ À CONNAÎTRE VOTRE APPAREIL
AUCUN OUTIL D'ASSEMBLAGE REQUIS

19
INSTALLATION DE L’ACCESSOIRE
Reportez-vous au manuel de l'opérateur de l'accessoire pour
obtenir des instructions de montage particulières.
AVERTISSEMENT : Utilisez uniquement des
accessoires de la série RM300 avec cet appareil. L'utilisation
d'autres accessoires peut entraîner des blessures et
endommager l'appareil.
AVERTISSEMENT : Avant d'utiliser un accessoire, lire
et comprendre le manuel livré avec l'accessoire.
Respectez toutes les consignes de sécurité qu’il contient.
Fig. 1
Cordon
d'alimentation
Adaptateur secteur
ASSEMBLAGE
AVERTISSEMENT : Pour éviter toute blesse grave ou
dommage, arrêtez l’appareil avant de démonter ou
d’installer un accessoire.
ASSEMBLAGE DU CHARGEUR DE BATTERIE
1. Branchez le cordon d'alimentation sur l'adaptateur secteur (Fig. 1).
REMARQUE : Le chargeur de batterie peut être installé sur une
surface stable, comme un mur ou un établi. Utilisez des attaches
(non incluses) capables de supporter le poids combiné de la
batterie et du chargeur. Gardez l'adaptateur secteur horizontal et
fermement soutenu. Ne laissez pas l'adaptateur secteur pendre.

20
Fig. 2
Batterie
DÉL
Station de recharge
CHARGE DE LA BATTERIE
REMARQUE : La batterie n'est pas livrée entièrement chargée.
REMARQUE : Les batteries lithium-ion ne développent pas de
mémoire et peuvent être chargées en tout moment.
Pour obtenir un temps de fonctionnement maximal, rechargez
complètement la batterie avant chaque utilisation.
1. Branchez le chargeur à une prise de courant appropriée. La DÉL
(Fig. 7) s'allume en vert après quelques secondes. Si le voyant ne
s'allume pas, assurez-vous que le chargeur de batterie est
correctement assemblé et testez la prise d'alimentation avec un
autre appareil électrique.
REMARQUE : Lors de la première utilisation du chargeur de
batterie, la DÉL peut prendre jusqu'à 2 minutes pour s'allumer.
2. Insérez la batterie dans la station de charge (Fig. 2). La DÉL
restera verte, rouge ou clignotera en rouge.
•Verte : La batterie est complètement chargée ou mal
connectée au chargeur de batterie.
Vérifiez le niveau de charge de la batterie (reportez-vous au
manuel de la batterie pour connaître les instructions complètes).
- Si la batterie est complètement chargée, passez à l'étape 3.
- Si la batterie n'est pas complètement chargée, retirez-la et
réinsérez-la fermement dans la station de charge. Si le voyant
reste vert, retirez la batterie de la station de charge et
débranchez le chargeur de la prise secteur. Enlevez tous les
débris qui peuvent être présents dans la station de charge.
Branchez le chargeur dans la prise d'alimentation et insérez la
batterie dans le socle de charge. Si le voyant reste vert,
remplacez la batterie et le chargeur.
•Rouge : La batterie doit être rechargée.
Chargez la batterie jusqu'à ce que le voyant passe au vert.
•Clignote en rouge : La batterie éprouve des problèmes
électriques ou de températures internes.
Enlevez et remettez la batterie dans la station de charge. Si le
voyant continue à clignoter en rouge, retirez la batterie de la
station de charge et débranchez le chargeur de la prise secteur.
Enlevez tous les débris qui peuvent être présents dans la station
de charge. Branchez le chargeur dans la prise d'alimentation et
insérez la batterie dans le socle de charge. Si le voyant continue
à clignoter en rouge, retirez la batterie du chargeur de batterie,
laissez-la refroidir pendant 30 minutes, puis remettre la
batterie dans la station de charge. Si le voyant continue à
clignoter en rouge, remplacez la batterie ou le chargeur.
3. Une fois la batterie complètement chargée, retirez-la du
chargeur de batterie. En option, la batterie peut être rangée dans
le chargeur de batterie, mais ce faisant, le chargeur de batterie
doit être débranché de la prise électrique.
Table of contents
Languages:
Other Remington Power Tools manuals
Popular Power Tools manuals by other brands

Makita
Makita BJS160 instruction manual

TOOLCRAFT
TOOLCRAFT 58 82 08 operating instructions

Performance Tool
Performance Tool M637 owner's manual

Lister
Lister Star Instruction book and parts list

Stahls
Stahls WEEDING TABLE Installation instructions manual

Powerfix Profi
Powerfix Profi 275402 Operation and safety notes