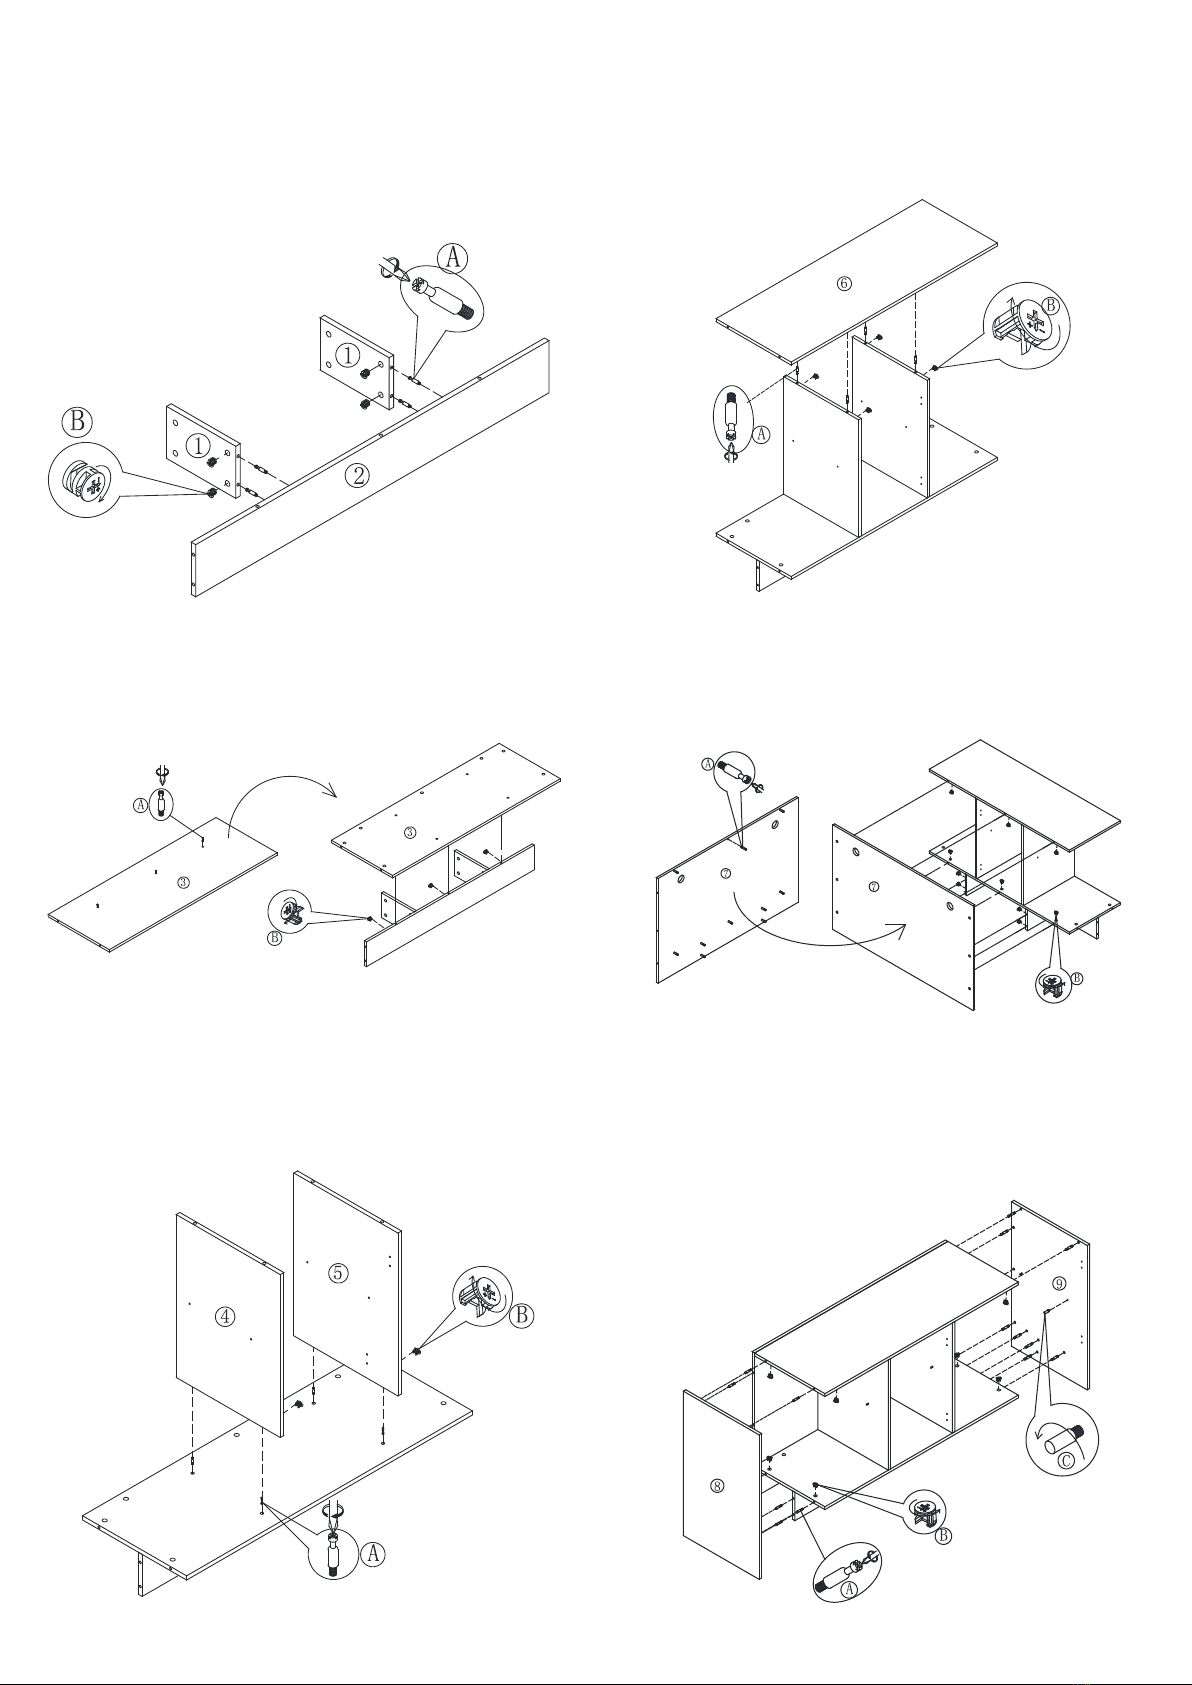
2. Screw the reverse side of ③(Bottom Board) with Accessories A (Lock
Lever* 3 pcs ), turn it over and install the components installed in step 1 as
shown in the figure, and finally tighten it with Accessories B(Lock Catch*3pcs)
3. Screw Accessories A (Lock Lever*4pcs) onto ③(Bottom Board), take ④
(Left Middle Board)and ⑤(Right Middle Board) and install it as picture shown,
and finally screw with Accessories B(Lock Catch*4pcs)
(Reminder: ④⑤Board may wobble from left to right during installation, it
is recommended that two men install it together)
Installation Instructions
1. Take Accessories A (Lock Lever* 4 pcs ),screw them separately into holes
of ②(Long Bottom Panel) and tighten it with ①(Short Bottom Panel) by using
Accessories B(Lock Catch*2pcs)
Note: The arrow direction of all accessories' lock catch must be aligned with
the direction of the accessories' locking lever before they can be put in (tighten
in the+direction and unscrew in the - direction)
Turn over
4. Take ⑥(Upper Board), screw it up with Accessories A (Lock Lever*4pcs),
then install with step 3 as below picture shown , and finally screw it down
with Accessories B(Lock Catch*4pcs)
(Reminder: the product may wobble from left to right in this step, it is recom
-mended that two men install it together)
5. Take ⑦(Back Board) and screw it with Accessories A (Lock Lever*10pcs),
and install it with the previous installation step 4 as below picture shown.
Finally, screw it with Accessories B (Lock Catch*10pcs)
(Note: there are many lock levers in this step, and the lock levers should be
aligned with each row of holes during installation)
6.Take Accessories A (Lock Lever*18pcs) and screw them separately on ⑧
(left Side Board ) and ⑨(Right Side Board) , and install it with step 5 of the
previous installation. Finally, tighten it with Accessories B (Lock Catch*18pcs) .
Take Accessories C (Laminate Nail * 12pcs) and tighten it on the hole of the
board
(Note: there are many lock levers in this step, and the lock levers should be
aligned with each row of holes during installation)