manuals.online logo
Brands
  1. Home
  2. •
  3. Brands
  4. •
  5. RetroSound
  6. •
  7. Radio
  8. •
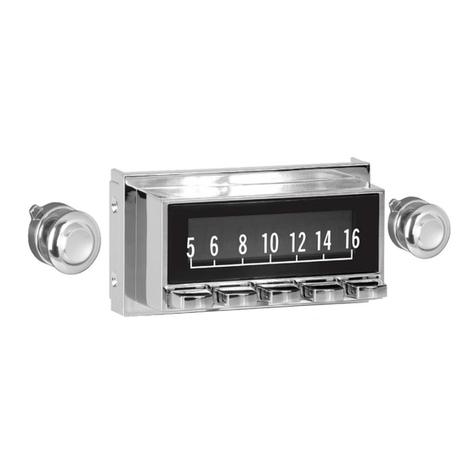
  9. RetroSound Redondo User manual

RetroSound Redondo User manual

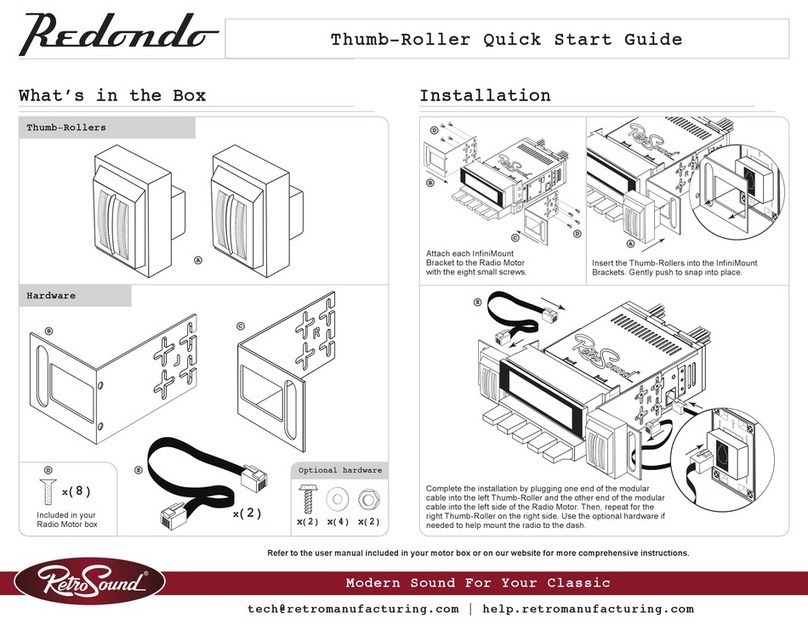
To complete the installation secure each Control Shaft with a Shaft Nut
and Shaft Washer then plug each shaft into the side of the Radio Motor.
Use the optional hardware if needed to help mount the radio to the dash.
10
A
B
B
C
C
x(8)
E
x(10)
F
D
D
E
E
F
F
A
Attach each InfiniMount
Bracket to the Radio Motor
with the eight small screws.
Place a Shaft Nut and Shaft Washer onto each
Control Shaft before inserting them into the
InfiniMount Brackets. The Control Shaft depth and
height can be adjusted as needed.
x(2)
Optional hardware
x(2) x(4) x(2)
x(8)
D
Included in your
Radio Motor box
Control Shaft Quick Start Guide
What’s in the Box Installation
Hardware
Control Shaft
Modern Sound For Your Classic
[email protected] | help.retromanufacturing.com
Refer to the user manual included in your motor box or on our website for more comprehensive instructions.
Radio Presets
Setting Radio Presets
To set a preset, tune to the station you want to set the preset to, and then press and hold the
desired Preset Button(5) for two seconds.
Recalling Radio Presets
To recall a preset, simply press the Preset Button(5) your station was set to previously.
Power On/O󰀨
Press the Left-Front Knob(1) to power the unit on.
Press and hold the Left-Front Knob(1) to power the unit o󰀨.
Volume
Rotate the Left-Front Knob(1) to change the volume.
Changing Source Modes
Rotate the Left-Rear Knob(2) clockwise to cycle through the source modes.
Changing Radio Bands
Rotate the Right-Rear Knob(4) counter-clockwise to cycle through the radio bands.
Tune
Rotate the Right-Front Knob(3) to scroll through the stations.
Mute On/O󰀨
Press the Right-Front Knob(3) to mute and unmute.
Equalizer (EQ)
Press the Left-Front Knob(1) to enter the Tone Control sub-menu. Press and release the Left-
Front Knob(1) until you see the EQ setting you’d like to adjust. Rotate the Left-Front Knob(1) to
adjust the setting. Press the Left-Front Knob(1) to move to the next item, and repeat to adjust
each option. Let the unit time out to set.
Setting the Clock
Press and hold the Right-Front Knob(3) to enter the System Settings sub-menu. Rotate the
Right-Front Knob(3) to cycle through the choices until you see CLK, then press the Right-
Front Knob(3) to select. Rotate the Right-Front Knob(3) to adjust the hours. Then press the
Right-Front Knob(3) again to move on to minutes. Rotate the Right-Front Knob(3) to adjust the
minutes. Let the unit time out to set.
Display Color*
Press and hold the Right-Front Knob(3) to enter the System Settings sub-menu. Rotate the
Right-Front Knob(3) to cycle through the choices until you see SCAN, then press the Right
Front Knob(3) to cycle through the colors. Let the unit time out to set.
Beep On/O󰀨
Press and hold the Right-Front Knob(3) to enter the System Settings sub-menu. Rotate the
Right-Front Knob(3) to cycle through the choices until you see BEEP ON/OFF, then press the
Right-Front Knob(3) to choose between BEEP ON or BEEP OFF. Let the unit time out to set.
1 Left-Front Knob
5 Preset Buttons
Right-Front Knob 32 Left-Rear Knob
Right-Rear Knob 4
Control Shaft Quick Start Guide
Modern Sound For Your Classic
[email protected] | help.retromanufacturing.com
*Some features are not available on all radios.

Other RetroSound Radio manuals

RetroSound Santa Cruz User manual

RetroSound

RetroSound Santa Cruz User manual

RetroSound New York User manual

RetroSound

RetroSound New York User manual

RetroSound Motor 1A User manual

RetroSound

RetroSound Motor 1A User manual

RetroSound Redonodo User manual

RetroSound

RetroSound Redonodo User manual

RetroSound Santa Cruz User manual

RetroSound

RetroSound Santa Cruz User manual

RetroSound Europa User manual

RetroSound

RetroSound Europa User manual

RetroSound HERMOSA User manual

RetroSound

RetroSound HERMOSA User manual

RetroSound HERMOSA User manual

RetroSound

RetroSound HERMOSA User manual

RetroSound Santa Cruz Troubleshooting guide

RetroSound

RetroSound Santa Cruz Troubleshooting guide

RetroSound Zuma Radio Installation instructions

RetroSound

RetroSound Zuma Radio Installation instructions

Popular Radio manuals by other brands

Sandstrom S2RADRB12E instruction manual

Sandstrom

Sandstrom S2RADRB12E instruction manual

Linear Satellite Radio user manual

Linear

Linear Satellite Radio user manual

Crosley CR3034A instruction manual

Crosley

Crosley CR3034A instruction manual

Nikkei NDB10 quick start guide

Nikkei

Nikkei NDB10 quick start guide

Scott DXi 50 WL instruction manual

Scott

Scott DXi 50 WL instruction manual

Bush DAB-1207 instruction manual

Bush

Bush DAB-1207 instruction manual

auna Buddy manual

auna

auna Buddy manual

Xoro DAB 120 user manual

Xoro

Xoro DAB 120 user manual

B-Tech GMRS-20V2 manual

B-Tech

B-Tech GMRS-20V2 manual

Eton FR-300 owner's manual

Eton

Eton FR-300 owner's manual

Sangean WFR-20 Quick setup guide

Sangean

Sangean WFR-20 Quick setup guide

Handic 16 Service manual

Handic

Handic 16 Service manual

Ocean Digital WR-390 user manual

Ocean Digital

Ocean Digital WR-390 user manual

LENCO UT-1000 instructions

LENCO

LENCO UT-1000 instructions

Panasonic RF-D20BT operating instructions

Panasonic

Panasonic RF-D20BT operating instructions

Radio Shack 21-1706 owner's manual

Radio Shack

Radio Shack 21-1706 owner's manual

The Fisher Stereophonic 220 operating instructions

The Fisher

The Fisher Stereophonic 220 operating instructions

Road Choice 1000-RIO160U manual

Road Choice

Road Choice 1000-RIO160U manual

manuals.online logo
manuals.online logoBrands
  • About & Mission
  • Contact us
  • Privacy Policy
  • Terms and Conditions

Copyright 2025 Manuals.Online. All Rights Reserved.