manuals.online logo
Brands
  1. Home
  2. •
  3. Brands
  4. •
  5. Rev-A-Shelf
  6. •
  7. Indoor Furnishing
  8. •
  9. Rev-A-Shelf 447-BCBBSC-5C User manual

Rev-A-Shelf 447-BCBBSC-5C User manual

Soft-Close Pullout with
Tandem slides with BluMotion
T-448SC-0412
Center line of Cabinet Opening
Recommended Screw and Pilot
Hole Location (8) Places
* Fold Template along
this edge to t
cabinet opening.
* Use this side for
8”Wide Pullout
Front edge of paper
to front of cabinet
(or front of face frame)
TOOLS REQUIRED:
ESTIMATED ASSEMBLY
TIME:
30 MIN
CARE AND MAINTENANCE:
CLEAN WITH A DAMP CLOTH
AND WIPE PARTS DRY
PARTS LIST:
SLIDES AND SLIDE STRAPS
PULLOUT CHASSIS
4 #6 X ½” FLAT HEAD SCREWS
10 #6 X 1”FLAT HEAD SCREWS
ADJUSTABLE RUB BUSHING KIT
2 DOOR BUMPERS
5/32”
1) Assemble the mounting straps (Fig 1) and attach them to the Blum Tandem slides by snapping the plastic feet into the appropriate holes.
(See Fig 1b)
2) Using the mounting template locations, pre drill 8 holes using a 5/32”drill bit.
3) Assemble the slide assembly to the oor of the cabinet using the (8) #6 x 1”at head screws. (Note: that the screws use the inner set of
holes on the plastic feet. (See Fig 2)
4) With the slides in the fully closed position the pullout chassis can now be slid into place fully inserted into the cabinet. When the unit is
pushed to the fully closed location the front release levers will engage the slides and the unit can be fully cycled.
5) Loosen the machine screws at the top back wall of the unit to allow the rear stop to oat freely. (See Fig. 3). Raise the rear stop until it
catches the rear of the face frame (if frameless application, a block may need to be added to allow the stop to work properly). Once the
stop is at the right height, the machine screws can be tightened. (Note: Once in place you can permanently secure the location using
the pre-drilled pilot holes and the (2) #6 x 1” at head screws provided.)
6) Rubber bumpers are provided to place at the top of the rear stop between the face frame and the stop to deaden the noise. (See Fig 3)
Attaching the cabinet door
1) Loosen the (4) lock nuts (3/8” wrench) inside the front wall of the unit. (See Fig 4)
2) Pull the Adjustable Door Mounting Brackets to ensure that you are mounting to the “thick” portion of the cabinet door. (Front of pull out
should line up with front of face frame).
3) Use the (4) #6 x ½” at head screws provided to attach the door to the pullout unit.
4) If the door needs to be tilted to lay ush against the face frame, loosen the 8mm nuts and turn the “T-Nut” screws so that it pushes against
the metal bracket. Each corner can be adjusted independently. (Note: It is recommended that door bumpers be used on each corner to
ensure quiet operation)
Install rub bushings using enclosed kit and instructions (Note: Chassis may need to be removed for proper installation)
Fig 1
Fig 2
Fig 3
Fig 4
Loosen
For Permanent
Attachment
T-Nut Screw for
Tilt Adjustment
Suggested
Bumper Location
Lock Nut
Fig 1b
1) Assemble the mounting straps (Fig 1) and attach them to the Blum Tandem slides by snapping the plastic feet into the appropriate holes.
(See Fig 1b)
2) Using the mounting template locations, pre drill 8 holes using a 5/32”drill bit.
3) Assemble the slide assembly to the oor of the cabinet using the (8) #6 x 1”at head screws. (Note: that the screws use the inner set of
holes on the plastic feet. (See Fig 2)
4) With the slides in the fully closed position the pullout chassis can now be slid into place fully inserted into the cabinet. When the unit is
pushed to the fully closed location the front release levers will engage the slides and the unit can be fully cycled.
5) Loosen the machine screws at the top back wall of the unit to allow the rear stop to oat freely. (See Fig. 3). Raise the rear stop until it
catches the rear of the face frame (if frameless application, a block may need to be added to allow the stop to work properly). Once the
stop is at the right height, the machine screws can be tightened. (Note: Once in place you can permanently secure the location using
the pre-drilled pilot holes and the (2) #6 x 1” at head screws provided.)
6) Rubber bumpers are provided to place at the top of the rear stop between the face frame and the stop to deaden the noise. (See Fig 3)
Attaching the cabinet door
1) Loosen the (4) lock nuts (3/8” wrench) inside the front wall of the unit. (See Fig 4)
2) Pull the Adjustable Door Mounting Brackets to ensure that you are mounting to the “thick” portion of the cabinet door. (Front of pull out
should line up with front of face frame).
3) Use the (4) #6 x ½” at head screws provided to attach the door to the pullout unit.
4) If the door needs to be tilted to lay ush against the face frame, loosen the 8mm nuts and turn the “T-Nut” screws so that it pushes against
the metal bracket. Each corner can be adjusted independently. (Note: It is recommended that door bumpers be used on each corner to
ensure quiet operation)
Install rub bushings using enclosed kit and instructions (Note: Chassis may need to be removed for proper installation)
Fig 1
Fig 2
Fig 3
Fig 4
TOOLS REQUIRED:
ESTIMATED ASSEMBLY
TIME:
30 MIN
CARE AND MAINTENANCE:
CLEAN WITH A DAMP CLOTH
AND WIPE PARTS DRY
PARTS LIST:
SLIDES AND SLIDE STRAPS
PULLOUT CHASSIS
4 #6 X ½” FLAT HEAD SCREWS
10 #6 X 1”FLAT HEAD SCREWS
ADJUSTABLE RUB BUSHING KIT
2 DOOR BUMPERS
Loosen
For Permanent
Attachment
T-Nut Screw for
Tilt Adjustment
T-448SC-0412
Suggested
Bumper Location
Lock Nut
5/32”
Fig 1b
Recommended Screw and Pilot
Hole Location (8) Places
* Fold Template along
this edge to t
cabinet opening.
* Use this side for
5”Wide Pullout
Front edge of paper
to front of cabinet
(or front of face frame)
Soft-Close Pullout with
Tandem slides with BluMotion
Center line of Cabinet Opening

This manual suits for next models

3

Other Rev-A-Shelf Indoor Furnishing manuals
Rev-A-Shelf 4WKB Series User manual

Rev-A-Shelf

Rev-A-Shelf 4WKB Series User manual

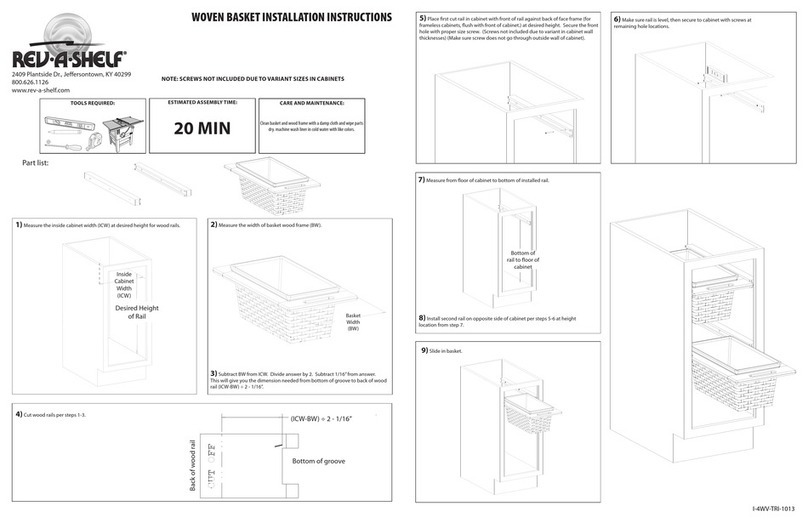
Rev-A-Shelf WOVEN BASKET User manual

Rev-A-Shelf

Rev-A-Shelf WOVEN BASKET User manual

Rev-A-Shelf WLS Series User manual

Rev-A-Shelf

Rev-A-Shelf WLS Series User manual

Rev-A-Shelf 441-12VSBSC-1 User manual

Rev-A-Shelf

Rev-A-Shelf 441-12VSBSC-1 User manual

Rev-A-Shelf 53WC Series User manual

Rev-A-Shelf

Rev-A-Shelf 53WC Series User manual

Rev-A-Shelf 5743 User manual

Rev-A-Shelf

Rev-A-Shelf 5743 User manual

Rev-A-Shelf 5322BCSC11GR User manual

Rev-A-Shelf

Rev-A-Shelf 5322BCSC11GR User manual

Rev-A-Shelf 5365-08-FOG User manual

Rev-A-Shelf

Rev-A-Shelf 5365-08-FOG User manual
Rev-A-Shelf 448 Series User manual

Rev-A-Shelf

Rev-A-Shelf 448 Series User manual

Rev-A-Shelf CHDSL-996-SN-1 User manual

Rev-A-Shelf

Rev-A-Shelf CHDSL-996-SN-1 User manual

Rev-A-Shelf 1550DM1-343-FL User manual

Rev-A-Shelf

Rev-A-Shelf 1550DM1-343-FL User manual

Rev-A-Shelf 434 User manual

Rev-A-Shelf

Rev-A-Shelf 434 User manual

Rev-A-Shelf GRP21891 User manual

Rev-A-Shelf

Rev-A-Shelf GRP21891 User manual

Rev-A-Shelf 9" Two-Tier Basket User manual

Rev-A-Shelf

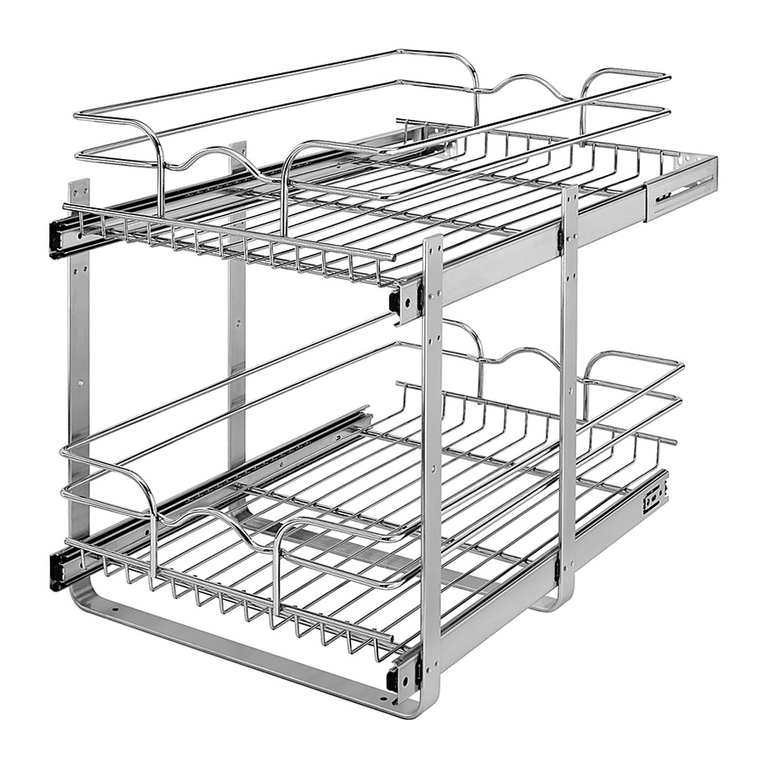
Rev-A-Shelf 9" Two-Tier Basket User manual

Rev-A-Shelf 5300 Series User manual

Rev-A-Shelf

Rev-A-Shelf 5300 Series User manual

Rev-A-Shelf 486-30VSBSC-BM-1 User manual

Rev-A-Shelf

Rev-A-Shelf 486-30VSBSC-BM-1 User manual

Rev-A-Shelf RV-DM-FDKIT User manual

Rev-A-Shelf

Rev-A-Shelf RV-DM-FDKIT User manual

Rev-A-Shelf Glideware User manual

Rev-A-Shelf

Rev-A-Shelf Glideware User manual

Rev-A-Shelf 448 User manual

Rev-A-Shelf

Rev-A-Shelf 448 User manual

Rev-A-Shelf THE CLOUD User manual

Rev-A-Shelf

Rev-A-Shelf THE CLOUD User manual

Rev-A-Shelf 4SH-15-1 User manual

Rev-A-Shelf

Rev-A-Shelf 4SH-15-1 User manual

Rev-A-Shelf 5UPD User manual

Rev-A-Shelf

Rev-A-Shelf 5UPD User manual
Rev-A-Shelf RV Series User manual

Rev-A-Shelf

Rev-A-Shelf RV Series User manual

Rev-A-Shelf 5786-900-CW-1 User manual

Rev-A-Shelf

Rev-A-Shelf 5786-900-CW-1 User manual

Popular Indoor Furnishing manuals by other brands

GIB MEBLE OLIER OL-17-B Assembly instruction

GIB MEBLE

GIB MEBLE OLIER OL-17-B Assembly instruction

True Innovations SHAQUILLE O'NEAL Nereus Assembly instructions

True Innovations

True Innovations SHAQUILLE O'NEAL Nereus Assembly instructions

DURAVIT Darling New DN 7255 installation instructions

DURAVIT

DURAVIT Darling New DN 7255 installation instructions

Portable Bar Company Flash Bar Setup guide

Portable Bar Company

Portable Bar Company Flash Bar Setup guide

HAIDER BIOSWING oneUP instruction manual

HAIDER BIOSWING

HAIDER BIOSWING oneUP instruction manual

URBAN OUTFITTERS MIKAELA 3 TIER SHELF Assembly instructions

URBAN OUTFITTERS

URBAN OUTFITTERS MIKAELA 3 TIER SHELF Assembly instructions

KITALY Lowboard Genio Conteporaneo 4735071823 Assembly instructions

KITALY Lowboard

KITALY Lowboard Genio Conteporaneo 4735071823 Assembly instructions

Amisco M656480176 Assembly

Amisco

Amisco M656480176 Assembly

HJH office PURE RELAX Assembly instructions

HJH office

HJH office PURE RELAX Assembly instructions

MAJA Möbel 1712 Assembling instructions

MAJA Möbel

MAJA Möbel 1712 Assembling instructions

Hagus Huckepack 2 instruction manual

Hagus

Hagus Huckepack 2 instruction manual

Germania Spiegel 5126 Assembly instruction

Germania

Germania Spiegel 5126 Assembly instruction

Forte EPLK421 Assembling Instruction

Forte

Forte EPLK421 Assembling Instruction

OMT-Veyhl OV1001 user guide

OMT-Veyhl

OMT-Veyhl OV1001 user guide

Woodland MISSISSIPPI Assembly instructions

Woodland

Woodland MISSISSIPPI Assembly instructions

Monarch Specialties I 7022 Assembly instructions

Monarch Specialties

Monarch Specialties I 7022 Assembly instructions

BLACK RED WHITE S435-LOZ3S/140 Assembly

BLACK RED WHITE

BLACK RED WHITE S435-LOZ3S/140 Assembly

Next CHILTERN SMALL SIDEBOARD Assembly instructions

Next

Next CHILTERN SMALL SIDEBOARD Assembly instructions

manuals.online logo
manuals.online logoBrands
  • About & Mission
  • Contact us
  • Privacy Policy
  • Terms and Conditions

Copyright 2025 Manuals.Online. All Rights Reserved.