manuals.online logo
Brands
  1. Home
  2. •
  3. Brands
  4. •
  5. Reverie
  6. •
  7. Indoor Furnishing
  8. •
  9. Reverie OSO 300T User manual

Reverie OSO 300T User manual

CUSTOMER SERVICE: 800-973-8374 [email protected]
3
300T
A
B
FB
ED
F
EA
D
E
D
C
E
REMOTE CONTROL
OPERATION &
PROGRAMMING
OPERATING INSTRUCTIONS
WIRELESS REMOTE PAIRING
PROCESS
POWER BASE HEAD AND FOOT
ADJUSTMENT
Adjusts the head and foot sections to
the desired positions.
FOUNDATION “FLAT” BUTTON
Return both head and foot to the at
position.
ZERO GRAVITY
Allows your legs to be lifted to a
position slightly above the chest, which
enables blood ow to easily circulate
back to the heart, thus reducing stress
and fatigue.
LOCK
Press the Lock button for 3 seconds,
the remote will not be functional until
you press the lock key for 3 seconds
again.
PROGRAMMABLE MEMORY
BUTTONS
You can store 2 personalized memory
positions. Press and hold the “SET”
button for 3 seconds until the LED
light ashes once and then stays lit,
then press button “1” or “2” to store
the position. The LED will turn off
after the process is complete.
LIGHT
Press to turn on/off the Nightlight under
the bed.
STEP 1
STEP 2
Place batteries into the remote control
(3 x AAA batteries)
Ensure the power base is plugged into
a functioning outlet.
CUSTOMER SERVICE: 800-973-8374 [email protected]
4
300T
EMERGENCY POWER
DOWN FEATURE
Your Power Base has an emergency
lowering feature in the event that your
base is in the raised position and has
lost power due to a power outage.
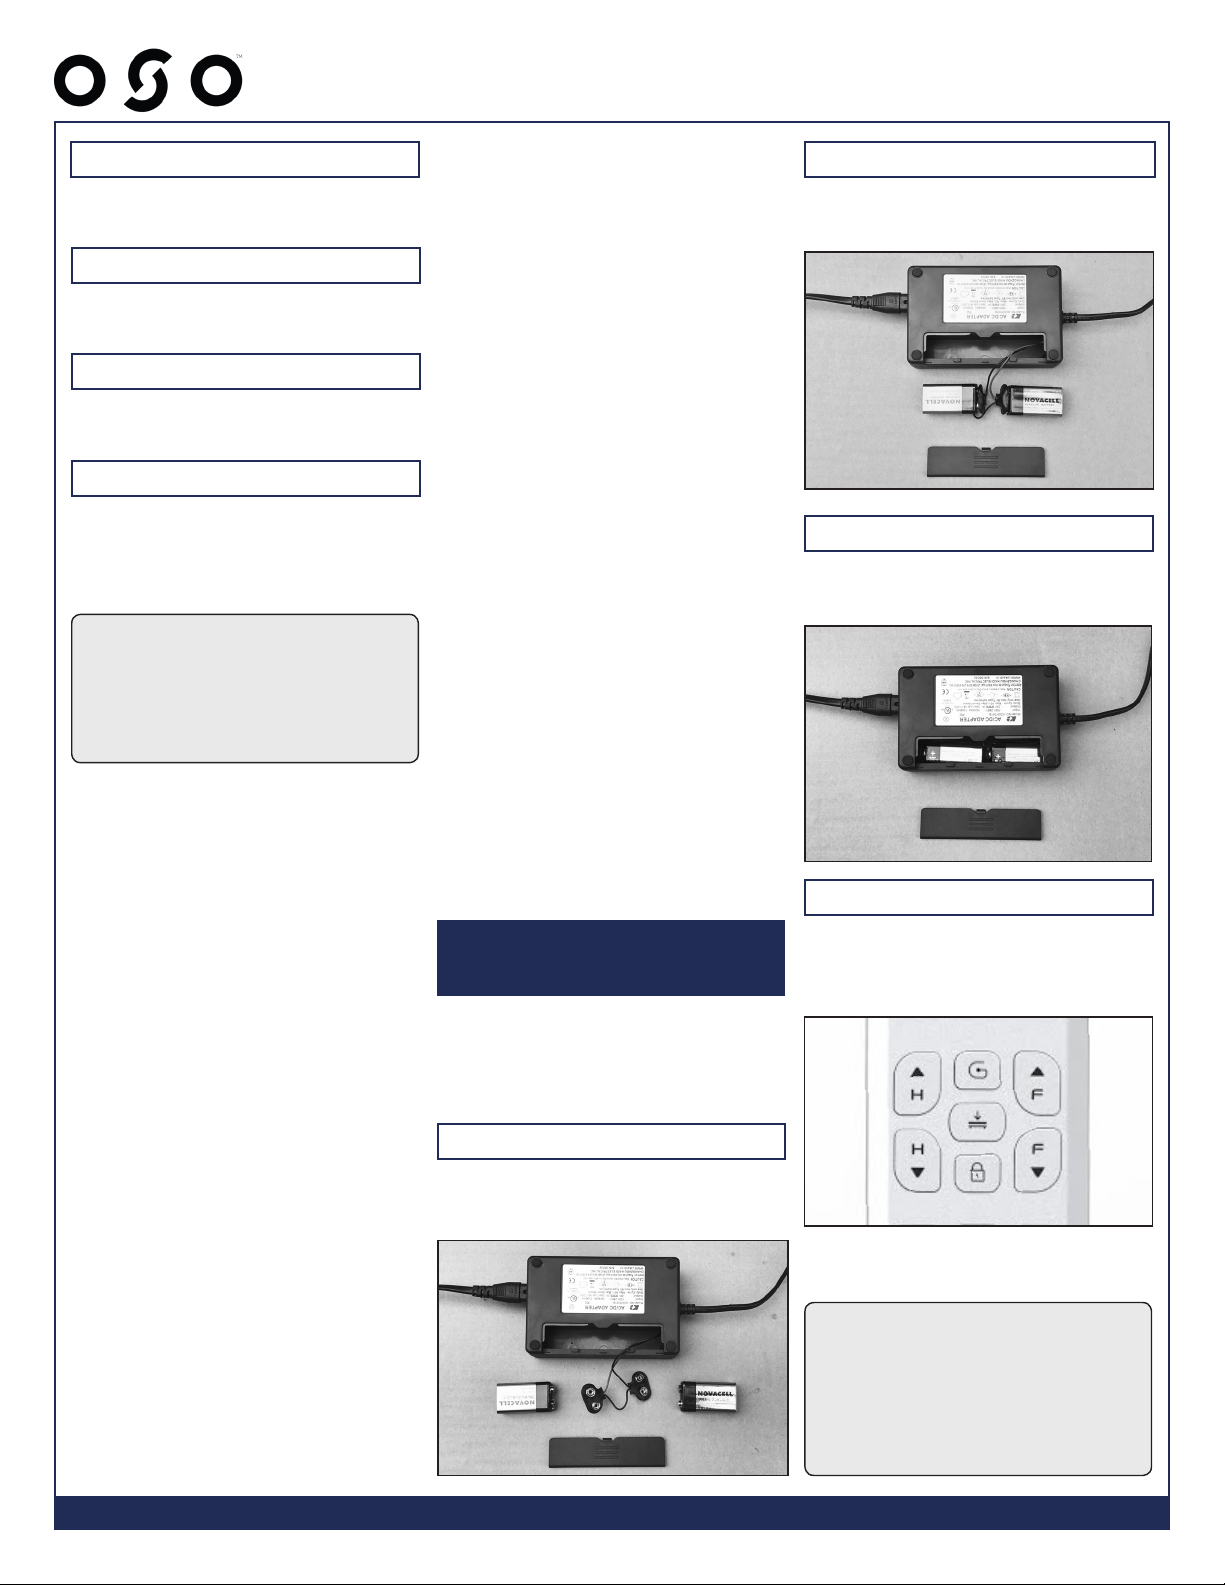
Locate and remove the cover for the 9
volt batteries.
Put the batteries back in the
compartment and close the cover.
Press the Flat button to lower the base
to at position during a power outage.
Your bed should lower to the at
position.
Install two (2) alkaline 9 volt batteries.
(Not included)
STEP 1
STEP 2
STEP 3
STEP 4
NOTE: The two (2) 9 volt batteries
are only intended to be used once.
After you complete the emergency
lowering, the batteries need to
be replaced with new alkaline
batteries.
PAIRING 1 REMOTE TO 2 BASES
Each base is already paired with the
remote control that comes with it. Each
control box has space in its memory to
remember two remote controls. King/
Cal King units require you to pair at
least 1 remote to both bases so that
both bases will move in sync when
using that remote. You can also pair
two remotes to two bases, so that
either remote can control both bases
at the same time. When reading these
instructions assume that you have two
power bases (either two TXL or two
Split Cal King bases), and two remote
controls – one that came with each
base. We will call these Base 1 and
Base 2, and Remote 1 (for Base 1) and
Remote 2 (for Base 2).
If you want to marry Remote 2 to base 1:
Take “Remote 2” and press the learn
button on the PLC for “base 1”. When
the indicator light lights up, press any
button on “Remote 2”. As soon as the
LED begins to Blink, release the
button on “Remote 2”. Do NOT hold
the remote button after the light blinks,
and do NOT press it again (see Note
below). If you do you will remove
Remote 1 from base 1’s memory. Wait
until the indicator light turns solid and
then turns off. Now both remotes will
operate base 1.
If you want to marry Remote 1 to base 2:
Take “Remote 1” and press the learn
button on the PLC for “base 2” When
the indicator light lights up, press any
button on “Remote 1”. As soon as
the LED begins to Blink, release the
button on “Remote 1”. Do NOT hold
the remote button after the light blinks,
and do NOT press it again (see Note
below). If you do you will remove
Remote 2 from base 2’s memory. Wait
until the indicator light turns solid and
then turns off. Now both remotes will
operate both bases in tandem.
Note: While the light is blinking if you
release the button on the remote
and press it a second time, or if you
continue to hold the button the PLC
can jump to the second slot and kick
out the rst remote. This is why some
people have a difcult time joining the
remotes. If they are patient and follow
the process described they will not
have a problem.
NOTE: When you press multiple
buttons at the same time, the
system will identify an invalid
operation, except for special
combination keys.
STEP 5
STEP 6
Press any button on the remote control
within 30 seconds to pair successfully.
When the receiver light stops ashing
and turns solid, you have completed
the learning process of the RF
frequency code.
STEP 4
The indicator light will begin to ash
rapidly.
STEP 3
Press the pair button on the control
box for 3 seconds.

Other Reverie Indoor Furnishing manuals

Reverie R550L User manual

Reverie

Reverie R550L User manual

Reverie R550 User manual

Reverie

Reverie R550 User manual

Reverie 7T R550 User manual

Reverie

Reverie 7T R550 User manual

Reverie Personal Comfort Flex 3 User manual

Reverie

Reverie Personal Comfort Flex 3 User manual

Reverie OSO 200 User manual

Reverie

Reverie OSO 200 User manual

Reverie 3E Power Base User manual

Reverie

Reverie 3E Power Base User manual

Reverie O300 User manual

Reverie

Reverie O300 User manual

Reverie O300T User manual

Reverie

Reverie O300T User manual

Reverie Flex 9 User manual

Reverie

Reverie Flex 9 User manual

Reverie Personal Comfort Flex Flex 5 User manual

Reverie

Reverie Personal Comfort Flex Flex 5 User manual

Reverie POWER-FLEX 3 User manual

Reverie

Reverie POWER-FLEX 3 User manual

Reverie 7T User manual

Reverie

Reverie 7T User manual

Reverie 1M User manual

Reverie

Reverie 1M User manual

Reverie R600 User manual

Reverie

Reverie R600 User manual

Reverie R400 User manual

Reverie

Reverie R400 User manual

Reverie OSO O400 User manual

Reverie

Reverie OSO O400 User manual

Reverie R450HT User manual

Reverie

Reverie R450HT User manual

Reverie 3EM User manual

Reverie

Reverie 3EM User manual

Reverie R350TLP User manual

Reverie

Reverie R350TLP User manual

Reverie R450 User manual

Reverie

Reverie R450 User manual

Reverie 3EMT User manual

Reverie

Reverie 3EMT User manual

Reverie R410 User manual

Reverie

Reverie R410 User manual

Reverie 8Q User manual

Reverie

Reverie 8Q User manual

Reverie R350 User manual

Reverie

Reverie R350 User manual

Popular Indoor Furnishing manuals by other brands

Sleep Emporium Malmo Solo Assembly instructions

Sleep Emporium

Sleep Emporium Malmo Solo Assembly instructions

Office Star Products AVE SIX CARRINGTON CAR51A Assembly instructions

Office Star Products

Office Star Products AVE SIX CARRINGTON CAR51A Assembly instructions

LDI Spaces Safco 6265 Assembly instructions

LDI Spaces

LDI Spaces Safco 6265 Assembly instructions

Takara Belmont Koken 90 operating manual

Takara Belmont

Takara Belmont Koken 90 operating manual

Wren Kitchens Vogue BASE UNIT 800 2 Door Assembly guide

Wren Kitchens

Wren Kitchens Vogue BASE UNIT 800 2 Door Assembly guide

LIVING ELEMENTS Clever Cube 468968 Assembly instructions

LIVING ELEMENTS

LIVING ELEMENTS Clever Cube 468968 Assembly instructions

Whittier Wood Furniture McKenzie 1113GACa Assembly instructions

Whittier Wood Furniture

Whittier Wood Furniture McKenzie 1113GACa Assembly instructions

Edsal CB Series quick start guide

Edsal

Edsal CB Series quick start guide

Safco Mobis II user guide

Safco

Safco Mobis II user guide

TherAdapt TC-250 manual

TherAdapt

TherAdapt TC-250 manual

TradeQuip 6024T Assembly instructions

TradeQuip

TradeQuip 6024T Assembly instructions

Ballard Designs Hampton MA265 quick start guide

Ballard Designs

Ballard Designs Hampton MA265 quick start guide

Living Spaces 305-P241171 Assembly instructions

Living Spaces

Living Spaces 305-P241171 Assembly instructions

Ovente MDT70 Series quick start guide

Ovente

Ovente MDT70 Series quick start guide

Core Products Nairn NR281 Assembly instructions

Core Products

Core Products Nairn NR281 Assembly instructions

modway EEI-5675 Assembly instructions

modway

modway EEI-5675 Assembly instructions

ALFEMO Foam Mattress Instruction book

ALFEMO

ALFEMO Foam Mattress Instruction book

Kvik U960 manual

Kvik

Kvik U960 manual

manuals.online logo
manuals.online logoBrands
  • About & Mission
  • Contact us
  • Privacy Policy
  • Terms and Conditions

Copyright 2025 Manuals.Online. All Rights Reserved.