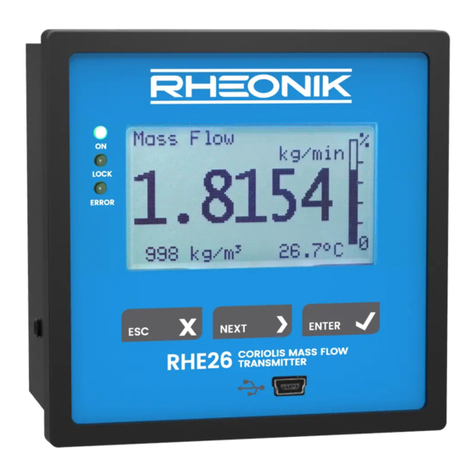
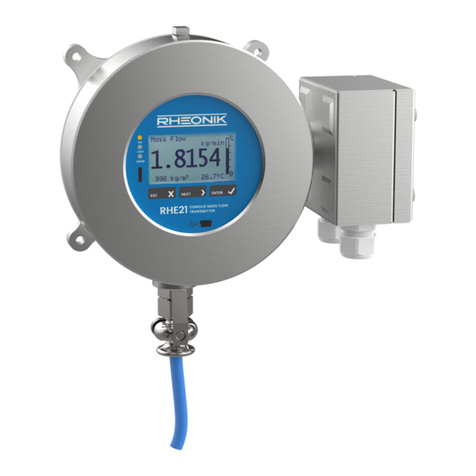
RHEONIK RHE28 Installation manual

RHE28 Installation & Startup Guide –Doc. No. 8.2.1.07 –Ver. 1.31
1 / 43
RHE28
Installation & Startup Guide
Documen t No.: 8.2. 1.0 7
Version 1. 31 AP R-2021

RHE28 Installation & Startup Guide –Doc. No. 8.2.1.07 –Ver. 1.31
2 / 43
Table of Contents
1General Information ..........................................................................................................4
1.1 Important Safety Instructions for operating Coriolis Flowmeters ......................................4
1.2 Manufacturer’s Liability......................................................................................................4
1.3 Additional Resources ..........................................................................................................4
2Quick Start ........................................................................................................................5
3Installation........................................................................................................................5
3.1 Mechanical Installation ......................................................................................................5
3.2 Electrical Installation ..........................................................................................................5
Interconnecting RHE/RHM..................................................................................................6
3.2.1.1 RHM Electrical Connection Type JM & SM (11 Terminals) .................................................6
3.2.1.2 RHM Electrical Connection Type TM (PTFE Cable) .............................................................7
3.2.1.3 RHM Electrical Connection Type JO (12 Terminals)............................................................8
3.2.1.4 Legacy RHM Sensors (9 Terminals).....................................................................................9
Power Supply and Grounding ...........................................................................................11
3.2.2.1 Grounding .........................................................................................................................11
3.2.2.2 12V to 24V DC Power Supply ............................................................................................11
3.2.2.3 100V to 240V AC Power Supply ........................................................................................11
3.2.2.4 AC and DC Supply..............................................................................................................12
Control Inputs and Outputs ..............................................................................................12
3.2.3.1 Digital Outputs..................................................................................................................12
3.2.3.2 Analog Outputs.................................................................................................................13
3.2.3.3 Digital Inputs.....................................................................................................................14
3.2.3.4 Analog Input .....................................................................................................................15
4Operation and Configuration ........................................................................................... 16
4.1 Function of the Pushbuttons.............................................................................................16
4.2 Passcodes and Menu Selection.........................................................................................17
4.3 Zero Offset Calibration......................................................................................................18
4.4 Change of Positive Flow Direction ....................................................................................18
4.5 Temperature Measurement Configuration ......................................................................19
4.6 Output Configuration........................................................................................................20
Analog Output Configuration ...........................................................................................20
Digital Output Configuration ............................................................................................21
Digital Input Configuration ...............................................................................................24
5Remote Operation ........................................................................................................... 25
5.1 RS485 ................................................................................................................................25

RHE28 Installation & Startup Guide –Doc. No. 8.2.1.07 –Ver. 1.31
3 / 43
5.2 HART .................................................................................................................................25
6Service and Maintenance................................................................................................. 26
6.1 Maintenance and Calibration...........................................................................................26
6.2 Troubleshooting................................................................................................................26
6.3 Service...............................................................................................................................26
6.4 WEEE and RoHS ................................................................................................................26
7Ordering Code ................................................................................................................. 27
Appendix A Ex-Safety Instructions................................................................................... 28
A.1 Safety instructions for the installation in a hazardous area:............................................28
A.2 System Description: ..........................................................................................................29
A.3 Electrical Safety Limits ......................................................................................................29
A.4 Thermal Safety Limits .......................................................................................................30
A.5 Grounding and Shielding ..................................................................................................30
A.6 Installation........................................................................................................................31
A.7 Electrical connection of power supply and I/O .................................................................31
A.8 Electrical connection to RHE .............................................................................................32
A.9 Ordering Code...................................................................................................................33
A.10 Technical Data ..................................................................................................................34
A.11 Compliance .......................................................................................................................34
A.12 Service and repair .............................................................................................................35
A.13 Contact address ................................................................................................................35
Appendix B Technical Information .................................................................................. 36
B.1 Technical Data ..................................................................................................................36
B.2 Mechanical drawing .........................................................................................................38
Appendix C CE Certificates .............................................................................................. 39

RHE28 Installation & Startup Guide –Doc. No. 8.2.1.07 –Ver. 1.31
4 / 43
1General Information
1.1 Important Safety Instructions for operating Coriolis Flowmeters
For RHE28 units requiring 12 to 24V DC power, the use of a properly grounded (PELV)
supply is highly recommended.
The use of shielded cables for all I/O signals is recommended to prevent interference
from high level EMI.
Only the specifically designed shielded cable supplied by Rheonik should be used to
connect RHE Transmitters to RHM Flow Sensors. Do not use other types of cable.
For safety instructions regarding RHM Coriolis Flow Sensors, please refer to the RHM
installation and startup guide manual.
These measuring instruments are not designed for, and should not be installed in, life-
preserving systems used in the medical, motor vehicle, aircraft, water craft or mining
industries.
All national regulations and standards regarding electrical installation must be
observed!
1.2 Manufacturer’s Liability
Rheonik assumes no liability for loss and/or consequential damages stemming from the
use of this product utilized in life-preserving systems in the medical, motor vehicle,
aircraft, water craft or mining industries.
Rheonik accepts no liability for loss or damage resulting from the improper use of any
of its products.
Rheonik assumes no liability for the loss of production and/or consequential damage
from the use of this product unless such liability has been expressly and contractually
agreed.
Rheonik provides a standard one year from shipment warranty on all products for
workmanship and materials. Performance of this warranty will be at the Rheonik
manufacturing facility.
Rheonik assumes no liability for determining the suitability of its products in any specific
application. This is the sole responsibility of the end user.
1.3 Additional Resources
This guide is intended as a quick reference instruction to aid the
installation and startup of an RHE28 Coriolis mass flow transmitter
with an RHM flow sensor and is a supplement to the documentation
found in the RHE2X Desktop Reference. The RHE2X Desktop
Reference and further resources are available for download from the
Rheonik website:
www.rheonik.com

RHE28 Installation & Startup Guide –Doc. No. 8.2.1.07 –Ver. 1.31
5 / 43
2Quick Start
A complete flowmeter system typically consists of a:
RHMxxx Sensor
RHExx Transmitter
Interconnection cable
Carry out the following steps to prepare the flow meter for operation:
1) If not already done, install the RHM sensor in line (refer to the RHM Coriolis Sensor
installation and startup guide for additional information on mechanical installation).
Connect the interconnecting cable to the RHE using the terminating scheme that matches
the RHM electrical connection type (see section 3.2.1 for electrical termination schemes).
2) Connect all signal input, output and communications interface wiring as required (section
3.2.3).
3) Connect power supply (section 3.2.2).
NOTE:
For safety, always connect the protective ground.
For installations in hazardous areas, a protective ground must always be connected.
4) Switch on the power supply. The display backlight will light up and after a power up
sequence, the display will show the flow measurement screen. In case of an error the
backlight will turn red.
5) Flush the RHM flow sensor with process fluid and ensure that it is free of air bubbles (in
case of a liquid process fluid) or liquid droplets (in case of a gaseous process fluid).
6) Wait until the RHM temperature has stabilized and then carry out a zero point calibration
(section 4.3):
Ensure a zero flow condition is present in the flow sensor by closing isolation valves
Initiate zeroing of the sensor and wait for the zeroing procedure to complete
Open isolation valves to allow flow through the sensor
3Installation
3.1 Mechanical Installation
The RHE28 is a wall mount transmitter for installation in harsh environment. The standard
enclosure rating is IP65 / NEMA 4, IP67 / NEMA 4X is available optionally.
Technical data and dimensioned drawings of the RHE28 transmitter can be found in Appendix B.
3.2 Electrical Installation
Caution, the surface of the connection box may be hot if a hot fluid is running through
the RHM sensor.
Unused cable entries at the RHE28 have to be closed by suitable sealing plugs.
Electrical connections to the transmitter are made onto multi-conductor plug headers which are
located under the cover at the bottom of the housing. The connectors are color coded for ease
of identification:

RHE28 Installation & Startup Guide –Doc. No. 8.2.1.07 –Ver. 1.31
6 / 43
Black: power supply
Blue: connection to RHM and 4-20mA pressure sensor (if present)
Green: I/O signals
The standard plugs are a push-in wire connection type. Solid wires and stranded wires with end
sleeves can be connected by simply pushing the wire into the opening. For connecting stranded
wires without prepared ends (crimp ferrules, etc.), it may be necessary to press down and hold
the cable release operator while inserting the wire. To disconnect a wire, simply press down the
cable release operator and withdraw the wire while it is held down. Other types of connector,
such as those with screw terminals may be available and can also be used. RHE28 units are
delivered with 2 x M16 cable glands and 2 x M25 blind covers as a standard.
Interconnecting RHE/RHM
Only interconnecting cable (ARHE-Cx cable) supplied by Rheonik should be used to connect an
RHE to an RHM. Cable not supplied by Rheonik may lead to a poor performance of the Coriolis
mass flow meter.
Table 1: Overview RHM electrical connection types
RHM electrical
connection type
Junction box / terminals
Section
JM, SM
aluminium, stainless steel / 11
3.2.1.1
TM
- / PTFE cable with 9 wires + shield
3.2.1.2
JO
aluminium / 12
3.2.1.3
legacy type
aluminium, stainless steel / 9
3.2.1.4
3.2.1.1 RHM Electrical Connection Type JM & SM (11 Terminals)
Table 2: RHE28 Wiring Plan for RHM Connection Types JM, SM
RHM Terminal
Cable
RHE28 Terminal
No.
Name
Wire
Color
Function
No.
Name
1
DRV H
Brown
Drive Coil high
1
DrvH
2
DRV L
Blue
Drive Coil low
2
DrvL
3
PT P
Red
Temperature Sensor Pipe
3
PtP
4
PT G
Pink
Temperature Sensors GND
4
PtG
5
PT T
Orange
Temperature Sensor Torsion
5
PtT
6
PUA H
Yellow
Pick Up Coil A high
6
PkAH
7
PUA L
Green
Pick Up Coil A low
7
PkAL
8
PUB L
Grey
Pick Up Coil B low
8
PkBL
9
PUB H
White
Pick Up Coil B high
9
PkBH
10 1
PE
(yel/grn)
Shield
10
PE
11 1
PE C
(yel/grn)
1The RHM has 2 terminals for the connection of the cable shield. One is connected directly to PE, the other via a
1nF capacitor (PE C).
The best protection against RF EMI is achieved if the cable shield is connected at both ends. In installations with a
long interconnecting cable between RHE and RHM, significant potential difference between the PE at the RHE and

RHE28 Installation & Startup Guide –Doc. No. 8.2.1.07 –Ver. 1.31
7 / 43
Figure 2: RHE28 Wiring
with RHM Connection
Type TM
the PE at the RHM may occur. Connecting the shield to PE at both ends might lead to undesirable current flow in
the shield. In situations where a high potential difference is present between the RHE and RHM, we recommend
grounding via the PE C terminal on the RHM side.
Figure 1: RHE28 Wiring with RHM Connection Types JM, SM & SC
Upon power up, if the RHE indicates an error and the temperature measurement on the bottom
right of the display shows “ -.--°C/°F ” please check the temperature measurement configuration
setting in the RHE (section 4.5).
The correct temperature measurement configuration setting for an RHM with connection type
JM or SM is “7”.
3.2.1.2 RHM Electrical Connection Type TM (PTFE Cable)
Table 3: RHE28 Wiring Plan for RHM Connection Type TM
1The shield of the cable is connected internally to the housing of the RHM. If there is a
risk of a significant potential difference between the housing of the RHM and the PE
terminal of the RHE, the shield should be connected to the RHE PE connection via a 1nF
capacitor. Alternatively, a separate cable can be run for potential equalization between
the RHM case and the RHE and the shield left both unconnected and isolated at the RHE
or terminated to the PE connection via a 1nF capacitor.
Cable
RHE28 Terminal
No.
Wire Color
Function
No.
Name
1
Brown
Drive Coil high
1
DrvH
2
Blue
Drive Coil low
2
DrvL
3
Red
Temp. Sensor Pipe
3
PtP
4
Pink
Temp. Sensors GND
4
PtG
5
Orange
Temp. Sensor Torsion
5
PtT
6
Yellow
Pick Up Coil A high
6
PkAH
7
Green
Pick Up Coil A low
7
PkAL
8
Grey
Pick Up Coil B low
8
PkBL
9
White
Pick Up Coil B high
9
PkBH
10 1
(yel/grn)
Shield
10
PE

RHE28 Installation & Startup Guide –Doc. No. 8.2.1.07 –Ver. 1.31
8 / 43
Upon power up, if the RHE indicates an error and the temperature measurement on the bottom
right of the display shows “ -.--°C/°F ” please check the temperature measurement configuration
setting in the RHE (section 4.5).
The correct temperature measurement configuration setting for an RHM with connection type
TM is “7”.
3.2.1.3 RHM Electrical Connection Type JO (12 Terminals)
Table 4: RHE28 Wiring Plan for RHM Connection Types JO
RHM Terminal
Cable
RHE28 Terminal
No.
Name
Wire Color
Function
No.
Name
1
DRIVE +
Brown
Drive Coil high
1
DrvH
2
DRIVE -
Blue
Drive Coil low
2
DrvL
3
PT1 Pipe Supply
Red
Temperature Sensor Pipe
3
PtP
4
PT1 Pipe Sense
Pink
Temperature Sensors GND
4
PtG
5
PT 1/2 Common
-
-
-
-
6
Pick-Up left+
Yellow
Pick Up Coil A high
6
PkAH
7
Pick-Up left -
Green
Pick Up Coil A low
7
PkAL
8
Pick-Up right-
Grey
Pick Up Coil B low
8
PkBL
9
Pick-Up right+
White
Pick Up Coil B high
9
PkBH
10 1
GND
(yel/grn)
Shield
10
PE
11
PT2 Tor. Supply
Orange
Temperature Sensor Torsion
5
PtT
12
PT2 Tor. Sense
-
-
-
-
1The shield of the cable is connected through terminal 10 to to the housing of the RHM. If there is a risk of a
significant potential difference between the housing of the RHM and the PE terminal of the RHE, the shield should
be connected to the RHE PE connection via a 1nF capacitor. Alternatively, a separate cable can be run for potential
equalization between the RHM case and the RHE and the shield left both unconnected and isolated at the RHE or
terminated to the PE connection via a 1nF capacitor.
Figure 3: RHE28 Wiring with RHM Connection Types J6 & JO

RHE28 Installation & Startup Guide –Doc. No. 8.2.1.07 –Ver. 1.31
9 / 43
Upon power up, if the RHE indicates an error and the temperature measurement on the bottom
right of the display shows “ -.--°C/°F ” please check the temperature measurement configuration
setting in the RHE (section 4.5).
The correct temperature measurement configuration setting for an RHM with connection type
JO is “3”.
3.2.1.4 Legacy RHM Sensors (9 Terminals)
Table 5: RHE28 Wiring Plan for RHM legacy version
RHM Terminal
Cable
RHE28 Terminal
No.
Wire Color
Function
No.
Name
1
Brown
Drive Coil high
1
DrvH
2
Blue
Drive Coil low
2
DrvL
3
Red
Temperature Sensor Pipe Supply
3
PtP
4
Pink
Temperature Sensor Pipe Sense
4
PtG
5
Orange
Temperature Sensors Common
5
PtT
6
Yellow
Pick Up Coil A high
6
PkAH
7
Green
Pick Up Coil A low
7
PkAL
8
Grey
Pick Up Coil B low
8
PkBL
9
White
Pick Up Coil B high
9
PkBH
Screw Term 1
(yel/grn)
Shield
10
PE
1The shield of the cable is connected to the housing of the RHM using a screw terminal in the junction box. If there
is a risk of a significant potential difference between the housing of the RHM and the PE terminal of the RHE, the
shield should be connected to the RHE PE connection via a 1nF capacitor. Alternatively, a separate cable can be run
for potential equalization between the RHM case and the RHE and the shield left both unconnected and isolated at
the RHE or terminated to the PE connection via a 1nF capacitor.
Figure 4: RHE28 Wiring with RHM legacy sensors

RHE28 Installation & Startup Guide –Doc. No. 8.2.1.07 –Ver. 1.31
10 / 43
Upon power up, if the RHE indicates an error and the temperature measurement on the bottom
right of the display shows “ -.--°C/°F ” please check the temperature measurement configuration
setting in the RHE (section 4.5).
The correct temperature measurement configuration setting for an RHM legacy sensor is “1”.

RHE28 Installation & Startup Guide –Doc. No. 8.2.1.07 –Ver. 1.31
11 / 43
Power Supply and Grounding
For connections longer than 0.5m shielded cables should be used. For connections longer than
3m, additional ferrite filter beads close to the RHE are recommended for avoiding RF EMI.
The power supply input is protected by a fuse. As a protection against fire in case of a short in
the cable, the supply side of the cable should be protected by a fuse (see figure 5, SI1) with a
rating not higher than the current carrying capacity of the cable.
The cables used for power supply and grounding must comply with the national
requirements. If required, certified cables must be used. The minimum cross section is
0.35mm² (AWG 22) for DC supply cables and 0.5mm² (AWG 20) for mains supply cables.
The RHE28 do not contain a mains switch. A switch or circuit breaker close to the RHE28
must be included in the supply line. The switch must be marked correspondingly.
3.2.2.1 Grounding
RHE28 transmitters must be grounded. Ground the RHE by connecting either a ground to
terminal 22 (PE) or to M4 screw connection at the bottom center of the housing. The cross
sectional area of the grounding wire must be equal to or larger than the conductors used for any
supply or I/O connection.
Note: National and Local electrical code requirements may contain additional grounding
requirements. Please ensure that all grounding to carried out to these [legal] requirements.
3.2.2.2 12V to 24V DC Power Supply
Units for use with a DC power supply (order
code options D1 and U1) require a regulated DC
supply voltage of 12V or 24V. They will operate
with a power supply in the range 10V to 28V.
Connect the positive supply to terminal 20 and
0V to terminal 21.
Terminals 21 (0V) and 22 (PE) are connected via
a 1kΩ resistor. The resistor can withstand a
potential difference of up to 30V between 0V
and PE, but voltage differences above 5V should
be avoided.
3.2.2.3 100V to 240V AC Power Supply
Units for use with an AC power supply (options
A1 and U1) will operate with any AC supply with
nominal 100V to 240V, 50H to 60Hz. Voltage
limits are 90V to 264V.
Connect the live or hot wire (L) to terminal 23
and the neutral wire (N) to terminal 24.
The AC supply terminals are completely isolated
from PE (terminals 10, 22, 68) and GND
(terminals 21, 37, 57).
Figure 5: DC Power Supply
Figure 6: AC Power Supply

RHE28 Installation & Startup Guide –Doc. No. 8.2.1.07 –Ver. 1.31
12 / 43
3.2.2.4 AC and DC Supply
Units with power supply option U1 can be operated from both DC and AC power supplies. Both
can be connected simultaneously and the RHE will be powered up as long as one of the supplies
is present and within operating tolerance.
The U1 power supply option is designed
to be used where, for instance, battery
backup of the flow meter is required.
Connect an AC supply to terminal 23 and
24 (see section 3.2.2.3) and a DC supply
to terminals 20 and 21 (see section
3.2.2.2).
If both power supply options are
connected, avoid a DC supply voltage
higher than 23V to ensure that the AC
power supply is used. If the AC supply is
disconnected, the DC supply will be used
to power the RHE until the Voltage
present drops below 10V.
An RHE/RHM flow meter has a typical
power consumption of around 3W. If a
12V / 100Ahr battery is used as the DC
input to the RHE, the unit would operate for more than 10 days after the AC supply had been
disconnected.
Control Inputs and Outputs
In general, shielded cables should be used for cable connections longer than 0.5m. For cable
connections longer than 3m, it is recommended that ferrite filter beads are installed close to the
RHE terminations to help avoid RF EMI.
3.2.3.1 Digital Outputs
The RHE28 can be supplied with up to four digital outputs.
Outputs DO1 and DO2 are universal outputs and can be used as frequency, pulse or
control/status outputs.
Outputs DO3 and DO4 are control/status outputs only.
Digital outputs are push-pull outputs compliant to IEC 60946. They can drive loads connected to
ground and loads connected to +24V.
Figure 7: Universal Power Supply

RHE28 Installation & Startup Guide –Doc. No. 8.2.1.07 –Ver. 1.31
13 / 43
Figure 8: Digital Outputs
Connect the output of the RHE to the load. Connect the other side of the load to either GND or
to the positive supply rail. With a grounded load, the output current should be limited to 20mA
(480mW at 24V). With a load connected to the positive supply rail the output can drive up to
100mA (2.4W at 24V).
The output can drive relays directly as well. Relays should be connected between the output and
the positive supply rail.
3.2.3.2 Analog Outputs
An RHE28 transmitter can be supplied with up to two 4-20 mA analog outputs. The outputs can
be connected in a passive/floating configuration or as active outputs for ground referenced loads.
Output 1 can optionally be equipped with a HART digital communications interface.
Figure 9: Digital Output with Relays

RHE28 Installation & Startup Guide –Doc. No. 8.2.1.07 –Ver. 1.31
14 / 43
Figure 10: Analog Outputs
For a floating output connect terminal 51 (53 for output 2) to the positive supply rail and terminal
52 (54 for output 2) to the input of local display/PLC/supervisory control system etc.
For an active output connect terminal 51 (53 for output 2) to terminal 50 and connect the load
between terminal 52 (54 for output 2) and terminal 57.
A protective resistor can be connected in series with the transmitter output and the load. Please
note, with a 24Vdc supply, the maximum total load resistance is 600 Ω.
For analog outputs with HART communication, a load resistance of 250 Ω is recommended.
3.2.3.3 Digital Inputs
RHE28 transmitters can be equipped with up to two IEC60946 compliant digital inputs.
NOTE: Unless advised in advance of delivery, all digital inputs are configured by default for
active high operation at the factory. Units with active low operational inputs are available upon
request.
Digital inputs have an input resistance of 24 kΩ and when operated, will draw approx. 1mA when
connected to a 24Vdc supply.
Figure 11: Digital Inputs

RHE28 Installation & Startup Guide –Doc. No. 8.2.1.07 –Ver. 1.31
15 / 43
Digital inputs can be operated with an active DC signal instead of a switch. The maximum input
voltage must not exceed 30V DC. Note that inputs require a switching current of 0.6mA; the
minimum input voltage for a high reading is 14.4V DC.
3.2.3.4 Analog Input
The RHE28 can be equipped with a 4-20 mA analog input for connecting an external transmitter
(such as a pressure sensor) with a passive 4-20 mA output. The RHE28 transmitter provides
power to the connected devices’ output.
The 4 –20mA analog input is connected to terminal 60 (positive) and terminal 61 (negative). It is
highly recommended that shielded cable be used and that the shield is connected to terminal 68
(PE) at the transmitter.
The analog input in RHE28 transmitters certified for use with an RHM in a hazardous area includes
certified barrier circuitry for connection with an intrinsically safe device.
The negative (AIG) terminal of the input is internally connected to PE, so it is important to connect
only devices that are floating.
Figure 12: Analog Input

RHE28 Installation & Startup Guide –Doc. No. 8.2.1.07 –Ver. 1.31
16 / 43
4Operation and Configuration
RHE2X transmitters can be interrogated and configured in one of three ways:
1) Manually through the front panel user interface
Each RHE2X transmitter has a user operation interface consisting of a color LCD screen
and three pushbuttons. The screen and pushbuttons are used to navigate through a
hierarchical menu structure that logically and intuitively organizes the various features
and functions available within the programming set supplied with the instrument. This
chapter gives a short introduction into operation of the RHE28 through the front panel
user interface. For more detailed information, please refer to the RHE2x Desktop
Reference Manual.
2) By RHECom PC software through the RS485 serial port
See Chapter 5 for details
3) Through Modbus commands via the RS485 serial port
See Chapter 5 for details
4.1 Function of the Pushbuttons
RHE2X transmitters are operated through three front panel pushbuttons. These are labeled
“ESC” [X], “NEXT” [>], and “ENTER” []. The function of these pushbuttons depends upon the
currently displayed screen.
The following table details button function in specific situations.
Table 6: Functions of the Pushbuttons
Button
Situation
Function
ESC
Menu Navigation
Navigates to the menu one level up
Number Input
Exits number input field and returns to the associated menu window without
saving any changes
NEXT
Menu Navigation
Selects the next menu item
During Number Input
Increments the number at the cursor position by one. Number increment is
circular: a ‘9’ increments to ‘0’ for decimal numbers, ‘F’ increments to ‘0’ for
hexadecimal numbers (used for service password)
Number Sign Change
Changes ‘+’ to ‘-’and vice versa. When entering a number with a sign
character, the cursor will start at the first number character to the right of
the sign character in the field. In order to reach the sign character, it is
necessary to traverse all the way to the rightmost character and then start
at the beginning of the input field again
Decimal Point Position
Change
Shifts the decimal point and cursor position one place to the right
End of input line
The entire number will flash upon pressing ENTER at the rightmost character
in an input field. Pressing NEXT when the field is flashing will return the
cursor to the start of the input line
ENTER
Menu Navigation
Navigates to the menu one level down or enters an input screen
During Number, Sign or
Decimal Point entry/
change
Moves the cursor one character to the right in an input field. Note that when
a number is entered that is not in the parameters’ acceptable range, the field
will change to inverse colors (light on dark instead of dark on light). When a
number is not within an acceptable range, pressing ENTER at the rightmost
character in the field will return the cursor to the leftmost position in the
field for re-editing.

RHE28 Installation & Startup Guide –Doc. No. 8.2.1.07 –Ver. 1.31
17 / 43
Button
Situation
Function
Number Input at the
End
Pressing ENTER at the rightmost character in the field will cause the entire
field to flash. Pressing ENTER again will commit the modified number and
return display to the associated menu window
Status Infos - Bit Status
Displays
Increment the index of individual bits in the status words. Successively
pressing ENTER in the Error Status, Soft Error Status, or Warnings items will
allow display/read of each individual bit value and its status description
For example, and as depicted in Figure 16, when navigating the menu structure, press the ENTER
pushbutton once to get from the main display screen to the top level menu selection. Press the
NEXT button repeatedly to scroll through the entire menu. To enter any specific menu, press
ENTER.
Figure 13: Example - RHE28 Top Level Menu Selection
4.2 Passcodes and Menu Selection
To configure and carry out certain functions in an RHE28 transmitter, it is necessary to enter a
predetermined passcode. Passcodes protect configuration setup and prevent inadvertent
changes to the flow meter operating condition. There are two different access levels with
separate passcodes: “USER” and “SERVICE”. The USER level accesses those functions that relate
to the operation of the flow meter on a day to day basis i.e. zeroing and totalizer reset. The
SERVICE level allows access to configuration and setup functions such as I/O ranging and
calibration.
When needed, the screen will prompt for a passcode. Passcodes are entered using the NEXT and
ENTER buttons. Once entry is complete, the entire passcode will flash. Press ENTER again to
enter the menu. If the passcode supplied is incorrect, the cursor will return to the leftmost
character of the passcode for re-entry.
Factory default passcodes are shown in Table 7. The USER level passcode can be changed by
accessing the “Service Login” menu.
Table 7: Default Passcodes
Access Level
Passcode
User
1111
Service
5678
Main Screen

RHE28 Installation & Startup Guide –Doc. No. 8.2.1.07 –Ver. 1.31
18 / 43
4.3 Zero Offset Calibration
Before carrying out a zero offset calibration, make sure that there is a zero flow condition in the
RHM sensor i.e. valves have been closed upstream and downstream of the RHM meter body.
Navigate to the “Zero Now” menu item as shown in Figure 14 to perform the zeroing procedure.
It will be necessary to enter the user passcode (see section 4.2).
Figure 14: RHE28 Menu - Zero Offset Calibration
To perform the zeroing procedure, press NEXT at the Y/N confirmation screen to change the “N”
to “Y”. Press ENTER to start the procedure or ESC to cancel. Once started, a countdown timer will
begin. When it reaches 0, the zero offset calibration procedure is complete. Return back to the
main screen by pressing the EXIT pushbutton twice.
4.4 Change of Positive Flow Direction
Rheonik mass flow meters are bi-directional and can operate with flow passing through them in
any direction. In some cases after installation, the transmitter may read negatively because of
orientation. In this case, the flow direction indication can be reversed within the transmitter. To
change the positive flow direction, navigate to the “Phase Measurement” menu item under
Service Login (Figure 15).
Change the value of the “PhsFlwDirConfig” parameter from “0” to “1” (or vice versa) to change
the flow direction indication of the transmitter.
Main Screen

RHE28 Installation & Startup Guide –Doc. No. 8.2.1.07 –Ver. 1.31
19 / 43
Figure 15: RHE28 Menu - Flow Direction Change
4.5 Temperature Measurement Configuration
For proper performance, it is important to ensure that the correct RHM temperature
measurement type is properly configured in all RHE2X transmitters. For new RHE/RHM systems,
the temperature measurement type will have already been configured at the factory. Checking
that the setting is correct, or to change the setting so the transmitter can be used with a different
RHM flow meter body requires accessing the temperature measurement configuration menu
item as shown in Figure 16.
Figure 16: RHE28 Menu - Temperature Measurement Configuration
Main Screen
Main Screen

RHE28 Installation & Startup Guide –Doc. No. 8.2.1.07 –Ver. 1.31
20 / 43
The value of this menu item will be a number between 0 and 7. Details of the correct setting for
this parameter are provided below each of the various wiring schemes found in section 3.2.1.
SERVICE access level passcode is required to access the temperature configuration menu.
4.6 Output Configuration
To configure the analog and digital outputs, navigate to the respective menu items under User
Login (Figure 17).
Analog Output Configuration
1. Select “Analog Output”1 [C] or 2 [B] and press “ENTER” [] to get to the “Configuration”
[C/B01] menu
2. Select one of the options stated in Table 8 under ID [C/B01], e.g. Configuration 3 –Density
3. The default settings are: “Maximum mA” [C/B02] = 20mA; “Minimum mA” [C/B03] = 4mA.
This can be changed if necessary
4. Assign the maximum and minimum of the measured variable to respective mA level,
e.g. 1200 kg/m³ for “Density Max” [C/B08] and 0 kg/m³ for “Density Min” [C/B09]
5. Select a fire state configuration [C/B14] to determine what shall happen if the measured
variable range is exceeded or in case of error condition
6. If necessary set a damping factor [C/B17] and damping band range [C/B18]
If the RHE28 is equipped with only one analog output use “Analog Output 2 [B]” for
configuration.
0
Main Screen
Figure 17: RHE28 Menus - Output Configuration
Table of contents
Other RHEONIK Transmitter manuals
Popular Transmitter manuals by other brands

NEAR
NEAR Smartbrief quick guide

Creative
Creative Bluetooth Audio BT-D1 quick guide

Panametrics
Panametrics DigitalFlow XGS868i Service manual

IFM Electronic
IFM Electronic Efector 600 TD Series operating instructions

NIVELCO
NIVELCO EasyTREK SCD-300 Series Installation and programming manual

Polaris
Polaris PFT-28s quick start guide