Rhima RH 50 User manual

Operator’s Manual
RH 50 Washer
Australia Tel: 1300 347 944 | New Zealand Tel: 0800 902 054 | Singapore Tel: +65 9107 8943

INSTRUCTION MANUAL FOR DISHWASHERS
●The appliance must be connected to water and electrical supplies by qualified
tradespersons only and according to local regulations.
●The appliance must be used by adults only. Do not let children play with, or operate
this machine.
●Only persons trained to use this dishwasher are permitted to operate it.
●This appliance has been designed to wash food preparation and eating utensils. It has
NOT been designed to wash objects soiled with petrol, paint, remnants of steel or iron,
corrosive chemical products such as acids, alkalis, or solvents or any item that cannot be
immersed in water.
●Do not open the appliance door or lift hood while the appliance is operating. The
appliance has a safety device which stops operation if the door or hood is accidentally
opened.
●After using the appliance, isolate the electric and water supply.
●Do not attempt to repair the appliance. Repairs made by unqualified persons may cause
further damage and will void warranty.
●Repairs and servicing of this appliance must be carried out by Rhima personnel only.
GENERAL INSTRUCTIONS
It is important to keep this instruction manual near the appliance for
future consultation.
If the appliance is sold or transferred to another user, make sure this
manual remains with the appliance so that the new owner is informed
about the warnings and operation of the appliance. These instructions
are given for safety reasons and they must be read carefully before
installing or using the appliance.
IMPORTANT CUSTOMER INFORMATION
●To request a service, detergents or rinse additive contact your local Rhima Service centre
below:
Australia: 1300 347 944
New Zealand: 0800 902 054
Singapore: +65 9107 8943
2

3
ELECTRICAL INSTALLATION
The Australian installation shall be in accordance with The Plumbing Code of Australia (PCA).
This appliance should be connected to a hot water supply (Max 65°C ) for in accordance
with Australian Standard AS/NZS 3500.1. for optimum performance.
The water supply pressure should be a minimum 200 kPa at all times and flow rate should
be at least 10 litres per minute. A static pressure higher than 600 kPa (73.5 psi) requires a
pressure reducing valve upstream of the supply line. If water pressure is below 150 kPa,
the use of a rinse booster pump is recommended.
This appliance is designed to drain to a tundish. Waste connection to a spigot is not
recommended and may cause draining issues.
The drainpipe should withstand 70°C (158°F) in continuous duty conditions.
The grey water drain hose must have a fixed watertight seal above the tundish in
accordance with the Australian Standard AS/NZS 3500.2.
A DIAGRAM SHOWING THE CORRECT METHOD OF WASTE INSTALLATION IN ACCORDANCE
WITH THE AUSTRALIAN STANDARD AS/NZS 3500.2 IS BELOW
PLUMBING INSTALLATION
WMTS-101
WM-022203
This appliance is intended to be connected to a 3 x 16 Amps electrical supply and must be
earthed.

4
CONTROL PANEL AND RELATIVE SYMBOLS
pict. 2
pict. 1
S
!
1 32 4
A) Switching - On / STAND BY button
B) Regeneration push-button (Not Available)
C) Supplementary cold rinse push-button (Not Available)
D) Drain push-button (Not Available)
E) START push-button to start up cycle / select cycle
F) Tank temperature display
G) Washing type 1 (60 seconds)
H) Washing type 2 (90 seconds)
I) Washing type 3 (120 seconds)
L) Washing type 4 (180 seconds)
M) Boiler temperature display
N) Tank filling/draining indicator
O) Tank filling indicator
P) Tank draining indicator
Q) Cycle scrolling bar
R) STAND BY indicator
S) Set temperature reached indicator
T) Supplementary cold rinse indicator (Not Available)
U) Regeneration cycle indicator (Not Available)
V) Salt shortage indicator
Z) Machine alarm indicator

5
• Turn the button A(pict. 1). The power-on of the machine will be displayed by the indicator R switching OFF and by
the indicators F and M and by the one of the washing cycles switching ON.
Make sure that the overflow pipe is correctly inserted and that the hood is shut. The machine will automatically start filling
the sump. The indicators N, Oand the scrolling bar Qswitch on.
S
!
1 32 4
Then, when the sump is full, the push button START E swtich on and the heating step will start. Should the machines be
equipped with the WRAS certified Break Tank, the tank filling phase is extended.
Indicator S(pict. 2) switches on when the washing and rinsing water temperature is reached.
The indicators Fand Mshow the tank and boiler temperatures, respectively.
S
!
1 32 4
pict. 3
OPERATION
• Check that the filter is correctly fitted in its seat (pict. 3-4).
Filter must be cleaned every 20 wash-cycles or whenever necessary.
DO NOT use the appliance without the filter.
• Insert the overflow tube in the special seat inside the sump (pict. 3-4).
• Shut the dishwasher hood.
• Insert the special rinse aid dispenser tube in the canister and check that the quantity of additive
is enough for the day (see paragraph Use of rinse aid).
• Open the water supply valve.
• Turn the main power switch ON. The machine is on STAND-BY mode (indicator RON).
S
!
1 32 4

6
• Insert the rack filled with objects to wash. The objects must be correctly placed in the rack (see par. Cutlery and
).
• Select the wanted washing cycle (1-2-3-4) by pushing the button START E (pict. 2); after a few seconds (about
5 seconds) the indicators G, H, I, L (pict. 2) will start scrolling. Release the button when the cycle light indicator
desired is ON.
• Before starting the wash-cycle, in absence of an automatic dosing system, put the detergent in the sump. When the
temperature indicator Swill turn ON, press the START E button for at least a second. The beginning of the cycle is
indicated by the flashing of the selected cycle indicator, by the increasing of the brightness of the button START E and
by the progress of the scroll bar Q.
S
!
1 32 4
• At the end of the day, clean the machine (see chap. MAINTENANCE).
• Switch the machine offby pushing button Aand shut the water valve. When the indicator Rturns ON, the machine is on
STAND-BY mode.
• Switch the main power switch OFF.
At the end of the washing cycle, a hot rinse cycle will take place.
The button START E will flash when the cycle is completed.
N.B.: At cycle-end, keeping the door closed, objects will not dry. Take out the rack or keep the door open to allow the
evaporation, helping the drying of the objects.
crockery loading
• Drain the water by removing the overflow pipe.

7
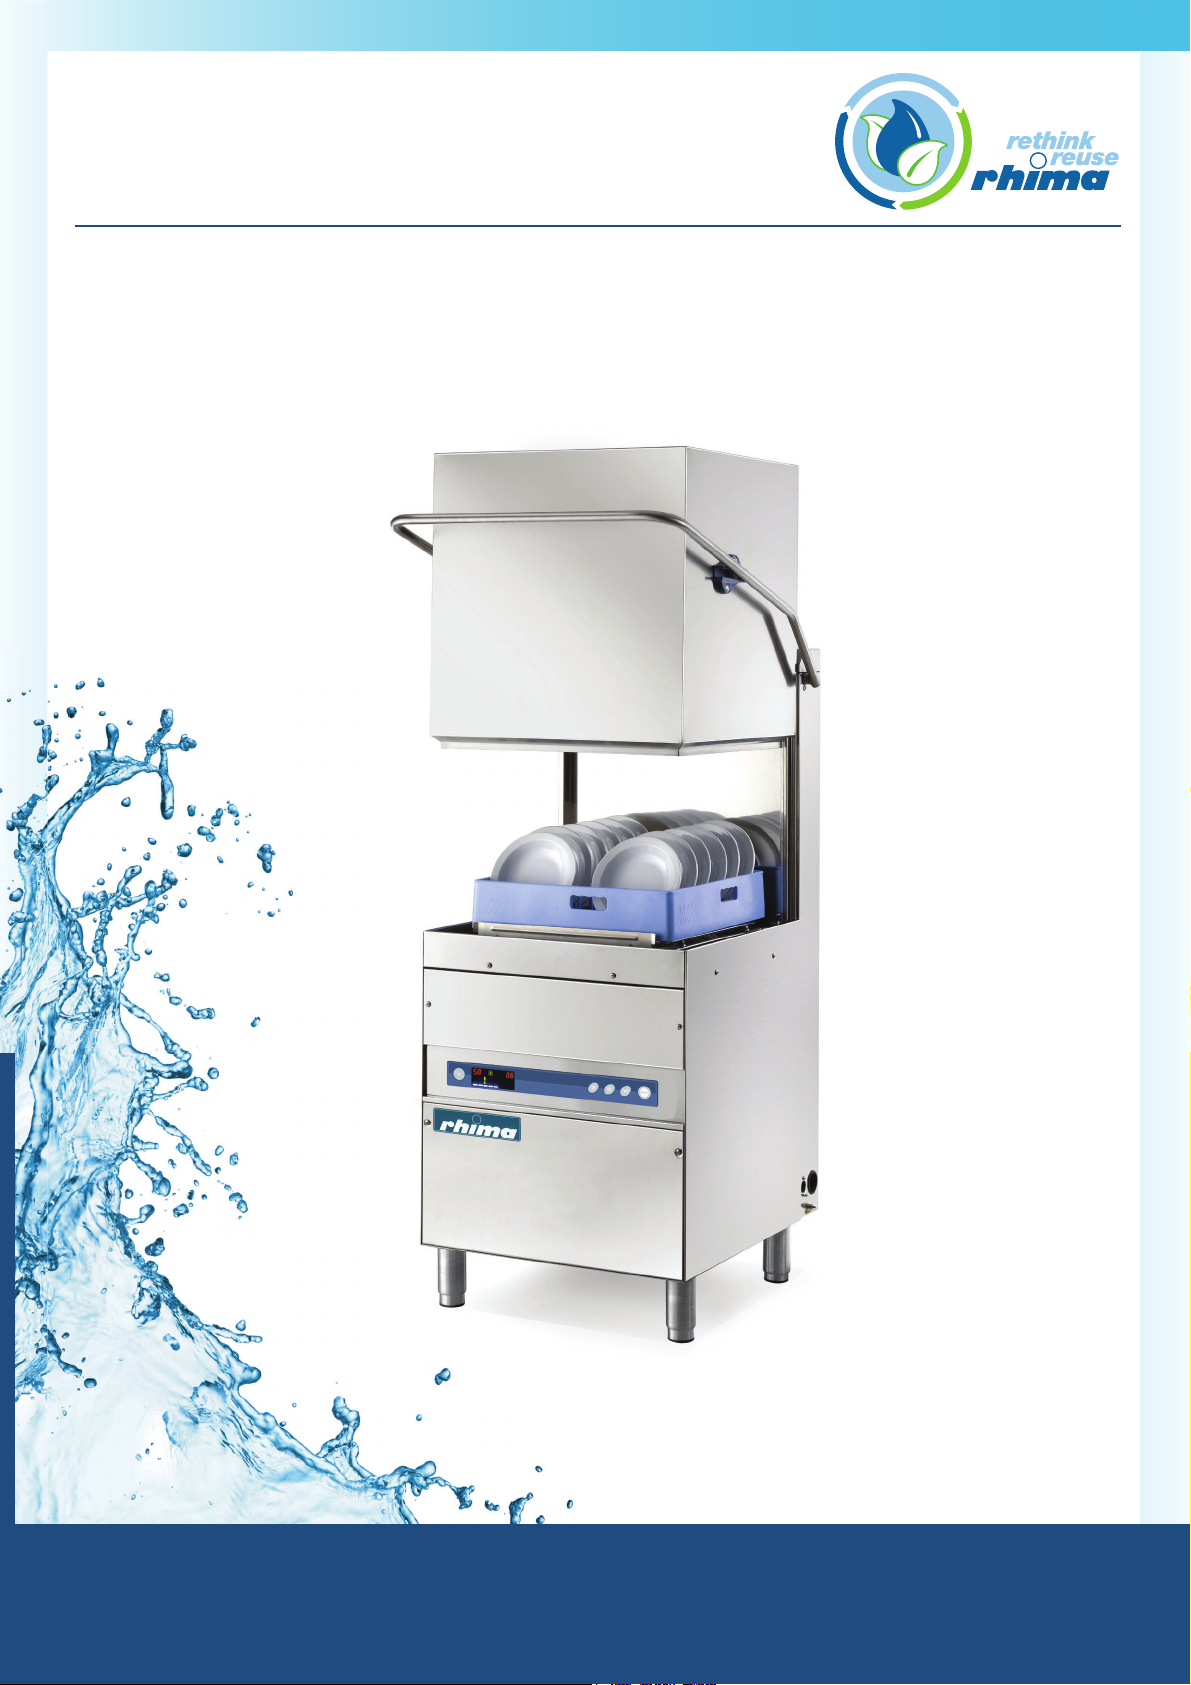
Cutlery and crockery loading
Before cutlery and crockery loading in the machine, coarsely clean them from the leftover food.
It isn't necessary to rinse the cutlery an crockery under water.
ATTENTION: Do not wash articles polluted with petrol, paint, chips of steel or iron, ash, sand, wax,
lubricant grease. These substances damage the machine. Do not wash fragile objects or material not
resistant to the washing process.
!
Note the following recommendations :
• Crockery and cutlery should not be inserted inside one another, covering each other.
• Place the crockery in order to all surfaces can be reached by water; otherwise the dishes are not washed.
• Make sure all the crockery are in a stable position and that the hollow containers don't overturn (cups, glasses, bowls,
etc.) .
• Place in the rack all the hollow containers such as cups, glass, etc. upside-down.
• Place the crockery with deep hollow with upper face downwards, so that water can flow out.
• Make sure the smaller crockery do not fall from the rack.
• Check all the wash arms runs freely and they are not blocked by too tall or too prominent crockery. Eventually, run a
manual rotation of the arms to check it.
Some foods, such as carrots, tomatoes, and others, may contain some natural dyes substances, that in large amounts, can
alter the crockery and plastic parts colors.
Any discoloration does not mean that the plastic is not heat resistant.
Crockery and cutlery not suitable for dishwasher
Not suitable for dishwasher:
• Wooden crockery and cutlery or with wooden parts; water at high temperature causes deformation to wood. Also the
adhesives used are not suitable for treatment in the dishwasher; a consequence could be the handles detachment.
• Crafts, precious vases or decorated glasses.
• Not heat-resistant plastic crockery.
• Copper, brass, pewter or aluminum objects: they may become discolored or opaque.
• The decorations on glass, after a certain number of washes, can lose gloss.
• Fragile glasses or crystal items, if often washed, can become opaque.
We recommend to buy exclusively crockery and cutlery suitable for dishwashing.
After several washes, the glass can become opaque.
It is mandatory to repeat the washing cycle if at the end of the cycle the crockery are not well clean or if there are
washing residues (glasses, cups, bowls, etc. with liquid inside).
pict. 5pict. 4

8
Detergent use
The detergent shall be the NO FOAM type, suitable for industrial dishwashers.
The use of good quality liquid detergents is recommended.
The detergent shall be placed in the sump. Follow manufacturer recommendations for dosage. The machine can be ordered
with an adjustable automatic detergent dispenser (always recommended).
1cm of the product drawn into the tube is equal to about 0.15 g. A correct amount of detergent is very important for a
successful wash.
Lack or poor quality of detergent, in this machine will cause bad wash results and clogging.
Rinse aid use
The machine has a standard rinse aid dispenser. The machine automatically sucks the product.
The rinse-aid chemical, shall be suitable for professional glass and dishwashers. It is advisable to rely on specialized retailers
in the sector.
H.A.C.C.P. and hygiene regulations
• The machines are equipped with a temperature indicator (LED S - pict. 2) which lights up when the boiler and the tub
have reached the preset temperature (values set by the manufacturer). It is recommended to wait for this light to go on
before starting the next cycle.
• Scrape food from the dishes carefully in order not to clog the filters, nozzles and pipes.
• Unload the wash tub and clean the filters at least twice a day.
• Check that the amount of detergent and rinse aid dispensed is correct (as suggested by the supplier of the product). In
the morning before starting up the machine, check that there is enough product in the containers for daily use.
• Always clean the support floor of the dishes.
• Remove the rack from the dishwasher with clean hands or gloves so as not to dirty the cutlery.
• Do not dry or polish the dishes with non-sterilized cloths, brushes, or dusters.
Machine features
The machine’s sound level is Lpa = 70dBA ± 2.5dB(A)**
**test made according to EN 60335-2-58/A11

9
MAINTENANCE
Routine maintenance
Daily cleaning is needed to ensure that the machine runs perfectly. The following shall be carried out:
• Turn the machine in stand-by mode, by pressing the button A(pict. 1).
• Turn offthe wall-mounted main switch.
• Drain the water by removing the overflow pipe.
• Remove the filter and clean it with a rigid brush underneath a powerful water jet.
WARNING: The machine is not protected against pressurized water jets. Do not use pressure cleaning
system against the machine.
It is recommended to contact seller for cleaning instructions, in order to have detailed indications on
methods and products for the correct periodical machine sanitation.
Do not use bleach or chlorine based detergents.
!
S
!
1 32 4
• Shut the water valve.
• Turned the machine offby switching the main power switch OFF.
N.B.: It is recommended to change the water in the wash-tank at least every 20 wash cycles, or twice a day. Do not
use metal-wool for cleaning and/or corrosive products, which will damage the machine.
S
!
1 32 4
S
!
1 32 4
• When flashing the indicators N - P - Z means that the tank is not empty.
• When displaying door means that the hood is open
• Remove the arms by loosening the fixing screws. Thoroughly clean the wash and rinse arms and the nozzles
underneath running water.
• Reassemble all the parts and replace the arms in their seats,fixing them with the relative screws. Take extreme care to
re-assemble the nozzles in the right position (open and / or closed nozzles) and that the arms are installed with the
right axial angle.
• Clean the tank very carefully, using a water shower.
• It is suggested to leave the door of the machine open at the end of the day.
• Automatic cycle of machine self-cleaning/ rinsing:
The machine should be in stand-by mode (red-lighted indicator R), remove the overflow pipe and close the door. Push
the button START E for 5 seconds. An automatic cycle of 15 seconds will start, after this the machine will be in stand-
by mode.

10
Extraordinary Maintenance – by qualified Service Personnel only
Once or twice per year, the machine should be checked by qualified Service Personnel:
1 Clean the intake filter of the solenoid valve
2 Remove scaling from the heating elements
3 Check the status and the tightness of all gaskets
4 Check the perfect state and/or wear of the components
5 Check the efficiency of the dispensers
6 Tighten firmly all electrical connections at least once per year.
ALARMS
Alarms will be displayed by the lighting of LEDs. according to their typology.
SEIDEMERESUACMRALAFOEPYT
DELIAFEBORPRELIOB2B
MRALAGNITAEHRELIOB3B
GNITAEHREVORELIOB5B
DELIAFDAOLRETAW1E Open the water supply valve and check the
overflow pipe
DELIAFEBORPKNAT2E
GNITAEHREVOKNAT5E
DELIAFGNINIARDKNAT6E Check the overflow pipe. Contact the Rhima
Service Department.
G FAILURENILLIFKNATKAERB01
ECOLOGICAL ASPECTS
Contact the Rhima Service Department.
Recommendations for optimal use of energy, water and additives
Chemical dosing: A pre-set (by the manufacturer) quantity of Chemical is injected in the resins at each cycle.
Use the machine fully loaded when possible: This shall prevent detergent, rinse aid, water and energy consumption
waste.
Detergent and rinse-aids: Use detergents and rinse-aid chemicals with high biodegradability, to best respect the environment.
Verify proper dosage in relation to water hardness at least once a year. Excess product pollutes rivers and seas while an
insufficient dose results in unsatisfactory objects washing and/or hygiene.
Boiler and Wash-Tank temperatures: The boiler and tank temperatures are set by the manufacturer in order to obtain the best
washing results with detergents on the market. The temperatures can be reset by the installer in relation to your detergent.
Pre-washing: Carefully pre-wash with a moderate amount of water at room temperature to facilitate the removal of animal
fats. To remove encrusted materials warm water soaking is recommended.
Note: Wash objects as soon as possible to avoid deposits from drying and compromise effective washing.
For effective washing routine dishwasher cleaning and maintenance is advised (see chap. MAINTENANCE).
Disregarding the points listed above and of any the information contained in this manual can cause energy, water
and detergent waste with a subsequent increase in running costs and/or performance reduction.

11
Type of Problem Possible Causes Cure
The machine does not
load water. Rinse area nozzles or solenoid-
valve filter blocked and/or scaled
with limestone.
Clean the rinse arm nozzles, conductors and solenoid-valve
filter. Contact the Rhima Service Department.
Defective pressure-switch.
Washing results are
unsatisfactory.
The washing nozzles are obstructed
or the rack does not rotate.
Clean the nozzles carefully, and check the right positioning
of the wash-arm, tightening firmly.
Foam is present. Use no-foam detergents or reduce the dose in use. Check
the rinse-aid dosage.
Fats or starches not removed. Insufficient detergent concentration.
Filters are dirty. Remove filters, clean with brush under a jet of water and
replace in original position.
Check tank temperature (which
must be between 55°C and 60°C).
Wash time insufficient for the type
of dirt.
Select a longer wash-cycle, if possible, otherwise repeat
the wash cycle.
Wash water is dirty. Drain the tank water, clean the filters; refill the tank and
replace the filters correctly.
Objects are not properly
dried.
Not enough rinse aid.
The rack is not suitable for the
objects.
Use the suitable rack which gives the objects an inclined
position so that water can rinse away.
The washed items may have been
sitting in the wash chamber too
long.
As soon as the cycle stops, remove the rack with pots and
tools so that they can dry more quickly in the air.
Rinse temperature under 80°C.
Surface of objects too rough or
porous for material wear.
Replace type of objects used. If the dirt on the objects is
dry and old, soak before washing.
Streaks and spots on
objects.
Too much rinse-aid chemical.
Too hard water. Check the water quality. Water must not exceed 8°f in
hardness.
TROUBLESHOOTING
The machine stops during
the wash stage and starts
refilling water.
The previous day's water was not
changed.
Drain the tank totally and refill.
Excessive water temperature in
tank.
Defective pressure switch.
Overflow pipe improperly
positioned.
Remove and reposition the overflow pipe properly.
Water tap shut. Open the hot and/or cold water tap.
Contact the Rhima Service Department.
Increase dosage. Contact the Rhima Service Department.
Contact the Rhima Service Department.
Reduce the rinse aid amount. Contact the Rhima
Service Department.
Contact the Rhima Service Department.
Machine will not drain. Object stuck in drain pump*. Contact the Rhima Service Department.
Blocked drain. Check sink’s drain correctly.
If not contact licenced plumber.
* If drain pump is supplied.
Contact the Rhima Service Department.

Australia Tel: 1300 347 944
New Zealand Tel: 0800 902 054
Singapore Tel: +65 9107 8943
DETERGENTS
To request detergents or rinse additive contact your local Rhima Service centre
below:
Australia: 1300 347 944
New Zealand: 0800 902 054
Singapore: +65 9107 8943
Mediwash
5 Litre
For washing glass &
instrument washing
Final rinse
5 Litre
Superwash
5 Litre
For all other washing
Version 1.0
Table of contents
Other Rhima Washer manuals

Rhima
Rhima RG 10 HR User manual

Rhima
Rhima RP 1 User manual

Rhima
Rhima RC231 User manual

Rhima
Rhima RH 60 User manual

Rhima
Rhima RR225 OPTIMA User manual

Rhima
Rhima HIGH SPARKLE 40 User manual

Rhima
Rhima RR360 PRO User manual

Rhima
Rhima RR108 COMPACT User manual

Rhima
Rhima MED SPARKLE User manual

Rhima
Rhima RG 9 User manual