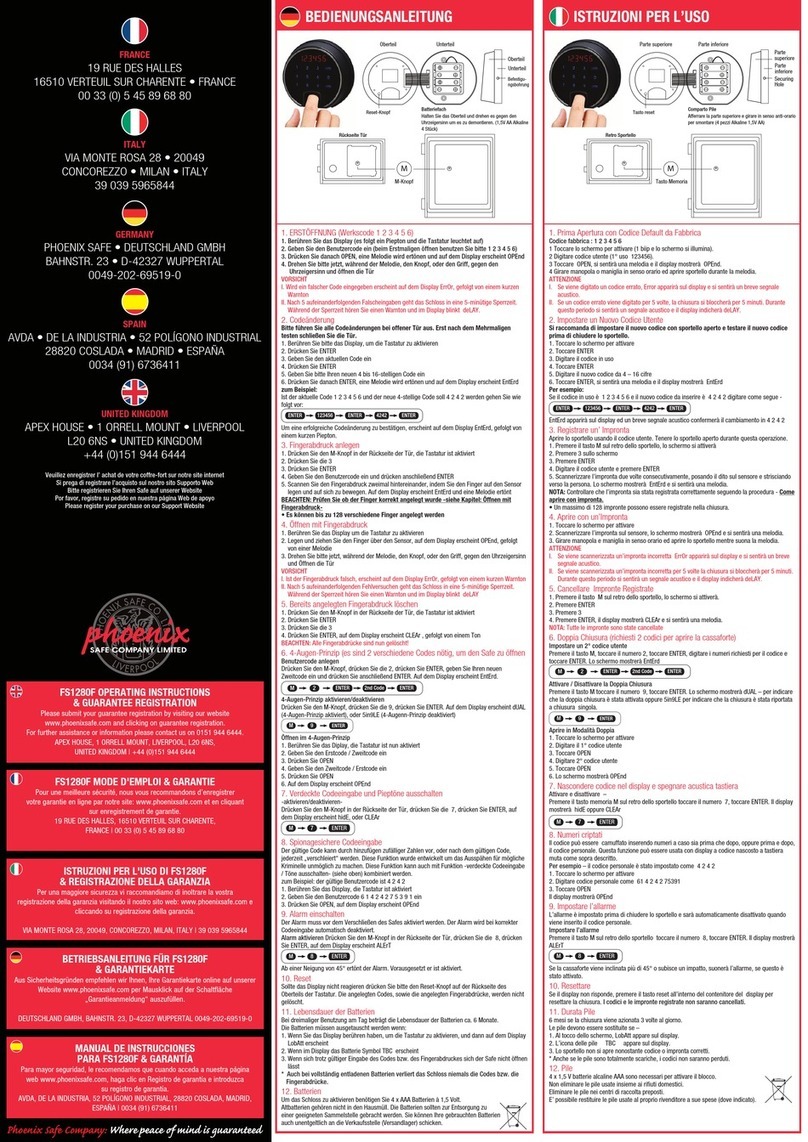
RHINO Bighorn series User manual

SAFE
OWNER’S MANUAL
MODEL NO. _________________________________
SERIAL NO.__________________________________

ATTACH COPY OF ORIGINAL SALES RECEIPT HERE
At Rhino Metals, Inc., our job goes beyond just
making safes. We believe our ulmate responsibility is
to provide a quality product that creates peace of mind
and unmatched value for our customers.
We are thankful you chose Rhino Metals, Inc. to
help protect your valuables and are condent you will
be sased with your safe for years to come.
The Rhino Metals, Inc. Team
ii

DO NOT STORE YOUR COMBINATION OR
PROOF OF PURCHASE INSIDE YOUR SAFE
PLEASE KEEP INFORMATION AVAILABLE AS WE WILL ASK FOR IT IF
WARRANTY WORK IS NECESSARY.
Serial Number:
___________________________________________
Combinaon:
___________________________________________
Purchased From:
___________________________________________
Date:
___________________________________________
Rhino Metals, Inc.
Makers of Bighorn, Kodiak and Rhino Safes
607 Garber Street
Caldwell, ID 83605
208-454-5545
208-459-0819 (FAX)
www.rhinosafe.com
Toll Free: 800-701-9128
For Technical Support issues, it is helpful to be near your safe when you call.
iii

1
Moving and Opening Your New Safe 2
Removing Shipping Feet on Bighorn and Kodiak Safes 3
Bolng Down Your Bighorn or Kodiak Safe 4
Removing Shipping Feet on Rhino Safes 5
Bolng Down Your Rhino Safe 6
Geng To Know Your Safe 7-8
LaGard and SecuRam Electronic Lock Instrucons 9-10
Sargent and Greenleaf Electronic Lock Instrucons 11-12
Sargent and Greenleaf Manual Lock Instrucons 13-14
Frequently Asked Quesons 15
Troubleshoong Guide 15-16
Limited Lifeme Warranty 17
CONTENTS

Moving Your New Safe
2
Safes can be very heavy, always use cauon when moving your safe to
prevent damage to ooring, doorways and walls.
Check to make sure that the route to the nal locaon for your safe is
capable of supporng the weight of your safe. Also make sure the oor
beneath the nal locaon for your safe is level and can withstand the
weight of your safe plus the weight of what you plan to store in it. Shims
can help keep your safe level and operang smooth.
Using a professional moving company is highly recommended to move
your safe and remove the shipping feet.
Opening Your New Safe
Bighorn and Kodiak safes are shipped unlocked.
Simply rotate the hub on the front of the safe clock-
wise.
Rhino safes with a LaGard electronic lock can be
opened by entering 1-2-3-4-5-6 on the keypad and
rotang the hub or hand wheel clockwise within 4
seconds.
Rhino safes with a Sargent and Greenleaf (S&G)
electronic lock will open by entering 1-2-3-4-5-6 on
the keypad and then rotang the outer ring of the
keypad clockwise within 6 seconds unl it stops.
Then rotate the hub or hand wheel clockwise.
Rhino safes with manual locks will open by simply
rotang the hub or hand wheel clockwise.
LaGard Lock
S&G Lock
Owner’s Manual and Accessory Sheet, handles (excludes models with hand
wheel), shelves, shelf clips, keys for Day-Lock (excludes models with elec-
tronic lock), power cord (if applicable).
What’s Inside

Aenon
When removing shipping feet, start on one side and then move to the
other. Only remove one shipping foot at a me.
If your safe is under 500 lbs, use a minimum of 2 people. If your safe is
over 500 lbs, professional installaon is highly recommended.
1. Make sure door is closed and handle is
spun counter-clockwise to keep safe
door closed.
2. On a Bighorn or Kodiak, you will need
either a 17mm or a 19mm socket
wrench to remove the shipping feet.
(Wrench not included)
3. Place wrench on head of bolt. Begin
turning bolt counter-clockwise to re-
move. Repeat for both bolts.
4. Angle the safe to the le (or right for
le side shipping foot) slightly, as
shown, and carefully pull shipping feet
away from boom of safe.
5. Once the shipping foot has been re-
moved from one side of the safe, care-
fully lower safe to the oor.
Proceed removing bolts from other side
of the safe, and follow steps 4 and 5.
Have an assistant brace the safe.
Use a minimum of two people for this
step.
3
Removing Shipping Feet
On Your Bighorn or Kodiak Safe

WARNING: Your safe is heavy and presents a safety hazard unless bolted down.
You must bolt down your safe to validate your break-in warranty.
4
Your safe is predrilled from the factory for anchoring with 4 holes through
the oor of your safe.
1. Place safe in exact locaon desired.
2. Use shims to level your safe if necessary (shims not included).
3. Open door carefully and remove black caps to expose anchor holes.
4. Purchase anchor bolts suited for your oor type. We recommend using
a minimum of 3” long wedge anchor bolts for concrete oors that are
1/2” in diameter. For wood oors, we suggest a minimum of 2 1/2”
long lag bolts at least 3/8” in diameter. Always research your oor type
to make sure standard anchor bolts or lag bolts are adequate.
5. Follow bolt manufacturer’s installaon instrucons.
Anchoring hardware and shims are not included.
Safe must be bolted directly to oor with the shipping feet
removed. To remove shipping feet, please refer to page 3.
Bolng Down Your
Bighorn or Kodiak Safe

Aenon
For your safety, we recommend that a professional mover remove the
shipping feet. For safety, blocks should be placed under the safe before
removal of the shipping feet.
Cauon: The door of your safe is extremely heavy and is a safety hazard
unl bolted down.
On Rhino Safes, you will need to unbolt the shipping feet from inside the
safe.
Exercise extreme cauon when opening the door to prevent the safe
from pping over.
5
Removing Shipping Feet on Rhino Safes
1. You will need a 5/16” socket wrench to re-
move the protecve plate and a 5/8” socket
wrench to remove the shipping feet.
(Wrench and sockets not included)
4. REMOVE ALL BOLTS. Place wrench on head of
bolt. Begin turning bolt counter-clockwise to
remove. Once ALL (4) bolts are removed, the
door MUST be closed and locked before the
next step. The door of your safe is heavy and
presents a safety hazard unl bolted down.
5. Tilt the safe to the le as shown (or right for
the le shipping foot), and carefully pull ship-
ping foot and blocks away from boom side of
safe.
Use a minimum of two people for this step
2. Place blocks under safe on all 4 corners of
the safe for safety purposes. Use the 5/16”
socket to remove the 4 outer screws that hold
the protecve plate across the front of the safe
in posion.
3. Locate boom oor tabs (le and right sides)
and pull up on the tab to li panel, exposing the
bolt heads (see page 6 for more details).
6. Once shipping foot and blocks have been re-
moved from one side of the safe, carefully low-
er safe to the oor as shown.
Proceed removing shipping foot and blocks
from other side of the safe, and follow steps 5
and 6.
Close and lock safe door before connuing
5

6
Bolng Down Your Rhino Safe
Your safe is predrilled from the factory for anchoring with 4 holes through
the oor of your safe. (Located under the oor panel)
1. Place safe in exact locaon desired.
2. Use shims to keep your safe level if necessary. (shims not included)
3. Open door.
4. Locate carpeted tabs on oor of safe. Pull tabs gently upward towards
the center of the safe to expose anchoring holes. It is not necessary to
remove the interior or the carpeted oor panel.
(See red arrows below)
5. Locate all 4 factory drilled anchoring holes.
6. Purchase anchor bolts suited for your oor type. We recommend using
a minimum of 3” long wedge anchor bolts for concrete oors that are
1/2” in diameter. For wood oors, we suggest a minimum of 2 1/2”
long lag bolts at least 3/8” in diameter. Always research your oor type
to make sure standard anchor bolts or lag bolts are adequate.
7. Follow bolt manufacturer’s installaon instrucons.
Anchoring hardware and shims are not included.
Safe must be bolted directly to oor with shipping feet removed.
To remove shipping feet, please refer to page 5.
6
PULL UP ON TABS
WARNING: Your safe is heavy and presents a safety hazard unless bolted down.
You must bolt down your safe to validate your break-in warranty.

7
Geng To Know Your Safe
The Clutch:
All UL listed Rhino, Kodiak and Bighorn Safes come with a factory installed
clutch. The clutch will automacally disengage the sha of the handle from
the locking mechanism if the handle is rotated in either direcon without rst
unlocking the lock. This helps prevent damage to the lock without requiring a
failure somewhere else in the mechanism that would cause a lockout.
If you suspect your clutch system is not funconing properly, do not aempt
to adjust the clutch without consulng Rhino Tech Support as it will void the
warranty and may cause a lockout to occur.
The Lock:
There are 4 types of locks that are used on Rhino, Kodiak and Bighorn safes.
All 4 are UL listed for maximum the protecon and come with a 1 year man-
ufacturer’s warranty. If you are interested in purchasing an extended warran-
ty, you have 30 days from the purchase of your safe to do so. For more infor-
maon, see the Accessory Sheet included in your safe, visit
www.rhinosafe.com or contact a local dealer.
-For operang instrucons on LaGard and SecuRam electronic
locks, see pages 9-10.
-For operang instrucons on Sargent and Greenleaf electronic
locks, see pages 11-12.
-For operang instrucons on Sargent and Greenleaf manual
locks, see pages 13-14.
Inside Your Safe:
Find the conguraon that is right for you. Most shelves are adjustable by
moving shelf clips. Make sure your shelves are level before loading them up.
Always make sure long guns are resng securely in the gun barrel slots to
prevent damage.
If the humidity in your gun safe is a concern, consider purchasing a dehumidi-
er to help prevent rust or tarnish on your guns and jewelry, or mildew on
documents or paper in your safe. More informaon on dehumidiers is avail-
able from the Accessory Sheet, www.rhinosafe.com or contact a local dealer.

WARNING: Max load for shelves is 40 lbs.
Gun Barrel Rest shelves are not designed to hold weight.
8
Maintenance:
Cleaning your safe - To clean the exterior of your safe, use a clean and so
cloth that is slightly damp with water. We suggest using a microber
cleaning cloth. Take care around the edges of any logos or pin striping.
Using pressure on logos or pin striping could damage them. Locks and
handles are coated to protect from rust or tarnish. Do not use any kind of
metal polish or harsh cleaning products on them. Simply wipe o with a
so, damp cloth. For minor scratches or blemishes in the paint of the safe,
informaon on touch-up paint is available from the Accessory Sheet,
www.rhinosafe.com or contact a local dealer.
Greasing the door bolts - To keep the door bolt acon of your safe smooth
and relieve any stresses from the mechanism, we recommend adding a
small amount of grease to the door bolts. With the door open and the
handle rotated counter-clockwise to extend the door bolts, wipe a very
small amount of lubricang grease onto the moving door bolts around the
door. We recommend using Super Lube™ or a mul-purpose silicone
grease with PTFE.
Manual Lock Maintenance - To keep your manual lock as reliable as possible,
we recommend having a cered lock technician service your lock annually.
Electronic Lock Maintenance - While electronic locks do not need annual
maintenance, changing out your 9-volt baery once a year is highly recom-
mended to ensure reliable access into your safe. We recommend using a
Duracell™ or Energizer™ alkaline baery with a “use date” at least 4 years
in the future.
The Handles:
If your safe did not come with a hand wheel,
the handles can be found packaged inside the
safe. To install the handles, screw them
clockwise into the hub on the front of your
safe.

LaGard Lock SecuRam Lock
9
LaGard and SecuRam Electronic Lock Instrucons
Installing or Replacing The Baery
-To remove the keypad, push
straight up from the boom of the
keypad unl it releases.
-Carefully pull the keypad away
from the safe to prevent damage to
the wiring harness.
-With the baery cavity accessible,
remove the old baery and discard
(if replacing).
-Plug a new 9-volt baery into the
terminals and tuck the baery and
wires back into the baery cavity.
-Slide the keypad back down onto
the shoulder screws. Be careful
not to pinch the wiring on the
screws.
We recommend using a Duracell™ or Energizer™ alkaline baery with a “use
date” at least 4 years in the future. Replacing the baery annually will help to
ensure reliable access into your safe.
Low Baery Indicaon
Repeated beeping during opening indicates that the baery is low and needs
immediate replacement.

Operang The Lock
Enter the exisng six digit code. The lock comes from the factory set to
1-2-3-4-5-6. Each key press is conrmed with an audio and visual (LED
ash) signal.
The lock will indicate a valid code entry with a double signal.
Within 4 seconds, turn handle clockwise and pull door open.
To lock the safe, turn handle counter-clockwise unl it stops. Always test
to see if the lock has re-engaged by turning the handle clockwise.
Wrong Try Penalty
Every invalid code entry is indicated by a triple signal. Entering 4
consecuve invalid codes starts a 5 minute delay period. (LED will ash at
5 or 10 second intervals.)
At the end of the delay period, two more incorrect codes will restart an
addional 5-minute delay period. Removing the baery during the delay
period will reset the 5 minute mer.
Changing Your Code
Before changing your code, open the door and extend the door bolts. Always
leave the door open when changing your combinaon.
Press “0” (zero) six mes.
Enter your exisng six digit code once.
Enter the NEW six digit code twice.
Enter the NEW code one more me to unlock the safe.
If a mistake is made, wait thirty seconds and repeat steps 1-4.
-Always test the lock several mes with the door sll open. Make sure the
lock re-engages aer opening.
-If you just changed your combinaon for the rst me, always check to make
sure that 1-2-3-4-5-6 (factory default) will no longer open the lock.
-When creang new combinaons, avoid using personal data such as birth
dates, street numbers or phone numbers to keep your valuables as secure as
possible.
Always keep a copy of your combinaon in a secure locaon
outside of your safe.
10

11
Sargent and Greenleaf Lock
Sargent and Greenleaf Electronic Lock Instrucons
Installing or Replacing The Baery
-Unlock and open your safe rst (if
possible).
-Pull out on the tab at the top of the lock
ring (highlighted in white in pictures) and
rotate the ring around the keypad counter-
clockwise. The ring will pull out away from
the safe far enough to reveal the baery
cavity.
-With the baery cavity accessible, remove
the old baery and discard (if replacing).
-Plug a new 9-volt baery into the terminals
and tuck the baery and wires back into the
baery cavity.
-Push the keypad ring back towards the safe
and rotate the ring clockwise. The ring will
slide back towards the safe and click into place.
- Test the operaon of the lock several mes with the door open before
closing and locking the safe.
We recommend using a Duracell™ or Energizer™ alkaline baery with a “use
date” at least 4 years in the future. Replacing the baery annually will help to
ensure reliable access into your safe.
Low Baery Indicaon
Repeated beeping during opening indicates that the baery is low and needs
immediate replacement.
TAB

12
Operang The Lock
Enter the exisng six digit code. The lock comes from the factory set to
1-2-3-4-5-6. Each key press is conrmed with an audio and visual (LED
ash) signal.
The lock will indicate a valid code entry with a double signal.
Within 6 seconds, turn the ring around the keypad clockwise unl it
stops. Then turn the handle on your safe clockwise and pull the door
open.
To lock the safe, turn the handle on your safe counter-clockwise unl it
stops. Then turn the ring around the keypad counter-clockwise. The lock
will beep twice when it has re-engaged.
Wrong Try Penalty
Every invalid code entry is indicated by a triple signal. Entering 5
consecuve invalid codes starts a 3 minute delay period. (LED will ash at
5 or 10 second intervals.)
During the delay period, pressing any key will extend the delay period a
few seconds.
Changing Your Code
Before changing your code, open the door and extend the door bolts. Always
leave the door open when changing your combinaon.
Press “0” (zero) six mes.
Enter your exisng six digit code once.
Enter the NEW six digit code twice.
Enter the NEW code one more me to unlock the safe.
If a mistake is made, wait ten seconds and repeat steps 1-4.
-Always test the lock several mes with the door sll open.
-If you just changed your combinaon for the rst me, always check to make
sure that 1-2-3-4-5-6 (factory default) will no longer open the lock.
-When creang new combinaons, avoid using personal data such as birth
dates, street numbers or phone numbers to keep your valuables as secure as
possible.
Always keep a copy of your combinaon in a secure locaon
outside of your safe.

13
Using Your Manual Lock For the First Time
All manual locks come from the factory with the dial locked in place by
the Day-Lock. Open your safe by rotang the hub or hand wheel
clockwise and pulling the door open. There is an envelope inside your
safe with a set of keys. Unlock the Day-Lock by inserng the key and
rotang clockwise. Now the dial is operaonal (using the dial is easier
with the Day-Lock key removed).
With the door to the safe open, extend the door bolts by turning the
handle counter-clockwise.
The combinaon to your manual lock can be found on the envelope that
contained your Owner’s Manual and Day-Lock keys.
Operang the Dial On Your Manual Lock
Always align each number (2 digits per number) of your combinaon to the
“opening index” at the 12 o’clock posion at the top of the ring around the
dial.
Rotate the dial counter-clockwise at least 4 full
revoluons. Stop at exactly the rst number of your
combinaon.
Turn the dial clockwise, passing the second number of
your combinaon twice. Stop at exactly the second
number on the third revoluon.
Sargent and Greenleaf Manual Lock Instrucons
4X
3X

14
Turn the dial counter-clockwise passing the third number
of your combinaon once. Stop at exactly the third
number on the second revoluon.
Turn the dial slowly clockwise unl it stops. You may
noce some resistance at around 95 which is normal.
Keep rotang unl it completely stops at about 87.
Turn the handle of the safe clockwise and pull the door open.
Using the Day-Lock
-The Day-Lock does NOT lock your safe. It only locks the dial to prevent it
from rotang.
-For maximum security, we recommend using the Day-Lock in addion to the
combinaon to your manual lock. This would require someone to have the
key and know the combo, or be able to pick the lock and defeat the manual
combinaon to get in.
Suggested Day-Lock Operaon
Shut the door to your safe and turn the handle counter-clockwise to
extend the door bolts.
Rotate the dial on your manual lock counter-clockwise at least 4 mes to
clear the combinaon completely.
Center the “0” (zero) on the dial with the opening index at the 12 o’clock
posion.
Insert the Day-Lock key into the keyway and turn counter-clockwise.
Remove the key.
To Open Aer the Day-Lock is Locked
Insert the Day-Lock key into the keyway and turn clockwise. Remove the
key.
Follow the “Operang the Dial On Your Manual Lock” instrucons on
pages 13-14.
2X

1. I can’t get the combinaon to work on my manual lock.
Review the opening procedure on page 13-14.
2. I have a SecuRam electronic lock and my safe won’t lock.
The most common issue is low current from the baery. If your safe won’t lock, try
installing a new Duracell™ or Energizer™ 9 volt alkaline baery with “use date” at least 4
years in the future.
3. Should I clean my door bolts?
Yes! With the door open and the handle rotated counter-clockwise to extend the door bolts,
wipe a very small amount of lubricang grease onto the moving door bolts around the door.
We recommend using Super Lube™ or a mul-purpose silicone grease with PTFE.
FREQUENTLY ASKED QUESTIONS
1. Where is my serial number located?
For Rhino Safes, the serial number is located on the boom back corner of the safe and on
the lower inside secon of the door. For Bighorn and Kodiak Safes, the serial number is
located on the right side of the safe near the back top corner and on the lower inside
secon of the door. Serial numbers are also recorded in the Owner’s Manual.
2. How do I clean my safe?
See safe maintenance secon on page 8.
3. Is my safe pre-drilled for a dehumidier?
Yes, depending on model, your safe may either be predrilled or have an internal power
outlet. If predrilled, you will see a small hole drilled in the steel in one of the lower corners
on the backside of the safe. You’ll need to back-drill through the re lining and upholstery to
be able to feed the wire for your dehumidier through the hole.
4. My safe has external hinges. Are they more vulnerable to an aack than internal hinges?
No. In fact, external hinges are just as, if not more, secure. Your safe has door bolts on both
sides of the door to prevent the door from opening if the hinges are sawed o. Also, in a
re, internal hinged safes are vulnerable to heat transfer as there is a large unprotected
area where the hinges are welded to the inside of the body. External hinges help provide
you the best re and the protecon possible.
5. Should I bolt my safe down?
Denitely! If you had the ability to get your safe into your house, a burglar will be able to
get it out. Bolng your safe down ensures the best possible protecon for your valuables.
Also, safes are very top heavy and when unsecured can be a safety hazard. You must bolt
down your safe to validate your break-in warranty.
6. How do I bolt my safe down?
Your safe has pre-drilled anchoring holes in the oor. (Refer to pages 4 &6)
7. Can my electronic lock be hot-wired by a burglar to gain entry?
All U.L. Listed electronic locks are designed to block any aempts at hot-wiring, shorng,
and manipulaon. The only way to open your lock is with the exisng combinaon.
TROUBLESHOOTING GUIDE
15

4. I am geng no response from my electronic lock.
Replace your baery with a new 9-volt Baery. We recommend using a Duracell™ or
Energizer™ alkaline baery with a “use date” at least 4 years in the future. Replacing the
baery annually will ensure reliable access into your safe. Low current will cause the keypad
to malfuncon. Make sure all wires are properly and ghtly connected to the keypad with
no pinched wires or bent connectors.
5. My electronic lock is randomly ashing and not allowing me to enter my combinaon.
You may be in a delay period. Do not touch anything on the keypad for a period of 10-15
minutes. (If you aempt to enter your combinaon while in a delay period, the delay period
will be extended. Changing the baery on your keypad while in a delay period will also
extend the delay period.) Aer you have waited 10-15 minutes and the light stops ashing,
you may then enter your combinaon. If it is sll ashing randomly, wait up to 2 hours
before trying again.
6. My electronic lock beeps and ashes aer every digit is pressed, but it will not
lock/unlock my safe.
If your lock is accepng your combinaon (indicated by two beeps and ashes aer the
combinaon has been pressed), you may have a baery with too lile current. Try replacing
the 9-volt baery. We recommend using a Duracell™ or Energizer™ alkaline baery with a
“use date” at least 4 years in the future. Then, try your combinaon again. If your lock gives
you three beeps and ashes aer the combinaon has been pressed, an invalid code has
been entered.
7. I’ve changed my baery and the safe is sll not locking/unlocking.
If you are aempng to unlock the safe, rotate the handle counter-clockwise while you
enter your combinaon. Once you hear the two beeps wait for 2 seconds, and then rotate
clockwise to open. If you are aempng to lock the safe, turn the handle counter-clockwise
unl it stops, then press and hold the handle to the counter-clockwise for 7 seconds before
checking to see if it locked.
8. What do I do if I have forgoen the combinaon to my safe?
If you have an electronic lock and have forgoen your code, you will have to have your safe
drilled open by a locksmith, which could cost you over $500. To prevent this, please keep
your combinaon in a secure locaon– NOT inside your safe. WE DO NOT STORE YOUR
COMBINATION AT THE FACTORY. If you have a manual lock, we may have your combinaon
on le; however, we neither guarantee it is available, nor are we responsible for keeping the
informaon. If available, we can give the factory set combinaon to you with proof of
purchase and idencaon. If you have since changed your combinaon, a locksmith must
be called.
9. My door is dragging. How can I x this?
Make sure you have removed the shipping feet from under your safe as it is a safety
hazard and could cause your safe to be un-level. Once the feet have been removed, check
to be sure the safe is on level ground. If it is not, use shims to level the safe. If your door is
sll dragging, contact Rhino Tech Support.
10. My door seems loose when closed. Is there a way to ghten this?
There are 2 door adjustment tabs located on the le side of the door frame inside the safe.
You can bend these out using a screwdriver to put tension on your door bolts and pull the
door into the frame. Be sure not to pull the door adjustment pads out too far as they can
damage your door bolts and make the safe dicult to open. For assistance, call Rhino Tech
Support.
16

Limited Lifeme Warranty
Rhino Metals, Inc. offers to the original purchaser, a limited lifetime warranty,
covering defects in workmanship, material, damage by unlawful attempted or actual
break-in, and fire. This Warranty applies only to safes located in the United States,
purchased at an authorized Bighorn, Kodiak or Rhino Safe dealer, and that have been used
solely in residential applications. Commercial or industrial use applications carry a one year
warranty against defects in workmanship and materials.
In order to receive warranty support under this Warranty, Purchaser must provide
Rhino Metals, Inc. with (1) proof of purchase, (2) a written statement, (3) photographs of the
damaged safe and (4) a police or fire department report. Rhino Metals, Inc. will make the
decision to repair the safe in-home, at the factory, or replace the safe altogether. If possible,
the safe will be repaired locally. If the safe is to be repaired at the factory or replaced, Rhino
Metals, Inc. will, at its expense, have the safe opened, if required, and will pay for the freight
back to the factory. Purchaser must package and palletize the safe and make the safe
available for a curb side pickup at their expense. The Warranty does not cover any costs for
removal or installation of the safe or its contents. Personal property in the safe is not covered
by the Warranty.
The obligation of Rhino Metals, Inc. under this Warranty is contingent upon proper
use, installation, and maintenance of the safe and shall not apply to safes or safe parts which
have been neglected, misused, or exposed to extreme or unusual environments. Failure to
bolt down the safe using factory pre-drilled holes voids this warranty. Any modifying or
tampering with the safe which alters or affects the safe’s use or operation voids the warranty.
Without limit, this Warranty specifically excludes any liability for defects or damage
caused or increased by the use of unauthorized parts. Upon purchase, the Purchaser must
promptly notify Rhino Metals, Inc. of any defects. The Purchaser’s remedies are solely limited
to replacing parts or repair and are at the discretion of Rhino Metals, Inc. This warranty gives
you specific legal rights, and you may also have other rights which vary from state to state.
Locks and electronic keypads carry a one year warranty for labor and parts. The
warranty does not cover forgotten or lost combinations, lost keys, dead or weak batteries, or
improper opening procedures. Lights and electrical components carry a one year warranty.
Paint or powder coat finish and interior are warranted for one year based on proper care and
environment.
This Warranty is given in place of all other warranties and assurances, whether
expressed or implied, including but not limited to matters of merchantability, quality, or fitness
for purpose. Rhino Metals, Inc. accepts no liability under any circumstances whatsoever, for
any incidental or consequential damage or loss suffered by anyone as a result of using or
being unable to use the safe.
This Warranty does not apply to the following: Bighorn Model 12ECC, Bighorn Model P-20 and Rhino
Ironworks Personal Safe Series. This warranty does not apply to models built before Sept. 1, 2016. For older model
exclusions, please refer to the owner’s manual that came with your product or contact Rhino Tech Support.
Version 16D
17
This manual suits for next models
1
Table of contents
Popular Safe manuals by other brands

Homak
Homak First Watch HS30120100 Owner's manual & operating instructions

Keybox
Keybox 9000 Series user manual

Hornady
Hornady 98210 owner's manual

Promet
Promet PROTECTOR PLUS Series Operation manual

Royal Sovereign
Royal Sovereign RS-SAFE20 owner's manual

SPORTS AFIELD
SPORTS AFIELD SA-HD6-BIO-DP instruction manual