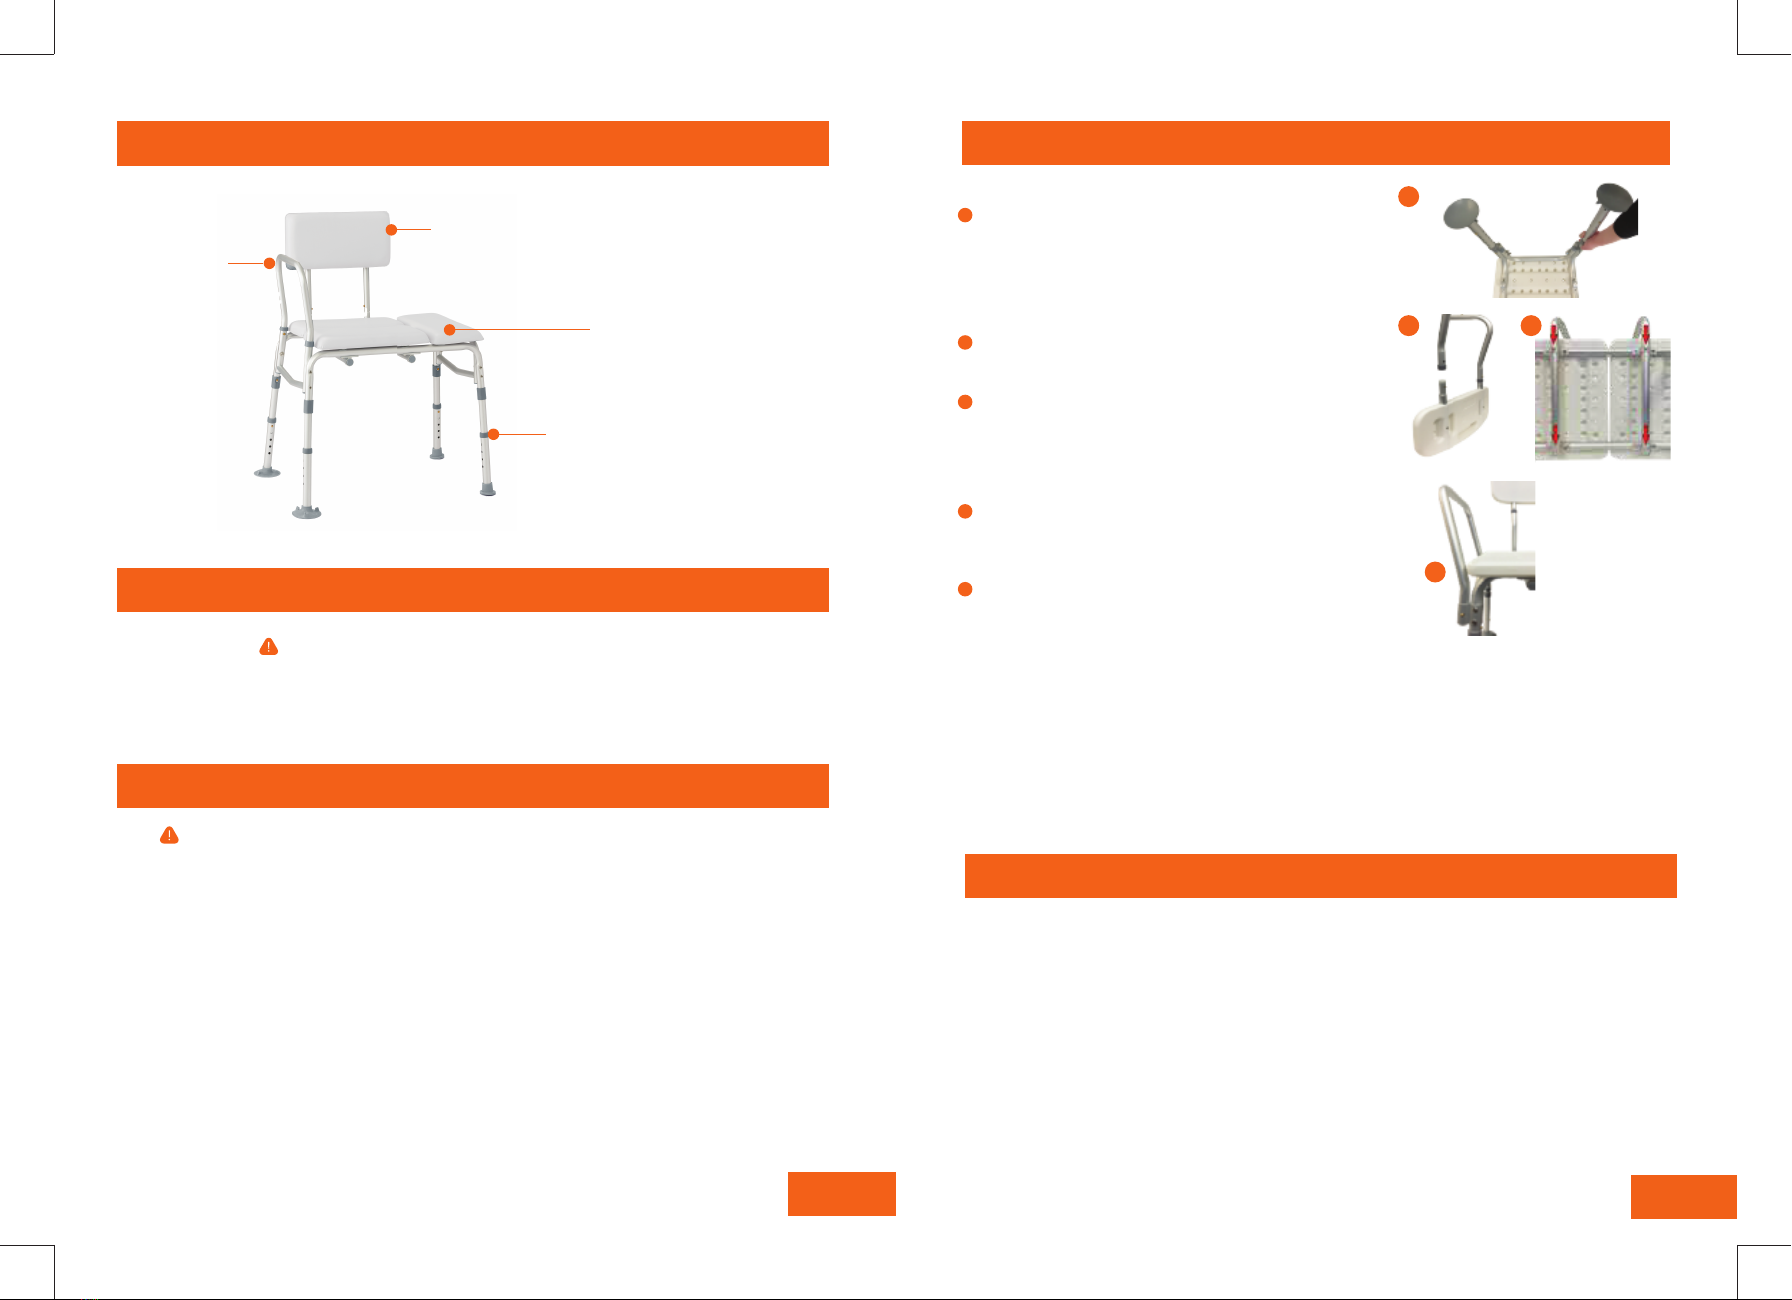
GENERAL EXPLANATION OF TRANSFER BENCH
2
Handle
Seat
Adjustable Legs
Back
3
Bench Assembly
D
SET UP
Prior to use, please read all instructions.
We recommend you keep this user guide for future reference.
LIFESTYLE LIMITED WARRANTY
Your Rhythm Healthcare product is warranted to be free of defects in materials and workmanship for the
lifetime of the original consumer purchaser. This device was built to exacting standards and carefully
inspected prior to shipment.
This Lifetime Limited Warranty is an expression of our confidence in the materials and workmanship of
our products and our assurance to the consumer of years of dependable service.
In the event of a defect covered by this warranty, we will, at our option, repair or replace the device.
This warranty does no cover device failure due to owner misuse or negligence, or normal wear and tear.
The warranty does not extend to non-durable components, such as rubber accessories, casters, and
grips, which are subject to normal wear and need periodic replacement.
Should you have any questions regarding your Rhythm Healthcare product or warranty please call your
local dealer or contact us directly.
CLEANING
Do not use high pressure cleaners, steam cleaners or harsh, caustic chemicals for cleaning.
> Use a non-abrasive detergent or household cleaner with warm water.
> Rinse with warm water and wipe dry.
> DO NOT USE AN ABRASIVE CLEANER OR CLOTH with this product, as damage may ensue.
Place the bench with the seat facing down on a level surface.
Insert the two legs with large suction tips into the end of the
frame that has the seat handle slots. Depress the chrome
button at the top of the leg and push the leg into the frame.
Ensure that the chrome button clicks and locks into position.
Following the same procedure, insert the two legs with small
suction tips at the other end of the bench [A].
Insert the backrest extensions into the backrest tubes. Depress
the chrome button on the backrest tube and ensure that the
chrome button clicks and locks into position [B].
Turn the bench on its side and insert the backrest extensions
into the four tubing slots under the seat. Depress the chrome
button on the backrest extensions and ensure that the chrome
buttons click and lock into position from the top tubing slots.
The backrest can slide on either side of the bench depending
on the direction the you will be sitting [C].
Place the bench upright so that it is resting evenly on all four legs
and insert the seat handle into the seat handle slots. Depress
both chrome buttons on each side of the handle and push down
until the chrome buttons click and lock into position [D].
To adjust the legs and seat height, depress the chrome button on
the legs and slide each leg to a desired height. Be sure all four
legs are level, stable, and all push buttons are fully locked into
position before using. The two legs with large suction tips should
be used inside of the shower.
A
BC
1
1
1
2
1
3
1
4
1
5
D
USER GUIDE


