Ricatech RMC240 User manual


IMPORTANT SAFEGUARDS FOR AUDIO PRODUCTS
PLEASE READ CAREFULLY THE FOLLOWING IMPORTANT SAFEGUARDS THAT
ARE APPLICABLE TO YOUR EQUIPMENT.
1. Read Instructions - All the safety and operating instructions should be read before the appliance is operated.
2. Retain Instructions - The safety and operating instructions should be retained for future reference.
3. Heed Warnings - All warnings on the appliance and in the operating instructions should be adhered to.
4. Follow Instructions - All operating and use instructions should be followed.
5. Water and Moisture - The appliance should not be used
near water-for example, near a bathtub,washbowl,kitcken
sink,laundry tub, in a wet basement, or near a swimming
pool and the like.
6. Carts and Stands - The appliance should be used only with a
cart or stand that is recommended by the manufacturer.
6A.An appliance and cart combination should be moved with care. Quick stops,
excessive force, and uneven surfaces may cause the appliance and cart combination to overturn.
7. Wall or Ceiling Mounting - The appliance should be mounted to a wall or ceiling only as recommended
by the manufacturer.
8. Ventilation - The appliance should be situated so that its location or position does not interfere
with-its proper ventilation.For example, the appliance should not be situated on a bed, sofa, rug,or
similar surface that may block the ventilation openings; or, placed in a built-in installation, such as a
bookcase or cabinet that may impede the flow of air through the ventilation openings.
9. Heat - The appliance should be situated away from heat sources such as radiators,heat registers,
stoves,or other appliances (including amplifiers) that produce heat.
10.Power Sources - The appliance should be connected to a power supply only of the type described in the
operating instructions or as marked on the appliance.
11.Grounding or Polarization - Precautions should be taken so that the grounding or polarization means of an
appliance is not impeded.
12.Power - Cord Protection - Power-supply cords should be routed so that they are not likely to be walked on or
pinched by items placed upon or against them, paying particular attention to cords at plugs, and the point where
they exit from the appliance.
13.Cleaning - The appliance should be cleaned only as recommended by the manufacturer.
14.Antenna-This product is designed for use with the antenna attached and should not be connected to any other
external antennas.
15.Non-use Periods - The power cord of the appliance should be unplugged from the outlet when left unused for a
long period of time.
16.Object and Liquid Entry - Care should be taken so objects do not fall and liquids are not spilled into the
enclosure through openings
17.Damage Requiring Service - The appliance should be serviced by qualified service personnel when:
A. The power-supply cord of the plug has been damaged;or
B. Objects have fallen, or liquid has been spilled into the appliance;or
C. The appliance has been exposed to rain;or
D. The appliance does not appear to operate normally or exhibits a marked change inperformance; or
E. The appliance has been dropped, or the enclosure damaged.
18.Servicing - The user should not attempt to service the appliance beyond that described in the operating
instructions.All other servicing should be referred to qualified service personnel.

CONTROL LOCATORS


UNPACKING
1. Remove packing materials from unit.
NOTE: Save all packing materials until you are completely satisfied all parts of the unit are operating satisfactorily
and just in case the unit should need service in the future.
2. Make sure you have located the Remote Control before storing the packaging.
3. Remove the plastic bag covering the unit.
4. Remove the plastic safety cover from the AC 3-pin plug.
5. Remove the tie from the AC cord and untie the Wire Antenna on the back of the unit.
6. Lift up the Record Player Lid and remove the Polystyrene shipping material from the turntable.
7. Remove the black tie-wire from the Tone arm.
8. Remove the white protective needle cover by gently pulling it towards the front of the unit.
STYLUS
A universal Sapphire Stylus is supplied and fitted to the Tone Arm, this is suitable for playing records of all 3 speeds
(331/3/45/78rpm). A replacement universal stylus and a separate stylus for playing 78rpm records are available direct
from the Manufacturer and some Dealers.
Removing/Refitting the Stylus
To remove the Stylus from the Tone Arm, hold the Tone Arm head steady while
grabbing the plastic Stylus Holder with two fingers - then gently pull the complete red
stylus holder straight towards you and off the silver cartridge, as shown in the
diagram.To re-fit the Stylus, hold the sides of the red plastic stylus holder, ensuring
the Needle is facing downwards. Gently push the back of the stylus holder at a slight
angle against the silver cartridge at the end of the TONE ARM until you are sure it is
securely fitted. Refit the white protective needle cover, if so required.
NOTES:
· Always handle the Stylus with care as the Sapphire needle tip is easily amaged.
· When transporting the turntable it is advisable to re-fit the white protective needle cover and the one Arm Hold-down
Clip until the unit is going to be used again.
· When removing or re-fitting the Stylus, always be careful not to put too much pressure on the Stylus Holder and the
Tone Arm silver cartridge to avoid any possible damage to them.
POWER SOURCE
This unit is operated by 230V AC Mains.
NOTES:
a) ESD remark: In case of a malfunction due to electrostatic discharge, you may need to re-set the product to resume
normal operation (re-connection to the power source may be required).
b) Electrical Fast Transient (Burst) : In case of a malfunction due to electrical fast transient (Burst), just reset the
product to resume normal operation (re-connection to the power source may be required).
SET UP
Unwind the AC Power Cord at the back of the unit and insert the 3-pin plug into a 230V AC Power socket.
RADIO OPERATION
1. Untie the FM WIRE ANTENNA and allow it to hang down in a straight line for optimum FM reception. Do no
connect the FM antenna to an outside antenna.
2. Switch the unit on by turning the power ON-OFF SWITCH/VOLUME CONTROL to the ON position and turn the
Sound Volume to mid-range position.
3. Set the Function switch to RADIO mode.
4. Slide the Band switch to the desired band –AM (= MW) or FM or FM.ST*.
5. Select the desired radio station by rotating the TUNING KNOB.
6. Adjust the Volume again if necessary.
NOTE: *If FM Stereo reception is not good, it may be better to switch to FM Mono.
ANTENNA
For FM reception, the unit has an FM WIRE ANTENNA on the rear of the unit.
Move the wire until Radio reception is clear and with no interference. If you have trouble tuning in an FM station,
re-position the wire FM antenna for best reception.
CAUTION: The external FM ANTENNA must not be connected to an outside antenna.
For AM (= MW) reception, the unit is provided with a directional built-in ferrite antenna.Rotate the set to find the
position in which the best reception is obtained.
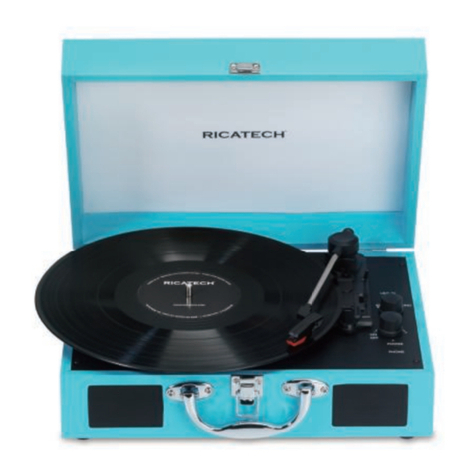
TURNTABLE OPERATION
Preparing to use the Turntable
1. Lift up the Record Player Lid, untwist and remove the black tie-wrap securing the TONE ARM.
2. Remove any packing materials.
3. Remove the white protective NEEDLE COVER by gently pulling it off the red stylus holder towards the front of the unit.
Keep this safe and re-fit to the stylus in case the unit needs transporting to a different location.
4. Release the TONE ARM HOLD-DOWN CLIP by gently pushing this to the right. This will unlock the tone arm from
its ARM REST. Re-lock the hold-down clip when moving the unit to another location.
PLAYING A RECORD
1. Switch the unit ON by turning the power ON-OFF SWITCH/VOLUME CONTROL switch to the ON position.
2. Turn the VOLUME control to mid-range position.
3. Slide the FUNCTION Switch to PHONO mode.
4. Set the SPEED CONTROL SWITCH to the correct speed (331/3, 45 or 78 rpm) required for the selected record.
5. Use the CUE LEVER to raise the tone arm off its rest. Move the tone arm gently to the right until a ‗click‘ is heard,
the turntable should start rotating.
6. Move the Tone Arm towards the record and use the cue lever to lower it onto the point where you want the record to
start playing.
7. At the end of the record, the TONE ARM will stop automatically. Lift the Tone Arm and return it manually to the
TONE ARM REST.
ACCESSORY SUPPLIED - Spindle Adaptor for 45 rpm records
To play a 45rpm record with the centre clip missing, remove the adaptor from the record player deck
by placing thumb & forefinger in the recesses and pulling it upwards, then place it on the Turntable
Spindle. The record can then be placed on the turntable.
CD PLAYER OPERATION
Playing a CD
1. Switch the unit ON by turning the power ON-OFF SWITCH/VOLUME CONTROL switch to the ON position and turn
the Sound Volume to mid-range position.
2. Slide the FUNCTION Switch to CD mode.
3. Press CD OPEN / CLOSE / to open the CD Compartment.
4. Insert a pre-recorded compact disc with the printed side facing up. Press CD OPEN / CLOSE / again to close
the compartment, ― READ ― is displayed as the CD player scans the contents of the disc.
5. Track no. 1 will start playing back automatically after the CD Player has finished reading the contents of the disc.
6. Press
FORWARD SKIP
/ or
BACKWARD SKIP /
once or repeatedly until the desired track number appears
on the display.
7. Press or the ― STOP/SD/USB ― key (marked with a red dot) to stop playback.
8. Press or the ― PLAY/PAUSE ― key (marked with a green dot) to resume play or pause the music.
MP3-CD Disc Playback –by Remote Control
1. Insert an MP3-CD format disc. Press CD OPEN / CLOSE / again to close the compartment. ― READ ― is
displayed as the CD Player scans the contents of the disc.
2. Track no. 1 in the Root Folder (Folder 1) will start playing back automatically after the MP3-CD disc contents has
been read.

3. Press
FORWARD SKIP
/ or
BACKWARD SKIP /
once or repeatedly until the desired track number appears
on the display.
4. Press STOP / to stop playback.
5. In Stop mode, press and hold the PLAY/PAUSE key / to select the MP3 folder.
NOTE: In Stop Mode: For faster skipping forward or backward of 10 tracks at a time, press and hold the
ORWARD
SKIP
/
or
BACKWARD SKIP /
button. This stops when the button is released.
USB & SD CARD OPERATION
SD Card Operation:
1. Switch the unit ON by turning the power ON-OFF SWITCH/VOLUME CONTROL switch to the ON position.
2. Turn the VOLUME control to mid-range position.
3. Slide the FUNCTION Switch to ― CD ― mode.
4. In ― STOP ― mode Press and hold STOP / for over half a second –this will switch from CD>SD .If no Card
has been detected, ― NO CARD ― will show on the Display.
5. Insert an SD Card with pre-recorded MP3 music (not supplied) into the card slot. ―READ‖ is then displayed as the
system scans the contents of the SD Card.
6. Track no. 1 of the Root folder (Folder 1) will play back automatically after reading the SD card contents.
7. Press the
FORWARD SKIP
/ or
BACKWARD SKIP /
once or repeatedly until the desired track number
appears on the display. Release the button –the track will start playing automatically.
8. Press STOP / to stop playback and press PLAY/PAUSE/ to resume play.
9. To pause the music, press PLAY/PAUSE / , press it again to resume play.
USB Operation:
1. Switch the unit ON by turning the power ON-OFF SWITCH/VOLUME CONTROL switch to the ON position.
2. Turn the VOLUME control to mid-range position.
3. Slide the FUNCTION Switch to CD mode.
4. In ― STOP ― mode Press and hold STOP / for over half a second –this will switch from CD>SD .
5. In Stop mode, press STOP / and hold the key for over half a second - this will switch from SD>USB. If no USB
has been detected, ―NO USB‖ will show on the Display.
6. Plug-in a USB mass storage device. " READ " is displayed as the system scans the contents of the USB device.
7. Track no. 1 of root folder (Folder 1) will be played back automatically after the USB device contents has been read.
8. Press the
FORWARD SKIP
/ or
BACKWARD SKIP /
once or repeatedly until the desired track number
appears on the display. Release the button - the track will start playing automatically.
9. Press STOP / to stop playback and press PLAY/PAUSE/ to resume play.
10.To pause the music, press PLAY/PAUSE / , press it again to resume play.
NOTES:
· The USB Port does not support connection with a USB Extension Cable.

· It is not designed for direct communication with a computer.
· It is not guarantee that all USB memory devices (or SD cards) will work on this audio system
IMPORTANT:
Do not disconnect the USB device during USB mode, as this may damage the external device or its files. Please power
off first or select another Mode before safely disconnecting the USB device.
USB Specification
Interface:
- USB 2.0 Full speed, HOST (USB HUB is not supported) Corresponding Flash memory
- Compatible with MPEG Audio 1, 2, 2.5
- Compatible with Layer 1, 2, 3
- Compatible with Bit rate: 128 –320 Kbps
- Subfolder nest : 8 levels
- Number of track / titles max 999
- Support ID3 tag V2.0
PROGRAMMING TRACKS
Up to 20 tracks can be programmed to play tracks on an Audio or MP3-CD, USB Device or SD Card in the desired
sequence.
1. In ― STOP ― position, press PROGRAM / to start programming - ―P‖ and P0-01 will start flashing on the display.
2. Press the
FORWARD SKIP
/ or
BACKWARD SKIP /
buttons once or repeatedly until the desired track
number appears on the display.
3. For MP3 Programming: press and hold the PLAY/PAUSE key / to select the desired album.
4. Press PROGRAM / to confirm, the display shows the stored track number and the next store position.
5. Repeat steps 2-3 to select and store all desired tracks. ― FULL ― is displayed if you attempt to program more than 20
tracks.
6. Press PLAY/PAUSE / to play the programmed tracks.
Erasing the Program –by Remote Control or on the Main Unit
You can erase the contents of the memory as follows:
- In Stop position: Press ― STOP ― once, or
- During Playback: Press ― STOP ― twice, or
- Turn the ON-OFF Switch/Volume Control to OFF, or
- Select another sound source/function, or
- Press the CD OPEN/CLOSE button to open the CD door.(at CD mode)
PLAY MODE
Repeat Play Mode for CD-DA or MP3 Playback
1. Press REPEAT / on the Remote Control while in Play mode.
2. The default Play Mode function is OFF.
3. For CD-DA playback there is a choice of 2 Play Modes: ―REPEAT 1‖ / ―REPEAT ALL‖
4. For MP3 Playback there is a choice of 3 Play Modes: ―REPEAT 1‖ / ―REPEAT FOLDER‖ / ―REPEAT ALL‖.
MP3 RECORDING
Recording from CD to USB / SD
The system is capable of converting (encoding) a whole Audio CD into MP3 format and copy/record this to a USB mass
storage device (e.g. a Flash Drive) or SD card (not supplied). It can also copy a single MP3 track to/from a USB device
or SD card.
1. In CD playback mode, press REC / to start ripping (recording) to USB/SD card (the default is USB if both

devices are detected), playback will stop and skip back to the beginning of the current track, the system will scan the
contents of the USB/SD Card and create a folder to store the MP3 Tracks in. Resume CD playback and ripping will start
from that moment. ― USB ‖ or ― CARD ― will start flashing, depending on the device selected.
2. Press STOP / to exit CD ripping.
MP3 CD/USB/SD Copying
1. In MP3-CD, USB or SD Card playback mode, press REC / to start MP3 copying from MP3-CD to USB or SD
card, USB to SD Card and SD Card to USB. Playback will stop and the system will scan the contents of the USB or
SD card and create a folder to store the MP3 tracks in.
2. ― REC ― will show on the display.
3. ― COPY ‖ will be displayed.
4. Either ―USB‖ or ―CARD‖ will start flashing, MP3 copying starts, the process will stop when copying has finished.
5. The current MP3 track will play back from the beginning.
Recording from Phono to SD / USB
The system is capable of converting an audio signal from PHONO input (record player) into MP3 format and store it on a
USB mass storage device or SD card (the default is USB if both devices are detected). Prepare for playing a record, as
described previously.
1. Slide the FUNCTION button to PHONO mode, place a record on the turntable and start playing it.
2. Press REC / to start ripping(recording), the system will scan the contents of the USB or SD card and create a
folder to store the MP3 tracks.
3. ― REC ‖ and ― TO‖ are displayed on the LCD for about 15 seconds, ― USB ― starts flashing.
4. Either ― USB ‖ or ― CARD ‖ starts flashing as Recording begins.
5. Press STOP / to exit PHONO Recording mode.
DELETING MP3 TRACKS
The system can delete previously recorded MP3 or existing files on either USB device or SD Card.
1. In USB or SD card playback mode, press and hold REC / for 2 seconds, the currently playing track is stopped
and will be deleted.
2. ― DELETE ― is displayed.
FITTING OPTIONAL EXTERNAL SPEAKERS
1. There is the option of connecting external speakers to this unit (not supplied).
2. The speaker jacks to connect external speakers to are located on the back of
the unit. Along with the speaker jacks there is a switch marked ― INT./EXT.‖
When using external speakers, this switch must be switched to the ― EXT.‖
position. This turns off the internal speakers in the unit and redirects the power to
the External Speakers.
3. If you decide not to use External Speakers, make sure the switch is set to
― INT.‖
CASSETTE OPERATION
1. Switch the unit ON by turning the power ON-OFF SWITCH/VOLUME CONTROL switch to the ON position.
2. Turn the VOLUME control to mid-range position.
3. Slide the FUNCTION Switch to PHONO mode.
4. Insert a prerecorded tape through
t
he
CASSETTE
DOOR Tape will slide into the cassette mechanism and start
playing.
5. For fast forwarding, press the CASSETTE EJECT/F.F half wayin. Pressing again, will stop the fast forwarding
and return the cassette to the playing mode.
6. To stop and eject the cassette, press the CASSETTE EJECT/F.F in completely.
7. When one side of the tape finishes playing, the cassette will automatically stop.
NOTE: Remove the tape from the unit when it is not in use or stopped.

LINE IN INPUT
1 You can connect external components to your unit by using the Line In Jack.
2 Plug Auxiliary cable into the LINE IN JACK on the near panel of your unit.
3 Switch the LINE IN SWITCH to the ON position.(the SW on the Back Panel)
4 Plug the other end of the Auxiliary cable into the output jack on your desired external component.
5 Check the volume level of your external component.
6 See operator manual for correct operation of the external component.
NOTE: When not using the Auxiliary Input, make sure the LINE IN SWITCH is in the OFF position.
EARPHONE JACK OPERATION
Insert the earphones (not supplied) into the 3.5mm diameter EARPHONE JACK
on the front panel.
Please note that when listening through earphones, the sound from the built-in
speakers is cut off.
TROUBLESHOOTING
There is no power
· Make sure the unit is plugged in correctly.
· Make sure the unit is switched on by the ON/OFF POWER SWITCH.
There is no sound
· Check to make sure the power is turned on.
· Check the volume level by turning the On/Off Power Switch/Volume Control.
· Check the Line In Switch on the back of the unit to make sure it is in the OFF position.
· Check you did not leave any Headphones plugged in –this will cut all sound form the speakers.
· Make sure the INT./EXT. switch on the back of the radio is switched to INT. (Unless you are using external speakers,
in which case it should be on EXT.)
The Turntable will not work
· Make sure the unit is set to Phono mode by sliding the Function switch.
· Try moving the Tone arm to the right until you hear a click - the turntable should start rotating.
· Make sure the Turntable Drive Belt has not come off. To replace the belt, see separate Instructions and diagrams.
The Tone Arm will not move
· The black tie-wrap has not been removed from the Tone Arm.
· The Tone Arm hold down clip has not been released.
· Make sure you lift the Tone Arm with the Cue Lever and then move it manually over the edge of the record –then
lower it with the Cue Lever. Caution: Do not force it down onto the record without using the Cue Lever.
The Tone Arm slides across the Record
· Make sure the protective needle cover is removed.
· Make sure the Stylus has not been damaged –replace if necessary.
· Your record may be one of the newer types with micro grooves and may need a different stylus to play successfully.
Any of the older style records should not have this problem.
Turntable –the sound is low when playing a record
· Try removing and refitting the stylus.
· Turn up the volume.
I have recorded a Record but it does not display any Folder/Artist/Title or Song Information
· Vinyl records have no digital information, so no MP3 song information will be stored on the USB device or card.
However, if required, MP3 tracks can be transferred to, viewed and named on a computer.
I have recorded a CD but it does not display any Folder/Artist/Title or Song Information
· If this information was not already on the original Disc, this will not show on the recorded disc either.
The CD does not play
· Check to make sure the CD is inserted correctly (label side facing up).
· Make sure the Function switch is set to CD and a CD is in the tray.
· Make sure the CD is not blank.
· Check that the surface of the CD is clean. See separate Instructions on CD Care.
USB /SD Card - no music is playing when PLAY/PAUSE is pressed
· Make sure there are MP3 music files stored on the USB Device/Flash Drive / SD Card.
· Check the USB Device/Flash Drive / SD Card is not larger than 4GB as the limit of this unit is up to 4GB max.
· Try resetting the USB by powering off.

· Check if the files on the device/card are perhaps in WMA format. This unit does not play WMA format, only MP3
format.
· Not all makes of USB device/SD Card are compatible with this unit –this is not a malfunction of the unit.
Cannot Record Music on the USB /SD Card
· Make sure the USB/SD Card is not full.
· Make sure the lock switch on the SD card is in the unlocked position.
· It may be the device/card is not compatible or of the correct size (up to 4GB max.) –not all available USB/SD devices
are guaranteed to work with this unit due to the way they are manufactured.
The recorded MP3 Music does not have the same sound quality as the original CD
· The sound quality of an MP3 disc varies from that of a pre-recorded Audio Compact Disc, due to the quality and
method of recording and the difference in format.
The Remote is not working
· Replace the battery. See Specifications for type of battery required.
· Remove any obstacles in the path of the Infra Red Remote and the Remote Sensor next to the LCD Display, so the
remote signal has a straight path to it.
Cassette will not work
· Make sure the FUNCTION SWITCH is set to phono.
· Make sour the cassette tape is not empty.
· Make sour the cassette tape is not at the end.

WARNING:
TO PREVENT FIRE OR SHOCK HAZARD, DO NOT EXPOSE THIS APPLIANCE TO RAIN OR
MOISTURE. DO NOT REMOVE COVER. PILOT LAMPS SOLDERED IN PLACE. NO USER
SERVICEABLE PARTS INSIDE. REFER SERVICING TO QUALIFIED SERVICE PERSONNEL.
―Ventilation not being impeded.‖
―Do not exposed to dripping or splashing and that no objects filled with liquids, such as vases, shall
be placed on the apparatus.‖
Specifications
FREQUENCY : FM 88 -108 MHz
AM 530 - 1600 KHz
USB 2.0 PORT : Full Speed 512MB - 4GB
(Support FAT16, FAT32)
SD CARD SLOT : 512MB –4GB
POWER SOURCE : AC 230V ~ 50Hz
ANTENNA : External antenna for FM
Built-in ferrite bar for AM
POWER CONSUMPTION : 18W
SPEAKER SIZE : 2 x 3" x 5‖ 8 ohm Dynamic type
REMOTE CONTROL : A Cell battery is fitted -
Replacement Lithium Battery required: 1 x 3V CR2025
*DESIGN AND SPECIFICATIONS SUBJECT TO CHANGE WITHOUT NOTICE.
The lighting flash with arrowhead symbol,
within an equilateral triangle, is intended to
alert user to the presence of uninsulated
"dangerous voltage" within the product's
enclosure that may be of sufficient
magnitude to constitute risk of electric shock
to persons.
CAUTION
RISK OF ELECTRIC
SHOCK DO NOT
OPEN
CAUTION: TO REDUCE THE RISK OF
ELECTRIC SHOCK, DO NOT REMOVE
COVER (OR BACK). NO USER –
SERVICEABLE PARTS INSIDE.
REFER SERVICING TO QUALIFIED
SERVICE PERSONNEL.
The exclamation point within an equilateral
triangle is intended to alert user to the
presence of important operating and
maintenance (servicing) instruction in the
literature accompanying the appliance.

Customer support
You can contact the Ricatech customer service when you have a question or a problem with your Ricatech product. You
can contact us by telephone and email.
Email
For customer support by email, please sent a email to
support@ricatech.com Please make sure that you mention the model number and serial number of the product, mention
your name & address and describe your question or problem clearly.
Telephone
For customer support by telephone, please dial +31(0)10-4626733. One of our service staff will be ready to serve you. For
full procedure please visit the website of Ricatech at: www.ricatech.com
Ricatech B.V.
Cornusbaan 1
2908 KB Capelle a/d IJssel
The Netherlands

Gebruikers handleiding
BELANGRIJKE VOORZORGSMAATREGELEN VOOR AUDIOPRODUCTEN LEES
AANDACHTIG DE VOLGENDE BELANGRIJKE VOORZORGSMAATREGELEN
DIE VAN TOEPASSING ZIJN OP UW APPARATUUR.
1. Instructies lezen - Alle veiligheids- en bedieningsinstructies moeten worden gelezen voordat het apparaat wordt gebruikt.
2. Instructies bewaren - De veiligheids- en bedieningsinstructies moeten worden bewaard voor raadpleging in de toekomst.
3. Aandacht besteden aan waarschuwingen - Alle waarschuwingen op het apparaat en in de bedieningsinstructies moeten in acht
worden genomen.
4. Instructies opvolgen - Alle bedienings- en gebruiksinstructies moeten worden opgevolgd.
5. Water en vocht - Het apparaat mag niet worden gebruikt in de buurt van water, bijvoorbeeld nabij een badkuip, wasbak, gootsteen,
wastobbe, in een vochtige kelder of nabij een zwembad en dergelijke.
6A. Karretjes en staanders - Het apparaat mag alleen worden gebruikt met een karretje of staander aanbevolen door de fabrikant.
6A. Een apparaat op een karretje moet voorzichtig worden verplaatst. Bruusk stoppen, overmatige kracht en oneffen oppervlakken
kunnen het karretje met apparaat doen omkantelen.
7. Wand- of plafondbevestiging - Het apparaat mag aan een wand of plafond alleen worden bevestigd volgens de aanbevelingen van
de fabrikant.
8. Ventilatie - De plaats en de stand van het apparaat mogen correcte ventilatie niet belemmeren. Het apparaat mag bijvoorbeeld niet
op een bed, sofa, vloerkleed of dergelijk oppervlak worden geplaatstaangezien de ventilatieopeningen kunnen worden geblokkeerd; en
evenmin in een ingebouwde installatie zoals een boekenrek of kast aangezien de luchtstroom door de ventilatieopeningen kan worden
belemmerd.
9. Warmte - Het apparaat moet verwijderd zijn van warmtebronnen zoals radiators, warmteregisters, kachels of andere toestellen
(inclusief versterkers) die warmte produceren.
10. Voedingsbronnen - Het apparaat mag alleen worden aangesloten op een voeding van het type beschreven in de
bedieningsinstructies of aangegeven op het apparaat.
11. Aarding of polarisatie - Er moeten voorzorgsmaatregelen worden genomen zodat de middelen voor aarding of polarisatie van een
apparaat niet worden belemmerd.
12. Voeding - Netsnoerbescherming –Netsnoeren moeten zodanig worden geleid dat de kans om erop te trappen of ze te knellen met
voorwerpen die erop of ertegen staan minimaal is, met bijzondere aandacht voor netsnoeren aan stekkers en op de plaats waar ze het
apparaat verlaten.
13. Reiniging - Het apparaat mag alleen worden gereinigd volgens de aanbevelingen van de fabrikant.
14. Dit product is ontworpen voor gebruik met de bevestigde antenne en mag niet worden aangesloten op andere externe antennes.
15. Perioden van niet-gebruik - Het netsnoer van het apparaat moet uit het stopcontact worden getrokken wanneer het apparaat
lange tijd niet wordt gebruikt.
16. Voorwerpen en vloeistoffen in het apparaat - U dient voorzichtig te zijn dan er geen voorwerpen vallen of vloeistoffen worden
gemorst in de behuizing via openingen
17. Schade die onderhoud vereist - Het apparaat moet door gekwalificeerd onderhoudspersoneel worden onderhouden wanneer:
A. Het netsnoer van de stekker beschadigd is; of
B. Voorwerpen zijn gevallen of vloeistoffen zijn gemorst in het apparaat; of
C. Het apparaat werd blootgesteld aan regen; of
D. Het apparaat niet normaal lijkt te werken of de prestaties opvallend zijn gewijzigd; of
E. Het apparaat is gevallen, of de behuizing beschadigd is.
18. Onderhoud - De gebruiker mag niet proberen onderhoud van het apparaat uit te voeren behalve het onderhoud beschreven in de
bedieningsinstructies. Alle andere onderhoudswerkzaamheden moeten worden uitgevoerd door gekwalificeerd onderhoudspersoneel.

PLAATS VAN ONDERDELEN
VOORUIT SKIP
RADIO/CD/PHONO-SC
HAKELAAR
CD-LADE
VOEDINGSINDICATOR
LCD-SCHERM
PROGRAMMERE
N/HERHALEN
OPENEN/SLUITEN
AFSPELEN/PAU
ZEREN
STOP/SD/USB
FM.ST LED
AFSTEMKNOP
AAN/UIT-SCHAKELAAR/
VOLUMEREGELAAR
SENSOR
AFSTEMSCHAAL
OPNEMEN/WISS
EN
Luidspreker
s
OORTELEFOONAAN
SLUITING
ACHTERUIT SKIP
SD-KAART
USB-POORT
AM/FM/FM.ST-SCHAKELAAR
CASSETTE
UITWERPEN/VOORUITS
POELEN
CASSETTEDEUR
OPENEN/SLUITEN
VOORUIT SKIP
OPNEMEN/WIS
SEN
0-9
ACHTERUIT SKIP
AFSPELEN/PAU
ZEREN
STOP/SD/USB
PROGRAMMEREN
/HERHALEN

TOONARM
DRAAITAFEL
SPIL
SPILADAPTER VOOR 45-TOERENPLATEN
SD-KAART
USB-POORT
CASSETTE
UITWERPEN/VOORUITSP
OELEN
CASSETTEDEUR
TOONARMHENDE
L
TOERENTALREGE
LAAR
TOONARMSTEUN
AANSLUITING VOOR
EXTERNE
LUIDSPREKER
WISSELSTROOMSTEKKER
SCHAKELAAR
INTERNE/EXTERNE
LUIDSPREKER (INT./EXT.)
EXTERNE FM-ANTENNE
LIJNINGANG-SCHA
KELAAR
LIJNINGANG

UITPAKKEN
1. Verwijder de verpakkingsmaterialen van het apparaat.
OPMERKING: Bewaar al het verpakkingsmateriaal tot u volledig tevreden bent over de goede werking van het
apparaat en voor het geval dat het apparaat in de toekomst onderhoud vereist.
2. Zorg dat u de afstandsbediening hebt gevonden voordat u het verpakkingsmateriaal opbergt.
3. Neem het apparaat uit de plastic zak.
4. Verwijder de plastic veiligheidsafdekking van de 3-pins wisselstroomstekker.
5. Verwijder de kabelbinder van het wisselstroomsnoer en maak de draadantenne op de achterzijde van het apparaat
los.
6. Til het deksel van de platenspeler op en verwijder het piepschuimen transportmateriaal van de draaitafel.
7. Verwijder de zwarte tie-wrap van de toonarm.
8. Verwijder de witte naaldbescherming door deze voorzichtig naar de voorzijde van het apparaat te trekken.
STYLUS
Een universele saffierstylus wordt meegeleverd en op de toonarm gemonteerd, deze is geschikt voor het afspelen van
platen van alle 3 toerentallen (331/3/45/78-toeren). Een universele vervangingsstylus en een afzonderlijke stylus voor
het afspelen van 78-toerenplaten zijn rechtstreeks verkrijgbaar bij de fabrikant en
sommige dealers.
De stylus verwijderen/monteren
Om de stylus van de toonarm te verwijderen houdt u de kop van de toonarm stil
terwijl u
de plastic stylushouder met twee vingers vastpakt –trek vervolgens voorzichtig de
gehele rode stylushouder naar u toe en uit het zilveren element, zoals getoond in de
tekening. Om de stylus weer te monteren, houdt u de zijkanten van de rode plastic
stylushouder vast, terwijl u ervoor zorgt dat de naald naar beneden is gericht. Druk
de achterzijde van de stylushouder voorzichtig in een lichte hoek tegen het zilveren
element aan het uiteinde van de TOONARM tot u zeker bent dat de houder goed
vastzit. Breng de witte naaldbescherming weer aan, indien nodig.
OPMERKINGEN:
· Ga altijd zorgvuldig om met de stylus, aangezien de saffieren naaldpunt gemakkelijk wordt beschadigd.
· Wanneer u de draaitafel vervoert, wordt het aanbevolen de witte naaldbescherming en de neerdrukker van de
toonarm weer aan te brengen tot het apparaat opnieuw wordt gebruikt.
· Wanneer u de stylus verwijdert of monteert, moet u altijd voorzichtig zijn dat u niet te hard drukt op de stylushouder
en het zilveren element van de toonarm om mogelijke beschadiging ervan te vermijden.
VOEDINGSBRON
Dit apparaat werkt met een netvoeding van 230 V wisselstroom.
OPMERKINGEN:
a) Opmerking over ESD: In geval van storing als gevolg van elektrostatische ontlading moet u het product mogelijk
resetten om de normale werking te hervatten (mogelijk moet u de voedingsbron opnieuw aansluiten).
b) Elektrische snelle transiënt (Burst): In geval van storing als gevolg van elektrische snelle transiënt (Burst) reset u het
product om de normale werking te hervatten (mogelijk moet u de voedingsbron opnieuw aansluiten).
INSTALLATIE
Wikkel het wisselstroomsnoer aan de achterzijde van het apparaat af en steek de 3-pins stekker in een stopcontact met
230 V wisselstroom.
BEDIENING VAN DE RADIO
1. Maak de FM-DRAADANTENNE los en laat deze in een rechte lijn omlaag hangen voor optimale FM-ontvangst.
Sluit de FM-antenne niet aan op een buitenantenne.
2. Schakel het apparaat in door de voeding AAN/UIT-SCHAKELAAR/VOLUMEREGELAAR naar de stand AAN te
draaien en het geluidsvolume in de middelste stand te zetten.
3. Zet de functieschakelaar op RADIO-modus.
4. Schuif de golfbandschakelaar naar de gewenste golfband –AM (= MW) of FM of FM.ST*.
5. Selecteer de gewenste radiozender door aan de AFSTEMKNOP te draaien.
6. Pas het volume opnieuw aan indien nodig.
OPMERKING: *Als de FM-Stereo-ontvangst niet goed is, kan het beter zijn om te schakelen naar FM-Mono.

ANTENNE
Voor FM-ontvangst is het apparaat uitgerust met een FM-DRAADANTENNE aan de achterkant van het apparaat.
Verplaats de draad tot de radio-ontvangst zuiver en zonder storingen is. Als u moeilijk kunt afstemmen op een
FM-zender, verplaatst u de FM-draadantenne voor een betere ontvangst.
LET OP: De externe FM-ANTENNE mag niet aangesloten worden op een buitenantenne.
Voor AM (= MW)-ontvangst, is het apparaat uitgerust met een ingebouwde richtingsgevoelige ferrietantenne. Draai het
toestel om de positie met optimale ontvangst te vinden.
BEDIENING VAN DE DRAAITAFEL
De draaitafel klaarmaken voor gebruik
1. Til het deksel van de platenspeler op, draai de zwarte tie-wrap waarmee de TOONARM is vastgezet los en verwijder
deze.
2. Verwijder al het verpakkingsmateriaal.
3. Verwijder de witte NAALDBESCHERMING door deze voorzichtig van de rode stylushouder naar de voorzijde van het
apparaat te trekken. Bewaar deze op een veilige plaats en plaats het weer op de stylus als het apparaat naar een
andere locatie moet worden gebracht.
4. Maak de NEERDRUKKER van de TOONARM los door deze voorzichtig naar rechts te duwen. Hierdoor wordt de
toonarm losgemaakt van de ARMSTEUN. Vergrendel de neerdrukker opnieuw wanneer u het apparaat naar een andere
locatie brengt.
EEN PLAAT AFSPELEN
1. Zet het apparaat AAN door de voeding AAN/UIT-SCHAKELAAR/VOLUMEREGELAAR naar de AAN-stand te
draaien.
2. Zet de VOLUME-regelaar in de middelste stand.
3. Schuif de FUNCTIE-schakelaar naar de PHONO-modus.
4. Zet de TOERENTALSCHAKELAAR op het correcte toerental (331/3-, 45- of 78-toeren) voor de geselecteerde plaat.
5. Gebruik de TOONARMHENDEL om de toonarm op te tillen van de steun. Beweeg de toonarm voorzichtig naar
rechts tot u een ‗klik‘ hoort, de draaitafel moet beginnen te draaien.
6. Beweeg de toonarm naar de plaat en laat deze met de toonarmhendel neer op het punt waar u het afspelen van de
plaat wilt starten.
7. Aan het einde van de plaat stopt de TOONARM automatisch. Til de toonarm op en plaats deze handmatig terug op
de TOONARMSTEUN.
MEEGELEVERD ACCESSOIRE - Spiladapter voor 45-toerenplaten
Voor het afspelen van een 45-toerenplaat zonder middenklem, verwijdert u de adapter van het deck
van de platenspeler door duim en wijsvinger in de uitsparingen te plaatsen en omhoog te trekken en
zet u deze vervolgens op de spil van de draaitafel. Daarna kunt u de plaat op de draaitafel plaatsen.
BEDIENING VAN DE CD-SPELER
Een CD afspelen
1. Schakel het apparaat AAN door de voeding AAN/UIT-SCHAKELAAR/VOLUMEREGELAAR naar de standAAN te
draaien en het geluidsvolume in de middelste stand te zetten.
2. Schuif de FUNCTIE-schakelaar naar de CD-modus.
3. Druk op CD OPENEN/SLUITEN/ om de CD-lade te openen.
4. Plaats een vooraf opgenomen CD met de bedrukte zijde naar boven. Druk opnieuw op CD OPENEN/SLUITEN/
om de lade te sluiten, ―READ‖ wordt weergegeven terwijl de CD-speler de inhoud van de disc scant.
5. Track nr. 1 wordt automatisch afgespeeld nadat de CD-speler de inhoud van de disc heeft gelezen.
6. Druk een of meerdere keren op
VOORUIT SKIP
/ of
ACHTERUIT SKIP/
tot het gewenste tracknummer in het
display verschijnt.
7. Druk op of de ―STOP/SD/USB‖toets (gemarkeerd met een rode stip) om het afspelen te stoppen.
8. Druk op of de ―AFSPELEN/PAUZEREN‖toets (gemarkeerd met een groene stip) om het afspelen te hervatten of
de muziek te pauzeren.

MP3-CD afspelen –met de afstandsbediening
1. Plaats een disc in MP3-CD-formaat. Druk opnieuw op CD OPENEN/SLUITEN/ om de lade te sluiten. ―READ‖
wordt weergegeven terwijl de CD-speler de inhoud van de disc scant.
2. Track nr. 1 in de hoofdmap (Map 1) wordt automatisch afgespeeld nadat de inhoud van de MP3-CD is gelezen.
3. Druk een of meerdere keren op
VOORUIT SKIP
/ of
ACHTERUIT SKIP/
tot het gewenste tracknummer in het
display verschijnt.
4. Druk op STOP/ om het afspelen te stoppen.
5. Houd in de stopmodus de AFSPELEN/PAUZEREN toets/ ingedrukt om de MP3-map te selecteren.
OPMERKING: In de stopmodus: Om sneller vooruit of terug te skippen met 10 tracks tegelijk, houdt u de
VOORUIT SKIP
/
of
ACHTERUIT SKIP/
knop ingedrukt. Het skippen stopt wanneer u de knop loslaat.
USB & SD-KAART GEBRUIKEN
SD-kaart gebruiken:
1. Zet het apparaat AAN door de voeding AAN/UIT-SCHAKELAAR/VOLUMEREGELAAR naar de AAN-stand te
draaien.
2. Zet de VOLUME-regelaar in de middelste stand.
3. Schuif de FUNCTIE-schakelaar naar de ―CD‖-modus.
4. In de ―STOP‖-modus, houd STOP/ langer dan een halve seconde ingedrukt –het apparaat wordt omgeschakeld
van CD>SD. Als er geen kaart wordt gedetecteerd, wordt ―NO CARD‖ in het display getoond.
5. Plaats een SD-kaart met vooraf opgenomen MP3-muziek (niet meegeleverd) in de kaartsleuf. Vervolgens wordt
―READ‖ weergegeven terwijl het systeem de inhoud van de SD-kaart scant.
6. Track nr. 1 van de hoofdmap (Map 1) wordt automatisch afgespeeld nadat de inhoud van de SD-kaart is gelezen.
7. Druk een of meerdere keren op
VOORUIT SKIP
/ of
ACHTERUIT SKIP/
tot het gewenste tracknummer in het
display verschijnt. Laat de knop los –het afspelen van de track start automatisch.
8. Druk op STOP/ om het afspelen te stoppen en druk op AFSPELEN/PAUZEREN om het afspelen te hervatten.
9. Druk op AFSPELEN/PAUZEREN/ om de muziek te pauzeren, druk opnieuw om het afspelen te hervatten.
USB gebruiken:
1. Zet het apparaatAAN door de voeding AAN/UIT-SCHAKELAAR/VOLUMEREGELAAR naar de AAN-stand te
draaien.
2. Zet de VOLUME-regelaar in de middelste stand.
3. Schuif de FUNCTIE-schakelaar naar de CD-modus.
4. In de ―STOP‖-modus, houd STOP/ langer dan een halve seconde ingedrukt –het apparaat wordt omgeschakeld
van CD>SD.
5. In de stopmodus, houd STOP/ langer dan een halve seconde ingedrukt –het apparaat wordt omgeschakeld van
SD>USB. Als geen USB werd gedetecteerd, wordt ―NO USB‖ in het display getoond.
6. Sluit een USB-massaopslagapparaat aan. ―READ‖ wordt weergegeven terwijl het systeem de inhoud van het

USB-apparaat scant.
7. Track nr. 1 van de hoofdmap (Map 1) wordt automatisch afgespeeld nadat de inhoud van het USB-apparaat is
gelezen.
8. Druk een of meerdere keren op
VOORUIT SKIP
/ of
ACHTERUIT SKIP/
tot het gewenste tracknummer in het
display verschijnt. Laat de knop los - het afspelen van de track start automatisch.
9. Druk op STOP/ om het afspelen te stoppen en druk op AFSPELEN/PAUZEREN om het afspelen te hervatten.
10.Druk op AFSPELEN/PAUZEREN/ om de muziek te pauzeren, druk opnieuw om het afspelen te hervatten.
OPMERKINGEN:
· Gebruik van de USB-poort met een USB-verlengsnoer wordt niet ondersteund.
· Het is niet ontworpen voor directe communicatie met een computer.
· Het is niet gegarandeerd dat alle USB-geheugenapparaten (of SD-kaarten) werken op dit audiosysteem
BELANGRIJK:
Koppel het USB-apparaat niet los in de USB-modus, aangezien daardoor het externe apparaat of de bestanden ervan
kunnen worden beschadigd. Schakel het apparaat eerst uit of selecteer een andere modus alvorens het USB-apparaat
veilig te verwijderen.
USB-specificatie
Interface:
- USB 2.0 Full Speed, HOST (USB HUB wordt niet ondersteund) overeenkomstig Flashgeheugen
- Compatibel met MPEG-Audio 1, 2, 2.5
- Compatibel met Layer 1, 2, 3
- Compatibel met bitsnelheid: 128 –320 kbps
- Submappen nesten: 8 niveaus
- Aantal tracks/titels max 999
- Ondersteunt ID3 tag V2.0
TRACKS PROGRAMMEREN
Maximaal 20 tracks kunnen worden geprogrammeerd voor het afspelen van tracks op een audio- of MP3-CD,
USB-apparaat of SD-kaart in de gewenste volgorde.
1. Druk in de stand ―STOP‖ op PROGRAM/ om het programmeren te starten - ―P‖ en ―P0-01‖ beginnen te
knipperen in het display.
2. Druk een of meerdere keren op de knoppen
VOORUIT SKIP
/ of
ACHTERUIT SKIP/
tot het gewenste
tracknummer in het display verschijnt.
3. Voor het programmeren van MP3: houd de AFSPELEN/PAUZEREN-toets/ ingedrukt om het gewenste album
te selecteren.
4. Druk op PROGRAMMEREN/ om te bevestigen, het display toont het opgeslagen tracknummer en de volgende
opslagpositie.
5. Herhaal de stappen 2-3 om alle gewenste tracks te selecteren en op te slaan. ―FULL‖ wordt weergegeven als u
meer dan 20 tracks probeert te programmeren.
7. Druk op AFSPELEN/PAUZEREN/ om de geprogrammeerde tracks af te spelen.
Table of contents
Languages:
Other Ricatech Turntable manuals

Ricatech
Ricatech RTT77 User manual

Ricatech
Ricatech RTT21 User manual

Ricatech
Ricatech RTT25 User manual

Ricatech
Ricatech RMC160 User manual

Ricatech
Ricatech RTT95 User manual

Ricatech
Ricatech RMC430 User manual

Ricatech
Ricatech RTT22 User manual

Ricatech
Ricatech RTT98 User manual

Ricatech
Ricatech Ibiza RMC90 User manual

Ricatech
Ricatech REVOLUTION BLACK RTT20 User manual