manuals.online logo
Brands
  1. Home
  2. •
  3. Brands
  4. •
  5. Ricoh
  6. •
  7. Projector
  8. •
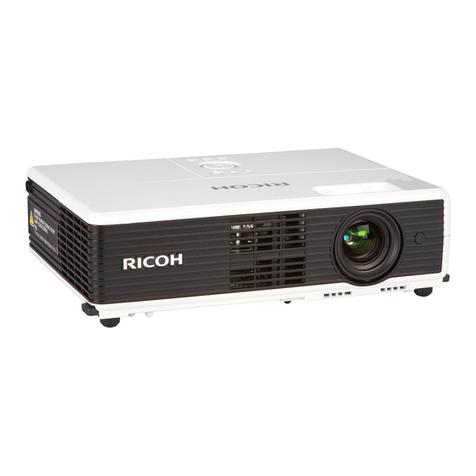
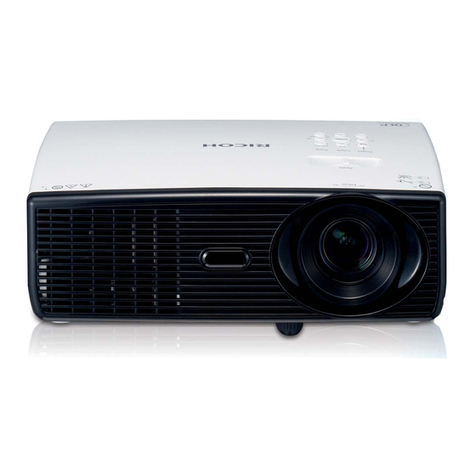
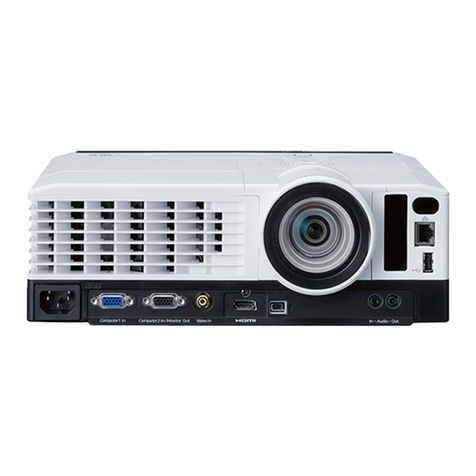
  9. Ricoh PJ X5360N User manual

Ricoh PJ X5360N User manual

Connect the supplied power cord.
Connecter le câble d’alimentation fourni.
Conecte el cable de alimentación suministrado.
Ligue o cabo da alimentação fornecido.
Connect your computer to the projector.
Connecter l’ordinateur au projecteur.
Conectar el ordenador al proyector.
Ligue o seu computador ao projector.
Supplied computer cable (VGA)
Câble d’ordinateur fourni (VGA)
Cable de ordenador suministrado (VGA)
Cabo de computador (VGA) fornecido
PJ X5360N/WX5350N
Quick Setup Guide
PJ X5360N/WX5350N
Quick Setup Guide
RigelPJ1_Quick_F-US.indd 1 2011/10/18 10:54:36
Slide the lens cover to the left to uncover the lens.
Faites coulisser la protection de la lentille vers la gauche pour
découvrir la lentille.
Deslice la tapa de la lente hacia la izquierda para descubrir la
lente.
Deslize a tampa da lente para a esquerda para destapar a lente.
Select a source.
Sélectionner une source.
Selección de una fuente.
Escolha uma fonte.
Turn on the projector.
Allumer le projecteur.
Encienda el proyector.
Ligue o projector.
RigelPJ1_Quick_F-US.indd 2 2011/10/18 10:54:38
Fn F1 F
12
(→ page 24, 132, 170 of the User’s Manual)
TIP:
Press the Auto Set button to optimize an RGB image
automatically.
ASTUCE:
Appuyer sur la touche Auto Set pour optimiser
automatiquement une image RGB.
SUGERENCIA:
Pulse el botón de Auto Set para optimizar una imagen
RGB automáticamente.
DICA:
Prima o botão Auto Set para optimizar automaticamente uma imagem RGB.
RigelPJ1_Quick_F-US.indd 3 2011/10/18 10:54:39
Adjust the tilt foot
Régler le pied de réglage de l’inclinaison
Ajuste de las patas de inclinación
Ajuste o Pé de Inclinação
(→ Page 21 of the User’s Manual)
Rotate the Lens Shift dial (Lens shift)
Tournez le bouton de réglage de l’objectif (décalage d’objectif)
Gire el dial de desplazamiento de la lente (desplazamiento de lente)
Rodar o disco de deslocação da lente (deslocação da lente)
Rear foot
Pied arrière
Pata posterior
Pé traseiro
Up
Haut
Arriba
Cima
Down
Bas
Abajo
Baixo
Adjust the picture size and position.
Ajuster la taille et de la position de l’image.
Ajuste del tamaño y la posición de la imagen.
Ajuste o tamanho da imagem e a posição.
Adjustable Tilt Foot
Pied à inclinaison réglable
Pata de inclinación ajustable
Pé de inclinação ajustável
Adjustable Tilt Foot Lever
Levier de pied à inclinaison réglable
Palanca de la pata de inclinación ajustable
Alavanca ajustável do pé de inclinação
Ventilation (outlet)
Ventilation (sortie)
Ventilación (salida)
Ventilação (saída)
Downward
Vers le bas
Hacia abajo
Para baixo
Upward
Vers le haut
Hacia arriba
Para cima
RigelPJ1_Quick_F-US.indd 4 2011/10/18 10:54:40
Automatic Keystone Correction function is turned
on at the time of shipment.
You can also use the
▲
or
▼
button to perform
Keystone correction manually with no menu
displayed.
La fonction de correction automatique du trapèze
Keystone est activée par défaut en sortie d’usine.
Vous pouvez également utilisez les touches
▲
ou
▼
pour effectuer la correction Keystone
manuellement sans afficher aucun menu.
La función de corrección automática keystone es
activada en el momento del envío.
También pude utilizar los botones
▲
o
▼
para
llevar a cabo la corrección keystone manualmente
sin ningún menú visualizado.
A função Correcção automática de trapezóide vem
activada de fábrica.
Também pode usar o botão
▲
ou
▼
para executar
manualmente a correcção trapezoidal sem nenhum
menu apresentado.
(→ page 22 of the User’s Manual)
Zoom Focus
Mise au point optique
Enfoque
Focagem
(→ page 20 of the User’s Manual) (→ page 19 of the User’s Manual)
RigelPJ1_Quick_F-US.indd 5 2011/10/18 10:54:42
1. Press the Power button twice.
The lamp will go off. The Power indicator will
change color to orange and the Status
indicator will light green. This indicates the
projector is in the standby mode.
2. Slide the lens cover to the right to cover the
lens.
3. Disconnect all the cables.
1. Appuyez deux fois de suite sur la touche Power.
La lampe s’éteint. Le témoin Power change
de couleur et passe à l’orange, puis le témoin
Status s’allume en vert. Ceci indique que le
projecteur se trouve en mode de veille.
2. Faites glisser la protection de la lentille vers la
droite pour couvrir l’objectif.
3. Débranchez tous les câbles.
1. Pulse el botón Power dos veces.
La lámpara se apagará. El indicador Power
cambiará a color naranja y el indicador Status
se iluminará en verde. Esto indica que el
proyector se encuentra en el modo de espera.
2. Para tapar la lente, deslice la tapa de la lente
hacia la derecha.
3. Desconecte todos los cables.
1. Prima duas vezes o botão Power (Desligar
alimentação).
A lâmpada apaga. O indicador da alimentação
muda de cor para laranja e o indicador Status
(Estado) acende em verde. Isto indica que o
projector está em modo espera.
2. Deslize a tampa da lente para a direita para
cobrir a lente.
3. Desligue todos os cabos.
(→ page 25 of the User’s Manual)
7N8N2321
Printed in China
©2011 EN US FR FR ES ES PT PT
Y015-6057
RigelPJ1_Quick_F-US.indd 6 2011/10/18 10:54:43

Other manuals for PJ X5360N

2

This manual suits for next models

1

Other Ricoh Projector manuals

Ricoh PJ WX6170N User manual

Ricoh

Ricoh PJ WX6170N User manual

Ricoh PJ WUL6670 User manual

Ricoh

Ricoh PJ WUL6670 User manual

Ricoh PJ K7000 User manual

Ricoh

Ricoh PJ K7000 User manual

Ricoh PJ X5770 Quick start guide

Ricoh

Ricoh PJ X5770 Quick start guide

Ricoh PJ S2240 User manual

Ricoh

Ricoh PJ S2240 User manual

Ricoh PJ U3000 User manual

Ricoh

Ricoh PJ U3000 User manual

Ricoh PJ WX6170N Operating manual

Ricoh

Ricoh PJ WX6170N Operating manual

Ricoh Hadar-PJ1 Series Installation guide

Ricoh

Ricoh Hadar-PJ1 Series Installation guide

Ricoh PJ X5360N User manual

Ricoh

Ricoh PJ X5360N User manual

Ricoh Praesepe-PJ1 Series Manual

Ricoh

Ricoh Praesepe-PJ1 Series Manual
Ricoh PJ X6180N User manual

Ricoh

Ricoh PJ X6180N User manual

Ricoh PJ X5580 User manual

Ricoh

Ricoh PJ X5580 User manual

Ricoh PJ X3340N User manual

Ricoh

Ricoh PJ X3340N User manual

Ricoh Altair-PJ2 Series Installation guide

Ricoh

Ricoh Altair-PJ2 Series Installation guide

Ricoh PJ WXL5860 User manual

Ricoh

Ricoh PJ WXL5860 User manual

Ricoh PJ WX2440 User manual

Ricoh

Ricoh PJ WX2440 User manual

Ricoh PJ WX4240N User manual

Ricoh

Ricoh PJ WX4240N User manual

Ricoh PJ WXC1110 User manual

Ricoh

Ricoh PJ WXC1110 User manual

Ricoh Altair-PJ2 Series Installation guide

Ricoh

Ricoh Altair-PJ2 Series Installation guide

Ricoh PJ WX4141 User manual

Ricoh

Ricoh PJ WX4141 User manual

Ricoh PJ WX3131 User manual

Ricoh

Ricoh PJ WX3131 User manual

Ricoh PJ WX4153N User manual

Ricoh

Ricoh PJ WX4153N User manual
Ricoh PJ WX4152NI User manual

Ricoh

Ricoh PJ WX4152NI User manual

Ricoh PJ X3351N User manual

Ricoh

Ricoh PJ X3351N User manual

Popular Projector manuals by other brands

PLUS Vision U5-512h Specifications

PLUS Vision

PLUS Vision U5-512h Specifications

Optoma DV10 MovieTime Specifications

Optoma

Optoma DV10 MovieTime Specifications

Philips PPX 4350 quick start guide

Philips

Philips PPX 4350 quick start guide

Ask IMPRESSION A10+ user guide

Ask

Ask IMPRESSION A10+ user guide

Hitachi CP-X380W user manual

Hitachi

Hitachi CP-X380W user manual

Paso C56/6-T Instructions for installation and mounting

Paso

Paso C56/6-T Instructions for installation and mounting

Fisher PLV-Z4 owner's manual

Fisher

Fisher PLV-Z4 owner's manual

Christie CP2000-X user manual

Christie

Christie CP2000-X user manual

Epson VS210 Brochure & specs

Epson

Epson VS210 Brochure & specs

Vivitek Voyager AV200 Specifications

Vivitek

Vivitek Voyager AV200 Specifications

Sanyo UF10 - PLC UXGA LCD Projector owner's manual

Sanyo

Sanyo UF10 - PLC UXGA LCD Projector owner's manual

Hitachi CP-EX3051WN user manual

Hitachi

Hitachi CP-EX3051WN user manual

Mitsubishi Electric XD221U-G Specifications

Mitsubishi Electric

Mitsubishi Electric XD221U-G Specifications

NEC NP600 XGA brochure

NEC

NEC NP600 XGA brochure

Ask Proxima M6 quick start

Ask Proxima

Ask Proxima M6 quick start

Toshiba TDP-T250U owner's manual

Toshiba

Toshiba TDP-T250U owner's manual

Optoma EP755 Specifications

Optoma

Optoma EP755 Specifications

Eagletone PARLED 9W user manual

Eagletone

Eagletone PARLED 9W user manual

manuals.online logo
manuals.online logoBrands
  • About & Mission
  • Contact us
  • Privacy Policy
  • Terms and Conditions

Copyright 2025 Manuals.Online. All Rights Reserved.