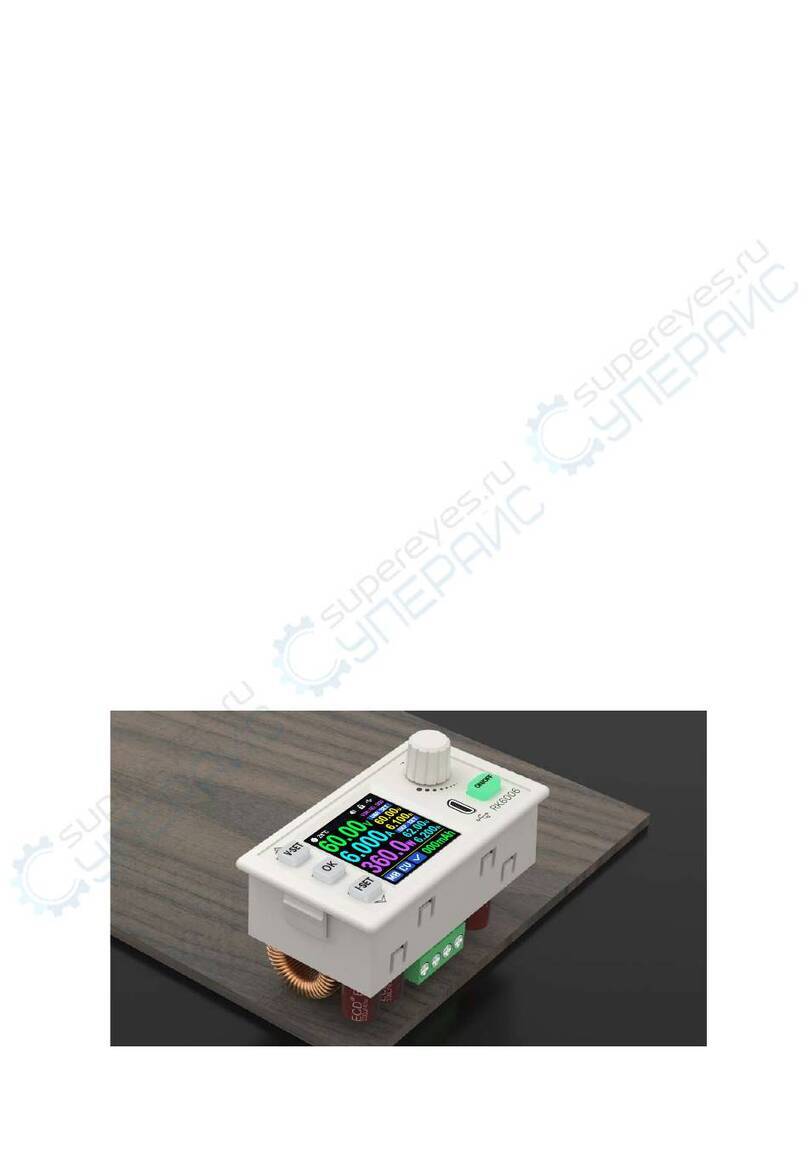
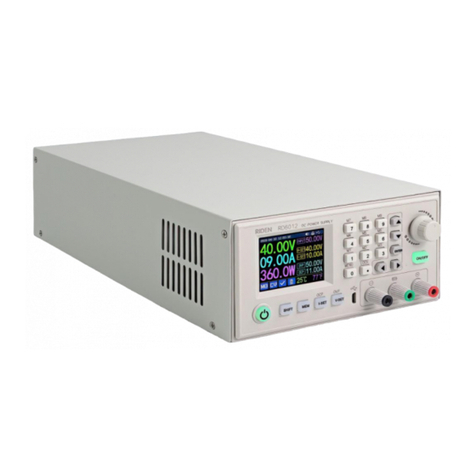
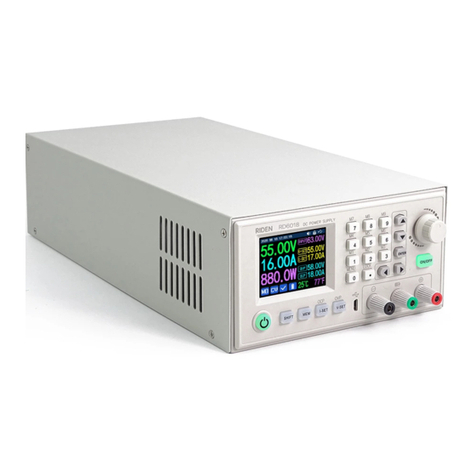
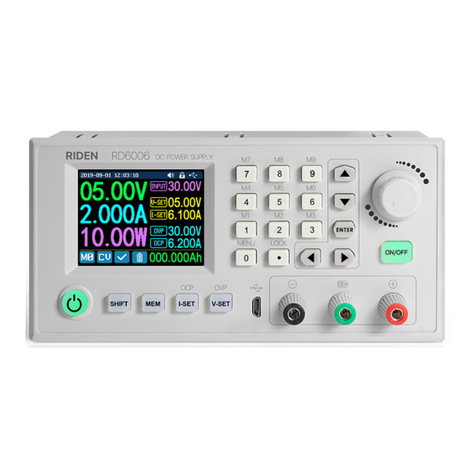
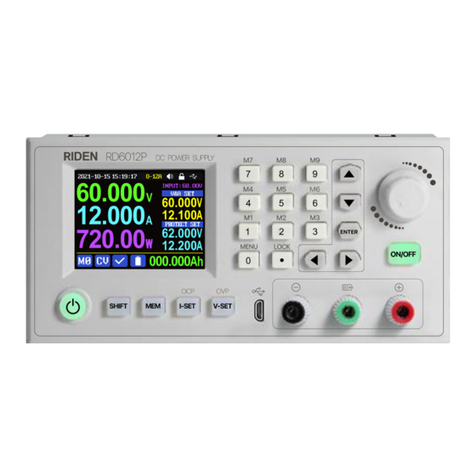
Riden RD6006P User manual

Constant Voltage and Constant Current DC
Power Supply Instruction
Model: RD6006P
Date: 2021.2.25
Dear users, thank you for purchasing the constant voltage constant current DC
power supply produced by Hangzhou Ruideng Technology Co., Ltd. In order to let you
know more about the full function of this product, get a better experience and avoid
misuse. Please read this instruction carefully before using it. Keep it for future
reference.
Note: This instruction is corresponding to firmware V1.34, the page and
operation may be different under different firmware versions, please pay attention
when using it. We do recommend you to download the latest firmware for better
experience.

CONTENT
Constant Voltage and Constant Current DC Power Supply Instruction......1
1.1 Technical Parameter........................................................................ 5
1.2 Core Function...................................................................................6
1.3 Panel Instruction..............................................................................6
1.3.1 Front Panel..............................................................................6
1.3.2 Back Panel...............................................................................6
1.4 Operation Instruction...................................................................... 8
1.4.1 Main Page............................................................................... 8
1.4.2 Operation Introduction.......................................................... 9
1.4.2.1 Battery Charging Function Introduction....................... 9
1.4.2.2 Main Page Output Voltage and Current Setting......... 10
1.4.2.3 Data Group Quick Storage and Call out...................... 10
1.4.2.4 Keypad lock and unlock...............................................11
1.4.2.5 System Setting............................................................. 11
1.4.2.6 Main Page Display Style Setting..................................13
1.4.2.7 Storage Data Setting....................................................14
1.4.2.8 System Information..................................................... 14
Android APP Instruction............................................................................ 15
2.1 Mobile Phone APP Installation......................................................15
2.1.1 APP Download...................................................................... 15
2.2 Installation Introduction................................................................15

2.2.1 APP Update...........................................................................15
2.2.2 APP Interface Display........................................................... 15
2.2.3 APP Operation...................................................................... 16
2.2.3.1 Network Distribution.................................................. 16
3.2.3.2 Proper Wi-Fi Connection.............................................18
2.2.3.3 APP Operation............................................................. 18
IOS APP Instruction....................................................................................20
3.1 Mobile Phone APP Installation......................................................20
3.1.1 APP Download...................................................................... 20
3.2 Installation and Operation.............................................................20
3.2.1 APP Update...........................................................................21
3.2.2 UI Instruction........................................................................21
3.2.3 APP Operation...................................................................... 22
3.2.3.1 Network Distribution.................................................. 22
3.2.3.2 Proper Wi-Fi Connection.............................................23
3.2.3.3 APP Operation............................................................. 23
PC Software Installation and Operation Instruction................................. 24
4.1 Software Download....................................................................... 24
4.1.1 Unzip Files.............................................................................24
4.1.2 Unzip Files.............................................................................24
4.2 Software Operation....................................................................... 25
4.2.1 Software Connection............................................................25

4.2.2 PC Software Operation Instruction...................................... 26
4.3 Functions Introduction.................................................................. 26
4.3.1 Basic Functions..................................................................... 27
4.3.2 Calibration............................................................................ 27
4.3.3 Advanced Function...............................................................28
4.3.4 RS485 Multiple Devices Communication.............................29
4.3.5 Firmware Update..................................................................29
4.3.6 Boot Logo Update.................................................................30
4.3.7 Version Update Detection.................................................... 31
4.3.8 Language Setting.................................................................. 32
4.3.9 About.................................................................................... 32
Appendix.................................................................................................... 34
Appendix 1: Common Battery Voltage Comparison Table................. 34
Appendix 2: Common Battery Voltage Comparison Table................. 35

1.1 Technical Parameter
Model
RD6006P
RD6006P-W
Input voltage range
7-70.00V
Output voltage range
0-60.000V
Output current range
0-6.0000A
Output power range
0-360.00W
Input voltage measurement resolution
0.01V
Output voltage setting measurement resolution
0.001V
Output current setting measurement resolution
0.0001A
Battery voltage measurement resolution
0.01V
Input voltage measurement accuracy
±(1%+5 digits)
Output voltage accuracy between setting and
measurement
±(0.5‰+4 digits)
Output current accuracy between setting and
measurement
±(1‰+6 digits)
Battery voltage measurement accuracy
±(0.5%+3 digits)
Automatic cut off current value when charging
Set by yourself
Output ripple typical
20mV VPP Note①
Working temperature range
-10℃~40℃
External sensor Temperature detection range:
-10℃~100℃/0℉~200℉
External sensor Temperature detection
accuracy:
±3℃/±6℉
Constant voltage mode response time
2ms(0.1A-5A Load)
Constant voltage mode load regulation
±(0.1%+2 digits)
Constant current mode load regulation
±(0.1%+3 digits)
Capacity measurement range
0-9999.99Ah
Energy measurement range
0-9999.99Wh
Capacity and energy statistical error
±2%
Buck working mode
Voltage drop >10%*VOUT+2V
Cooling fan start condition
Output current >4A or System temperature>45℃
Cooling fan shut down condition when working
Output current <3.9A and System temperature <45℃
Over temperature protection
System temperature >80℃
Screen brightness setting
0-5(6 levels)
Screen
2.4 inch color HD display
Weight(with package)
About 0.62Kg
Product dimension
167*81*65mm
Support USB communication
Yes
Support WiFi communication
No
Yes
Note①:
Ripple measurement method: noise and ripple are measured at X1 range, AC coupling, 20M

Hz of bandwidth on your oscilloscope with a 0.1uF parallel capacitor at the output terminals
1.2 Core Function
·Keypad + encoder potentiometer combination adjustment
·10 data groups for storage and call out
·2.4 inch HD color display
·Dedicated terminal for battery charging
·Firmware update, support more functions later
·Brand new PC software
·Support WiFi communication(RD6006P-W) /USB communication
·Support Android/ IOS APP
·Support multiple display interfaces
1.3 Panel Instruction
1.3.1 Front Panel
A: Power button
B: SHIFT Second function button
C: Quick storage button
D: Current/Over current protection setting
E: Voltage/Over voltage protection setting
F: Micro USB port
G: Power supply output negative terminal/
Battery charging negative terminal
H: Battery charging positive terminal
(Dedicated terminal for battery charging)
I: Power supply output positive terminal
J: Output switch
K: Enter/ Confirm button encoder
L: potentiometer/Cancel button
M: Direction button
N: keypad
O: Screen
1.3.2 Back Panel

P: Input fuse
Q: Output fuse
R: Power source input interface
S: External temperature sensor interface
T: CR1220 battery socket
U: Communication module interface
V: Fan interface
NOTE:
Power source input interface must be
connected to 7-70V constant DC power source. The
external sensor cable (as shown on right) must be
connected to the external temperature sensor
interface. The fan interface cannot be connected to
other fans. When the system temperature is higher than 80 ℃, the output will be
shut down and show OTP on the screen. CR1220 is the clock battery (Please prepare
by yourself), it can power on the clock function. Communication interface is a special
interface, please don’t connect to other modules or cables.
You can see the Wi-Fi module and RS-485 module in the picture below. If you
need RS-485 for industrial batch test , if you want to use that, please contact us to
see if it supports RS-485.

1.4 Operation Instruction
After power-on, it will show boot image first, and then enters the main page.
1.4.1 Main Page
Traditional Style
Detail Style
Curve Style
At main page you can press button to change the display style between Traditional
Style, Detail Style and Curve Style, the display style will not be saved automatically, you need to
set default boot display at section 1.4.2.6 Main Page Style Setting.
W: Date/Time
X: Button tune
Y: Button lock status
Z: Communication interface
AA: Actual output voltage value
AB: Actual output current value
AC: Output power
AD: Current data group
AE:Constant voltage Constant current status
AF:Protection status indication
AG: Battery charging indication
AH:Battery related information display area
AI: Over current protection value
AJ: Over voltage protection value
AK: Output current preset value
AL: Output voltage preset value
AM: Input voltage

1.4.2 Operation Introduction
In the menu operation, the icon in red or cursor is the currently selected menu,
the icon in blue is not selected, press to confirm or enter, press the encoder
potentiometer to cancel or return, press the direction button to move the cursor or
switch menu, rotate the encoder potentiometer to change the setting, the settings
will be automatically saved when returning from the menu page. Press and hold the
0 button and power on to restore the factory settings, press and hold the 1 button
and power on to restore the factory calibration value, press and hold and
power on to enter the boot mode.
1.4.2.1 Battery Charging Function Introduction
Battery charging operation video:
https://drive.google.com/drive/folders/1g8v_l1X9uwRM1P4GPwKhnP4No
pKIUm1s?usp=sharing
After power on, at battery related information display area, external
temperature, capacity and energy will loop display. When there is output current:
capacity, energy will be automatically accumulated, and automatically cleared after
power off.
The green terminal is connected to the positive electrode of the battery, and the
black terminal is connected to the negative electrode of the battery. After the battery
is correctly connected, the battery charging indicator turns red and the battery is
connected. Press ON/OFF to start charging, the battery charging indicator turns
green . When the actual output current is lower than 10 mA (charging cut-off
current value can be set by user), the output will be shut down automatically. Battery
with protection board or low capacity needs to be charged with red and black
terminals. The charging voltage and current should be set on your own. When the
charging function is not in use, you can connect the green and black terminals with a
cable to prevent interference with the battery detection terminal and accidentally
turn off the output.
It is strongly recommended to use the original charger to charge the battery.
The charging function of this machine can only serve as a temporary replacement,
not for long-term use. There is a risk of fire and explosion during the charging
process. Non-professionals should not operate.

figure 1
figure 2
Figure 3
1.4.2.2 Main Page Output Voltage and Current Setting
Output voltage and current setting operation video:
https://drive.google.com/drive/folders/1NZW7k3-Kyc5YgIh-bWn8gBGaY5xo7_Lm?us
p=sharing
Press button to set the output current value, you can use encoder
potentiometer to adjust the output value directly, press button to move the
cursor. Of course you can use keypad to enter the value, and press to confirm.
If you set the wrong value, you can press encoder potentiometer to cancel.
Press button to set the output voltage value, the operation way is similar
to output current setting.
Press + button / + button to set the over current
protection/ over voltage protection value. The operation method is similar to output
current setting.
When the device is under constant voltage mode, it will show , and it will
show when under constant current mode; when the device works normally it
will show at protection status indication, when the actual output current value
is higher than the over current protection value(OCP), the output will be cut off
automatically, and show , when the actual output voltage value is higher than
the over voltage protection value(OVP), the output will be cut off automatically, and
show , when the system temperature is higher than 80℃, the output will be cut
off automatically, and show .
1.4.2.3 Data Group Quick Storage and Call out
Data group quick store and call out operation video:
https://drive.google.com/drive/folders/139d28IHpZEgpNEC6pfBVruNF3b9FRVWW?usp=sharing
Press + keypad button 1-9, you can store the output voltage value, output
current value, over voltage protection value, over current protection value into the
corresponding data group(as shown in figure 2), then press to confirm, it will
show at bottom left, you can press button and choose “X”, then press ENTER
to cancel, after change the setting value it will show .

Press + keypad button 1-9 to quick call out the saved data (as shown
above in figure 3) from the corresponding data group. Press to confirm, it will
show ,after change the setting value it will show . When disable the “Take
OK” option, it will be called out directly to change the data setting value, no prompt.
is the default data group, when you edit the settings and press button or
rotate encoder potentiometer to change the setting and press encoder
potentiometer to return, it will be stored into M0 automatically, or you go to the data
group setting menu, change the setting and press encoder potentiometer to return,
it will save too, and it will not save by other settings.
1.4.2.4 Keypad lock and unlock
Keypad lock operation video:
https://drive.google.com/drive/folders/121yIfNLh3O99AU4tUkxtC5q34XT3s
nn1?usp=sharing
Press +to lock or unlock the keyboard. And the keypad will be
automatically locked when communication starts, there will be displayed on the
top (cannot unlock manually), and the keypad will be automatically unlocked when
the connection disconnected manually, there will be displayed, the keypad will
be automatically unlocked after 3 seconds when the connection disconnected
abnormally, and the power off button can be used when the keypad is locked.
1.4.2.5 System Setting
System setting operation video:
https://drive.google.com/drive/folders/1JCPJkD92Iv2Qtplmd6rs1pQma
js1EsVB?usp=sharing
Press +to enter the system setting menu, the icon in Red shows the
menu being chosen, press or to enter the sub-menu, the option in blue
is the option being chosen, you can rotate the encoder potentiometer to change
setting, and you can press button to select menu.

figure 4
figure 5
figure 6
figure 7
figure 8
Press +to enter the system setting menu showed in figure 4, press
or to enter the sub-menu.
Settings Sub-menu:
System language is is set to English by default. You can also set Simplified
Chinese, French, Germany and Russian language;
Take OK is set to ON by default, when you quickly call out a data group, there
will be a prompt as shown in figure 3, if you set OFF for this option, the settings will
be edited directly when call out a data group;
Take Out is set to OFF by default, when call out a data group, it will keep the
previous output status, when set it ON, it will output directly when call out a data
group.
Boot Power is set to OFF by default, when boot the device the output is cut off,
when set it on, it will automatically turn on the output after booting.
Boot Logo is set to ON by default, when boot the device, it will show the boot
logo first, then enter the main interface, when set it OFF, it will enter the main
interface directly.
Buzzer is set to ON by default,it will show on the top, and you can hear the
beep when press the button. When set it OFF, it will show , there will not be beep
when press the button.
Backlight is set to level 4 by default, it can be set between level 0-5.
Update Rate is set to Low by default, you can set it low/mid/high, it is the fresh
rate of the real output voltage and current.
Max Power is set to 380W by default, you can set it between 1-380W, it is the
max output power. The max output is default voltage priority mode, when the setting
voltage*setting current is higher than the max power, the device will automatically
decrease the output current setting value. When used together with low power

power source, it is recommended to set the value as the rated power of the power
source*95%;
Temperature unit is ℃by default, it can be switched between ℃and ℉(figure
5);
Battery Charger Sub-menu(figure 6):
CutOff Current is set to 10mA by default and it can be edited, when the real
output current is lower than this set value, the output will be cut off automatically.
CutOff Temp. is set to 60℃by default, when the external temperature sensor
detect over 60℃, the output will be cut off automatically.
Communication Sub-menu(figure 7):
Interface is set to USB by default, you can also set it to WIFI/TTL/RS485, USB
means the micro USB port, you can see on the top when set it USB, and when
the communication starts, it will show ; You need to insert a WIFI board to use
the WIFI function, and it will show on the top, and when the communication
starts, it will show ; TTL is not available now; You need to insert RS485 module to
use RS485, and it will show on the top, and when the communication starts, it
will show .
Baudrate is set to 9600 by default, you can set it to 9600/19200/38400/57600/
115200, under WIFI communication mode the baud rate is 115200 and it cannot be
edited.
Address is set to 001 by default, you can set it between 1 and 255;
The Baud rate and address on the device should be same with the information
on PC software or APP. You can see more communication at PC software and APP
section.
Date and Time Sub-Menu(figure 8):
Date and Time can be set from 2000 to 2100, press or you can select
the option, and use encoder potentiometer can adjust the value, it will be applied
immediately when you change the value, please do not set the wrong time.
figure 9
figure 10
figure 11
1.4.2.6 Main Page Display Style Setting
Main interface display style setting operation video:
https://drive.google.com/drive/folders/1gMkuCZrr_G-PlyHqO-i6fxdS-XRvuOIG?
usp=sharing
You can press + to enter the system setting menu, then press

and it will be switched to display style menu: you can press or to enter
the sub-menu.
Layout Sub-menu(figure 9):
Digits Style is set to Normal by default, you can set it to Normal/7-Seg V1/7-Seg
V2.
Home Style is set to 0(traditional style), you can also set it to 1(Detail Style) or
2(Curve Style).
Custom Colors(figure10):
You can set the the display colors for output voltage, output current, output
power.....as shown in figure 10 and figure 11.
figure 12
figure 13
1.4.2.7 Storage Data Setting
Data group setting in manual operation video:
https://drive.google.com/drive/folders/13APYtlRAaMcKmStbWM8toB8oOW5wi
4ph?usp=sharing
You can press + to enter the system setting menu, and then press
button twice to enter the data storage setting menu as shown in figure12. Press the
Enter button to enter the sub-menu, press the direction button to choose the data
group, the setting way is same as the operation in Section 1.4.2.2.
1.4.2.8 System Information
System information operation video:
https://drive.google.com/drive/folders/1APFNHtOufuh46rc5i2XTZKrQoTqgHdUr?
usp=sharing
You can press + to enter the system setting menu, and then press
button three times to enter the system information menu as shown in figure 13.
Product Model is the device name, Product SN is product serial number, Firmware is
the firmware version, Temperature is the System temperature.

Android APP Instruction
2.1 Mobile Phone APP Installation
This App only supports Android 5.0 to Android 10.0 operating system, and there may be
incompatibilities problems between APP and operating system, please install and test the
software before buying the product. It will apply for location service, please agree and
turn on the location service. After downloading the mobile APP zip-file, please install
the APP in file manager. Don’t install or remove Wi-Fi module when the powered on,
otherwise it will be damaged. This instruction is made for version 1.1.2, there will be
little difference between different versions, and we do recommend you to download
the latest APP for better experience.
2.1.1 APP Download
You can download the APP in Google Play by searching RDPower.
You can also download the RD60XX APP zip-file in this URL:
https://drive.google.com/drive/folders/1V0l6P1sIJilN1yBOsTO9YGLVdkuO0cX9?usp=s
haring
2.2 Installation Introduction
Android APP download and connection video instruction:
https://drive.google.com/drive/folders/15GfqS3vN3prvdVYOT1_yGHjkz0jHk_LO?usp
=sharing
2.2.1 APP Update
Click the APP icon, After the APP starts, it will automatically detect whether
there is a new version, and it will remind you by popping the window. You need to
check if there is a new version by manual detecting.
2.2.2 APP Interface Display
When finish the installation and succeed in connection, it will show the main page as shown
in the picture below.

AN: sidebar
BC: setting wheel
AO: add device
BD: move the cursor to the left
AP: return
BE: move the cursor to the right
AQ: more options
BF: set button
AR: curve
BG: screen brightness
AS: actual output voltage
BH: system temperature
AT: actual output current
BI: sync time
AU: actual output power
BJ: data group quick call out
AV:input voltage
BK: battery voltage
AW: preset voltage value
BL: external sensor temperature detecting value
AX: preset current value
BM: accumulated output capacity
AY: ON/OFF button
BN: accumulated output energy
AZ: protection status indication
BO: device
BA: keypad lock indication
BP: product SN number
BQ: product firmware version
2.2.3 APP Operation
2.2.3.1 Network Distribution
Picture 14

Connect Wi-Fi for the first time, please insert the WiFi board to the right place,
then power on RD6006P, you will see the blue LED blinks once. Set the
communication interface to WIFI, restart RD6006P, then place the RD6006P and the
mobile phone close to the 2.4G router (the mobile phone must also be under the
same 2.4G network, and the router must disable the AP isolation function and the
WMM function).
RD6006P will wait for the phone to connect as shown in Picture 14. Press “AO”
(add device) and choose “RD power series”, it will show like Picture 15, then enter
the WiFi password and confirm you are using 2.4G network as shown in Picture 16.
After 10 seconds
Picture 15
Picture 16
RD6006P will obtain the IP address of your
phone(picture 17), if it shows right, confirm that
“device display sever IP”, and click “Confirm”, wait
20s ( picture 18) ,APP show connection successful,
RD6006P will start automatically, the network
distribution success, return to the main page and
click the connect in the “AQ”.
Picture 17

Picture 18
If the distribution network fails, please power off the module and re-operate in
the same way (multiple networking failures you can watch the video and try to use
the hotspot of the mobile phone to test). If you use Huawei brand phone, please turn
off the random MAC address function.
3.2.3.2 Proper Wi-Fi Connection
Android APP download and connection operation video:---
When power on RD6012, it will connect Wi-Fi first, and then detect if it can be
connected to APP, and it may not be connected successfully if the phone is under
screen-lock status or the APP is running at the background. If the IP address of the
phone has changed, you need to press the button and then press button
to reset the net, repeat 3.2.3.1 operation.
2.2.3.3 APP Operation
Android APP operation video:
https://drive.google.com/drive/folders/1vyIktoZ2ACqg1gW1uw4ZBWh7f_awHRtK?usp=sharing
Click “AW” to set the output voltage, and use the wheel “BC” to adjust the value,
the “BD”,“BE” to change the position of cursor, click “BF” to set the parameter. Click

SHARE in “AQ” to exports the voltage-current curve to excel file, up to 24 hours
document can be recorded.
NOTE:
1. There are many kinds of Android phone, so the user interfaces maybe
different on some brand phones or different scales of the same brand.
2. Application permission requirements, allow the necessary permissions when
the APP is installed (allow background running, using Bluetooth, operation on the
folder, reading the application list, etc.) and also set the permissions of the APP after
installation: Allow background running, never shut down when lock screen, allow
self-starting (it is used to prevent the system from forcibly exiting the APP when
recording data), etc.

IOS APP Instruction
3.1 Mobile Phone APP Installation
3.1.1 APP Download
Apple APP only supports IOS10.0-14.3, iphone6 and above models, search for
"RDPower" in the Apple store to download. If you must use the software function,
please pre-install the test first. To use the WiFi function of the software, you need to
apply for location service. Please agree and turn on location in Settings-Privacy. This
manual corresponds to the software version 1.1.11, it is recommended to upgrade to
the latest software for a better user experience.
3.2 Installation and Operation
When the software is started for the first time, the system may apply for positioning (as shown in
Picture 19), select "Allow when using APP", and apply for data when the software is running (as
shown in Picture 20), select "Wireless LAN and cellular mobile network".
Picture 19
Picture 20
This manual suits for next models
1
Table of contents
Other Riden Power Supply manuals
Popular Power Supply manuals by other brands

TDK-Lambda
TDK-Lambda GWS 500 Series instruction manual

TGW
TGW IntelliROL Power Supply 1166694PULS Application Control Guidelines

Hantek
Hantek HDP43 Series user manual

Altronix
Altronix SMP10PM24X Series installation guide

Vertiv
Vertiv NetSure 801DB NVGB System application guide

Tenma
Tenma 72-2660 user manual