RIDGID PCS-500 User manual

PipeSaw
Transportable Pipe Saw
•Français – 19
•Castellano – pág. 39
PCS-500 PipeSaw Manual

999-995-226.10 REV. Aii
PCS-500 Pi eSaw
Ta le of Contents
Recording Form For Machine Serial Number ............................................................................................................1
Safety Symbols..............................................................................................................................................................2
General Power Tool Safety Warnings
Work Area Safety ........................................................................................................................................................2
lectrical Safety ..........................................................................................................................................................2
Personal Safety ..........................................................................................................................................................3
Power Tool Use And Care ..........................................................................................................................................3
Service........................................................................................................................................................................3
Specific Safety Information
PipeSaw Safety ..........................................................................................................................................................4
RIDGID®Contact Information ......................................................................................................................................5
Description ....................................................................................................................................................................6
Specifications ................................................................................................................................................................7
Standard quipment ..................................................................................................................................................7
Pre-Operation Inspection..............................................................................................................................................8
Set-Up And Operating Instructions ............................................................................................................................8
Workpiece Preparation................................................................................................................................................9
Mounting Clamp on Pipe ..........................................................................................................................................10
Mounting Saw on Clamp ..........................................................................................................................................11
Cutting Operation ......................................................................................................................................................11
Dismounting the PipeSaw and Clamp ......................................................................................................................13
Transportation ..........................................................................................................................................................14
Storage ........................................................................................................................................................................14
Maintenance Instructions
Cleaning....................................................................................................................................................................14
Cleaning Saw Blade Cavity ......................................................................................................................................14
General Lubrication ..................................................................................................................................................14
Gearbox Lubrication..................................................................................................................................................14
Changing Saw Blade ................................................................................................................................................15
Replacing Carbon Brushes ......................................................................................................................................15
Motor Thermal Overload ..........................................................................................................................................16
Troubleshooting ........................................................................................................................................................16
Service And Repair ..................................................................................................................................................16
Optional Equipment ....................................................................................................................................................17
Disposal ......................................................................................................................................................................17
FCC/ICES Statement ..................................................................................................................................................60
EC Declaration ....................................................................................................................................Inside Back Cover
ifetime Warranty ..........................................................................................................................................Back Cover
*Original Instructions - English

PCS-500 Pi eSaw
Record Serial Number below and retain product serial number which is located on nameplate.
Serial
No.
Transporta le Pipe Saw
PCS-500 PipeSaw
WARNING!
Read this O erator’s Manual
carefully before using this
tool. Failure to understand
and follow the contents of
this manual may result in
electrical shock, re and/or
serious ersonal injury.

999-995-226.10 REV. A2
PCS-500 Pi eSaw
General Power Tool Safety
Warnings*
WARNING
Read all safety warnings, instructions, illustra-
tions and specifications provided with this power
tool. Failure to follow all instructions listed elow
may result in electric shock, fire and/or serious
injury.
SAVE ALL WARNINGS AND INSTRUCTIONS
FOR FUTURE REFERENCE!
The term "power tool" in the warnings refers to your
mains-operated (corded) power tool or battery-operated
(cordless) power tool.
Work Area Safety
•Keep work area clean and well lit. Cluttered or dark
areas invite accidents.
•Do not operate power tools in explosive atmo-
spheres, such as in the presence of flam mable liq-
uids, gases, or dust.Power tools create sparks which
may ignite the dust or fumes.
•Keep children and bystanders away while operat-
ing a power tool. Distractions can cause you to lose
control.
Electrical Safety
•Po er tool plugs must match the outlet. Never
modify the plug in any ay. Do not use any adap ter
plugs ith earthed (grounded) po er tools. Un -
modified plugs and matching outlets will reduce risk of
electric shock.
•Avoid body contact ith earthed or grounded sur-
faces such as pipes, radiators, ranges and refrig-
erators. There is an increased risk of electrical shock
if your body is earthed or grounded.
•Do not expose po er tools to rain or et condi-
tions. Water entering a power tool will increase the risk
of electrical shock.
•Do not abuse the cord. Never use the cord for car-
rying, pulling or unplugging the po er tool. Keep
cord a ay from heat, oil, sharp edges or moving
Safety Sym ols
In this operator’s manual and on the product, safety symbols and signal words are used to communicate important safe-
ty information. This section is provided to improve understanding of these signal words and symbols.
This is the safety alert symbol. It is used to alert you to potential personal injury hazards. Obey all safety messages that follow this
symbol to avoid possible injury or death.
DANG R indicates a hazardous situation which, if not avoided, will result in death or serious injury.
WARNING indicates a hazardous situation which, if not avoided, could result in death or serious injury.
CAUTION indicates a hazardous situation which, if not avoided, could result in minor or moderate injury.
NOTIC indicates information that relates to the protection of property.
This symbol means read the operator’s manual carefully
before using the equipment. The operator’s manual con-
tains important information on the safe and proper oper-
ation of the equipment.
This symbol means always wear safety glasses with side
shields or goggles and hearing protection while using
this equipment to reduce the risk of injury.
This symbol indicates the risk of electrical shock.
This symbol indicates the risk of hands, fingers or other
body parts being cut by the rotating saw blade.
NOTICE
DANGER
WARNING
CAUTION
* The text used in the General Power Tool Safety Warnings section of this manual is verbatim, as required, from the applicable UL/CSA/ N 62841-1 standard. This
section contains general safety practices for many different types of power tools. Not every precaution applies to every tool, and some do not apply to this tool.
This symbol indicates the risk of equipment and material
tipping, causing striking or crushing injuries.
This symbol means do not reach into the chip chute to
reduce the risk of injury from contact with the rotating saw
blade.
This symbol means not to reach inside of pipe to reduce
the risk of injury from rotating saw blade, moving pipe and
other causes.
This symbol indicates that chips are ejected in this area.
Stay clear of the chip chute to reduce the risk of injury
from chips.
This symbol indicates the risk of burns from hot sur-
faces.

999-995-226.10 REV. A 3
parts. Damaged or entangled cords increase the risk
of electric shock.
•When operating a po er tool outdoors, use an
extension cord suitable for outdoor use. Use of a
cord suitable for outdoor use reduces the risk of elec-
tric shock.
•If operating a power tool in a damp location is
unavoidable, use a ground fault circuit interrupter
(GFCI) protected supply. Use of a GFCI reduces
the risk of electric shock.
Personal Safety
•Stay alert, watch what you are doing and use com-
mon sense when operating a power tool. Do not
use a power tool while you are tired or under the
influence of drugs, alcohol, or medication. A mo -
ment of inattention while operating power tools may
result in serious personal injury.
•Use personal protective equipment. Always wear
eye protection. Protective equipment such as dust
mask, non-skid safety shoes, hard hat, or hearing
protection used for appropriate conditions will reduce
personal injuries.
•Prevent unintentional starting. Ensure the switch is
in the OFF-position before connecting to power
source and/or battery pack, picking up or carrying
the tool. Carrying power tools with your finger on the
switch or energizing power tools that have the switch
ON invites accidents.
•Remove any adjusting key or wrench before turn-
ing the power tool ON. A wrench or a key left at -
tached to a rotating part of the power tool may result in
personal injury.
•Do not overreach. Keep proper footing and balance
at all times. This enables better control of the power
tool in unexpected situations.
•Dress properly. Do not wear loose clothing or
jewel ry. Keep your hair and clothing away from
moving parts. Loose clothes, jewelry, or long hair
can be caught in moving parts.
•If devices are provided for the connection of dust
extraction and collection facilities, ensure these are
connected and properly used. Use of dust collection
can reduce dust-related hazards.
•Do not let familiarity gained from frequent use of
tools allow you to become complacent and ignore
tool safety principles. A careless action can cause
severe injury within a fraction of a second.
PCS-500 Pi eSaw
Power Tool Use And Care
•Do not force the power tool. Use the correct power
tool for your application. The correct power tool will
do the job better and safer at the rate for which it is
designed.
•Do not use the power tool if the switch does not
turn it ON and OFF. Any power tool that cannot be
controlled with the switch is dangerous and must be
repaired.
•Disconnect the plug from the power source and/or
remove the battery pack, if detachable, from the
power tool before making any adjustments, chang-
ing accessories, or storing power tools. Such pre-
ventive safety measures reduce the risk of starting the
power tool accidentally.
•Store idle power tools out of the reach of children
and do not allow persons unfamiliar with the pow -
er tool or these instructions to operate the power
tool. Power tools are dangerous in the hands of un-
trained users.
•Maintain power tools and accessories. Check for
misalignment or binding of moving parts, breakage
of parts and any other condition that may affect the
power tool’s operation. If damaged, have the power
tool repaired before use. Many accidents are caused
by poorly maintained power tools.
•Keep cutting tools sharp and clean. Properly main-
tained cutting tools with sharp cutting edges are less
likely to bind and are easier to control.
•Use the power tool, accessories and tool bits etc.
in accordance with these instructions, taking into
account the working conditions and the work to be
performed. Use of the power tool for operations dif-
ferent from those intended could result in a hazardous
situation.
•Keep handles and grasping surfaces dry, clean
and free from oil and grease. Slippery handles and
grasping surfaces do not allow for safe handling and
control of the tool in unexpected situations.
Service
•Have your power tool serviced by a qualified repair
person using only identical replacement parts.
This will ensure that the safety of the power tool is
maintained.

•Never hold the workpiece in your hands or across
your leg while cutting. Always secure the work
piece in an appropriate pipe vise and properly
support. It is important to support the work properly to
minimize body exposure, blade binding, equipment
and material falling or loss of control.
•Do not start the saw with the saw blade touching
the work piece. et the blade reach full speed
before carefully feeding it into the work piece. The
blade may bind, walk or kickback if the tool is started
with the blade in contact with the work piece.
•Do not reach into the chip chute. Do not insert
tools or other objects into the chip chute. Do not
block chip chute. This will reduce the risk of cutting,
entanglement and striking injuries.
•Do not reach inside the pipe. The guard cannot
protect you from the blade inside the pipe.
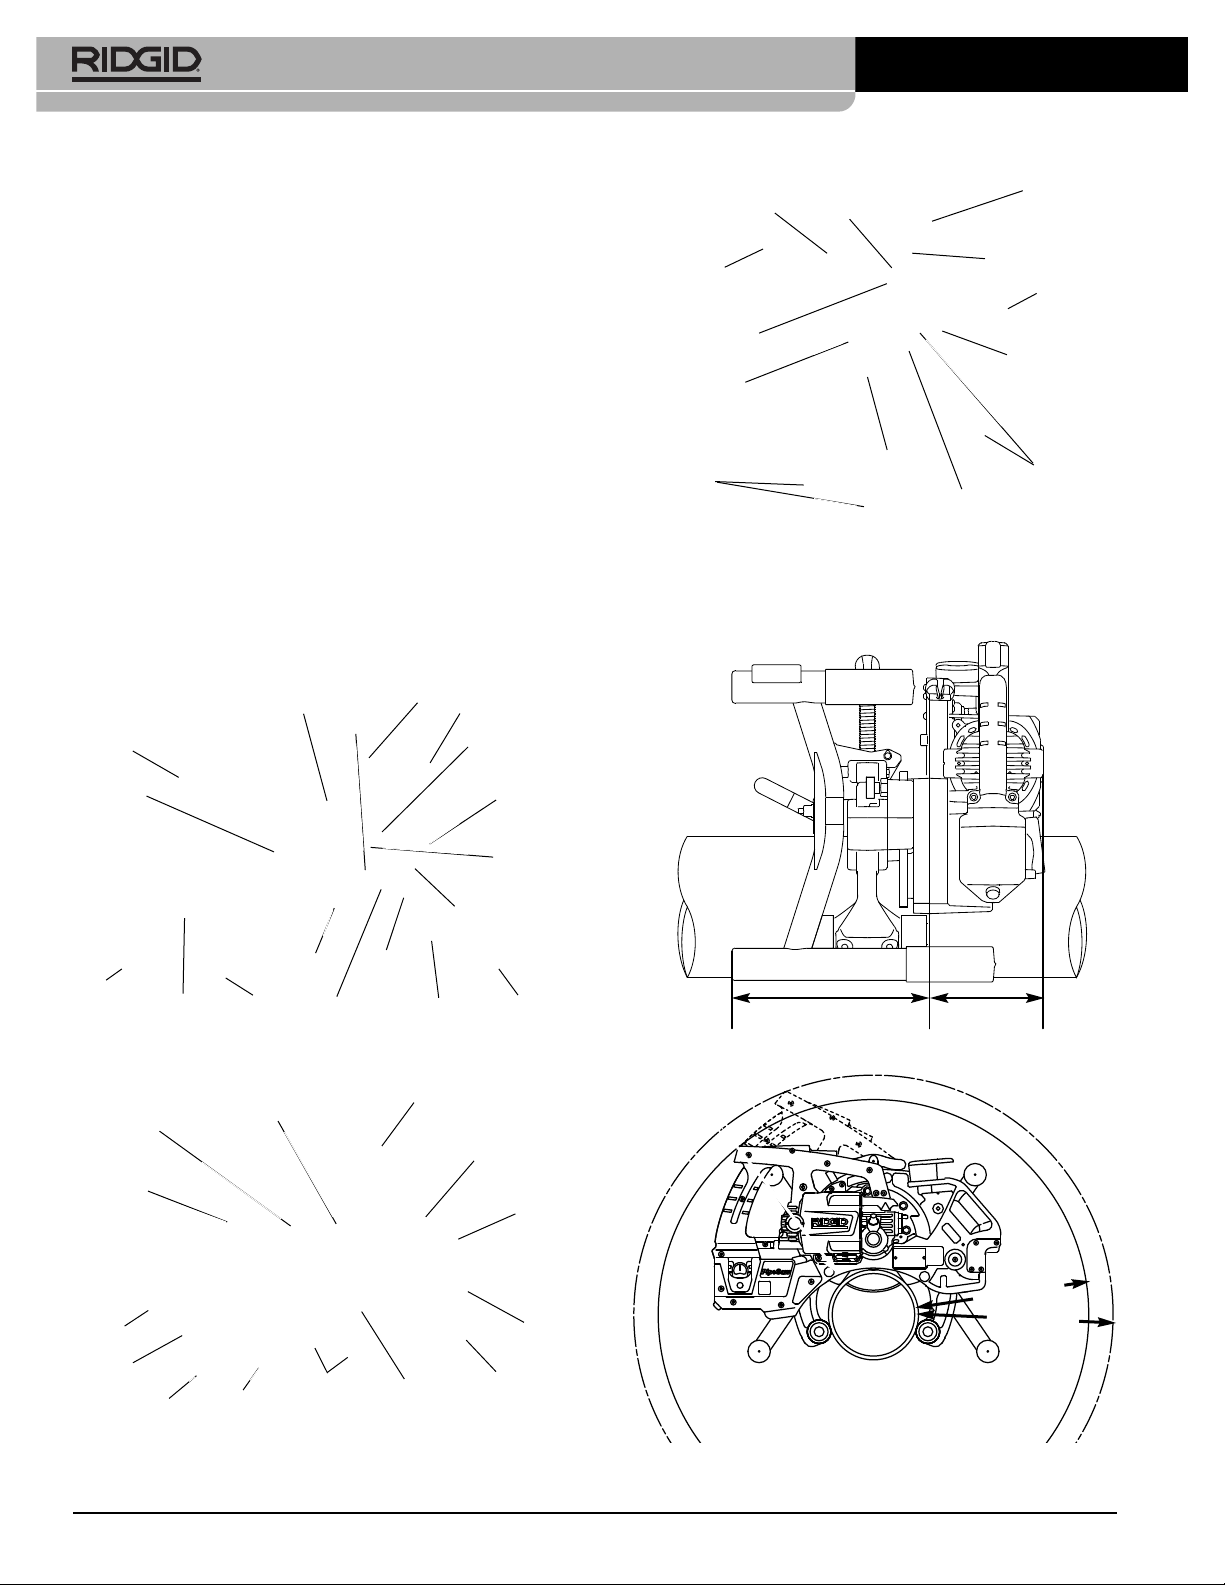
•During set-up, always confirm the saw is locked in
position on the clamp with the clamp 10 degrees
from vertical. This will reduce the risk of unintended
movement of the saw during use.
•Be aware that the saw gear box can be hot from
use. Do not touch gearbox during or after operation to
reduce the risk of burns.
•Properly route and position the cord during use to
reduce the risk of cord damage and electrical
shock. If the cord is cut, the saw, pipe or other objects
may be electrically charged. Make sure the saw is
controlled and unplug the cord from the outlet.
•Read and understand these instructions and the
instructions and warnings for all equipment and
materials being used before operating this tool to
reduce the risk of serious personal injury.
•Do not modify PipeSaw or use for any other pur-
pose. Other uses or modifying the saw for other appli-
cations may damage the tool, damage the attachments
and/or cause personal injury.
•Only cut empty pipe. Do not cut pipe with any type of
contents to reduce the risk of electrical shock and
other hazards.
•Avoid breathing of dust created from pipe cutting.
Some dust created may contain chemicals known to
cause cancer, birth defects or other serious personal
injury. Consider the pipe material and coatings when
determining appropriate respiratory protection, includ-
ing things such as lead based paint.
Your risk from these exposures varies, depending on
how often you do this type of work and the concen-
tration of dust. To reduce your exposure to these chem-
Specic Safety Information
WARNING
This section contains important safety information
that is specic to this tool.
Read these precautions carefully efore using the
PCS-500 Transporta le Pipe Saw to re duce the risk
of electrical shock or other serious injury.
SAVE ALL WARNINGS AND INSTRUCTIONS
FOR FUTURE REFERENCE!
Keep this manual with machine for use by the operator.
PipeSaw Safety
Keep hands away from cutting area
and blade. Allow parts to come to a complete stop
before handling the tool or pipe. This will reduce the
risk of cutting and entanglement injuries.
•Keep your hands on saw handles and firmly control
during use. This provides better control of the machine
and cutting process. If both hands are holding the saw,
they cannot be cut by the saw blade.
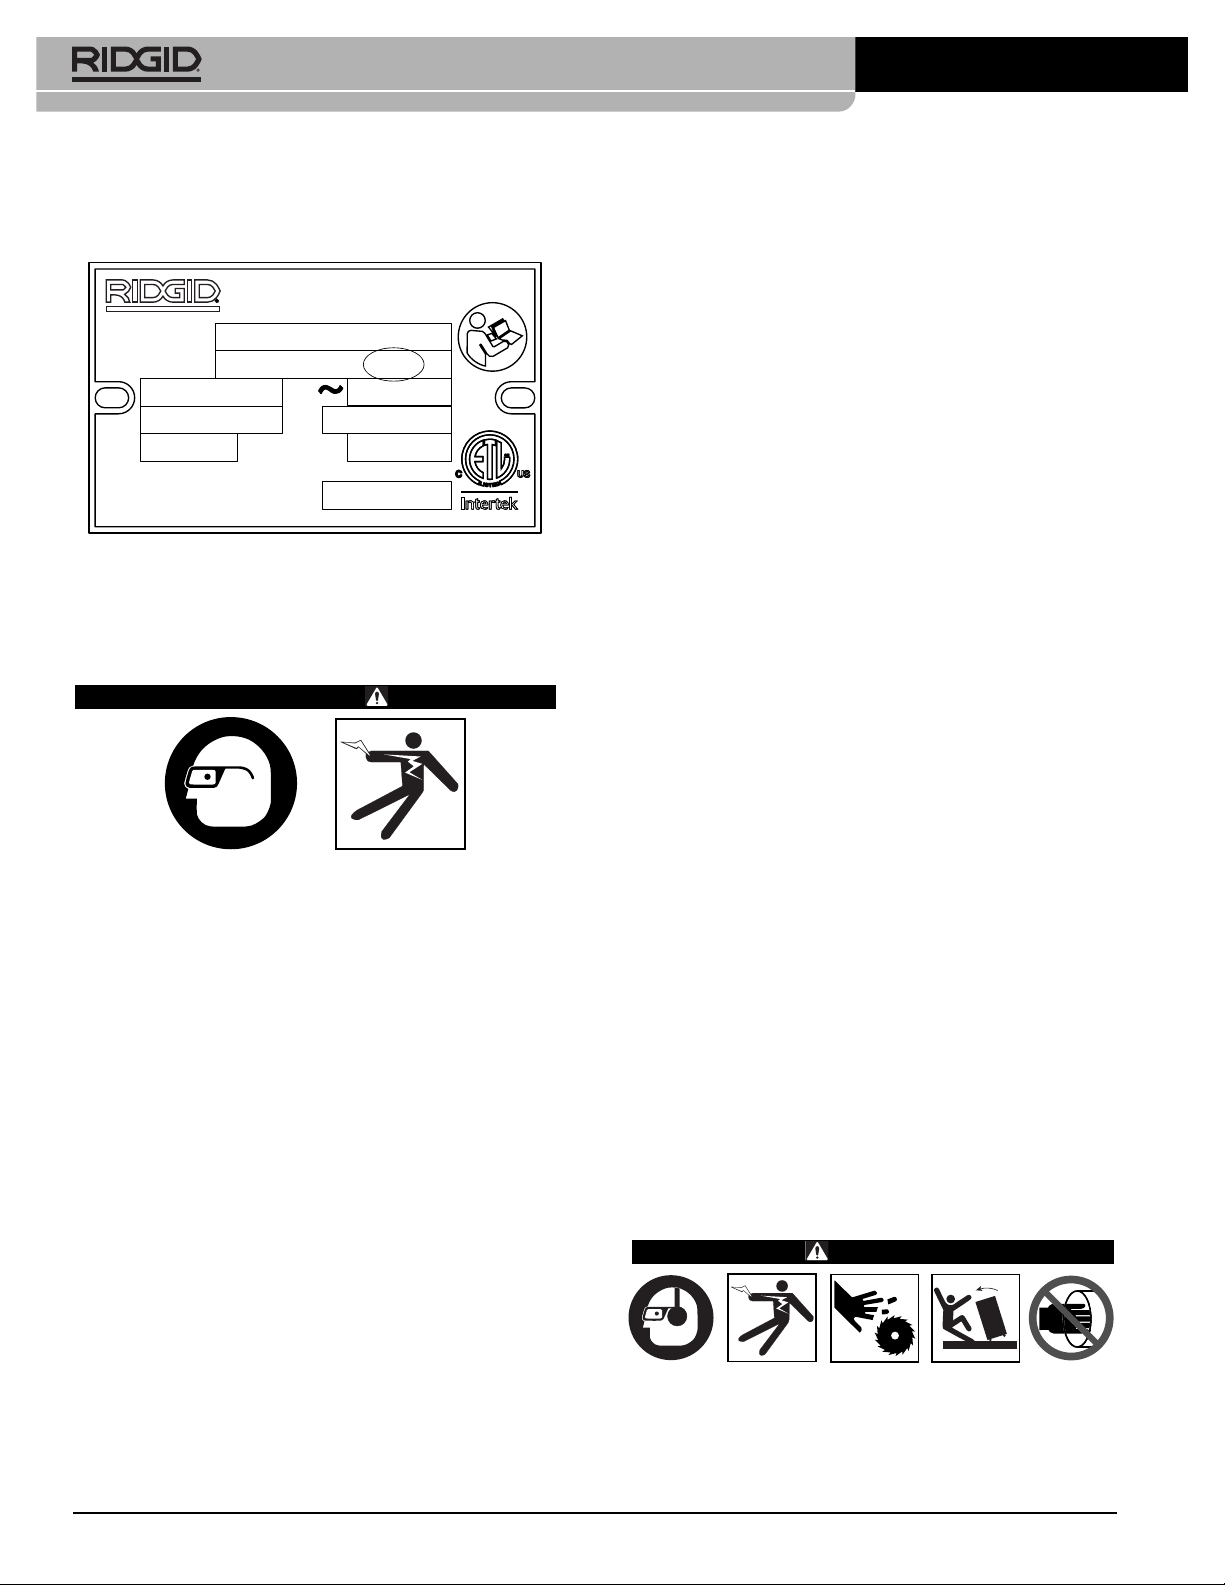
•Always wear appropriate eye protection and hear-
ing protection. Cutting tools can break or shatter.
Cutting produces chips that can be thrown or fall into
eyes. Cutting produces high noise levels that over
time can damage your hearing.
•Always wear appropriate personal protective equip-
ment. Face shields, long sleeves, safety shoes, hard
hat, and other equipment as appropriate will reduce the
risk of injury.
•Do not wear loose clothing when operating PCS-500
Transportable Pipe Saw. Keep sleeves and jackets
buttoned. Do not reach across machine. Clothing can
be caught by the machine resulting in entanglement.
•Keep bystanders clear of work area. Guard or bar-
ricade minimum of 9 feet (2.7 meter) around the
working area. Chips or broken saw teeth can be thrown
and cause injury beyond immediate area of operation. A
guard or barricade that provides a clearance around the
work piece will reduce the risk of injury.
•One person must control the work process and the
saw ON/OFF switch. Only the operator should be in
the work area when the machine is running. This helps
reduce the risk of injury.
•Properly support work piece and PipeSaw Trans-
portable Pipe Saw. Make sure the saw clamp is
secure to the work piece. This will reduce the risk of
striking and crushing injuries from tipping and falling
pipe and equipment.
999-995-226.10 REV. A4
PCS-500 Pi eSaw
DANGER

icals, work in a well ventilated area, and use respiratory
protection selected based on appropriate regulations
and standards, such as ANSI Z88.2 and OSHA.
•Do not use tool near flammable material. Do not
use lubricants during cutting. Hot metal chips/sparks
may cause a fire.
Blade Related Warnings
•Only use the RIDGID-recommended saw blades.
Improper saw blades can increase forces and reduce
control, increasing the risk of injury.
•Do not use dull or damaged saw blades. Dull or
improper blades can cause excessive friction and
heat, blade binding, kickback, reduce control and
increase the risk of injury.
•Always use saw blades with correct size and shape
(diamond versus round) of arbor holes. Blades
that do not match the mounting hardware of the saw
will run eccentrically, causing loss of control.
•Do not use wood cutting blades. Using blades not
recommended in this manual can result in a haz-
ardous situation.
•Only use proper blade recommended for the mate-
rial to be cut. Improper blade type can damage the
equipment and reduce control, increasing the risk of
injury.
•Never use damaged or incorrect blade washers
or bolt. The blade washers and bolt were specially
designed for your saw, for optimum performance and
safety of operation.
Kickback
Kickback is a sudden reaction to a pinched, jammed or
misaligned saw blade, causing an uncontrolled saw to
lift up and out of the workpiece. Kickback is the result of
saw misuse and/or incorrect operating procedures or
conditions and can be avoided by following the instructions
and warnings, including those below.
•When blade is binding, or when interrupting a cut
for any reason, depress the OFF switch and hold
the saw motionless in the material until the blade
comes to a complete stop. If saw blade is binding, it
may walk up or kickback from the workpiece as the saw
is restarted. Investigate and take corrective action to
eliminate the cause of blade binding.
•Do not restart saw in work piece to reduce risk of
kickback. With saw OFF, remove saw from pipe.
Confirm proper set up and continue with a new cut.
•Properly support pipe to minimize the risk of blade
pinching and kickback. Pipe can sag or shift as it is
cut. Support pipe on both sides of cut to prevent move-
ment.
•The saw blade washers and the bolt on your saw
have been designed to work as a clutch to reduce
the intensity of a kickback. Understand the opera-
tion and settings of the clutch. The proper setting of
the clutch, combined with firm handling of the saw
will allow you to control kickback.
Guard Function
•Inspect your equipment before every use for prop-
er assembly, maintenance and operation. Do not
use if damaged. Do not use if guards do not work
correctly.
•Check guards for proper closing before each use.
Do not operate saw if guards do not move freely
and enclose the blade instantly. Never clamp or tie
the guards so that the blade is exposed. If saw is
accidentally dropped, guards may be bent. Raise the
guards and make sure the guards move freely and do
not touch the saw blade or any other part, throughout
range of motion.
•Check the operation and condition of the guard
return spring. If the guard and the spring are not
operating properly, they must be serviced before
use. Guard may operate sluggishly due to damaged
parts, gummy deposits, or a buildup of debris.
•Always observe that the guards are covering the
saw blade when saw is not in use. An unprotected,
coasting blade can cause injury and tool damage. Be
aware of the time it takes for the blade to stop after
switch is released.
•Do not run the tool when not installed on pipe.
Guards may be opened by a contact with your clothing.
Accidental contact with the spinning saw blade could
result in serious personal injury.
•Periodically remove the saw blade, clean the upper,
lower guards and the hub area. Wipe it dry, or blow
it clean with compressed air. Preventive maintenance
and properly operating guard will reduce the probabil-
ity of an accident.
RIDGID Contact Information
If you have any question concerning this RIDGID®product:
– Contact your local RIDGID®distributor.
– Visit RIDGID.com to find your local Ridge Tool contact
point.
– Contact Ridge Tool Technical Service Department at
Cana da call (800) 519-3456.
999-995-226.10 REV. A 5
PCS-500 Pi eSaw

Description
The RIDGID®Model PCS-500 Transportable Pipe Saw is
designed to clamp on the pipe and create a square cut.
The saw can cut steel, stainless steel, plastic and cast iron
pipes with the correct saw blade selection.
The clamps securely grip the work piece between clamp
wheels and then the PCS-500 Transportable Pipe Saw is
mounted on the clamp. The cut is formed by rotating the
saw around the stationary pipe.
L D indicator lights are supplied to give feedback on
proper cutting speed. L Ds are normally OFF and flash to
indicate that the pipe is being cut too quickly.
The PipeSaw is lightweight and compact for ease of
transport.
The saw is not designed to cut bars and plates. The pipe
saw and clamp must be used together. The PipeSaw is
only meant to be used with pipe on stands, and is not
designed for use with in-place pipe.
Figure 1 – Model PCS-500 Transportable Pipe Saw, Front
Side
Figure 2 – Model PCS-500 Transportable Pipe Saw, Back
Side
Figure 3 – RIDGID®Clamp
Figure 4A – PipeSaw Clearance on Pipe - Axial
Figure 4B – PipeSaw Clearance on Pipe - Radial
999-995-226.10 REV. A6
PCS-500 Pi eSaw
Chip Chute
Gear Box
Temperature
Warning
Handle
Warning
abel
Brush Cap
Pivot Pin
Bore
Saw Blade
Guards
Blade
Bolt/Clutch
Saw Blade
Cover Door
Cord Cord
Wrap
atch
Blade Change
abel
Ready Position
Hole
Chip Chute
Warning
abel
ON/OFF
(I/O)Switch
ED
Indicator
ight Serial
Number Plate
Gear Box
Pivot
Grip
Hex
wrench
Saw
Foot
Blade
Saw Blade
Cover
Brush Cap
Cut Position
Hole
Plunge
Plate
Plunge
ock Pin
Clamp
Handlebar
Upper Carriage
Pivot Pin
Clamp
Wheels
Quick Release
ever
Screw
Handle
ead Screw
Plunge Plate
Guide Clamp
Wheels
Alignment
Pad
Guard Start
Bracket
GFCI Cord
Clamp
ocation
Decal
ED Indicator
ight
Saw
Foot
Oil
Plug/ ock
Button
Cord Clip
10"
(254 mm)
8"
(203 mm)
14" (355 mm)
16" (406 mm)

999-995-226.10 REV. A 7
PCS-500 Pi eSaw
Specifications
Model .............................Small Clamp arge Clamp
(PC-106) (PC-612)
Nominal Pipe Cutting
Capacity.........................1" to 6" (25mm to 150mm) 6" to 12" (150mm to 300mm)
Actual Pipe
Outside Diameter ............1.26" to 6.625" (32mm to 168mm) 6.5" to 12.75" (165mm to 324mm)
Blade Type.......................Cermet-Tipped Carbide-Tipped Diamond Abrasive
Pipe Material
(With Proper Blade).........Steel, Stainless Steel Plastic Cast Iron
and most Metal***
Maximum Wall
Thickness ........................½" (12mm) 0.70" (18mm) ½" (12mm)
For Plastic Only
Maximum Pipe Out of
Roundness** ...................Less Than 1.5% of Nominal Pipe Outside Diameter
Minimum Cut-off
Length .............................1" (25mm) (PipeSaw Not For Facing Pipe nd)
Cut Quality (Max. Offset)...0.050" (1.27mm)
Saw Blade Type...............8" Outside Diameter with 5/8" Round Arbor
Motor:
Power .........................1800 W
Voltage .......................110V - 120V a.c.
Current .......................15 Amp
No Load Operating
Speed ............................3900 RPM
Controls..........................ON/OFF (I/O) Switch
Weight............................49 lbs. (22.2 kg) w/Small Clamp 52 lbs. (23.6 kg) w/Large Clamp
Dimension (w/saw
plunged down) ...............21.25" x 16" x 14.5" (540 x 406 x 368 mm) 24.5" x 20.5" x 14.5" (622 x 521 x 368 mm)
Dimension (w/saw up)....21.5" x 22" x 14.5" (540 x 559 x 368 mm) 24.5" x 26.25" x 14.5" (622 x 667 x 368 mm)
Operating temperature .....14°F to 120°F (-10°C to 49°C)
Storage Temperature........-10°F to 120°F (-23°C to 49°C)
Sound Pressure (LPA)*.......88.12 dB(A), K=3
Sound Power (LWA)*...........98.12 dB(A), K=3
* Sound measurements are measured in accordance with a standardized test per Standard 62841-1.
- Sound emissions may vary due to your location and specific use of these tools.
- Daily exposure levels for sound need to be evaluated for each application and appropriate safety measures taken when needed. valuation of exposure levels should consider
the time a tool is switched off and not in use. This may significantly reduce the exposure level over the total working period.
** Pipe Out of Roundness = Maximum outside pipe diameter minus minimum outside pipe diameter (pipe diameter measured with calipers).
*** Cermet-Tipped Blade is optimized for standard mild carbon steel. Reduced blade life can be expected on other materials.
Ability to cut depends on a variety of factors, including material type, chemistry, hardness, amount of material being removed and other factors. In some cases, cuts may not
be able to be made or may result in blade damage. If there are any questions about specific material to be cut, contact Ridge Tool Technical Service Department.
Selection of appropriate materials and instal-
lation, joining and forming methods is the responsibility of
the system designer and/or installer. Selection of improp-
er materials and methods could cause system failure.
Stainless steel and other corrosion resistant materials
can be contaminated during installation, joining and form-
ing. This contamination could cause corrosion and pre-
mature failure. Careful evaluation of materials and methods
for the specific service conditions, including chemical
and temperature, should be completed before any instal-
lation is attempted. (S NOTICE in Workpi c Pr paration
s ction.)
NOTICE

Standard Equipment
Refer to the RIDGID catalog for details on equipment
supplied with specific machine catalog numbers.
Figure 5 – Machine Serial Number (Serial number plate is
located on saw body near chip chute exit win-
dow. The last 4 digits indicate the month and
year of manufacture.)
Pre-Operation Inspection
WARNING
Before each use, inspect your PCS-500 Transport-
a le Pipe Saw and correct any pro lems to reduce
the risk of serious injury from electric shock, entan-
glement, crushing injuries and other causes and
prevent Machine damage.
Always wear safety glasses, and other appropri-
ate protective equipment when inspecting your
PCS-500 Transporta le Pipe Saw.
1. Make sure that the PCS-500 Transportable Pipe Saw
is unplugged and press the OFF (O) button.
2. Clean the machine. Clean any oil, grease, dirt, or
chips from the saw, including the handles and controls.
This aids inspection and helps prevent the machine or
control from slipping from your grip. Clean and main-
tain the machine per the Maintenance Instructions.
3. Inspect the PCS-500 Transportable Pipe Saw and
clamp for the following:
•Cord and plug for damage or modification.
• Proper assembly, maintenance and completeness.
• Any broken, worn, missing, misaligned or binding
parts or other damage.
• Presence and readability of the warning and instruc-
tion labels (S Figur 1, 2 and 6).
• Saw blade guards for correct operation – if opened
should close quickly under spring force. Guards
should not stick. If needed, clean chips from inside
the chip chute and blade cover, s Maint nanc
Instructions.
• Condition of the saw blade. Dull or damaged blades
increase required force, produce poor results and
increase the risk of injury. Chose the appropriate
RIDGID recommended saw blade for the material to
be cut. Confirm blade is properly secured to saw.
• Clamp wheel knurl is clean and in good condition. If
needed, clean with a wire brush. Worn or dirty
clamp wheel knurls can cause slippage or tracking
issues in use. Dirty clamp wheels and knurls can
cause ferrous contamination of stainless steel.
• Confirm chip chute is clear.
• Any other condition which may prevent safe and
normal operation.
If any issues are found, do not use the tool until the
issues have been repaired.
Figure 6 – Warnings
4. Inspect and maintain any other equipment being
used per its instructions to make sure it is functioning
properly.
Set-Up And Operating
Instructions
WARNING
Always wear appropriate eye protection and hearing
protection. Cutting tools can reak or shatter. Cut ting
produces chips that can e thrown or fall into eyes.
Cutting produces high noise levels that over time can
damage your hearing.
999-995-226.10 REV. A8
PCS-500 Pi eSaw
Ridge Tool Company, Elyria, Ohio,
U.S.A. RIDGID.com
Model No.
Serial No.
o
n
V
AW
Hz
/min Duty
ECS123451120
PCS-500
5010236
120 50/60
15.0
3900

while the machine is operated. Keep bystanders clear
of work area, set up guards or barricades to create a
minimum of 9 feet (2.7 m) of clearance around the
workpiece and PipeSaw. This helps to prevent by-
standers from being struck by chips during use.
4. When using the PCS-500 Transportable Pipe Saw, you
will generally need to use extension cords. Choose an
extension cord that:
• Is in good condition.
• Has a grounded (earthed) plug like on the PipeSaw.
• Is rated for outdoor use.
• Has sufficient wire size. For extension cords up to 25'
(7.6 m) long use 14 AWG (2.5 mm2) or heavier. For
extension cords up to 50' (15.2 m) long use 12
AWG (4.0 mm2) or heavier.
• With dry hands, plug the extension cord into the out-
let. Run the extension cord along a clear path to the
PCS-500 Transportable Pipe Saw. Keep all con-
nections dry and off the ground. Leave excess cord
at the base of the machine to allow for machine
movement. Do not plug the PipeSaw in at this time.
5. Make sure all equipment has been properly inspected.
Workpiece Preparation
1. Check that the pipe is straight and round in the area
to be cut. The PipeSaw cannot be used on curved,
out of round or damaged pipe. In the area that the
pipe clamp will mount to the pipe, the surfaces should
be clean and free from debris. If needed, mark the
pipe at the desired cut point.
2. Make sure that the work piece is solidly mounted
and stable. Work piece and support must be able to
withstand the weight of the PipeSaw and the force
and torque required for cutting without moving or
turning. Do not use for pipe in place – only use for hor-
izontal pipe on stands. In place pipe may be loaded
and shift or move unexpectedly during or after cutting,
and could cause equipment damage or injury.
Confirm there is suffient room for PipeSaw (S Fi-
gur 4).
When using a pipe vise, make sure that it is properly
sized and secured to prevent tipping during use. For
longer lengths of pipe, use appropriate pipe stands to
support extra length.
When cutting in the middle of a longer piece of pipe,
each resulting section of pipe must be properly sup-
ported to prevent the pipe from moving, falling or
pinching the saw blade during or after the cut. This
requires at least two pipe supports on each side of the
cut. Actual placement of the pipe supports will vary
depending on the position of the blade and the length
of pipe. S Figur 7 for an example.
999-995-226.10 REV. A 9
PCS-500 Pi eSaw
Do not start the saw with the saw lade touching
the work piece. Let the lade reach full speed efore
carefully feeding it into the work piece. The lade
may ind, walk or kick ack if the tool is started with
the lade in contact with the work piece.
One person must control the work process and the
saw ON/OFF switch. Only the operator should e in
the work area when the machine is running. This
helps reduce the risk of injury.
Never hold piece eing cut in your hands. Always se-
cure the work piece in an appropriate pipe vise and
properly support. It is important to support the work
properly to minimize ody exposure, lade inding,
equipment and material falling or loss of control.
Keep hands away from rotating saw lade and cut-
ting area. Allow parts to come to a complete stop
efore handling the tool or pipe. This will reduce the
risk of cutting and entanglement injuries.
Do not reach inside the pipe. The guard cannot
protect you from the lade inside the pipe.
Keep your hands on saw handles and rmly control
during use. This provides etter control of the ma -
chine and cutting process. If oth hands are holding
the saw, they cannot e cut y the saw lade.
Inspect your equipment efore every use for proper
assem ly, maintenance and operation. Do not use if
damaged. Do not use if guards do not work cor-
rectly.
Follow operating instructions to reduce the risk of
serious injury from electric shock, entanglement,
crushing injuries and other causes and prevent
Machine damage.
1. Check work area for:
• Adequate lighting.
• Flammable liquids, vapors or dust that may ignite. If
present, do not work in area until sources have
been identified and corrected. The machine is not
explosion proof and can cause sparks.
• Clear, level, stable and dry place for all equipment
and operator.
• Properly grounded electrical outlet of the correct volt-
age. Check the machine serial plate for required
voltage. A three-prong or GFCI outlet may not be
properly grounded. If in doubt, have outlet inspect-
ed by a licensed electrician.
2. Inspect the work to be done. Determine the material,
type and size of the pipe. Determine the correct equip-
ment for the job. S Sp cification section for tool
information.
To prevent ferrous contamination of stain-
less steel – use dedicated saw blades and clamp for
stainless steel. Best practice is to dedicate a saw and
clamp system for stainless steel.
3. The operator should be the only person in the area
NOTICE

3. When the resulting pipe section is too short for the use
of traditional pipe supports, users may need to field
fabricate a support, such as tack welding a support to
the end of the pipe to be cut off. The pipe must be
properly supported to prevent the pipe from falling or
pinching the saw blade after the cut is made. Falling
pipe can cause injury or damage the power cord.
Do not attempt to hold the pipe to be cut off by hand or
reach into the pipe.
Do not use the PCS-500 Transportable Pipe
Saw on material that is connected to a welder. If the saw
is connected to a workpiece during welding processes, it
can damage the saw circuitry.
Figure 7 – Example of Pipe Support
Mounting Clamp On Pipe
1. Confirm that the workpiece has been properly set
up.
To prevent ferrous contamination of stainless
steel, make sure that the clamp wheels are clean and
debris free. Thoroughly clean with a stainless steel brush.
2. Press the quick release lever (A) and push the upper
carriage down (B) to fully open the clamp. S Figur
8.
Figure 8 – Quick Release ever
3. Place clamp on the pipe with the lead screw at the 10°
from vertical position. S Figur 9. Do not place the
999-995-226.10 REV. A10
PCS-500 Pi eSaw
lead screw at 12 o’clock or greater – this can allow the
clamp to rotate around the pipe under its own weight.
4. Press quick release lever and lift the upper carriage
until all wheels lightly contact pipe.
Figure 9 – Pipe Clamp ocation
5. Align the Alignment pad 2" (50 mm) from the desired
cut location (s Figur 10). Cut must be at least 1"
(25mm) from a pipe end. This prevents the cut off
piece from lodging in the guard and damaging the
blade. Do not use saw to face the end of the pipe.
Figure 10 – Aligning Cut ocation
6. Tighten the clamp screw handle hand tight plus an
additional 1/8 turn (45°) to grip the pipe between the
clamp wheels. S Figur 9. Make sure that the clamp
is secure to the material.
At this point, the tracking of the clamp around the pipe
can be confirmed prior to mounting the PipeSaw, if
desired. Measure the distance of alignment pad from
desired cut location (should be 2" (50 mm)). Slowly
rotate the pipe clamp around the pipe until it reaches
its original position. If the clamp becomes loose at any
point during the rotation, check that the pipe is round
and the clamp is properly attached and tightened.
Remeasure the distance of alignment pad from de-
sired cut location. If the before and after measure-
NOTICE
NOTICE
AB

ments are within 0.05" (1.3 mm) of each other, track-
ing is within tolerance. If the measurements are
greater than 0.05" (1.3 mm) of each other, s th
Troubl shooting section for information.
Mounting Saw on Clamp
1. Confirm that the workpiece and clamp have been
properly set up.
2. Securely grasp the PCS-500 Transportable Pipe Saw
at the handle and the pivot grip. Align the pivot pin
bore on the PipeSaw with pivot pin of the clamp and
the plunge plate should be higher than the plunge
plate guide. S Figur 11.
Figure 11 – Aligning the Pivot Pin
3. Slide the PipeSaw pivot pin bore over the clamp pivot
pin until the latch engages groove on clamp pivot pin.
4. Pivot the handle end of the saw towards the pipe to
engage the plunge plate in the clamp plunge plate
guide. S Figur 12. The plunge lock pin will spring
engage with the plunge plate ready position hole.
Confirm that the PipeSaw is secure to the clamp and
that the assembly is stable. The PipeSaw is locked in
ready position and will not pivot until the plunge lock
pin is retracted.
5. Confirm saw is unplugged to prevent unintentional
starting. Grasp the saw handle with the right hand and
pull the plunge lock pin with the left hand. Carefully
pivot the saw towards the pipe and verify the saw
blade aligns with the desired cut location.
6. Pivot the saw away from the pipe until the plunge lock
pin engages with the ready position hole.
7. Adjust the clamp position if necessary. Loosen screw
handle and move as necessary.
Figure 12 – Engaging Plunge Plate Into Guide
8. Route the cord as shown in Figur 13 to prevent tan-
gling and obstructions during use. nsure cord does
not pass in front of the chip chute.
9. With dry hands, plug the power cord into a properly
grounded outlet/extension.
Cutting Operation
1. Assume a proper operating position (Figur 13).
• Stand to the side of the pipe, facing the PipeSaw
handle with good access to the ON/OFF (I/O)
switch. In case of emergency you must be able to
turn the machine OFF.
• Be sure you have good balance and do not have to
overreach.
• The operator should be the only one in the work
area.
2. Hold the nearest clamp handlebar with left hand.
999-995-226.10 REV. A 11
PCS-500 Pi eSaw
Bore Pivot
Pin
atch
Plunge Plate
Plunge
Plate
Guide

Figure 14 – Plunge ock Pin Disengagement
6. When the saw blade is fully plunged into the pipe, the
clamp plunge lock pin will engage cut position hole on
saw plunge plate. Confirm that saw is locked in the
cutting position. S Figur 15.
Figure 15 – PipeSaw Fully Plunged
7. With one hand on the saw handle, grip the nearest
clamp handlebar with other hand. Slowly rotate the
PipeSaw away from you around pipe. The PipeSaw
will only rotate in one direction.
Monitor the L D indicator lights on the unit (there are
two L Ds – one at the handle and one near the
pivot grip). If the L Ds flash, rotate the unit slower. It
is important not to rotate the saw too fast to prevent
saw overload, breaker tripping and saw blade dam-
age. S Figur 16.
Always have at least one hand holding the unit. As the
saw rotates around the pipe, move your hands from
one clamp handlebar to the next. Monitor the pipe for
movement that could indicate shifting, falling or bind-
ing pipe. Do not use cutting lubricants when cutting.
Figure 13 – Proper Operating Position
3. With right hand, press the ON (I) switch to turn saw
ON. The saw blade will start rotating.
4. Firmly grip the saw handle with your right hand. With
left hand, pull the spring-biased plunge lock pin on
clamp until it disengages from the ready position
hole in saw . S Figur 14.
Do not touch pipe, do not place hands in
pipe – the saw blade will be exposed in the pipe during cut-
ting and could cause serious injury.
5. Pivot the saw towards the pipe. Release the plunge
lock pin and hold the clamp handlebar firmly. The
guard start bracket will start to open the saw blade
guards and the rotating blade will contact the pipe.
Apply firm pressure to plunge the blade through the
pipe wall . Monitor the L Ds on PipeSaw; if it be-
gins to flash, plunge the saw slower.
999-995-226.10 REV. A12
PCS-500 Pi eSaw
WARNING
Cord
Routing
A
B
A
B
A

Figure 16 – Cutting Operation
Do not touch pipe, do not place hands in
pipe – the saw blade will be exposed in the pipe during cut-
ting and could cause serious injury.
Continually monitor the cord position and movement
of the PipeSaw to the workpiece. Make sure the cord
stays clear of moving parts. Stop rotating the unit
and press the OFF (O) button If:
• The blade binds in the pipe.
• The PipeSaw unit does not track properly.
• The saw blade is not cutting properly.
• The process needs to be stopped for any reason.
If cutting is stopped before a cut is completed, unplug
the saw. Hold the saw handle with right hand; with left
hand, pull the plunge lock pin to disengage from cut
position hole. Disengage the saw blade from pipe.
Pivot the saw handle until the plunge lock pin engages
ready position hole of saw plunge plate.
If the unit is stopped before the cut is complete, the cut-
ting operation will need to be restarted. If possible,
begin the cut at a new location to reduce the likelihood
of possible blade damage. If repositioning at a new
location is not possible, reposition the clamp on the pipe
per the Mounting Clamp On Pipe instructions and
align the saw blade with the prior cutting location.
Then, follow the Cutting Op ration instructions to
plunge the blade through the existing cut and continue.
8. Continue to rotate the PipeSaw around pipe until the cut
is completed and the saw returns to the start position.
As the cut is being completed, watch for the pipe shift-
ing or moving. Do not touch pipe, do not place hands in
pipe – the saw blade will be exposed in the pipe during
cutting and could cause serious injury. Keep feet and
body clear of any shifting or falling material.
9. When the cut is complete, keep the saw blade running.
While holding the saw handle with right hand; with
left hand, pull the plunge lock pin to disengage from cut
position hole.
10. Raise the saw handle until the plunge lock pin engages
ready position hole of saw plunge plate.
11. Press the OFF (O) button. Keep hands on saw until
blade stops rotating. Confirm that the saw and clamp is
secure and stable.
12. Unplug the PipeSaw.
13. If cutting plastic pipe, clean the chips from the blade
cavity after every cut. S Cl aning Saw Blad Cavity
section.
Dismounting the PipeSaw and Clamp
Dismount the saw from the clamp after every cut. Leaving
the saw on the clamp and moving as a unit can affect the
tracking of the saw.
1. Unplug the PipeSaw.
2. Pull the plunge lock pin out. Pivot the saw up to dis-
engage the plunge plate from the plunge lock pin
and plunge plate guide.
3. Hold the PipeSaw handle with one hand and pivot grip
with other hand.
4. Press the latch on PipeSaw unit to disengage the
pivot pin and slide the saw off of the pivot pin. S
Figur 11.
5. Properly supporting the clamp on pipe, loosen the
clamp lead screw about one turn.
6. Press the quick release lever on the clamp and push
upper carriage down to disengage the clamp from
workpiece. Be careful of sharp edges on the pipe.
999-995-226.10 REV. A 13
PCS-500 Pi eSaw
ED ED
ED
ED
ED
ED
ED
ED
2
1
4
3
6
5
WARNING

Figure 17 – Cord Wrapped for Transport
Transportation
1. Make sure the cord is unplugged from the outlet.
2. Separate the saw from the clamp, if needed, to reduce
the carried weight.
3. Clean the equipment.
4. Coil the power cord around cord wrap as shown in
Figur 17 and secure in cord clip.
Storage
The PCS-500 Transportable Pipe Saw must
be kept dry and indoors or well covered if kept outdoors.
Store the machine in a locked area that is out of reach of
children and people unfamiliar with PipeSaw. This machine
can cause serious injury in the hands of untrained users.
Maintenance Instructions
WARNING
Make sure the saw is unplugged efore performing
any maintenance or making any adjustments.
Dismount the PCS-500 Transporta le Pipe Saw from
clamp efore any maintenance.
Maintain saw according to these procedures to
reduce the risk of injury from electrical shock,
entanglement and other causes.
Cleaning
After each use, wipe any chips off with a soft, clean, cloth
or brush, especially areas of relative motion such as pivot
pin, lead screw. Clean any dust and debris from the motor
vents.
Clean the clamp wheel knurls with a wire brush.
Cleaning Saw Blade Cavity
Daily after use and after every plastic pipe cut, inspect and
clean chips from the saw blade cavity.
1. Securely position the saw with the blade cover up
2. Using the supplied hex wrench, unscrew the saw
blade cover door screw and swing the cover door out
of the way. The screw will be retained by the cover door.
3. Swing open the saw blade cover. S Figur 18.
4. Clean the chips from the blade and inspect blade.
Make sure the chip chute and surrounding cavity is
clear. S Figur 18. Be aware that chips can be hot.
To reduce risk of fire, do not allow hot chips to contact
combustible material.
5. Reverse steps 2-3 to close the saw blade cover.
Securely tighten the screw. Never operate the PipeSaw
with blade cover open.
Figure 18 – Saw Chip Chute and Cavity
General Lu rication
On a monthly basis (or more often if needed) lubricate all
points of relative motion (such as lead screw and pivot
points) with a light lubricating oil. Wipe any excess oil from
exposed surfaces.
Gear ox Lu rication
Always check the gearbox oil level before using the PipeSaw.
To check and add oil:
Place the saw feet on a horizontal surface. Remove oil
plug/lock button assembly with hex wrench.
Check oil level, it should never be below bottom threads in
the housing. Add heavy-duty worm drive saw lubricant oil as
necessary, fill until oil reaches bottom threads of housing.
Only use heavy-duty worm drive saw lubricant (catalog
#69933) – other oils may not properly lubricate the worm
gear and could damage the saw. Do not overfill. Install oil
plug/lock button assembly (Figur 19).
999-995-226.10 REV. A14
PCS-500 Pi eSaw
WARNING
Cord Clip
Chip
Chute
Saw
Blade
Cover
Door
Saw Blade Cover

Figure 19 – Gearbox ubrication
Changing Saw Blade
Replace the saw blade when the teeth become chipped or
damaged. If cutting takes more force or longer or the L Ds
start flashing more often, that indicates that the blade is
dulling and needs to be changed.
1. Open the saw blade cavity as per the Cl aning Saw
Blad Cavity section.
2. Press and hold the oil plug/lock button to lock the
saw blade (s Figur 19).
3. Use the supplied hex wrench to loosen the blade
bolt. The blade bolt uses a left hand thread and will
need to be turned clockwise (marked on the outer
washer) to be removed.
4. Remove the blade bolt and outer washer and retain for
reuse.
5. Remove the saw blade and replace with new blade,
ensuring saw blade teeth are oriented correctly. Mount
the blade against the inner washer (s Figur 20).
Figure 20 – Installing Saw Blade
999-995-226.10 REV. A 15
PCS-500 Pi eSaw
6. Install the outer washer and blade bolt and ensure
there is no debris between the blade and inner/outer
washer. nsure proper assembly of blade and wash-
ers. S Figur 20.
7. Press the oil plug/lock button and hand tighten the saw
blade bolt by rotating counterclockwise, then turn an
additional 45° (1/8 turn) using the supplied wrench, s
Figur 21. Do not overtighten the bolt – the washers
and bolt functions as a clutch to protect the tool.
Figure 21 – Tightening Blade Bolt
The saw blade clutching action is provided by the fric-
tion of the outer washer against the blade. It permits
the blade shaft to turn when the blade encounters
excessive resistance. When the blade bolt is proper-
ly tightened, the blade will slip when it encounters
excessive resistance, thus reducing kickbacks or
other damage.
One setting may not be sufficient for cutting all mate-
rials. If excessive blade slippage occurs, tighten the
saw blade stud a fraction of a turn more (less than 1/8
turn). Overtightening the blade bolt prevents the
clutch from slipping and can increase the risk
of tool damage and injury.
8. Reinstall the blade cover and securely tighten the
lock plate screw.
Replacing Car on Brushes
Check the motor brushes every six months and replace
when worn to less than 3/16" (5 mm).
1. Unscrew brush caps (both sides of the PipeSaw
motor).
2. Remove brushes noting orientation. Inspect brushes.
Replace when worn to less than 3/16" (5 mm). S
Figur 22. Inspect the commutator for wear. If exces-
sively worn, have machine serviced. Clean the brush
holders with a clean cloth.
ock Button
ock Button
Inner Washer
Bolt
Outer
Washer
Blade
Oil evel

999-995-226.10 REV. A16
PCS-500 Pi eSaw
Figure 22 – Changing Brushes
3. Re-install brushes in same orientation/install new brush-
es. Reassemble brush caps.
Motor Thermal Overload
If the saw overheats, the L Ds come on solid and the saw
shuts down and will not run. If this happens, unplug the saw,
allow the saw to cool for at least 30 minutes before operat-
ing again.
Service And Repair
WARNING
Improper service or repair can make machine
unsafe to operate.
The “Maint nanc Instructions” will take care of most of
the service needs of this machine. Any problems not ad-
dressed by this section should only be handled by a
RIDGID Authorized Independent Service Center. Only
use RIDGID service parts.
For information on your nearest RIDGID Authorized Inde-
pendent Service Center or any service or repair questions
s Contact Information section in this manual.
SYMPTOM POSSIBLE REASONS SOLUTION
Excessive vibration dur-
ing operation.
Machine not cutting
pipes properly.
Machine stalls while cut-
ting.
Cut not square to pipe.
Saw does not run.
Trou leshooting
Pipe not stable on stands.
Long pipes not properly supported.
Clamp not properly mounted.
Saw blade out of balance.
Worn saw blade.
Use on incorrect tube size or material.
Applying excessive force rotating the saw while
cutting.
Worn saw blade.
Blade binds during operation.
Clutch not set properly.
Damaged or dirty clamp or saw.
Improper Installation.
Saw is overheated.
Saw is damaged.
Support pipes on stands properly.
Support longer pipes with additional pipe sup-
ports. S Workpi c Pr paration section.
Properly mount the clamp on pipe. S Mounting
Clamp On Pip section.
Discard saw blade and use different blade.
Replace worn saw blade.
Use on correct type of pipe (s Sp cifications).
Rotate saw more slowly, L D’s should not be on.
Replace worn saw blade.
Properly support pipe.
Rotate saw more slowly, L D’s should not be ON.
Adjust the clutch properly, s Changing Saw Blad
section.
Inspect/clean saw. Have serviced if needed.
Reinstall per instructions.
S Motor Th rmal Ov rload section.
Take for service.
3/16" (5mm) minimum

Optional Equipment
WARNING
To reduce the risk of serious injury, only use acces-
sories specically designed and recommended for
use with the RIDGID PCS-500 Transporta le Pipe
Saw, such as those listed.
For a complete listing of RIDGID equipment avail-
a le for these tools, see the Ridge Tool Catalog
online at RIDGID.com or see Contact Information.
Disposal
Parts of these tools contain valuable materials and can be
recycled. There are companies that specialize in recy-
cling that may be found locally. Dispose of the components
in compliance with all applicable regulations. Contact
your local waste management authority for more infor-
mation.
For EC Countries: Do not dispose of elec-
trical equipment with household waste!
According to the uropean Guideline 2012/ 19/ -
U for Waste lectrical and lectronic quip-
ment and its implemen tation into national leg-
islation, electrical equipment that is no longer
usable must be collected separately and disposed of in an
environmentally correct manner.
999-995-226.10 REV. A 17
PCS-500 Pi eSaw
Catalog
No. Descri tion
66378 PC-106 1" - 6" PipeSaw Clamp
66383 PC-612 6" - 12" PipeSaw Clamp
67883 PCS-500 PipeSaw Cutting Unit
66388 PC-106+PCS-500 1" - 6" Clamp with PipeSaw Cutting
Unit
66393 PC-612+PCS-500 6" - 12" Clamp with PipeSaw
Cutting Unit
66398 PC-106+PC-612+PCS-500 1" - 6" Clamp, 6" -12"
Clamp, and PipeSaw Cutting Unit
66403 Storage Bag
66413 Saw Blade for Cutting Steel and Stainless Steel Pipe
69053 Saw Blade for Cutting Plastic Pipe
69988 Saw Blade for Cutting Iron Pipe
69933 Heavy-duty Worm Drive Saw Lubricant

999-995-226.10 REV. A18
PCS-500 Pi eSaw
Table of contents
Languages:
Other RIDGID Saw manuals

RIDGID
RIDGID R3002 User manual

RIDGID
RIDGID MEGAMax R86401 User manual

RIDGID
RIDGID R4031 User manual

RIDGID
RIDGID 530 User manual

RIDGID
RIDGID R3203 User manual

RIDGID
RIDGID R8646 User manual

RIDGID
RIDGID Contractor TS2424 User manual

RIDGID
RIDGID R8452 User manual

RIDGID
RIDGID R4041 User manual

RIDGID
RIDGID MS1250LZA User manual

RIDGID
RIDGID R4560 User manual

RIDGID
RIDGID BS1400 User manual

RIDGID
RIDGID 932-VS User manual

RIDGID
RIDGID R4113 User manual

RIDGID
RIDGID R8654 User manual

RIDGID
RIDGID MS1050 User manual

RIDGID
RIDGID R3400 User manual

RIDGID
RIDGID R854 User manual

RIDGID
RIDGID 614 User manual

RIDGID
RIDGID R3203-1 User manual