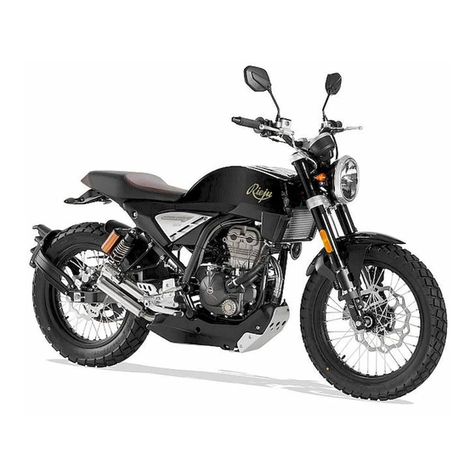
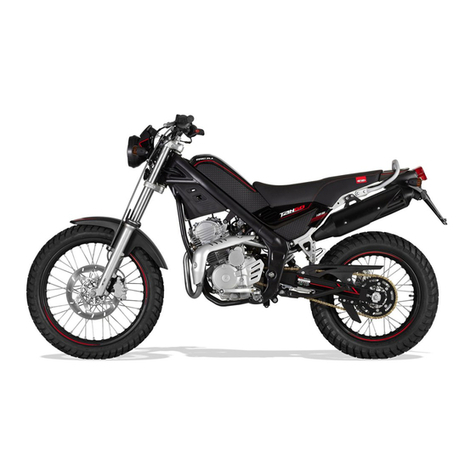
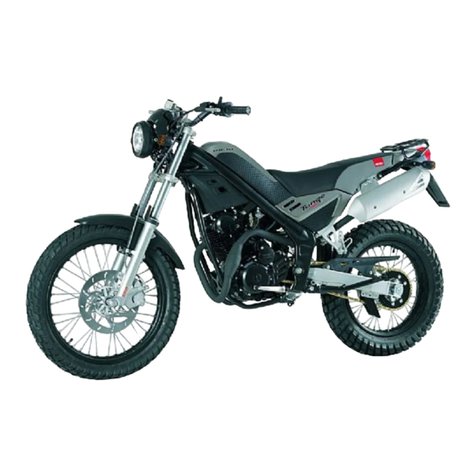
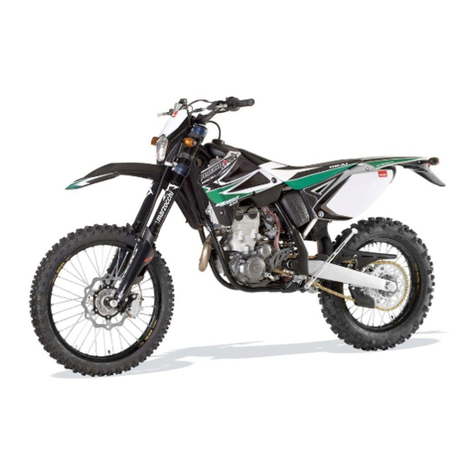
RIEJU TANGO 250 Instruction manual

TANGO 2
TANGO 2
50
50
Chassis workshop manual

5
EN
G
LI
S
H
Contents
INTRODUCTION
UPDATES FOR THE MANUALS
SYMBOLS USED IN THE MANUAL
ABBREVIATIONS USED IN THE MANUAL
GENERAL WORK RULES
RECOMMENDATIONS
LEARNING ABOUT THE MOTORCYCLE
MAINTENANCE OPERATIONS
TECHNICAL CHARACTERISTICS AND SPECIFICATIONS
TIGHTENING TORQUES
UNPACKING
“AESTHETIC APPEARANCE” CHECK
IDENTIFICATION DETAILS
IDENTIFYING THE MAIN ELEMENTS
CONTROLS AND INSTRUMENTS
KEYS
STEERING LOCK
PROP STAND
INSTRUMENT PANEL
TYRES
CHECKING PRESSURE
FUEL TANK
TRANSMISSION OIL
BRAKE FLUID
ADJUSTING THE MINIMUM IDLING RATE
ADJUSTING THE TRANSMISSION CHAIN TENSION
10
11
12
13
14
18
18
21
22
22
22
23
24
24
24
25
25
26
26
26
27
28
28
29

ENGLISH
6
Contents
REMOVAL
1. SEAT
2. SIDE COVERS
3. FRONT SIDE COVERS
4. REAR COWLING
5. SILENCER
6. EXHAUST
7. “AIS” SYSTEM (secondary air valve)
8. BATTERY
9. REAR TURN INDICATORS
10. REAR LIGHT
11. AIR FILTER
12. REGULATOR
13. TURN INDICATORS CONTROL UNIT
14. CENTRAL CDI UNIT
15. STARTER RELAY
16. GEAR LEVER
17. FILTER CANISTER
18. SHOCK ABSORBER
19. FUEL TANK
20. CARBURETTOR
21. PROP-STAND
22. FRONT MUDGUARD
23. ENGINE
24. FRONT TURN INDICATORS
25. FRONT HEADLIGHT
26. INSTRUMENT PANEL
27. FRONT BRAKE CYLINDER
28. CLUTCH LEVER
29. HANDLEBARS
30. FRONT BRAKE CALLIPER
31. REAR BRAKE CALLIPER
32. ODOMETER SENSOR
33. FRONT WHEEL
34. FRONT BRAKE DISK
32
32
32
33
33
30
34
34
35
36
37
38
38
38
39
39
40
41
42
43
43
43
44
45
45
46
46
47
47
47
48
48
49
49

7
EN
G
LI
S
H
Contents
49
50
50
50
51
51
52
52
52
54
54
55
56
59
60
REMOVAL
35. STEERING
36. FRONT FOOTRESTS
37. REAR FOOTRESTS
38. REAR BRAKE PEDAL
39. CHAIN PROTECTOR
40. TRANSMISSION CHAIN
41. REAR BRAKE CYLINDER
42. KICK-START LEVER
43. SWINGING ARM
ELECTRICAL SYSTEM
1. PRECAUTIONS
2. GENERAL WIRING
3. BATTERY
4. LIGHTING SYSTEM
5. SENSORS
6. WIRING DIAGRAM

9
EN
GLISH
Introduction
Introduction

ENGLISH
Introduction
10
This workshop manual contains the main electromechanical checks, as well as the general essential
checks and the fitting of components that are supplied unattached, in order to make delivery of the
motorcycle newly arrived from the factory.
It is very important that the indications given in the manual are adhered to strictly. Work carried
out is a superficial way, or worse still, not carried out at all, may lead to personal injury to the user,
damage to the machine, etc., or simply be the source of disagreeable complaints.
N.B.: Rieju, S.A. reserves the right to make modifications at any time without any prior no-
tification.
For any enquiry of for further information, please call the Rieju, S.A. Customer Service.
UPDATES FOR THE MANUALS
Any update will be sent within a reasonable period of time. Each new CD-Rom updates the informa-
tion in the previous one.
The list of contents will be updated if the modifications and/or variations in the pages do not ensure
the consulting of the manual.
IMPORTANT! The series of workshop manuals must be considered as an actual work instrument,
and the manuals can only maintain their “value” over time if they are kept constantly up to date.

Introduction
11
EN
G
LI
SH
SYMBOLS USED IN THE MANUAL
ATTENTION! Practical advice and information that refers to the safety of the
motorcyclist (user of the machine) and the features that maintain the condition
and integrity of the machine itself.
ATTENTION! Descriptions that relate to work that is dangerous for the te-
chnical maintenance staff, repair staff, other workshop staff or for those from
outside, for the environment, for the machine and for the equipment.
DANGER OF FIRE
Operations that could cause a fire.
DANGER OF EXPLOSION
Operations that could lead to an explosion.
TOXIC
Indicates the danger of poisoning or inflammation of the primary respiratory
tracts.
MEMBER OF TECHNICAL STAFF RESPONSIBLE FOR THE
MECHANICAL MAINTENANCE
Operations that assume competence in the field of mechanics/motorcycles.
MEMBER OF TECHNICAL STAFF RESPONSIBLE FOR
ELECTRICAL MAINTENANCE
Operations that assume competence in the field of electricity/electronics.
NO!
Operations that must be avoided.
WORKSHOP MANUAL
Information to be gleaned from this documentation.
SPARE PARTS CATALOGUE
Information to be gleaned from this documentation.
TOXIC
TOXIC
TOXIC

ENGLISH
Introduction
12
N.B.:
The illustrations frequently show securing or adjustment bolts or screws, indicated
by the letter B. The number following this letter indicates the quantity of identical
bolts (B) or screws to be found on the unit or component being described and its
corresponding illustration. A letter without a number indicates that the quantity
is 1. In the case of different bolts or screws shown in the same figure, the Bwill be
followed by the number and by a lower-case letter (e.g.: (B4a)).
The refitting of units and components is normally done in this opposite way to dis-
mantling operations (except for a specific description).
F
T Tq
P
Ap
S
Diag
T
B
Figure
Tightening torque
Page
Part
Section
Diagram
Table
Bolt
ABBREVIATIONS USED INTHE MANUAL

Introduction
13
EN
G
LI
SH
F-1
GENERAL WORK RULES
TIPS:
•
•
•
•
•
•
•
•
Always use equipment of an optimum quality.
Use specially designed equipment, in accordance with European guidelines, to raise the
machine.
While carrying out work, keep tools within reach, as far as possible according to a
predetermined sequence, and in any event never on the machine or in areas that are
hidden or difficult to access.
Keep the work area clean and tidy.
When tightening nuts and bolts, begin either with those with the larger diameter or the
inner ones, proceeding to tighten them in successive steps in a criss-cross pattern.
The correct method is using a set gap spanner, with a pulling rather than a pushing
action.
Adjustable spanners (F. 1) should only be used in an emergency, e.g. when the correct
size of set spanner is not available. When force is applied to these, the mobile jaws tend
to open, with the risk of possible damage to the bolt head or nut, as well as obtaining an
unreliable tightening torque. In any event, they must be used as illustrated in Figure 1.
Except in special service cases, a work sheet should be prepared for the customer, setting
out all the work carried out and notes about any possible future checks.
• The tips, recommendations and warnings that follow are aimed at ensuring that work
is carried out in a rational way and with maximum operational safety, thereby eliminating
significantly the chances of accidents, injury and damages of any nature and downtimes.
They should therefore be scrupulously observed.

ENGLISH
Introduction
14
F-2 F-3
Before beginning any work on the motorcycle, wait for each and every one of the
machine’s components to cool down completely.
If the operations envisage the use of two mechanics, they need to agree in advance on the
tasks to be performed and synergies.
Always check that a component has been fitted correctly before proceeding to fit
another.
Lubricate the (envisaged) parts before refitting them.
Gaskets, sealing rings, rubber rings and keys must be renewed each time they are
removed.
The par values indicated in the manuals refer to the “final tightness”, and need to be
reached progressively, step-by-step.
Loosening and tightening operations on aluminium alloy parts (crankcase) must be
performed when the engine is cold.
Always use screwdrivers of the correct size for the screws on which they are to be used.
Never work in uncomfortable conditions or those of precarious stability of the
motorcycle.
Never re-use a gasket or rubber ring.
Never tighten or loosen nuts and bolts with pliers, since, in addition to not
exercising enough locking force, this can damage the bolt head or the nut.
Never strike the spanner with a hammer (or other tool) to loosen or tighten
nuts and bolts (F-2).
Never increase the leverage by inserting a pipe over the spanner (F-3).
•
•
•
•
•
•
•
•
•
•
•
•
•
RECOMMENDATIONS

Introduction
15
EN
G
LI
SH
F-4
Never use naked flames under any circumstances.
Never leave open and unsuitable containers containing petrol where others are
passing, close to heat sources, etc.
Never use petrol as a cleaner to clean down the machine or to wash the workshop floor.
Clean the various components with detergent with a low flammability rating.
Never suck or blow into the petrol supply pipe.
Never carry our soldering or welding in the presence of petrol. Remove the fuel tank
even if it is completely empty, and disconnect the negative cable (-) from the battery.
Never leave the motorcycle with the engine running in closed or poorly aired
spaces.
Before carrying out any work, , make sure the motorcycle is perfectly stable.

17
EN
GLISH
Familiarising yourself with the
motorcycle
motorcycle

ENGLISH
Familiarising yourself with the motorcycle
18
TECHNICAL SPECIFICATIONS AND CHARACTERISTICS
1st SERVICE
1.000 KMS.
2nd SERVICE
3.000 KMS.
MAINTENANCE OPERATIONS SER. EVERY
5.000 KMS.
Check the braking system
Check the transmission oil level
Check chain tension and wear
Check suspensions
Check, adjust and grease levers and cables
Check wheel centring and spoke tensions
Clean and grease the air filter
Check and adjust the carburettor
Check and adjust the spark plug or renew
Check the tightness of the nuts and bolts
on the chassis and on plastic units
Check the electrical system
Check wear on piston rings
Check the exhaust system
Check condition of the battery and its terminals
·
·
·
·
·
·
·
·
·
·
·
·
·
·
·
·
·
·
·
·
·
·
·
·
·
·
·
·
·
·
·
Dimensions
Total length
Total width
Total height
Seat height
Distance between wheel shafts
Minimum distance to the ground
Weight
Empty
In running condition
109 kg.
114 kg.
Type
Number of gears
Cylinder and arrangement
Cylinder capacity
Diameter x stroke
Compression ratio
Starting system
Lubrication system
4 stroke
5 gears
Single cylinder, forward sloping
249.9 cc
65.5 x 74 mm
9:1
Kick-start and electric start
Wet crankcase
1925 mm.
800 mm.
1110 mm .
820 mm.
1320 mm.
250 mm.
Engine
Change Change

Familiarising yourself with the motorcycle
19
EN
G
LI
SH
Transmission oil
Type
Quantity
CASTROL SAE 20W-50 API, “SH” or higher
1 litre
Air filter
Type Wet-type foam rubber cartridge
Fuel
Type
Fuel tank capacity
Lead-free petrol
7,5 L.
Carburettor
Type DellOrto VHST-28 ECS
Spark plug
Type
Distance between electrodes
D8EA / NGK DENSO
0,6 - 0,7 mm.
Clutch
Type Multi-disk in oil bath
Secondary transmission
Engine output sprocket
Rear wheel sprocket
Transmission ratio
Chain
Z = 17
Z = 44
1: 2,58
428 RN8 x 124 links
Speed
1ª
2ª
3ª
4ª
5ª
Primary shaft
Z = 13
Z = 17
Z = 20
Z = 23
Z = 25
Secondary shaft
Z = 36
Z = 32
Z = 28
Z = 26
Z = 24
Gear ratio
1: 2,77
1: 1,88
1: 1,40
1: 1,13
1: 0,96
GEAR CHANGE

ENGLISH
Familiarising yourself with the motorcycle
20
Brake disks
Front
Rear
260 mm. Ø
200 mm. Ø
Mixed/road tyres
Front
Rear
100/80-17” 55P
130/70-17” 63P
Electrical equipment
Ignition system
Generator
Battery
Fuse
C.D.I.
AC 120 w magneto generator
12 V - 5,5 Ah
15 Amp
Voltage and wattage of bulbs
Headlight
Rear light
Instrument panel
Turn indicators
Odometer lighting
12V 55/60W H4
12V 21/10W
12V 1,2W
12V 10W
Leds
Suspension
Front
Rear
PAIOLI telescopic forks
0.37 mm bars
340 cc CASTROL SAE I5W per bar
Hydraulic shock absorber
B
rake d
i
sk
s
Enduro tyres
Front
Rear
90/100-19”
120 /90 -16

Familiarising yourself with the motorcycle
21
EN
G
LI
SH
Front wheel bolt
Front wheel bolt lock
Rear wheel bolt
Front/rear brake calliper
Silencer
Exhaust pipe side coupling
Engine mounting bolt
Handlebar lever bolt
Shock absorber bolts
Forks bolt
Handlebar securing bolt
Top steering nut
Intermediate steering nut
Swinging arm bolt
Element Kg*mN*m Notes
38 - 52
17 - 23
72 - 98
24 - 36
6 - 10
6 - 10
20 - 26
2 - 4
38 - 52
51 - 69
18 - 24
18 - 24
25 - 34
60 - 75
3,8 - 5,2
1,7 - 2,3
7,2 - 9,8
2,4 - 3,6
0,6 - 1,0
0,6 - 1,0
2,0 - 2,6
0,2 - 0,4
3,8 - 5,2
5,1 - 6,9
1,8 - 2,4
1,8 - 2,4
2,5 - 3,4
9,0 - 7,5
TABLE OF TIGHTENING TORQUES
G
G
Grease
G
G
G

ENGLISH
Familiarising yourself with the motorcycle
22
UNPACKING
Unpack the motorcycle following the directions present in the packaging itself, which must
then be disposed of in accordance with existing regulations.
“AESTHETIC APPEARANCE” CHECK
Check visually that all components made of plastic material are fitted correctly and that
the motorcycle does not have any visible scratches, marks, etc.
DETAILS FOR IDENTIFICATION
Machine Identification Number
The motorcycle’s identification number (A/F-1) is stamped onto the steering cylinder.
Engine identification number
The details for identifying the engine (B/F-2) can be seen on the right-hand crankcase.
F-1
•
•
•
•
F-2
B
A

Familiarising yourself with the motorcycle
23
EN
G
LI
SH
IDENTIFICATION OF MAIN ELEMENTS
(left-hand side)
1. Headlight.
2. Right-hand controls.
3. Left-hand controls.
4. Seat.
5. Exhaust pipe.
6. Rear grab bar.
7. Prop stand.
8. Gear change pedal.
9. Fuel tank.
IDENTIFICATION OF MAIN ELEMENTS
(right-hand side)
10.
Fuel tank cap.
11.
Forks.
12. Rear brake pedal.
13. Kick-start lever.
14. Pillion passenger foot-rests.
15. Number plate light and
number plate holder.
F-3
F-4
1
23 4
7
8
9
10
11
121314
15
5
6

ENGLISH
Familiarising yourself with the motorcycle
24
1. Rear-view mirror.
2. Clutch lever.
3. Instrument panel.
4. Main switch.
5. Front brake cylinder.
KEYS
• The motorcycle is supplied with two keys, with a numeric code, that allow:
- The ignition to be switched on.
- The lights to be switched on.
- The steering to be locked.
STEERING LOCK
• Locking: With the handlebars turned fully to the left, push the key fully in and turn it to
the left.
• Unlocking: Turn the ignition key to the right.
CONTROLS AND INSTRUMENTS
6. Front brake lever.
7. Throttle twist grip.
8. Starter button.
9. Fuel tank cap.
10. Light switch
(dipped beam/main beam).
11. Turn indicators switch.
12. Horn button.
13. Left-hand handlebar grip.
F-5
1 2 3 465
7891013 12 11

Familiarising yourself with the motorcycle
25
EN
G
LI
SH
PROP STAND
• Check that the prop stand is well secured
and moves properly. The retention system,
consisting of traction springs, should also be
checked frequently.
F-6
A
INSTRUMENT PANEL
F-7
1-
2-
3-
4-
5-
6-
Turn indicators indicator light
This indicator light flashes when the turn indicator switch is moved to the left or to the
right.
Oil level indicator light
This indicator light comes on when the oil level is low.
Coolant temperature indicator light
This indicator light comes on when the coolant temperature is too high. When the indi-
cator light comes on, stop the engine immediately.
Mode button.
See programming section.
“N” neutral indicator light.
This indicator light comes on when the transmission is in the neutral position.
Main beam indicator light.
This indicator light comes on when the headlight is on main beam.
1
6
5
2
3
4
Other manuals for TANGO 250
2
Table of contents
Other RIEJU Motorcycle manuals

RIEJU
RIEJU MARATHON 250 User manual

RIEJU
RIEJU CENTURY 125IE User manual

RIEJU
RIEJU MR 300 User manual

RIEJU
RIEJU MARATHON 125 AC User manual

RIEJU
RIEJU RS3 Naked 50 User manual

RIEJU
RIEJU TANGO 125 User manual

RIEJU
RIEJU NUUK URBAN User manual

RIEJU
RIEJU TANGO 250 User manual

RIEJU
RIEJU MRT 50 EURO 4 User manual

RIEJU
RIEJU TANGO 125 User manual

RIEJU
RIEJU MRT 50 Instruction manual

RIEJU
RIEJU MRT 50 User manual

RIEJU
RIEJU MRT 50 EURO 5 User manual

RIEJU
RIEJU Strada 125 ie User manual

RIEJU
RIEJU MRX User manual
RIEJU
RIEJU MRX 125 User manual

RIEJU
RIEJU TANGO 250 User manual

RIEJU
RIEJU Tango 125 E4 User manual
RIEJU
RIEJU Marathon 125 PRO User manual

RIEJU
RIEJU KOSO User manual