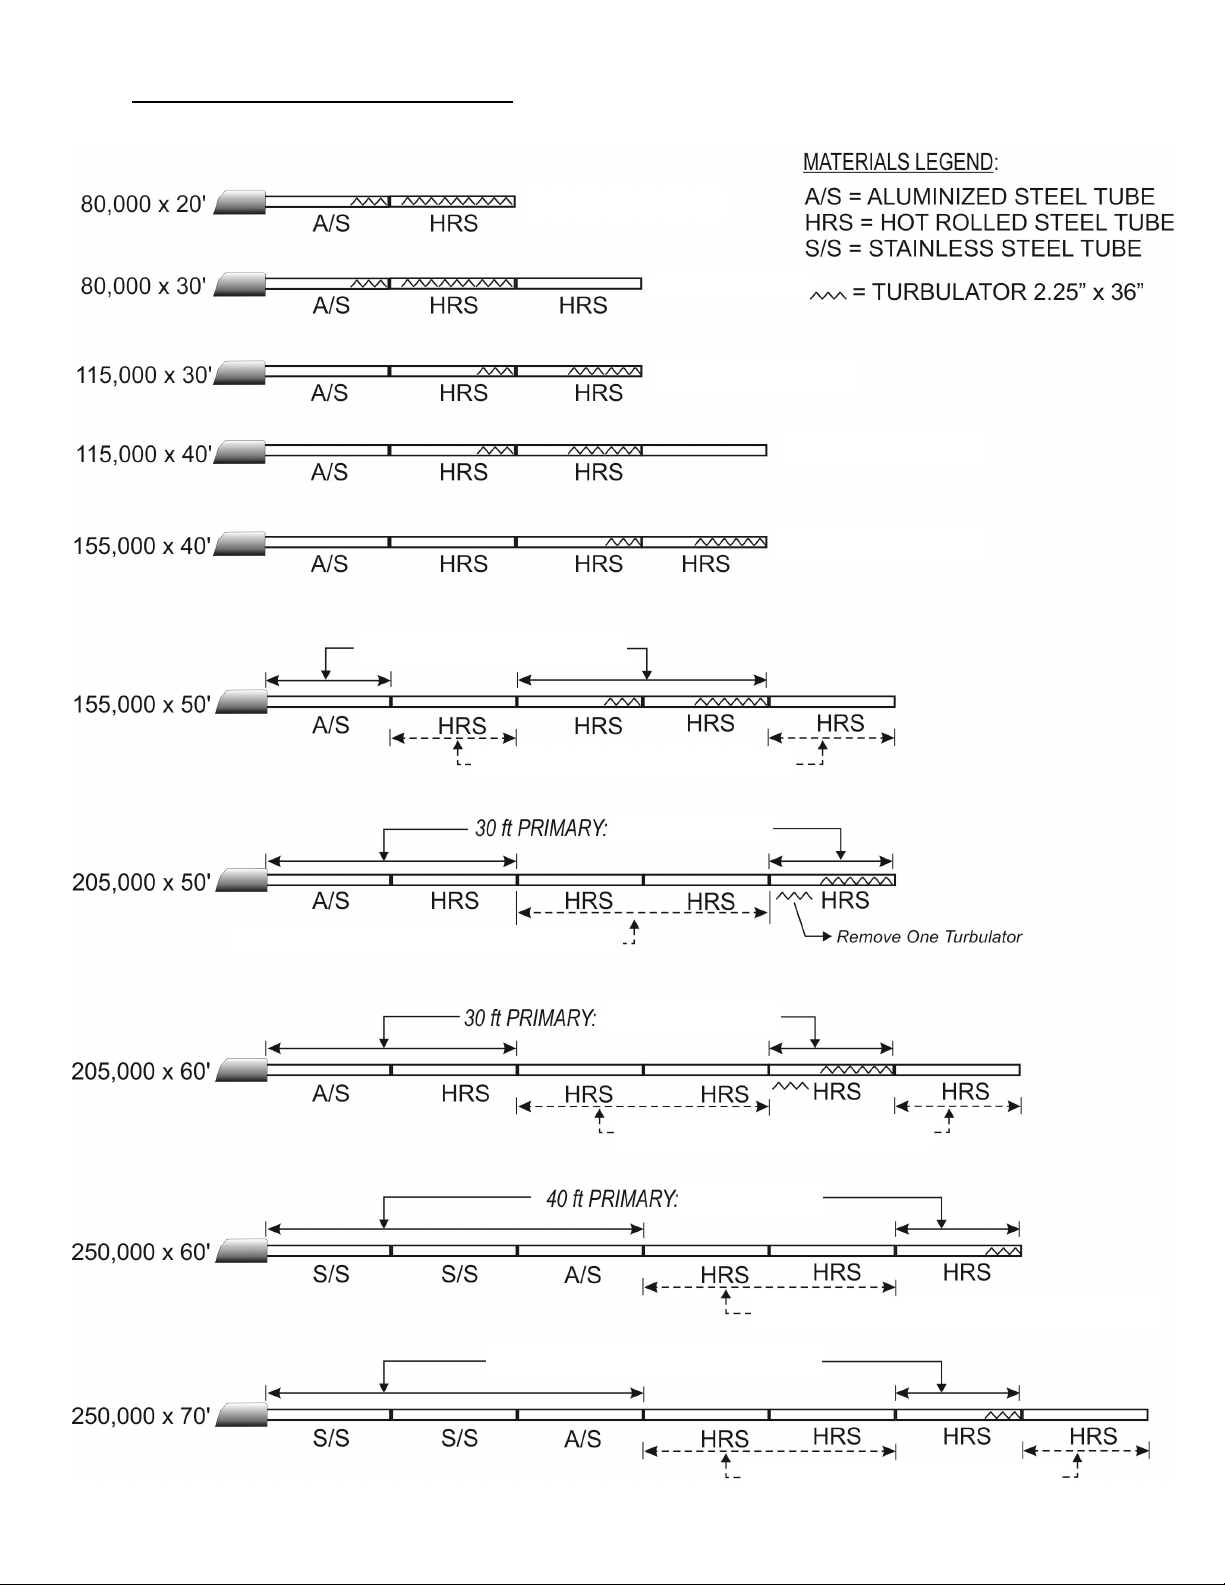
Rinnai RHEPM8020N Owner's manual
Other Rinnai Gas Heater manuals

Rinnai
Rinnai RHFE-1250ETR User manual

Rinnai
Rinnai RHFE-1004T User manual

Rinnai
Rinnai Brivis StarPro SP5 Series User manual

Rinnai
Rinnai RIBF2N User manual

Rinnai
Rinnai Spectrum 28 User manual

Rinnai
Rinnai REH-6T Quick start guide

Rinnai
Rinnai Compact 2 User manual

Rinnai
Rinnai RHFE-950ETR User manual

Rinnai
Rinnai Energysavers RHFE-1005FT Quick start guide

Rinnai
Rinnai Convector 417 User manual

Rinnai
Rinnai 2001 User manual

Rinnai
Rinnai Avenger 25 User manual

Rinnai
Rinnai REH-20DT Instruction Manual

Rinnai
Rinnai REH-18 Quick start guide

Rinnai
Rinnai Brivis CC315 Series User manual

Rinnai
Rinnai Granada MkII User manual

Rinnai
Rinnai brivis StarPro SP4UN User manual

Rinnai
Rinnai RHFE-950ETR User manual

Rinnai
Rinnai FC510 User manual

Rinnai
Rinnai RHFE-752ETR User manual


Popular Gas Heater manuals by other brands

Superior
Superior BGE18NV Installation and operation instructions

Dru
Dru Room-sealed atmospheric gas-fired heating... user manual

klover
klover TKR 35 user guide

Rothenberger Industrial
Rothenberger Industrial 035984 instruction manual

New Buck Corporation
New Buck Corporation 34 user manual

Hargrove
Hargrove Timberland Glow Operation and installation guide


Brant Radiant Heaters
Brant Radiant Heaters QTD Series User instruction

L.B. White
L.B. White Therma Grow HW220 Owner's manual and instructions

Sealey
Sealey LP35.V5 instructions

Italkero
Italkero Falo Evo User manual and assembly instructions

Desa
Desa 30LP owner's manual

Williams
Williams 2509822A owner's manual