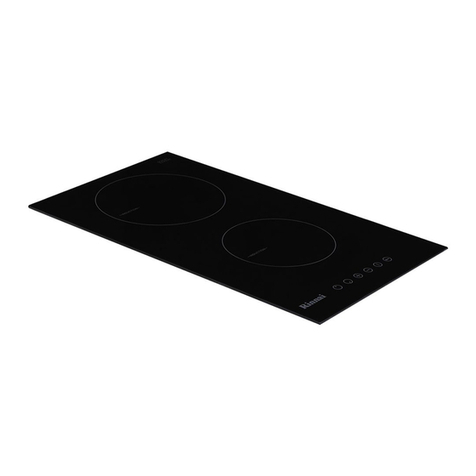
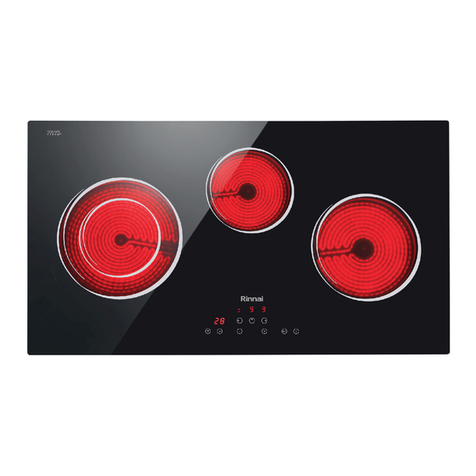
Rinnai RB-7022HE-CB User manual

Operation / Installation Manual
操作 / 安装说明
Electric Combi Hob
电组合炉(电磁炉 + 红外炉)
RB-7022HE-CB
Rinnai Corporation

TABLE OF CONTENTS
English Page 01 - 11

CONTENTS
Safety Instructions ---------------------------------------------------------------------------------------------------------------------------- 1
Technical Data --------------------------------------------------------------------------------------------------------------------------------- 2
Guide To The Appliance ---------------------------------------------------------------------------------------------------------------------- 3
Helpful Hints and Tips ------------------------------------------------------------------------------------------------------------------------ 3
Operating Instructions ----------------------------------------------------------------------------------------------------------------------- 5
Maintenance and Care -------------------------------------------------------------------------------------------------------------------- 7
Troubleshoot----------------------------------------------------------------------------------------------------------------------------------- 7
Installation Instructions --------------------------------------------------------------------------------------------------------------------- 8
Electrical Connection ----------------------------------------------------------------------------------------------------------------------- 10
IMPORTANT
Please paste the serial number labels enclosed with the packaging on your warranty card to register your product
warranty. Please contact your local Rinnai Customer Care Centre should you require further assistance.
Version: 2017 07

1
SAFETY INSTRUCTIONS
Please read this user manual thoroughly before attempting to use this appliance for the first time. This manual
contains important information on safe installation, use and care of the appliance. Keep these instructions for
reference and pass them on to future user.
Unpacking
• Do not use the appliance if there are obvious signs of
transportation damage.
• If the power supply cord is damaged, it must be
replaced by the manufacturer, its service agent or
qualified technician to avoid hazard.
• Please ensure that young children do not play with
plastic bag packaging.
For the user
• This appliance is for home food preparation only. Do
not use the appliance other than its specific
purpose.
• This appliance is not intended for use by young
children or infirm persons without supervision.
• Do not leave the appliance unattended during
operation.
• Do not use the appliance as a work surface or as a
storage surface
• It is dangerous to modify any part of this appliance.
Tampering with electrical connections or mechanical
parts can cause operation faults and may put the user at
risk.
• Installation and repair should only be attempted by
qualified technician.
• Flammable or combustible objects such as aerosol
cans should not be stored near the appliance.
• Accessible parts may become hot during use. Keep
small children away from the appliance.
• Do not heat unopened food containers as build-up
of pressure may cause container to burst and result in
injury.
• Do not use aluminium foil, aluminium liners,
aluminium containers on the appliance.
• Never leave appliance unattended at high heat
settings. Boil-over causes smoking and greasy
spillovers may ignite.
• Switch off the cooking zone after each use.
• Keep away plastic or aluminium objects or products
with high sugar content from the appliance. If placed on
hob surface while still hot, they may cause damage to
the hob surface.
• Do not use if appliance is faulty or cooktop is cracked
to avoid possibility of electric shock. Contact a qualified
technician immediately for repair and service.
• To avoid damaging the hob surface and cookware,
ensure that cookware do not boil dry.
• Clean the appliance with caution. If a wet sponge
or cloth is used to wipe spills on a hot cooking area,
be careful to avoid steam burn or marks on the hob
surface.
• Never use steam cleaners or pressure cleaners on the
appliance.
• Always make sure that the pan handles are turned
inwards to avoid accidental burns.
• Always disconnect the unit from the power supply
before carrying out any cleaning or maintenance work
on the appliance
• Ensure that power supply cord of other electrical
appliances do not come into contact with the hot parts
of the hob.
• Multiple plugs and extension cables must not be used.
Overloading is dangerous and may cause fire hazard.
Disposal
•This appliance and its packaging are environmentally
friendly and recyclable. Please help us to care for the
environment by disposing the packaging in a proper
manner and recycling any old appliances.
• Before disposing an old appliance, disconnect it from
the power supply and cut the power supply cord to
prevent hazards.
The manufacturer will not be held liable for any damages resulting from improper installation nor failure to adopt
proper safety measures during installation and operational use of the appliance.

2
TECHNICAL DATA
Model RB-7022HE-CB
Voltage 220-240V
Frequency 50/60Hz
No. of Cooking Zones 2
Power of Cooking Zones Left: 1.1/2.2kW
Right: 1.8/2.1kW
Total Power 4300W
Appliance Dimension 710*410*60mm
Cut-out Dimension 680*380mm
Model No. A(mm) B(mm) W(mm) D(mm) H(mm) X(mm) Y(mm)
RB-7022HE-CB 680 380 710 410 60 50 60
Measurements in mm.
Min. 50mm from hob cut-out to back wall.
Min. 60mm from hob cut-out to side wall.
Min. 70mm from the bench top with a fitted drawer underneath.
Min. 55mm from the bench top with a fitted oven underneath.
Min. 30mm from back cabinet for ventilation gap.

3
GUIDE TO THE APPLIANCE
RB-7022HE-CB
1. Dual radiant zone 1.1kW/2.2kW (Φ140/230mm)
2. Single induction zone 1.8kW/2.1kW (Φ210mm)
3. Control panel
1. ON/OFF key
2. Child lock
3. Power level indicator / Timer indicator
4. Power level selector ("+" to increase level)
5. Power level selector ("-" to decrease level)
6. Boost / Dual radiant zone
7. Timer key
8. Cooking zone selector
HELPFUL HINTS AND TIPS
Induction cooking uses induction heating to directly
heat a cooking vessel.
An induction coil is located under each cooking zone.
When an induction element (cooking zone) is switched
on, the electronic circuit unit (inverter) powers up
the induction coil. An alternating electric current
flows through the coil, which produces an oscillating
magnetic field. This magnetic field continuously
changes in terms of frequency and intensity, and
creates induced currents in the base of the cookware
and heats it up. The heat is directly transferred to the
food being cooked. The cooking zone is heated up
indirectly by the heat given off by the cookware.
Thus, induction heat makes the cookware a direct
source of heat, featuring high level of efficiency with
extremely low energy loss.
An induction cooking zone only works when a
cookware made of ferromagnetic material is placed on
it. See 'Choosing suitable cookware" in this manual.
Induction cooking automatically recognizes the size of
the cookware. i.e. heat is only generated in the area
covered by the base of the cookware.
• If there is no cookware placed on the cooking zone,
or if the cookware is incompatible, there will be no
power emitted by the induction coil.
• If the cookware is placed partially on the coil, or
if the base diameter is smaller than the coil, the
internal sensors will reduce power to the coil.
• If the cookware is taken off the cooking zone when
the hob is switched on, the display will show"U". See
'Pan Sensor' in this manual.

4
PRACTICAL COOKING ADVICE
Choosing suitable Cookware
Use cookware made from ferromagnetic materials
which are compatible with induction. We recommend
cookware made from cast iron, steel or stainless steel
cookware designed for induction cooking.
Cookware made by the following materials is not
suitable: pure stainless steel, aluminum or copper
without a magnetic base, glass, wood, porcelain,
ceramic, and earthenware.
To test the compatibility of the cookware:
• Hold a magnet to the base of the cookware. If the
magnet sticks, then it is suitable to use on induction
hob.
• If you do not have a magnet:
Turn on the hob and place the pan with water inside
on a cooking zone at any power level. If it doesn't flash
'U' in the display and the water is heating, the pan is
suitable. If it flashes 'U', the cookware is unsuitable to
use.
To obtain best results:
• Cookware with thick flat bases should be chosen for
the benefit of uniform heat distribution. Avoid using
cookware with rough or deformed based.
• Use of cookware with enamel coated base can
prevent the glass top from getting scratched.
• Always use pans with a diameter large enough to
cover the cooking zone fully to achieve even cooking
and more efficient heat distribution.
Suitable Cookware
Includes
Unsuitable Cookware
Includes
• Steel cookware with
magnetic base or designed
for induction cooking
• Enamel coated steel
(with or without non-stick
coating)
• Cast iron
• Steel cookware with
non-magnetic base
• Aluminum and copper
• Glass, ceramics,
earthenware
This appliance is programmed with 9 power levels.
The following power levels should be taken as a guide only. A higher power level setting is required when using
deep pans, cooking large food quantities, or cooking without a lid. Select a lower power setting for smaller food
quantities.
Power level range Cooking mode Suitable for
1 - 2 • Keeping warm
• Melting
• Keeping cooked foods warm, warming small quantities of liquid
• Melting butter, chocolate, sauces, thickening sauces
2 - 3 • Simmering
• Reheating
• Soup simmering
• Reheating ready-cooked meals
3 - 4
• Steaming
• Braising
• Light frying
• Steaming vegetables, fish
• Braising meat, fish, vegetables etc
• Lightly fried eggs, omelettes
4 - 5 • Boiling
• Cooking dumplings, potatoes
• Cooking larger quantities of food, stews and soups
• Making porridge
6 - 7 • Gentle frying • Frying sausages, meat, vegetables etc
• Crepes, frying pancakes etc
7 - 8 • Heavy frying • Cooking on a high flame and browning(roasts, steaks, fillets etc)
8 - 9 • Deep frying, searing
• Boiling
• Deep frying Chips, searing meat etc
• Boiling large quantites of water, cooking pasta
Environmental Tips
• Switch off the cooking zones before the end of cooking time to take advantage of residual heat.
• Residual heat can be used for keeping food warm.
• Place lids on the cookware whenever possible to minimize heat loss.
• Cookware base size and cooking zone should be of same size for better heat efficiency.
• Select a smaller cookware size if cooking small food quantities. A smaller pan size uses less energy than a
larger pan with small food quantities.
• Lift cookware into positions on the hob. Sliding them can cause scuffs and scratches on the hob surface.

5
New appliances have a slight smell on first use. The
unpleasant odour that is often detected during initial
use is caused by the burning of protective substances
used during the manufacturing process. The odour
emitted does not indicate a faulty appliance nor is
harmful to health.
Remove packaging material
Ensure that all packaging material is removed before
using the hob for the first time.
Using the Touch Controls
• The controls respond to touch, so you don’t need to apply any pressure.
• Use the ball of your finger, not its tip.
• You will hear a beep each time a touch is registered.
• Make sure the controls are always clean, dry, and that there is no object (e.g. a utensil or a cloth) covering them.
Even a thin film of water may make the controls difficult to operate.
OPERATING INSTRUCTIONS
USING FOR THE FIRST TIME
Switching ON/OFF the hob
The hob must be switched on before any of the cooking
zones can be used.
• To switch on the hob, press ON/OFF key . A '
signal' sounds and power indicator light is displayed
(on standby mode). If no function is selected within
1 minute after switching on, the hob automatically
switches itself off for safety reasons.
• To switch off the hob, press the ON/OFF key
and power indicator goes off.
Switching on the cooking zones
Each cooking zone is controlled by a cooking zone
selector and power level select key and .
• To start operating a cooking zone, touch the
corresponding zone selector key (i.e. ).
• Set the desired power level (between 0~9) for the
selected cooking zone using or keys. The
default power level setting is level '5'.
Switching off the cooking zones
• To switch off a cooking zone, use the corresponding
control key and progressively press the key until
the hob is switched off.
BOOST function (For induction zone only)
The power function makes more power available to the
induction cooking zones that can be used to temporally
boost the normal maximum power for a cook zone.
To use Boost function:
• Press the zone selector key (i.e. ).
• Press Boost key , display will show 'P'.
To cancel Boost function:
• Choose the zone under Boost (i.e. ).
• Press the power select key to cancel Boost, and
choose the level you want to set.
Note: The Power Boost function will only activate
for 5 minutes at most, after that the induction zone
automatically switches back to heat setting 9.
Dual zone function (For radiant zone only)
The dual zone function means there has two cooking
zones, includes the central zone and the outer zone.
You can use the central zone (A) independently or both
zones (B) at once.
When you touch the cooking zone selector, it will
switch on the central zone only.
To activate the outer zone:
• Press the zone selector key (i.e. ).
• Press dual zone key , display will show '='.
To deactivate the dual outer zone:
• Choose the zone with dual zone active (i.e. ).
• Press dual zone key to switch off the outer
cooking zone, and choose the level you want to set.
Child Lock function
The child lock function prevents unintentional changing
of settings. Any operation on the control functions will
not work until the hob is unlocked.
• To activate, press the lock key . The display on
timer key shows 'Lo'.
• To deactivate, press and hold the lock key for 3

6
seconds. The 'Lo' goes off and hob is unlocked.
When the hob is in lock mode, all keys are disable
except ON/OFF. You can always turn the hob off with
the ON/OFF key in an emergency, but you shall need to
unlock the hob first in the next operation.
Minute Minder
You can use the timer as a minute minder while the
cooking zones do not operate
To operate:
• Turn on the hob, using the on/off key.
• Press the timer key to operate this function
• Press on the power level key selector to set the
time (00 to 99 minutes)
• When the time has ended the buzzer will beep for
30 seconds and display will shows " - "
• To deactivate the minute minder, press the timer
key to adjust the time to 00.
Timer
Count Down Timer
Use the countdown timer to set how long you want the
cooking zone to operate
Set the countdown timer only after you have selected
the cooking zone
The selection of timer function is only possible
when the cooking zones are active and the heat setting
is set
• To set the cooking zone press on the corresponding
zone selector key (i.e. )that you wish to set the
timer.
• To activate the countdown timer, press the timer
key to operate this function
• Press or of the power level key selector to
set the desired minutes (0 to 9). Press the timer
key again, Press or of the power level
key selector to set the desired tenths (0 to 9). The
indicator of the cooking zone starts to blink.
• To see the remaining time press on the
corresponding zone selector key, the display will
show the remaining time
• When the time is set, the countdown will begin and
the display will show the remaining time. There
will be a red dot in the right bottom corner of the
power display to indicate which are the cooking
zones is having this function turn on
• When the countdown function comes to an
end the corresponding zone will be switchd off
automatically.
• To deactivate the countdown time, press on the
corresponding zone selector key (i.e. )
• Press the timer key selector to adjust the time
to 00. The indicator of the cooking zone goes off.
Safety feature
Pan sensor (For induction zone only)
Each cooking zone is equipped with a pan sensor. The
cooking zone emits heat only when a suitable cookware
is placed on it. The display shows "U" if:
• The cookware is incompatible for induction
cooking.
• The base diameter of cookware is too small.
• The cookware is not centrally placed in the cooking
zone.
The hob will switch to 'Standby mode' with display
shows '--' after 1 minute; if no operation implemented,
the hob will switch off 1 minute later.
Residual heat warning
When switching off a cooking zone, if the temperature
of the zone is too warm to be touched, the display will
show "H".
Avoiod touching the hob surface over the cooking area.
Please pay special attention to children.
"H" is turned off when the cooking zone temperature
drops below a present temperature.
Automatic switch off
This hob is equipped with a safety switch which
automatically switches off the cooking zones after they
have been in continuous operation at different power
levels.
Suppose the front cooking zone is set to level 8, the
cooking zone will switch off after 2 hours of continous
operation, while the back cooking zone set to level 2
will switch off after 6 hours of continuous operation.
Power levels Cooking zone switches off after
1, 2, 3 8 hours
4, 5, 6 4 hours
7, 8, 9 2 hours
Useful Tip
• Always place cookware on the cooking zone before
switching on the appliance.
• Take care to keep the control panel clean and never
place the pans on the control panel sensors. The
electronic unit beneath it could be damaged.
7
WARNING:
Disconnect the power supply cord before carrying out
any cleaning or maintenance activities.
Cleaning the appliance
The appliance should be cleaned regularly, preferably
after each use.
• Do not use abrasive or corrosive cleaning agents as
these may scratch the surface.
• Avoid using hard, abrasive brushes or sponges.
• Never use steam cleaners or presure cleaners on
the appliance.
• Clean the hob with a damp soft cloth using and
mild detergent or suitable ceramic and stainless
steeel hob cleaner. Do not apply cleaner when the
hob is still hot as this could result in marking on the
surface. Wipe dry with a soft dry cloth. Ensure that
all cleaner residues are removed as residues can
burn onto the appliance next time it is used and
could cause possible damage to the surface.
• To remove more stubborn dirt, or if any sugary
deposits are melted on the hob during cooking,
remove the spills as soon as possible with a special
scraper while the surface is still hot. Allow the
appliance to cool down, and then clean the hob as
described above.
• *Scraper for glass ceramic can be purchased from
specialized shops.
Useful Tips:
• Allow the appliance to cool down to room
temperature before cleaning. Use a soft cloth to
dry surfaces that have been cleaned with water to
avoid water marks.
• To avoid food or liquid residues forming deposits
on the appliance surface, remove stains or spills as
soon as possible without waiting for the appliance
to cool.
MAINTENANCE AND CARE
The hob does not work
• Check that the main switch is turned on and any plug or
power cable is properly inserted in the electrical outlet.
The hob gives off a smell when used for the first time
• This is a normal occurrence. Please read ‘Using for the First
time’ in this manual.
The cooking zones not switching on or are not functioning
• Check if more than 10 seconds have passed since the
appliance was switched on.
• Check if the child lock function is activated.
• Check if several sensor keys were touched simultaneously.
Touch only one sensor key at a time.
The hob gives off a “buzzing sound” or “humming noise”
• Some cookware may produce a “buzzing sound” during
induction cooking on higher power settings. This is a normal
occurrence. The noise is a result of vibrations caused
by induced currents. The sound will decrease or cease
altogether when the power setting is reduced.
The appliance produces a “whirring sound”
• The hob has a ventilation cooling fan to help extend the
life of the appliance. When the hob is used extensively, the
fan comes on and creates a “whirring sound”. The fan may
continue to run after the appliance has been switched off.
This is a normal occurrence.
Pans cannot be detected
• Please read ”Choosing the Suitable Cookware” in this
manual
TROUBLESHOOT
FAILURE CODE AND INSPECTION ( FOR INDUCTION ZONE ONLY)
Failure Code Possible Causes What to do
E4/E5 Temperature sensor failure Please contact the after sales service.
E7/E8 Temperature sensor of the IGBT
failure Please contact the after sales service.
E2/E3 Abnormal supply voltage Please check whether power supply is normal. Restart
hob after power supply normal.
E6/E9 Induction hob overheat internally. Please restart if the induction hob cools down.
WARNING: Do not disassemble the unit by yourself in case of any dangers.
If the problem persists despite observing the above checks, please contact your local Rinnai Customer Care Center
for assistance.
Please quote the model number of your appliance as shown on the rating plate attached to your equipment.
For service calls under warranty, please note that it is necessary to provide your proof of purchase and valid
warranty card.

8
CAUTION
• This appliance shall only be serviced by authorized
personnel.
This appliance is to be installed only by an authorized
person according to the current local regulations and
in observation of the manufacturer’s instructions.
• Incorrect installation, for which the manufacturer
accepts no responsibility, may cause personal injury of
damage.
• Always disconnect the cooktop from mains
power supply before carrying out any maintenance
operations or repairs.
WARNING
• We would point out that the adhesive which
bonds the plastic laminate to the furniture must
withstand temperatures not less than 150 to avoid
delamination.
• The appliance must be housed in heat resistant
units.
• The walls of the units must be capable of resisting
temperatures of 75 above room temperature.
INSTALLATION INSTRUCTIONS
A
50mm
from the top of
countertop to
bottom metal cover
68mm
from the top of
countertop to
terminal block
at least 50 mm between the back side of the cut-out
and the back of the countertop
The cooktop can be built into a working surface 30 to
40 mm thick and 600 mm deep.
In order to install the induction hob into the kitchen
fixture, a hole with the dimensions shown in fig.4.1 has
to be made, keeping in consideration of the following:
• The cooktop shall not be installed directly above
a dishwasher, fridge, freezer, washing machine or
clothes dryer, as the humidity may damage the cooktop
electronics.
• If the cooktop is installed above an oven, the oven
shall be provided with cooling fan. The two electrical
supply with independent connections.
• The induction hob must be kept no less than 60 mm
away from any side wall.
• The rear wall must be at least 50 mm from the
induction hob.
• There must be a distance of at least 650 mm between
the hob and any wall cupboard or extractor hood
positioned immediately above (see fig. 4.2)
• The coatings of the walls of the unit or appliances
near the cooktop must be heat resistant.
IMPORTANT WARNING! This cooktop requires
adequate supply of fresh, cool air to fully function.
The base of the cooktop must have direct unrestricted
ventilation to the room where the cooktop is installed.
Follow the requirements of figure 4.3
If the hob is installed above an oven, maintain a
minimum distance of 55mm from the underside of the
hob to the top of the oven, or follow the distance as
instructed in the oven’s manufacturer’s manual. Follow
the higher distance if in doubt.

9
FASTENING THE COOKTOP
Each cooktop is supplied with a set of tabs and screws
to fasten it on units with a working surface from 3 to 4
cm deep.
The kit includes 4 tabs A and 4 self-threading screws B
(fig. 4.4)
• Cut the unit
• Turn the hob upside down and rest the glass side on
a cloth.
• Spread the seal C around the edge of the hob(fig. 4.5)
• Put tabs A into the mountings; only tighten screws B
a few turns.
• Make sure that the tabs are mounted correctly as
shown in the figure 4.4
• Put the cooktop into the hole cut into the unit and
position it correctly.
• Put tabs A into place, tooth D of the tabs should go
into the hole.
• Tighten screws B until the cooktop is completely
secured.
• Using a sharp tool cut off the part of gasket C which
protrudes from the cooktop. Take care not to damage
the workbench.

10
IMPORTANT: Installation must be carried out according to the manufacturer’s instructions. Incorrect installation
may cause harm and damage to people, animals or property, for which the manufacturer accepts no responsibility.
Before carrying out any work on the electrical section of the appliance, it must be disconnected from the mains.
Connection to a good earth wiring system is absolutely essential.
The manufacturer accepts no responsibility for any inconvenience caused by failure to comply with this rule.
ELECTRICAL REQUIREMENTS
• Connection to the electric power supply must be carried out by a qualified technician and following the
appropriate safety regulations.
• The appliance must be connected to the mains checking that the voltage corresponds to the value given in the
rating plate and that the electrical cable sections can withstand the load specified on the plate.
• If the hob is supplied without plug, fit a standard device which is suitable for the power absorbed by the
appliance and in conformity with the local rules in force.
• A suitable isolating switch providing full disconnection from the mains power supply shall be incorporated in the
permanent wiring, mounted and positioned to comply with the local wiring rules and regulations. The isolating
switch must be of an approved type and provide a 3 mm air gap contact separation in all poles.
• The power supply cable must not touch the hot parts and must be positioned so that it does not exceed 50℃
above ambient.
• Once the appliance has been installed, the power switch must always be in a accessible position.
N.B. For connections to the mains power supply, never use adaptors, reductions or multiple power points as
these may overheat and catch fire.
In the event that installation should require modifications to the mains supply wiring system, it is recommended
that a qualified technician be called to carry out substitution.
The technician will also have to verify that the cross-section of the electric cables on the power point match the
appliance’s power rating.
If the hob surface is cracked disconnect the appliance from the mains and contact the after-sales service.
Replacing the power cord must be done by a qualified electrician in accordance with the instructions
supplied by the manufacturer and in compliance with established electrical regulation.
Descriptions and illustrations in this booklet are given as simply indicative. The manufacturer reserves
the right, considering the characteristics of the models described here, at any time and without notice,
to make eventual necessary modifications for their construction or for commercial needs.
ELECTRICAL CONNECTION

11
WIRING DIAGRAM

12

13
Table of contents
Other Rinnai Hob manuals

Rinnai
Rinnai RB-2CGN Guide

Rinnai
Rinnai RB-3011E-CB User manual

Rinnai
Rinnai RB-63SSV-DL User manual

Rinnai
Rinnai JZY-11N User manual

Rinnai
Rinnai RB-7303S-GBSM Specification sheet

Rinnai
Rinnai RB-3011H-CB User manual

Rinnai
Rinnai RB-3002E-CB User manual

Rinnai
Rinnai RB-3311S-GBS User manual

Rinnai
Rinnai RB-27f User manual

Rinnai
Rinnai RB3CG User manual

Rinnai
Rinnai RRTB62S-G-LP User manual

Rinnai
Rinnai RB-12S-C User manual

Rinnai
Rinnai RB-7502D-SSS User manual

Rinnai
Rinnai RB-2CGS-RM User manual

Rinnai
Rinnai JZ-11G User manual

Rinnai
Rinnai RB7913G-CSSM Guide

Rinnai
Rinnai JZY-11S User manual

Rinnai
Rinnai RB-2MYG User manual

Rinnai
Rinnai RB-3002H-CB User manual

Rinnai
Rinnai RB-27f User manual