Roadragon LTS-3YT User manual

LTS-3YT User manual
User Manuel
LTS-3YT

LTS-3YT User manual
Content
Chapter One: Product Photo............................................................................................................................. 3
Chapter two: Product feature............................................................................................................................4
Chapter three: Technical Parameters................................................................................................................ 5
3.1 【Parameter】................................................................................................................................ 5
3.2【4G frequencies in different countries】..........................................................................................5
Chapter 4: Function.......................................................................................................................................... 6
4.1 【Basic function】......................................................................................................................... 6
4.1.1 Position......................................................................................................................6
4.1.2 AGPS......................................................................................................................6
4.1.3 LBS........................................................................................................................... 6
4.1.4 Battery Level Detect..................................................................................................7
4.1.5 Intelligent Tracking................................................................................................... 7
4.1.6 Clock mode............................................................................................................... 7
4.1.7 Backend Specific Commands................................................................................... 7
4.1.8 Blind zone compensation.......................................................................................... 7
4.1.9 E-Sim.........................................................................................................................8
4.2【Extention/Optional Functions】..................................................................................................... 8
4.2.1 Light Sensor.............................................................................................................. 8
4.2.2 Motion Detect............................................................................................................8
4.2.3 Temperature and humidity detect..............................................................................8
Chapter Five: Installation Guide.......................................................................................................................9
5.1 【Installation diagram】................................................................................................................ 9
5.2 【Installation and debugging】....................................................................................................10
5.2.1 SIM card installation............................................................................................... 10
5.2.2Main Unit power on................................................................................................. 10
5.2.3 Parameter setting..................................................................................................... 10
5.3 【Key parameter setting】........................................................................................................... 10
5.3.1 Fixed mode..............................................................................................................10
5.3.2 Track mode..............................................................................................................11
5.3.3 Position mode..........................................................................................................11
5.3.4 Clock mode............................................................................................................. 11
5.3.5 Motion and static mode...........................................................................................12
5.4【Common SMS command list】....................................................................................................12

LTS-3YT User manual
1
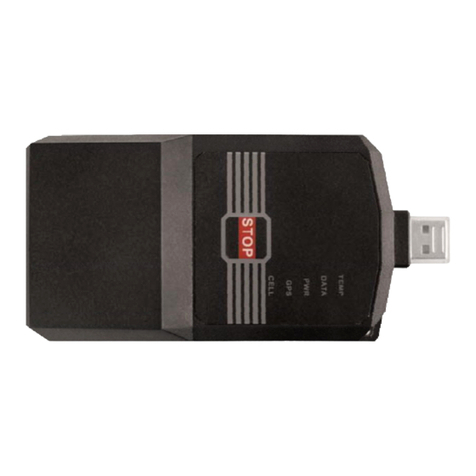
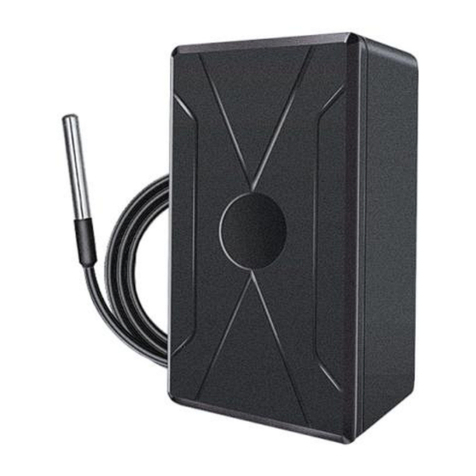
Chapter One: Product Photo

Chapter two: Product feature
1. This product is designed for the applications on container management, it can
replace the air vent of the container, which will not affect the integrity of the
container, meanwhile for a concealable installation.
2. The standby time is long. If the data upload interval is one packet every 24 or 48
hours and the working time is about 5-10 years, the battery can support different
battery capacity to meet different needs of customers.
3. Low Voltage: The working voltage can be decreased to 10μA during sleep mode,
to make sure the unit would work longer.
4. The device supports 4G, 3G, 2g networks in most parts of the world, which can
almost meet the needs of all regions of the world and cross-regional use. 4G
network supports tdd lte/fdd lte,3g network, supports wcdma,2g network,
supports gsm/gprs
5. Wireless, easy to install, the product has double waterproof function design, it is
completely applicable to the outdoors usage, anti-water, salt, sun, aging and other
tough environment
6. Support E-Sim with better stability and vibration proof.

Chapter three: Technical Parameters
3.1 【Parameter】
Characteristic
s
Description
Working
Voltage
Built in Unchangeable Lithium battery
(3.6V,5400~10800mAh)
Optional 5400/8100/10800mAh
Power
Consuming
Average working current<100mA;Sleep
current<20uA;
Communication
4G network: TDD LTE/ FDD LTE
3G network: WCDMA
2G network: GSM/ GPRS
GNSS
Support GPS、BD Dual mode
GPS L1:1575.42MHz,C/A Code
BD B1: 1561.098MHz
Dimension
205mm*68mm*27mm(L*W*H)
Weight
200g±5g
Waterproof
IP67
Double waterproof function
Working
Temperature
-20℃~70℃
Relative
humidity
5%~95%
3.2【4G frequencies in different countries】
Regions
Frequencies
China/India
TDD LTE:B38/B39/B40/B41
FDD LTE:B1/B3/B5/B8
WCDMA:B1/B8
GSM:900/1800MHz
Europe/Middle
TDD LTE:B38/B40/B41

East/Africa
FDD LTE:B1/B3/B5/B7/B8/B20
WCDMA:B1/B5/B8
GSM:B3/B8
North America
FDD LTE:B2/B4/B5/B12/B13/B14
WCDMA:B2/B4/B5
Australia/Taiwa
n/Brazil
FDD LTE:B1/B3/B4/B5/B7/B8/B28
WCDMA:B1/B2/B5/B8
GSM:B2/B3/B5/B8
Chapter 4: Function
4.1 【Basic function】
4.1.1 Position
The default setting is the terminal would send one packet each 24 hours, the packet information
includes: Position status, longitude and latitude, GSM Signal Strength, GPS numbers, battery voltage
etc, the upload interval can be configured, the unit is able to work no less than 365 days.
4.1.2 AGPS
The terminal is with APGS function, when the terminal connects GPRS; AGPS is used for speeding up
the position speed and improve the position accuracy
4.1.3 LBS
The default position mode is by GPS, when GPS enters into the blind zone and can not position
accurately, the terminal will switch to LBS, LBS provides the reference location which is not very
accurate

4.1.4 Battery Level Detect
The terminal will upload the battery level status together with the location data pack, and display the
battery level on the backend so the user could well know the balance battery , and meanwhile display
the current transmission time and the balance battery level of the next uploading pack, so the user
could have clear view on the terminal status
4.1.5 Intelligent Tracking
In case of found the door of the container is stolen or in other emergency cases and the real time
location of the container needs to be tracker, a SMS can be sent or send a command from the backend,
when the terminal starts work next time, it will receive this command and enter into track mode, and
upload the location data according to the preconfigured interval by customer until a stop tracking
command is received
4.1.6 Clock mode
The terminal could verify the timely wake up time points, maximum 4 points can be set for position
that is more accurate and connection to the server, this function could use SMS command or backend
command to set
4.1.7 Backend Specific Commands
Since the working time of the terminal is short, it is rare to receive the SMS, to ensure the command
sending efficiently, the backend uses a specific commands for MT06CW which can preset the
command, when the terminal is online, the backend will automatic send this command, to make sure
the commands is properly received.
4.1.8 Blind zone compensation
When the terminal enter into blind zone when in sleep mode, it will store the trace data according to
the preconfigured time interval and it will upload the data in the blind zone to the backend,

4.1.9 E-Sim
This terminal support E-Sim which could improve the product stability and to prevent the card slot is
loosen or the SIM is removed.
4.2【Extention/Optional Functions】
4.2.1 Light Sensor
Built in high sensitive light sensor module, it could detect the light changes from dark to light and
wake up the terminal to send alarm, this function is for detecting the door open alarm purpose.
4.2.2 Motion Detect
Built in high sensitive, low consumption G-sensor to detect whether the equipment is in motion or
static status and providing the real time moving data.
4.2.3 Temperature and humidity detect
The temperature and humidity detection interface is reserved inside the device, and the digital
temperature and humidity sensor can be connected to detect the temperature and humidity in the
container in real time.

Chapter Five: Installation Guide
5.1 【Installation diagram】
Battery
Switch
SIM card slot
Red LED:
Fast blink:GPRS connecting
Slow Blink:GPRS Connected
Solid on:Module error
Light sensor
E-SIM
Green LED:
Solid on-Position
Blink:LBS
Off:Unpositioned

5.2 【Installation and debugging】
5.2.1 SIM card installation
Open the top cover of the terminal, insert the prepared SIM card into the SIM cardholder, and then
confirm that the SIM card button is well placed. Please make sure that the SIM card has the GPRS
function available in advance and write down the SIM card number.
If the terminal is with built in E-SIM, no need to insert SIM card
5.2.2Main Unit power on
After installing the SIM card, turn the battery switch to the ON position. When the red light starts to
flash, indicating that the terminal is powered on.
5.2.3 Parameter setting
TCP/UDP connection mode setting
For example, the client's server IP is: 119.145.40.64, port number: 8881. If it is connected by TCP, use
SMS to edit: *88*1119145040064*8881*1#; if it is UDP connection, edit:
*88*1119145040064*8881*0#. The terminal will reply: set ok, the setting is successful.
5.3 【Key parameter setting】
5.3.1 Fixed mode
Command format:HX,T#
Command description:T:wake up time,unit:minutes,default T:1440,value range :10-43200f
minutes;for example,HX,1440#,set the wake up time is 1440 minutes (24 hours)。
Remark: Normally we use the default setting 1440, if set shorter wakeup time, the working time of the
terminal will be reduced.

5.3.2 Track mode
Command format:ZZ,<A>[,T1,T2]#
Description:track mode
A: A=1, Enter track mode A=0 Exit track mode
T1: Set upload interval in track mode,Unit:Seconds
T2: Set the continue tracking upload interval,unit: minutes
ZZ,1,30,60# enter track model,upload interval is 30 seconds, enter sleep mode after 60 minutes
ZZ,0# Exit track mode
5.3.3 Position mode
Command format:LBS,A#
Description
A=3:WIFI Position Priority;A=2:Switch off position function ;A=1:LBS+WIFI mode;A=0:
GPS position priority;default A=3
Examples:LBS,1# enter LBS+WIFI position mode,Switch off GPS
5.3.4 Clock mode
Command Format:WAKEUP,[T1[,T2[,T3[,T4]]]]#
Description: Set a multiple points upload parameter, maximum 4 points T1…T4, it is allowed to set 1
clocks or more clocks, maximum supports 4
Example:WAKEUP,0800,1200,1600,2000#;
They are all clock points which will wake up at 8:00、12:00、16:00、20:00 and upload terminal
parameter info
Remark: After entering into tracking mode, please remember to send command to make the device exit
track mode, otherwise the power will be consumed fast if upload data frequently.

5.3.5 Motion and static mode
Configuration
SMS Command
Set motion and
static mode 1
MODE,6,T1,T2,A#
or
MS, T1,T2[,A]#
For example:
MODE,6,60,300,1# Indicates
upload interval in motion
status is 60 minutes, upload
interval in static status is 300
minutes, motion alarm on
T1:Upload interval in motion status , value
5-43200 minutes
T2: Upload interval in static status, value
5-43200 minutes or set clock mode, format
(HH:MM)
A:Motion Alarm on, 0:Motion Alarm off
Set motion and
static mode 2
(Optional)
MODE,8,T1,T2,A,B#
For example:
MODE,8,2,1440,0,1#
Indicates upload interval in
motion status is 2 minutes,
upload interval in static status
is 1440 minutes, motion alarm
on, after motion always keep
tracking by interval 2
minutes,only exist command
MODE,0# can stop the tracking
T1: The return interval for entering the
tracking mode during exercise, the value
range is 1-5 minutes
T2: Return interval at rest (value range
5-43200 minutes) or alarm clock (format
HH:MM)
A: 1-Quit tracking at static, 0-continuous
tracking
B: 1- turn on the vibration alarm, 0- turn off
the vibration alarm
You can exit the tracking mode by command;
B=1 and the device is awakened by vibration,
and the vibration alarm will be reported after
going online;
Note:
Device can’t be wake up by vibration while in motion mode
Device can be wake up by vibration while in static mode
After wake up, there should be 3 seconds vibration in 6 seconds, device will turn on cellular
module and upload position data, otherwise it would enter into sleep mode again and maintain
the previous configuration parameters
5.4【Common SMS command list】
HX,<T>#
Upload Interval in Sleep Mode
default: 1440 minutes ,as 24hours
T:wake up time,unit: minutes
value range :5-43200 minutes

For example:HX,120#, set the wake up time is 120 minutes.
ZZ,<A>[,T1,T2]#
Track Mode
A: A=1, Enter track mode A=0 Exit track mode
T1: Set upload interval in track mode,Unit:second
value range:5-300 seconds
T2: Set the continue tracking upload interval,unit: minutes
value range:5-57600 minutes
For example:ZZ,1,10,60#
enter track model,upload interval is 10 seconds, enter sleep mode
after 60 minutes
WAKEUP,T1[,T2[,T3
[,T4]]]#
Set a multiple points upload parameter, maximum 4 points T1…T4, it
is allowed to set 1 clocks or more clocks, maximum supports 4
For example:WAKEUP,0800,1000,1530,1900#
They are all clock points which will wake up at 8:00、10:00、15:30、
19:00 and upload terminal parameter info
FALL,A#
A=3 Open tamper alarm,no track
A=2 Open tamper alarm,track 15 minutes,every 300 seconds
A=1 Close tamper alarm
A=0 Open tamper alarm,track 60 minutes,every 60 seconds
Default :A=0
For example; FALL,0# ,Open tamper alarm,track 60 minutes,every 60 seconds
UTC,TTTT#
Set Time zone Range 780~-720
For example:UTC,480#,Platform positioning time is Beijing time
*11*4#
Check terminal communication status
“Online” represent online
"Offline" represent offline
Link represent connect to the server
Ip, port, apn, terminal id, software version number followed by status
*22*1#
terminal restore to factory
*22*4#
Restart terminal
*77*0 number#
Set center number 1
For example :*77*0123456# center number 1:123456
*77*0# delete center number 1
*77*2 number#
Set center number 2
For example:*77*2123456# center number 2:123456
*77*2# delete center number 2
VPN,apn,user,pswd#
Set APN, user name,passport
For example:VPN,APNAPDemo.com.attz,internet,internet#

APN:APNAPDemo.com.attz
Username: internet
Password: internet
VPN,APNAPDemo.com.attz# Set APN
IP, ip or dns,port,type#
IP,119.23.233.52,6000,1#
Set primary server IP as 119.23.233.52,Port as 6000,communication mode as TCP
IP,www.365qczx.com,6000,0#
Set primary server domain name as www.365qczx.com,port as 6000,
communication mode as UDP
IP2,ip or dns,port,type#
IP2,119.23.233.52,6000,1#
Set standby server IP as 119.23.233.52, Port as 6000,communication mode as TCP
IP2,www.365qczx.com,6000,0#
Set standby server domain name as www.365qczx.com,port as 6000,
communication mode UDP
IP2,,0,0# delete standby server parameter
LTS-J10YS Usage Requirements
The users are required to strict using the terminal according to the operating instructions ,any
disassemble, collide, charge, soak, over 80 °C, human failure, force majeure damage, etc. may cause
short circuit, insufficient working time, battery deformation, liquid leakage, explosion, no warranty
and compensation will be provided by Dragon Bridge.
Table of contents
Other Roadragon GPS manuals
Roadragon
Roadragon LTS-60TH Configuration guide

Roadragon
Roadragon LLS-300T Configuration guide

Roadragon
Roadragon LTS-50DS Configuration guide
Roadragon
Roadragon BK-800 User manual

Roadragon
Roadragon MT-009 4G User manual
Roadragon
Roadragon G-M100 User manual

Roadragon
Roadragon G-MT008G User manual

Roadragon
Roadragon G-V803 User manual
Roadragon
Roadragon GLL-150 User manual
Roadragon
Roadragon LTS-100D Configuration guide
