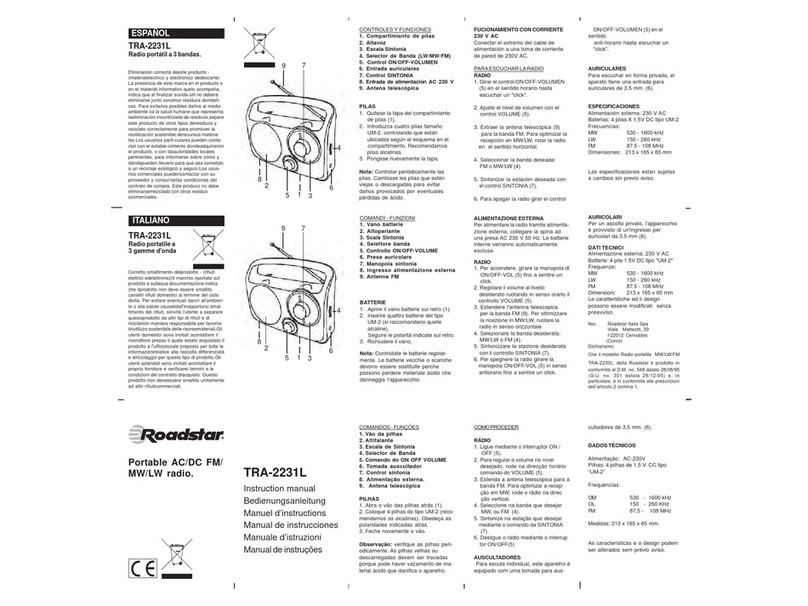
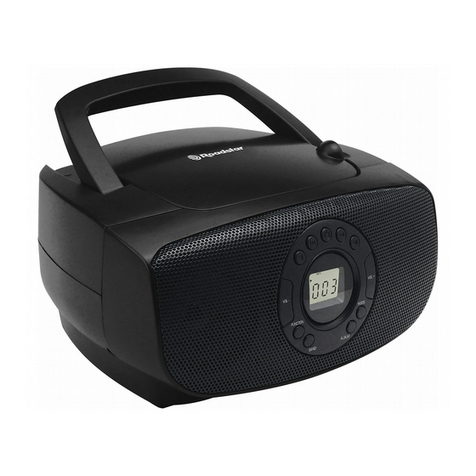
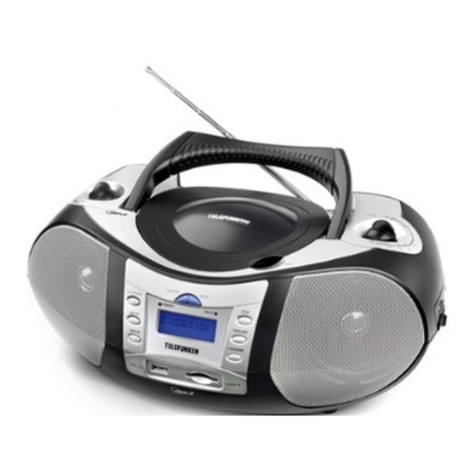
Roadstar TRA-2425PSW User manual

www.roadstar.com
TRA-2425PSW
User manual
Bedienungsanleitung
Manuel d’instructions
Manuale d’istruzioni
Manual de instrucciones
Manual de instruções
Gebruikers handleiding

INDEX
English Page 1
Deutsch Seite 5
Français Page 9
Italiano Pagina 13
Español Página 17
Português Página 21
Nederlands Page 25
Your new unit was manufactured and
assembled under strict ROADSTAR
quality control. Thank-you for purcha-
sing our product for your music enjo-
yment. Before operating the unit, please
read this instruction manual carefully.
Keep it also handy for further future re-
ferences.
Votre nouvel appareil a été fabriqué et
monté en étant soumis aux nombreaux
tests ROADSTAR. Nous espérons que
cet appareil vous donnera entière sati-
sfaction. Avant de vous adonner à ces
activités, veuillez lire attentivement ce
manuel d’instructions. Conservez-le à
portée de main à fin de référence ulté-
rieure.
Vuestro nuevo sistema ha sido construi-
do según las normas estrictas de
control de calidad ROADSTAR. Le felici-
tamos y le damos las gracias por su e-
lección de este aparado. Por favor leer
el manual antes de poner en funciona-
miento el equipo y guardar esta docu-
mentación en case de que se necesite
nuevamente.
Ihr neues Gerät wurde unter Beachtung
der strengen ROADSTAR Qualitätsvor-
schriften gefertigt. Wir danken Ihnen für
den Kauf unseres Produktes und wün-
schen Ihnen optimalen Hörgenuss. Bitte
lesen Sie diese Bedienungsanleitung
durch, und heben Sie sie auf, um jeder-
zeit darin nachschlagen zu können.
Il vostro nuovo apparecchio é stato pro-
dotto ed assemblato sotto lo stretto con-
trollo di qualità ROADSTAR. Vi ringrazia-
mo di aver acquistato un nostro prodotto
per il vostro piacere d’ascolto. Prima di
procedere all'utilizzo dell'apparecchio,
leggete attentamente il manuale
d’istruzioni e tenetelo sempre a portata
di mano per futuri riferimenti.
Seu novo aparelho foi construido e mon-
tado sob o estrito controle de qualidade
da ROADSTAR. Agradecemos por ter
comprado nosso produto para a sua di-
versão. Antes de usar esta unidade é
necessário ler com atençâo este manual
de instruções pare que possa ser usada
apropriadamente; mantenha o manual
ao seu alcance para outras informações.

TRA-2425PSW
Front view

1 English
LOCATION OF CONTROLS
1. LCD Display
2. Mode Button
3. Set Button
4. Tuning Knob
5. Power On / Off Button
6. Headphones output
7. Volume Knob
8. Preset Memory -
9. Preset Memory +
10. Snooze / Sleep Button
11. Alarm Button
12. SW Band Button
13. AM / FM Band Button
14. Battery Compartment
15. Speaker
16. Power Socket
17. Handle
18. FM Antenna
POWER SUPPLY
AC Power Operation
Connect the AC Power Cord to your AC household mains outlet and switch on the
mains supply. Make sure the voltage is compatible.
Battery Operation
1. Remove mains lead from the unit for battery operation.
2. Open the Battery Compartment at the back of the radio and insert four UM3 batte-
ries following the polarity diagramshown inside the battery compartment.
3. Batteries should be removed form the compartment if the unit is not to be used for
some time.
4. Flat batteries should be removed from the unit to avoid leakage
RADIO OPERATION
1. Press the Power ON/OFF Button (5) to power ON the unit.
2. Choose the radio wave band (AM, FM or SW) using the BAND Button (12 or 13)
3. Search for the station of your choice using the Tuning knob (4).
4. To switch off the radio, press the Power button (5) to OFF.
Antenna
For FM reception there is a built-in telescopic FM antenna (18) at the rear of the unit.
Extend the antenna and move it around to obtain the best reception.
For AM / SW reception the signals are picked up through a built-in ferrite antenna.
Your may have to orient the unit to obtain the best reception.

2
English
Store Radio Stations manually
This unit can store 24 stations (8 FM, 8 AM and 8 SW).
1. Tune the desired station as explained above
2. Press the SET button (3) to enter in preset mode
3. The icon “CH” flash and appear in the display
4. Press the M+ or M- buttons (8 or 9) to choose the preset number, from 1 to 8.
5. Press the SET button (3) to confirm the memory setting.
Store Radio Stations automatically
Keep pressed the SET button (3) 3 seconds and the Radio will be stored in the me-
mory sequencially.
CLOCK SETTING
Make sure the POWER switch is set to the 'Off' position. The time or alarm time can-
not be set or adjusted while the unit is 'On'.
1. Press the SET button (3) and the display will show the minute 00 will flash and
turn the Tuning Knob (4) to select the minute.
2. Press the SET button (3) again to confirmsetting, then the Display will show 00:00
and the first 00 will flash, then turn the Tuning Knob (4) to select the correct hours.
3. Press the SET button (3) again to confirmsetting, then the Display will show 24H
will flash, then turn the Tuning Knob (4) to select the 12H or 24H.
4. Press the SET button (3) to confirm the clock setting,
CALENDAR SETTING
When the display shows the time, press MODE button (2) and shows calendar mode.
1. Press SET button once (3) to select the year
2. Turn the Tuning Knob (4) to set the correct year
3. Press SET button (3) again to select the month
4. Turn the Tuning Knob (4) to set the correct month
5. Press SET button (3) again to select the day
6. Turn the Tuning Knob (4) to set the correct day
7. Press SET button (3) to confirm the calendar setting
ALARM SETTING
Make sure the POWER switch is set to the 'Off' position. The time or alarm time can-
not be set or adjusted while the unit is 'On'.
1. Press the Alarm button (11) and select the Alarm 1 or Alarm 2
2. Press the SET button (3) and the display will show the minute 00 will flash and
turn the Tuning Knob (4) to select the minute.
3. Press the SET button (3) again to confirmsetting, then the Display will show 00:00
and the first 00 will flash, then turn the Tuning Knob (4) to select the correct hours.
4. Press SET button (3) to confirm the alarm setting.
5. Press ALARM button (11) to enter in normal clockmode.

3 English
ALARM OFF
During Alarm on, press SET button (3) or ON/OFF button (5). The alarm sound goes
off but theAlarmsetting remains.
ALARM VOLUME SETTING
In Radio Alarm, the Alarm Volume is setwith the last volume level used during
playback. In BuzzerAlarm, theAlarmlevel is fixed.
WAKE TO BUZZER ALARM
Alarm1 and Alarm2 both have “wake to buzzer Alarm” function
1. Set the Alarm time as shown above
2. Turn the Tuning knob to set Alarm to wake up to Buzzer alarm
WAKE TO MUSIC
1. Repeat the steps of Alarm Time Setting Alarm1 and Alarm2 both have the “wake
tomusic” function.
2. Press the Alarm button (11) once to set the desired Alarm 1 time.
3. Press the Alarm button (11) twice to set the desired Alarm 2 time.
4. Turn the Tuning Knob (4) once after alarm setting to activate wake to Radio fun-
ction.
5. After finish the Alaem 1 or Alarm 2 time setting, press the SET button (3) once to
confirm alarm timer setting.
6. The RadioMemory icon appear in the display. During that time, turn the Tuning +/-
knob to select the desired Radio station stored in the memory before.
7. Press the Set button (3) to confirm.
8. Press the ON/OFF button (5) to turn ON the unit, then adjust the Volume to the
desired level. Press theON/OFF button (5) to switch OFF theRadio, then it switch
ON automatically at the preset Alarm time.
SLEEP FUNCTION
Press ON button (5) to switch ON the radio.Press the Snooze/SleepButton (10) se-
quentiually to display will show 90, press again is 80/70/60/50.....10, then press again
is off. After set the Sleep function and when finish, then the unit will off automatically.
SNOOZE
The alarm can be temporarily turned off manually by pressing the SNOOZE button
(10); the alarm will turn back on 5 minutes later automatically. This feature can be re-
peated endlessly.
HEADPHONES
Headphones should have a 3.5mmdiameter stereo plug and an impedance of 8-32
ohms. When headphones are connected (6), the speaker is automatically disconnec-
ted.

4
English
SPECIFICATIONS
AC: 230V ~ 50Hz
DC: 4 x UM-3
Radio Frequency Coverage
FM: 87.5 - 108 MHz
AM: 522 - 1620 kHz
SW: 3,16 - 18,10 MHz in 10 Bands
Speaker 8 Ohms, 3-5W
Output Power 0.8Wrms, 10% THD
General
Headphones 3.5mm jack plug, 8-32W
Impedance 32Ohms
Specifications and the design are subject to possible modifications without notice due
to improvement.
This marking shown on the product or its literature, indicates that it should not be disposed with
other household wastes at the end of its working life. To prevent possible harm to the environment
or human health from uncontrolled waste disposal, please separate this from other types of wa-
stes and recycle it responsibly to promote the sustainable reuse of material resources. Household
users should contact the retailer where they purchased this product, or their local government
office, for details of where and how they can take this item for environmentally safe recycling. Bu-
siness users should contact their supplier and check the terms and conditions of the purchase
contract. This product should not be mixed with other commercial wastes for disposal.
CORRECT DISPOSAL OF THIS PRODUCT
(Waste Electrical & Electronic Equipment)
WARNINGS
The exclamation point within the triangle is a warning sign alerting the user of important instruc-
tions accompanying the product.
The lightening flash with arrowhead symbol within the triangle is a warning sign alerting the user
of “dangerous voltage” inside the unit.
To reduce the risk of electric shock, do not remove the cover. No user serviceable parts inside
the unit. Refer all servicing to qualified personnel.
This unit operates on 230V ~ 50Hz. If the unit is not used for a long period of time, remove the
plug from the AC mains.
Ensure all connections are properly made before operating the unit.
This unit must not be exposed to moisture or rain.
This unit should be positioned so that it is properly ventilated. Avoid placing it, for example, close
to curtains, on the carpet or in a built-in installation such as a bookcase.
Do not expose this unit to direct sunlight or heat radiating sources.

5 Deutsch
BEDIENELEMENTE
1. LCD Display
2. Mode-Taste (Tuner / Uhr / Alarm)
3. Set-Taste
4. Tuning Knob
5. Power On / Off-Taste
6. Kopfhörerbuchse
7. Lautstärkeregler
8. Speicher M-
9. Speicher M +
10. Snooze / Sleep-Taste
11. Alarmknopf
12. SW Knopf
13. AM / FM-Taste
14. Batteriefach
15. Lautsprecher
16. Netzkabel
17. Griff
18. FM-Antenne
STROMVERSORGUNG
Wechselstrombetrieb
Schließen Sie den Stecker über eine Steckdose an eine Versorgung mit 230 VAC,~50
Hz an.
Batteriebetrieb
1. Nehmen Sie das Gerät vom Netz für Batteriebetrieb führen.
2. Öffnen Sie das Batteriefach auf der Rückseite des Radios und legen Sie vier UM3
Batterien entsprechend der Polarität Diagramm im Batteriefach dargestellt.
3. Batterien sollten entfernt bilden die Fach werden, wenn das Gerät nicht für länge-
re Zeit nich benutzt werden.
4. Leere Batterien aus dem Gerät entfernt werden, um ein Auslaufen zu vermeiden
AM/FM-SW TUNER
Drücken Sie die Power ON / OFF-Taste (5), um das Gerät einzuschalten.
Wählen Sie den Radio-Wellenbereich (MW, UKW oder SW) mit der BAND-Taste (12
oder 13).
Suche nach der Station Ihrer Wahl mit dem Tuning-Regler (4).
Um das Radio auszuschalten, drücken Sie die Power-Taste (5) auf OFF.
Antenne
Für FM-Empfang ist ein bereits installierter FM-Antennendraht auf der Rückseite des
Gerätes vorhanden (18). Drehen Sie den Draht, um den besten Empfang zu erhalten.
Für MW-Empfang werden die Signale über eine eingebaute Ferritantenne erfasst.
Gegebenenfalls müssen Sie das Gerät für optimalen Empfang ausrichten.

6
Deutsch
Speichern von Radiosendern manuell
Dieses Gerät kann 24 Stationen (8 FM, 8 MW und 8 SW).
• Stellen Sie den gewünschten Sender wie oben beschrieben
• Drücken Sie die SET-Taste (3) im Preset-Modus geben
• Das Symbol "CH" Blitz und im Display erscheinen
• Drücken Sie die M+ oder M- Taste (8 oder 9), um die Preset-Nummer wählen, 1-8.
• Drücken Sie die SET-Taste (3), um den Speicher Einstellung zu bestätigen.
Radiosender automatisch speichern
Gedrückt halten die SET-Taste (3) 3 Sekunden, und das Radio im Speicher sequen-
ziell werden.
UHR OPERATION
Stellen Sie sicher, dass die POWER-Schalter auf 'Aus' Position gesetzt ist. Die Zeit
oder Weckzeit kann nicht eingestellt oder angepasst werden, während das Gerät 'On'.
• Drücken Sie die SET-Taste (3) und das Display zeigt die Minute 00 blinkt, und drü-
cken Sie Tune + / - (4), um die Minuten auszuwählen.
• Drücken Sie die SET-Taste (3) erneut, um die Einstellung zu bestätigen, wird dieAn-
zeige 00:00 an und die ersten 00 blinkt, und drücken Sie dann Tune + / - (4), um die
richtigen Stunden wählen.
• Drücken Sie die SET-Taste (3) erneut, um die Einstellung zu bestätigen, dann er-
scheint auf dem Display 24H blinkt, und drücken Sie dann Tune + / - (4), um die
12H oder 24H auszuwählen.
• Drücken Sie die SET-Taste (3), um die Einstellung zu bestätigen Uhr.
KALENDEREINSTELLUNG
Wenn das Display die Uhrzeit anzuzeigen, drücken Sie die MODE-Taste (2) einmal,
zeigen Sie Kalender-Modus.
• Drücken Sie SET-Taste einmal (3), um das Jahr wählen
• Drehen Sie den Tune + / - (4), um das richtige Jahr
• Drücken Sie die SET-Taste (3) erneut, um den Monat auszuwählen
• Drehen Sie den Tune + / - (4), um den richtigen Monat
Drücken Sie die SET-Taste (3) erneut, um den Tag auszuwählen
• Drehen Sie den Tune + / - (4), um den richtigen Tag
• Drücken Sie die SET-Taste (3), um die Einstellung zu bestätigen Kalender
ALARMEINSTELLUNG
Stellen Sie sicher, dass die POWER-Schalter auf 'Aus' Position gesetzt ist. Die Zeit
oder Weckzeit kann nicht sein gesetzt oder eingestellt werden, während das Gerät ist
'On'.
• Drücken Sie die Alarm-Taste (11) und wählen Sie den Alarm 1 oder Alarm 2

7 Deutsch
• Drücken Sie die SET-Taste (3) und das Display zeigt die Minute 00 blinkt, und drü-
cken Sie Tune + / - (4), um die Minuten auszuwählen.
• Drücken Sie die SET-Taste (3) erneut, um die Einstellung zu bestätigen, wird dieAn-
zeige 00:00 an und die ersten 00 blinkt, und drücken Sie dann Tune + / - (4), um die
richtigen Stunden wählen.
• Drücken Sie die SET-Taste (3), um die Einstellung zu bestätigen Alarm
• Drücken Sie ALARM-Taste (11), im normalen Takt zu gelangen
Alarm OFF
WährendAlarm, drücken Sie die Taste SET (3) oder ON / OFF-Taste (5). Der Alarmton
erlischt aber dieAlarm-Einstellung bleibt.
Alarm Lautstärkeeinstellung
• Im Radio-Alarm, wird der Alarm mit dem letzten Volume Lautstärke während der
Wiedergabe verwendet wird.
• InAlarmton, wird die Alarm-Pegel fixiert.
Aufwachen mit BUZZER ALARM
• Alarm 1 und Alarm 2 haben beide Funktion ", um den Summer Alarm wecken"
• Stellen Sie die Weckzeit wie oben gezeigt
• Drehen Sie den Tuning-Regler, um Alarm eingestellt aufwachen, um Summerwar-
nung
Aufwachen mit Musik
• Wiederholen Sie die Schritte Weckzeiteinstellung,Alarm 1 und Alarm 2 haben beide
das "Aufwachen mit Musik"-Funktion.
• Drücken Sie die Alarm-Taste (11) , um die gewünschte Zeit für Alarm 1 eingestellt.
• Drücken Sie die Alarm-Taste (11) zweimal, um die gewünschte Zeit einzustellen A-
larm 2.
• Drehen Sie den Tune + / - (4) einmal nachAlarm EinstellungAufwachen mit Radio-
Funktion zu aktivieren.
• Nach Beendigung der Alarm 1 oderAlarm 2 Einstellung der Uhrzeit drücken Sie die
SET-Taste (3) einmal, um den Alarm-Timer-Einstellung zu bestätigen.
SLEEP-FUNKTION
Drücken Sie ON-Taste (5), um das Radio einzuschalten. Drücken Sie die Snooze /
Sleep Taste (10) angezeigt wird 90 zeige, drücken Sie wieder 80/70/60/50.....10, und
drücken Sie dann wieder ausgeschaltet ist.
SCHLUMMERFUNKTION
DerAlarm kann vorübergehend ausgeschaltet werden manuell durch Drücken der Ta-
ste SNOOZE (10), wird der Alarm wieder einzuschalten 5 min später automatisch.
Diese Funktion kann endlos wiederholt werden.

8
Deutsch
Die Kennzeichnung auf dem Produkt bzw. auf der dazugehörigen Literatur gibt an, dass es nach seiner Leben-
sdauer nicht zusammen mit dem normalen HaushaltsmüIl entsorgt werden darf. Entsorgen Sie dieses Gerat
bitte getrennt von anderen Abfallen, um der Umwelt bzw. der menschl i chen Gesundhei t ni cht durch unkontrol l
i erte Mül l besei ti gung zu schaden. Recycel n Si e das Gerät, um di e nachhaltige Wiederverwertung von stof-
flichen Ressourcen zu fördern. Private Nutzer sollten den Händler, bei dem das Produkt gekauft wurde, oder die
zuständigen Behörden kontaktieren, um in Erfahrung zu bringen, wie sie das Gerät auf umweltfreundliche Weise
recyceln können. Gewerbliche Nutzer sollten sich an Ihren Lieferanten wenden und die Bedingungen des Ver-
kaufsvertrags konsultieren. Dieses Produkt darf nicht zusammen mit anderem Gewerbemüll entsorgt werden.
KORREKTE ENTSORGUNG DIESES PRODUKTS
(Elektromüll)
SICHERHEITSHINWEISE
Das Ausrufszeichen im Dreieck weist den Benutzer auf wichtige Bedienungs- und Wartungsanwei-
sungen (Service) in diesem Handbuch hin, die unbedingt zu befolgen sind.
Um die Gefahr elektrischer Schläge auszuschliessen, Gehäuse auf keinen Fall abnehmen.
Im Innem befinden sich keine vom Benutzer selbst instandsetz-baren Teile. Reparaturen dürfen nur
von einer autorisierten Fachwerkstatt durchgeführt werden.
Dieses Gerät ist für 230V ~ 50Hz Netzspannung ausgelegt. Bei längerer Nichtbenutzung des Geräts
ziehen Sie den Stecker aus der Steckdose.
Setzen Sie das Gerät weder Feuchtigkeit noch Regen aus.
Schalten Sie das System erst dann ein, wenn Sie alle Verbindungen genau geprüft haben.
Stellen Sie das Gerät so auf, dass immer eine ungestörte Frischluftzufuhr sichergestellt ist. Es ist
zum beispiel keinesfalls auf Teppiche und in der Nähe von Gardinen zu stellen oder in Bücherregale
einzubauen.
Setzen Sie das Gerät weder direkter Sonneneinstrahlung noch Wärmequellen aus.
KOPFHÖHRER
An dieses Gerät können Kopfhörer(nicht mit geliefert)mit einem Stecker von 3,5 mm
und einer Impedanz von mindestens 8 Ohm angeschlossen werden. Der Lautspre-
cher werden bei Anschluss der Kopfhörer an die KOPFHÖRERBUCHSEN (6) auto-
matisch abgeschaltet.
TECHNISCHE DATEN
AC: 230 V ~ 50 Hz
DC: 4 x UM-3
Radiofrequenzbereich
FM: 87.5 - 108 MHz
AM: 522 - 1620 kHz
SW: 3,16 - 18,10 MHz in 10 Bands
Lautsprecher 8 Ohm, 3-5 W
Ausgangsleistung: 0,8 Wrms, 10% THD
Allgemeine
Kopfhörer: 3,5 mm Klinke Stecker, 8-32W
Ausführung und Spezifikationen unterliegen unangekündigten Änderungen.

9 Français
POSITIONNEMENT DES COMMANDES
1. Ecran LCD
2. Bouton MODE (Tuner / horloge / alarme)
3. Bouton SET
4. Bouton Tuning
5. Bouton Marche / Arrêt
6. Prise entrée casque
7. Bouton volume
8. Bouton mémoire préréglée -
9. Bouton de mémoire préréglée +
10. Répéter / sommeil
11. Bouton d'alarme
12. Bouton Bande SW
13. Bouton bande AM / FM
14. Compartiment de batterie
15. Haut-parleur
16. Câble d'alimentation
17. Poignée
18. Antenne FM
SOURCES D’ALIMENTATION
Utilisation sur reseau CA
Brancher la fiche à une prise murale de 230V CA ~ 50Hz.
Fonctionnement sur batterie
• Retirer la fiche 230V CA de l'unité avant de travailler sur les batteries.
• Ouvrez le compartiment de la batterie (14) à l'arrière de l'appareil et insérez 4 x UM-
3 e suivant le schéma de polarité indiquée à l'intérieur du compartiment à piles.
• Les piles doivent être retirées lorsque l'appareil n'est pas utilisé pendant une longue
période de temps.
• Les piles usées doivent être retirés de l'appareil pour éviter déversements d'acide.
ECOUTE DE LA RADIO
• Appuyez sur le bouton d'alimentation (5) ON/OFF pour allumée dispositif .
• Choisissez la bande souhaitée (AM,FM ou SW) utilisant le bouton BAND (12 ou 13)
• Recherchez la station de votre choix en utilisant le bouton de réglage (4).
• Pour éteindre la radio, appuyez le bouton interrupteur d'alimentation ON / OFF (5).
Antenne
Pour la réception en FM il y a une antenne télescopique FM incorporée (18) à l’arrière
de l’appareil. Extraire l’antenne et l’orienter de manière à ce que la qualité de la ré-
ception soit la meilleure possible.
Pour la réception en AM les signaux sont interceptés par une antenne en ferrite incor-
porée. Pour que la réception soit la meilleure possible, il faut orienter l’appareil.

10
Français
Présélection des stations de radio manuellement
Cette radio est capable de stocker 24 stations FM (8 FM, 8 AM et SW 8).
• Réglez la station souhaitée, comme expliqué ci-dessus
• Appuyez sur le bouton SET (3) pour entrer dans le mode prédéfini
• L'icône "CH" apparaît sur l'affichage et clignote
• Appuyez la touche M+ ou M- (8 ou 9)pour sélectionner le numéro de présélection,
de 1 à 8.
• Appuyez sur le bouton SET (3) pour confirmer le réglage de la mémoire.
Mémoriser des stations de radio automatiquement
Appuyez et maintenez enfoncé le bouton SET (3) 3 secondes, et la radio seront sto-
ckées dans la mémoire séquentielle men t automatiquement.
REGLAGE DE L’HORLOGE
Assurez-vous que la radio est en position OFF. L 'heure et les paramètres d'alarme
peuvent pas être réglés ou ajustés lorsque la radio est allumée.
• Appuyez sur le bouton SET (3) et l'écran affiche les clignotants 00 minutes et tour-
ner le Sintonie + ou - (4) pour régler les minutes.
• Appuyez sur le bouton SET (3) fois et l'écran affiche le 00 et le maintenant clignote.
Tourner le bouton Sintonie + ou - (4) pour régler le 'maintenant.
• Appuyez sur le bouton SET (3) fois et l'écran affiche le 12 clignotant. Tourner le bou-
ton TUNE + ou - (4) pour régler le mode 12 ou 24.
• Appuyez de nouveau sur le bouton SET (3) pour confirmer le réglage.
RÉGLAGE DU CALENDRIER
Lorsque l'écran affiche le temps, appuyez sur le bouton MODE (2) pour afficher le ca-
lendrier.
• Appuyez sur le bouton SET (3) une fois pour sélectionner le 'année
• Tournez le bouton sélecteur + ou - (4) pour régler le 'année.
• Appuyez sur la touche SET de repas (3) pour sélectionner le mois.
• Tourner le DIAL + ou - (4) pour régler le mois.
• Appuyez de nouveau sur le bouton SET (3) pour sélectionner le jour.
• Tourner le DIAL + ou - (4) pour régler le jour.
• Appuyez sur le bouton SET (3) pour confirmer l'horaire.
REGLAGE DE L’ALARME
Assurez-vous que la radio est en position OFF. L 'heure et les paramètres d'alarme
peuvent pas être réglés ou ajustés lorsque la radio est allumée.
• Appuyez sur le bouton bouton d'alarme (11) et sélectionnez alarme 1 ou 2
• Appuyez sur le bouton SET (3) et l'écran affiche quelles sont les 00 minutes. Tour-
nez la mélodie touche + ou - (4) pour régler les minutes.
• Appuyez sur le bouton SET (3) pour confirmer, l'écran affichera wuindi 00h00 et le
premier 00 clignote. Appuyez sur la touche Tune + ou - (4) pour régler le
«maintenant.

11 Français
• Appuyez sur le bouton SET (3) pour confirmer.
• Appuyez sur le bouton d'alarme (11) pour entrer dans l'horloge en mode normal.
ARRETER L `ALARME
Lorsque l’alarme retentit, appuyez sur le bouton SET (3) ou la touche ON / OFF (5).
L’Alarme sera arrêté, mais le réglage reste mémorisé.
RÉGLAGE DU VOLUME ALARME
• En mode alarme radio, le volume est réglé avec le volume utilisé pour 'écoute.
• En mode Buzzer, le niveau d'alarme est fixe et vous ne pouvez pas régler.
REVEILALARME AVEC BUZZER
• Alarmes 1 et 2 tous les les deux ont la fonction "réveil avec buzzer".
• Réglez l’ heur d'alarme comme expliqué ci-dessus.
• Tournez le bouton pour régler le 'alarme de réveil avec sonnerie.
REVEILALARME AVEC LA MUSIQUE
• Répétez les étapes de "réglage de l'alarme" Alarme 1 et Alarme 2 ous les les deux
ont la fonction «Réveil avec la musique."
• Appuyez sur le bouton d'alarme (11) fois pour définir le 'alarme 1.
• Appuyez sur le bouton d'alarme (11) à deux reprises pour définir le 'alarme 2.
• Tourner le DIAL + ou - (4) pour activer le «Réveil avec la radio."
• Une fois la «mise en alarme 1 ou 2, appuyez sur le bouton SET (3) pour confirmer.
• Le 'icône de radio apparaît à l'écran. Pendant ce temps, mettez les manopols tune +
ou -- Pour sélectionner la station préréglée en mémoire.
Appuyez sur le bouton SET (3) pour confirmer
• Appuyez sur le bouton ON / OFF (5) pour allumer la radio, puis réglez la commande
de volume au niveau souhaité. Appuyez de nouveau sur le bouton ON / OFF (5)
pour éteindre la radio. Lorsque la fonction d'alarme est activée, l'appareil se met en
marche automatiquement.
SLEEP TIMER
• Appuyer sur le bouton ON/OFF (5) pour allumer la radio. Appuyez sur la touche
Snooze / sommeil (10) dans l'ordre et l'écran affiche 90, appuyer de nouveau
pour 80/70/60/50....10, donc si vous appuyez nouveau il annuler cette fonction.
• Après avoir réglé la fonction de veille et lorsque le temps est écoulé, l'appareil
s'éteint automatiquem
REPETITION (SNOOZE)
L'alarme peut être temporairement désactivée manuellement en appuyant sur le
Snooze / sommeil, l'alarme s'active automatiquement au bout de 5 minutes.
CASQUE
Casque (non inclus) doivent avoir un diamètre de fiche de 3,5 mm et un’ Impédance
8-32 ohms. Quand des écouteurs sont connectés (8), le haut-parleur sera exclu.

12
Français
CARACTERISTIQUES TECHNIQUES
Alimentation CA: 230V ~ 50Hz
Piles: 4 x UM-3
Fréquence Radio
FM: 87.5 - 108 MHz
AM: 522 - 1620 kHz
SW: 3,16 - 18,10 MHz in 10 Bands
Haut-parleur: 8 Ohms, 3-5 W
Puissance de sortie: 0.8Wrms, 10% THD
Casque: 3,5mm jack, 8-32W, Impédance 32 Ohms
Les spécifications sont sujettes à modification sans préavis.
Ce symbole sur le produit ou sa documentation indique qu'il ne doit pas être éliminé en fin de vie avec les
autres déchets ménagers. L' élimination incontrôlée des déchetspouvant porter préjudice a l'environnement
ou a la santé humaine, veuillez le séparer des autres types de déchets et le recycler defaçon responsable.
Vous favoriserez ainsi la réutilisation durable desressources matérielles. Les particuliers sont invites a con-
tacter le distributeur leur ayant vendu le produit ou a se renseigner auprès de leur mairie pour savoir ou et
comment ils peuvent se débarrasser de ce produit afin qu'il soit recycle en respectant l'environnement. Les
entreprises sont invitées a contacter leurs fournisseurs et aconsulter les conditions de leur contrat de vente.
Ce produit ne doit pas être éliminé avec les autres déchets commerciaux.
COMMENT ÉLIMINER CE PRODUIT
(déchets d'équipements électriques et électroniques)
ATTENTION
Le symbole “point d’exclamation” à l’intérieur d’un triangle avertit l’utilisateur que d’importantes instructions
d’utilisation et de maintenance sont contenues dans le mode d’emploi.
Le symbole “éclair” à l’intérieur d’un triangle sert à avertir l’utilisateur de la présence du courant à l’intérieur
du l’appareil qui pourrait constituer un risque.
Afin de minimiser les risques, ne pas ouvrir le boîtier ni ôter le dos de l’appareil. En case de panne, faites
appel aux techniciens qualifiés pour les réparations. L’appareil ne renferme aucune pièce reparable par
l’utilisateur.
Cet appareil a été conçu pour une tension d’alimentation de 230V ~ 50Hz. Débranchez la prise de courant
quand on prévoit de ne pas utiliser l’appareil pendant un certain temps.
Mettez l’appareil sous tension seulement après avoir vérifié que tous les raccordements soient corrects.
L’unité ne doit pas être exposée à l’humidité ou à la pluie.
L’appareil doit être gardé dans un endroit suffisamment ventilé. Ne le gardez jamais par exemple près des
rideaux, sur un tapis ou dans des meubles, tels qu’une bibliothèque.
L’unité ne doit pas être exposée à la lumière directe du soleil ou à des sources de chaleur.

13 Italiano
LOCALIZZAZIONE DEI CONTROLLI
1. Display LCD
2. Tasto Modalità
3. Tasto SET
4. Manopola Sintonia
5. Tasto Power On / Off
6. Ingresso cuffie
7. Manopola Volume
8. Tasto Memoria preselezioni -
9. Tasto Memoria preselezioni +
10. Tasto Snooze / Sleep
11. TastoAllarme
12. Tasto Banda SW
13. Tasto Banda AM / FM
14. Compartimento Batterie
15. Altoparlante
16. Cavo alimentazione
17. Maniglia
18. Antenna FM
ALIMENTAZIONE
Alimentazione AC
Collegare il cavo elettrico alla presa di corrente AC.
Controllare che la vostra fonte di alimentazione sia di 230V, 50 Hz.
Funzionamento con pile
• Rimuovere il cavo di aliment. dall’apparecchio prima del funzionamento a batterie.
• Aprire il Compartimento batterie (14) sul retro dell’apparecchio e inserire 4 batterie
UM-3 seguendo le polarità mostrate all’interno del compartimento batterie.
Le batterie dovranno essere rimosse quando l’apparecchio non verrà utilizzato per
un lungo periodo di tempo.
Le batterie scariche dovranno essere rimosse dall’apparecchio per evitare la fuoriu-
scita di acido.
UTILIZZO DELLA RADIO
• Premere il tasto di alimentazione ON / OFF (5) per accendere l’ apparecchio.
• Scegliere la banda desiderata (MW, FM o SW) utilizzando il tasto BAND (12 o 13)
• Cercare la stazione di vostra scelta utilizzando la manopola di sintonizzazione (4) .
• per spegnere la radio, premere il pulsante di alimentazione ON/OFF (5).
Antenna
Per la ricezione in FM è incorporata un’antenna telescopica (18) sul retro dell’ appa-
recchio. Estendere l’antenna e ruotarla fino a raggiungere la migliore ricezione.
Per la ricezione in AM/SW vi è un’antenna in ferrite incorporata internamente. Si do-
vrà orientare l’apparecchio fino a raggiungere la migliore ricezione.

14
Italiano
Memorizzare le stazioni radio manualmente
Questa radio é in grado di memorizzare 24 stazioni FM (8, 8 MW e SW 8).
• Sintonizzarsi sulla stazione desiderata, come spiegato sopra
• Premere il tasto SET (3) per entrare in modalità di preselezione
• L'icona "CH" lampeggia e viene visualizzata sul display
• Premere il tasto M + oppure M - (8 o 9) per scegliere il numero di pres., da 1 a 8.
• Premere il tasto SET (3) per confermare l'impostazione della memoria.
Memorizzare le stazioni radio automaticamente
Tenere premuto il tasto SET (3) 3 secondi e le radio saranno memorizzate nella me-
moria in modo sequenziale automaticamente.
REGOLAZIONE DELL’OROLOGIO
Assicurarsi che la Radio sia impostata in posizione 'OFF'. L’ ora e le impostazioni di
allarme non possono essere impostate o regolate mentre la Radio é accesa.
• Premere il tasto SET (3) e il display visualizzerà il 00 minuti lampeggia e ruotare la
manopola sintonia + o - (4) per regolare i minuti.
• Premere il tasto SET (3) ancora e il display visualizzerà il 00 e l’ ora lampeggia.
Ruotare la manopola sintonia + o - (4) per regolare l’ ora.
• Premere il tasto SET (3) ancora e il display visualizzerà il 12 lampeggiando. Ruotare
la manopola sintonia + o - (4) per regolare la modalità 12 o 24.
Premere il tasto SET (3) ancora una volta per confermare la regolazione.
REGOLAZIONE DEL CALENDARIO
Quando il display visualizza l’ ora, premere il tasto MODE (2) una volta per visualizza-
re il calendario.
• Premere il tasto SET (3) una volta per selezionare l’ anno
• Girare la manopola sintonia + o - (4) per impostare l’ anno.
• Premere il pasto SET (3) per selezionare il mese
• Girare la manopola sintonia + o - (4) per impostare il mese.
• Premere il tasto SET (3) per selezionare ancora il giorno.
• Girare la manopola sintonia + o - (4) per impostare il giorno.
• Premere il tasto SET (3) per confermare il calendario.
REGOLAZIONE DELLA SVEGLIA
Assicurarsi che la Radio sia impostata in posizione 'OFF'. L’ ora e le impostazioni di
allarme non possono essere impostate o regolate mentre la Radio é accesa.
• Premere il tasto Alarm (11) e selezionare Alarm 1 o Alarm 2
• Premere il tasto SET (3) e il display visualizzerà 00 che sono i minuti. Ruotare il ta-
sto sintonia + o - (4) per regolare i minuti.
Premere ancora il tasto SET (3) per confermare, quindi il display visualizzerà 00:00
e il primo 00 lampeggerà. Premere il tasto Tune + o - (4) per impostare l’ ora.
• Premere ancora il tasto SET (3) per confermare.
• Premere ancora il tasto Alarm (11) per entrare in modalità orologio normale.

15 Italiano
Spegnere la sveglia
Quando l’ allarme suona, premere il tasto SET (3) oppure il tasto ON/OFF (5). L’ allar-
me verrà arrestato ma comunque il settaggio rimarrà memorizzato.
Regolazione Volume Sveglia
• In modalità Allarme RADIO, il volume sarà impostato con il volume utilizzato per l’
ascolto.
• In modalità Buzzer, il livello di allarme é fisso e non si può regolare.
Impostare la sveglia con buzzer
• Allarme 1 e Allarme 2 entrambi hanno la funzione “Sveglia con Buzzer”.
• Impostare l’ orario di allarme come spiegato sopra.
• Ruotare il tasto sintonia per regolare l’Allarme per risveglio con Buzzer.
Impostare la sveglia con musica
• Ripetere i passaggi “ImpostazioneAllarme”,Allarme 1 e Allarme 2 entrambi hanno la
funzione “Sveglia con Musica”.
• Premere il tasto Allarme (11) una volta per settare l’Allarme 1.
• Premere il tasto Allarme (11) due volte per settare l’Allarme 2.
• Ruotare la manopola di sintonia + o - per attivare la funzione “Sveglia con la Radio”.
• Una volta terminata l’ impostazione Alarm 1 oAlarm 2, premere il tasto SET (3) per
confermare.
• L’ icona RADIO apparirà nel display. Durante questo tempo, ruotare la manopola
sintonia + o - per selezionare la stazione radio memorizzata nella memoria.
• Premere il tasto SET (3) per confermare
• Premere il tasto ON/OFF (5) per accendere la radio, quindi regolare il controllo Volu-
me per ottenere il livello desiderato. Premere il tasto ON/OFF (5) ancora per spe-
gnere la radio. Quando la funzione allarme sarà attivata, la radio si accenderà auto-
maticamente.
FUNZIONE SLEEP
• Premendo il tasto ON/OFF (5) per accendere la radio. Premere il tasto Snooze / Sle-
ep (10) in sequenza e il display visualizzerà 90, premere ancora per
80/70/60/50....10, quindi se premuto ancora si annullerà questa funzione.
• Dopo aver impostato la funzione Sleep e quando è trascorso il tempo impostato,
l’apparecchio si spegne automaticamente.
SNOOZE
L'allarme può essere spento temporaneamente manualmente premendo il tasto
Snooze/Sleep (10), l'allarme si accenderà automaticamente dopo 5 minuti.
CUFFIE
Le cuffie (non incluse) devono avere una spina di 3.5 mm di diametro e un’impedenza
di 8-32ohms. Con le cuffie collegate (6), l’altoparlante é automaticamente escluso.

16
Italiano
II marchio riportato sul prodotto e sulla sua documentazione indica che il prodotto non deve essere smaltito
can altri rifiuti domestici al termine del ciclo di vita. Per evitare eventuali danni all'ambiente o alla salute
causati dall'inopportuno smaltimento dei rifiuti, si invita l'utente a separare questo prodotto da altri tipi di
rifiuti e di riciclarlo in maniera responsabile per favorire il riutilizzo sostenibile delle risorse materiali. Gli u-
tenti domestici sono invitati a contattare il rivenditore presso il quale e stato acquistato il prodotto a l'ufficio
locale preposto per tutte le informazioni relative alla raccolta differenziata e al riciclaggio per questo tipo di
prodotto. Gli utenti aziendali sono invitati a contattare il proprio fornitore e verificare i termini e le condizioni
del contratto di acquisto. Questo prodotto non deve essere smaltito unitamente ad altri rifiuti commerciali.
CORRETTO SMALTIMENTO DEL PRODOTTO
(rifiuti elettrici ed elettronici)
ATTENZIONE
Il punto esclamativo all’interno di un triangolo avverte l’utente che il libretto d’istruzioni contiene delle
importanti istruzioni per l’uso e la manutenzione.
Il simbolo del fulmine all’interno di un triangolo avverte l’utente della presenza di una pericolosa tensio-
ne all’interno dell’apparecchio.
Per ridurre i rischi di scosse elettriche, non aprire l’apparecchio. L’apparecchio non contiene parti ripa-
rabili dall’utente. In caso di guasto fare appello a tecnici qualificati per le riparazioni.
Questo apparecchio è stato progettato per funzionare a 230V ~ 50Hz. Se non si intende utilizzare
l’apparecchio per un lungo periodo di tempo, rimuovere la spina dalla presa di corrente.
Utilizzare l’apparecchio solo dopo aver verificato che tutte le connessioni siano state eseguite corretta-
mente.
Non esporre l’apparecchio alla pioggia o all’umidità.
Posizionare l’apparecchio in un luogo sufficientemente ventilato. Evitare di sistemarlo vicino a tende,
sul tappeto o all’interno di un mobile quale, ad esempio, una libreria.
Non esporre l’apparecchio alla luce diretta del sole o a fonti di calore.
SPECIFICHE TECNICHE
AC: 230V ~ 50 Hz
DC (Batterie): 4 x UM-3
Frequenze radio
FM: 87.5 - 108 MHz
AM: 522 - 1620 kHz
SW: 3,16 - 18,10 MHz in 10 Bande
Altoparlante 8 Ohm, 3-5W
Potenza in uscita 0.8Wrms, 10% THD
Generale
Cuffie: jack 3.5mm, 8-32W, impedenza 32Ohm
Caratteristiche soggette a variazioni senza preavviso.

17 Español
UBICACIÓN DE LOS CONTROLES
1. Display LCD
2. Botón MODE (Sintonizador / reloj / alarma)
3. Botón SET
4. Perillade Sintonía
5. Botón de encendido / apagado
6. Entrada de auriculares
7. Control de volumen
8. Botón Memoria -
9. Botón Memoria +
10. Botón Snooze / Sleep
11. Botón de alarma
12. Botón de la banda SW
13. Botón de la banda AM / FM
14. Compartimiento de la batería
15. Altavoz
16. Cable de alimentación
17. Manejar
18. AntenaFM
FUENTE DE ALIMENTACIÓN
Funcionamento con coriente alterna
Conecte el enchufe al toma corrientes de la red de 230VAC~50Hz.
Funcionamiento con batería
• Retire la fuente tcavo de la unidad antes de trabajar con baterías.
• Abra el compartimiento de la batería (14) en la parte posterior de la unidad e inserte
4 pilas UM-3 siguiendo el diagrama de polaridad que se muestra en el interior del
compartimento de la batería.
• Las baterías deben retirarse cuando la unidad no se utiliza durante un largo periodo
de tiempo.
• Las baterías agotadas deben ser retiradas del dispositivo para evitar el derrame de
ácido.
SINTONIZADOR DE RADIO MW/FM/SW
• Pulse el botón de encendido mediante el interruptor (5) para activar la Radio.
• Seleccione la banda dessiderata (AM, FM o SW) con el botón BAND (12 o 13)
• Busque la emisora que desee con el botón de sintonización (4).
• Para apagar la radio, pulse el botón de encendido (5) ON / OFF.
Antena
Para la recepción en FM se encuentra incorporada una antena telescópica FM (18)
en la parte posterior del aparato. Extender la antena arato hasta alcanzar la mejor re-
cepción.
Other manuals for TRA-2425PSW
1
Table of contents
Languages:
Other Roadstar Portable Radio manuals

Roadstar
Roadstar TRA-1957N User manual

Roadstar
Roadstar TRA-2425PSW User manual

Roadstar
Roadstar CDR-380CD User manual

Roadstar
Roadstar TRA-70D+ User manual

Roadstar
Roadstar RCR-4730U User manual

Roadstar
Roadstar CDR-4208MP User manual

Roadstar
Roadstar TRA-1958 User manual

Roadstar
Roadstar TRA-2235 User manual

Roadstar
Roadstar TRA-570US/BT User manual

Roadstar
Roadstar CDR-4200MP User manual