manuals.online logo
Brands
  1. Home
  2. •
  3. Brands
  4. •
  5. Rocket Fish
  6. •
  7. Switch
  8. •
  9. Rocket Fish RF-WHD200 User manual

Rocket Fish RF-WHD200 User manual

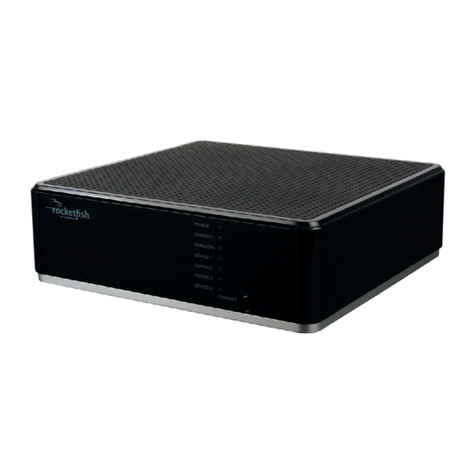
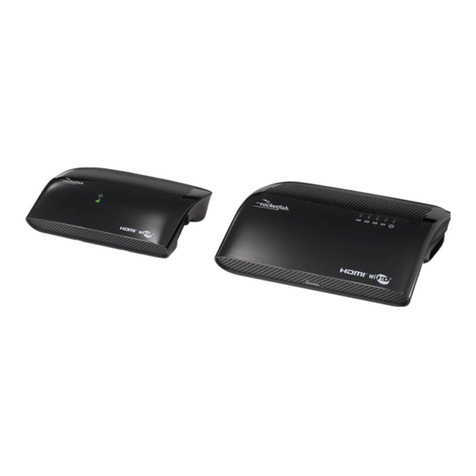
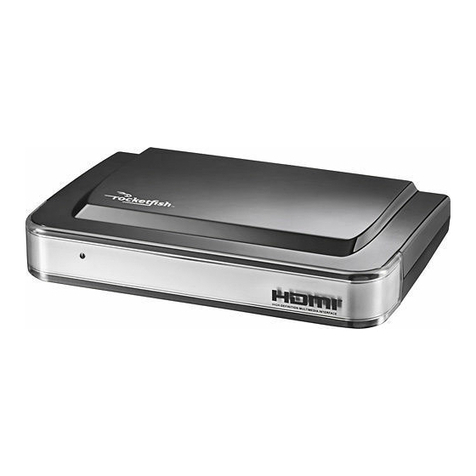
Wireless HD Transceiver
HDMI 1
HDMI 4HDMI 3
HDMI 2
SLEEP
Transmitter back panel
Receiver back and side panels
Right side Back panel Left side
RF-WHD200 I4-port Wireless HD Kit
Quick Setup Guide
# Component Description
1 HDMI 4 Lights to indicate that this HDMI input is selected.
2 HDMI 3 Lights to indicate that this HDMI input is selected.
3 HDMI 2 Lights to indicate that this HDMI input is selected.
4 HDMI 1 Lights to indicate that this HDMI input is selected.
5 Power and link status indicator Blinking—The power is connected and the transmitter is on.
(transmitter) On—The transmitter and receiver are linked.
O—The power is o.
6 Power and link status indicator Blinking—The power is connected and the receiver is on.
(receiver) On—The transmitter and receiver are linked.
O—The power is o.
Package contents
• 60 GHz WirelessHD transmitter (1) • Remote control (1)
• 60 GHz WirelessHD receiver (1) • Wall mounting bracket (1) (for use with the receiver)
• HDMI cables (2) • Quick Setup Guide
• AC power adapters (2) • For more detailed instructions, see your online User
Guide at www.rocketshproducts.com
Features
Transmitter front/top panel Receiver front/top panel
Remote control
Note: Remove the plastic lm from the remote control before to using it for the rst time.
Connecting the transmitter and receiver
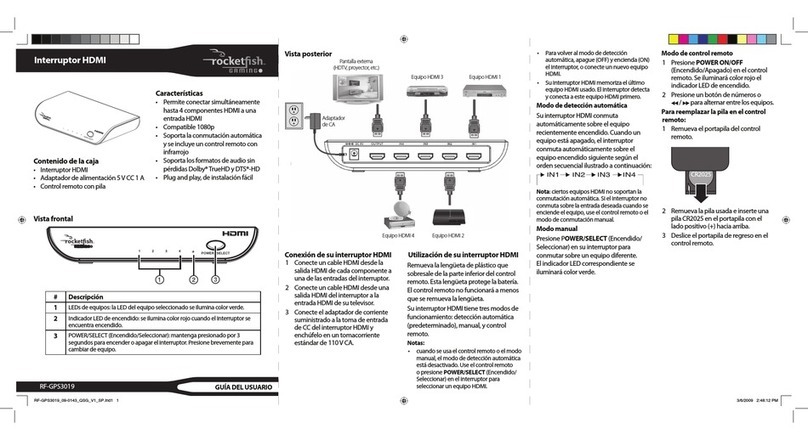
1Connect up to 4 HDMI enabled source components, such as a Blu-ray/DVD player, cable/satellite
box, gaming system, laptop, etc., to the HDMI input jacks on the transmitter.We recommend using
high-quality RocketshTM HDMI cables in the necessary length for your conguration (4 ft.
RF-G1160a, 8 ft. RF-G1161a, 12 ft. RF-G1162a).Two 4 ft. Rocketsh HDMI cables have been
included for your convenience. Additional Rocketsh HDMI cables can be found at your local Best
Buy or Future Shop store.
2Connect the transmitter to an available HDMI input on the display component, such as an HDTV or
HD projector. If desired, a wall mounting bracket is included to mount the receiver module on the
wall or ceiling near the display component. If the included 4 ft. Rocketsh HDMI cable is not long
enough to accommodate your desired mounting location, longer Rocketsh HDMI cables (up to
24 ft.) can be found at your local Best Buy or Future Shop store.
3Connect the AC power adapters to the transmitter and receiver.
4Turn on your TV or projector and switch the input to the HDMI input that the receiver module was
connected to.
5Turn on the source component(s) you wish to view (be sure to switch to the HDMI output if
necessary, consult documentation provided from the component manufacturer to accomplish this).
# Component Description
1 DC IN jack Connect the power adapter to this jack.
2 Power switch Turns the unit on or o.
3 HDMI select switch Slide to select the HDMI port.
4 HDMI 1 jack Connect an HDMI cable to this jack and to an HDMI signal source.
5 HDMI 2 jack Connect an HDMI cable to this jack and to an HDMI signal source.
6 HDMI 3 jack Connect an HDMI cable to this jack and to an HDMI signal source.
7 HDMI 4 jack Connect an HDMI cable to this jack and to an HDMI signal source.
# Component Description
1 HDMI jack Connect one end of an HDMI cable to this jack and the other end to your
TV or computer.
2 DC IN jack Connect the power adapter to this jack.
3 Power switch Turns the receiver on or o.
4 Cable routing clips Insert HDMI cable into these clips for receiver placement stability.
OR
(Steps continued on the back)
Blu-ray/DVD
Top view Side view
6Turn on the RF-WHD200 transmitter and receiver modules. During the initial setup, it may take a few
minutes for the transmitter and receiver modules to establish a link with each other, this is normal
operation.
7Using the remote, press the corresponding HDMI button to select the media source, such as a DVD
player or computer, that you want to watch.
8Refer to the following setup diagrams to arrange your transmitter and receiver.We recommend that
the transmitter and receiver face each other for the best performance.
9When operating your source components with their respective remote controls, some devices will
allow the remote commands to pass through the receiver (remote pointed at the receiver module) to
the transmitter by utilizing the HDMI CEC functionality. However, not all components are compatible
with CEC. If your remote does not operate your source component when pointed towards the
RF-WHD200 receiver, please remember to point your remote toward the source component itself for
operation.
Important safety instructions
• Keep these instructions.
• Do not use this apparatus near water.
• Clean only with a dry cloth.
• Do not block any ventilation openings. Install in accordance with the manufacturer's instructions.
• Do not install near any heat sources such as radiators, heat registers, stoves, or other apparatus
(including ampliers) that produce heat.
• Do not defeat the safety purpose of the polarized or grounding-type plug. A polarized plug has two
blades with one wider than the other. A grounding type plug has two blades and a third grounding
prong.The wide blade or the third prong is provided for your safety. If the provided plug does not t
into your outlet, consult an electrician for replacement of the obsolete outlet.
• Protect the power cord from being walked on or pinched particularly at plugs, convenience
receptacles, and the point where they exit from the apparatus.
• Only use attachments or accessories specied by the manufacturer.
• Unplug this apparatus during lightning storms or when unused for long periods of time.
• Refer all servicing to qualied service personnel. Servicing is required when the apparatus has been
damaged in any way, such as power-supply cord or plug is damaged, liquid has been spilled or objects
have fallen into the apparatus, the apparatus has been exposed to rain or moisture, does not operate
normally, or has been dropped.
• The apparatus shall not be exposed to dripping or splashing and no objects with liquids such as vases,
shall be placed on the apparatus.
For more information on using your 4-port wireless HD kit, see your online User Guide at
www.rocketshproducts.com.
FCC RF Exposure Statement
This equipment complies with FCC radiation exposure limits set forth for an uncontrolled environment.
This equipment should be installed and operated with minimum distance 20 cm between the radiator
and your body. This transmitter must not be co-located or operating in conjunction with any other
antenna.
Canadian RF Exposure Statement
This equipment is in conformity with the IC radiation exposure limits set forth for an uncontrolled
environment.This device must be installed and used at a distance of at least 20 cm (8 in) between the
antenna and the body of the user.The transmitter should not be placed close to another antenna or
another transmitter, or to function with another antenna or another transmitter.
FCC Part 15 Class B Statement
This device complies with Part 15 of the FCC Rules. Operation is subject to the following two conditions:
(1) this device may not cause harmful interference, and (2) this device must accept any interference
received, including interference that may cause undesired operation.
This equipment has been tested and found to comply with the limits for a Class B digital device, pursuant
to Part 15 of the FCC Rules.These limits are designed to provide reasonable protection against harmful
interference in a residential installation.This equipment generates uses and can radiate radio frequency
energy and, if not installed and used in accordance with the instructions, may cause harmful interference
to radio communications. However, there is no guarantee that interference will not occur in a particular
installation. If this equipment does cause harmful interference to radio or television reception, which can
be determined by turning the equipment o and on, the user is encouraged to try to correct the
interference by one or more of the following measures:
• Reorient or relocate the receiving antenna.
• Increase the separation between the equipment and receiver.
• Connect the equipment into an outlet on a circuit dierent from that to which the receiver is needed.
• Consult the dealer or an experienced radio/TV technician for help.
IC Class B Statement (Canada)
This Class B digital apparatus complies with Canadian ICES-003 and RSS-210.
Cet appareil numérique de la classe B conforme á la norme NMB-003 et RSS-210 du Canada.
Operation is subject to the following two conditions: (1) this device may not cause interference, and (2)
this device must accept any interference, including interference that may cause undesired operation of
the device.
FCC Caution:
Any changes or modications not expressly approved by the party responsible for compliance could void
the user’s authority to operate this equipment.
One-year limited warranty
Visit www.rocketshproducts.com for details.
Contact Rocketsh:
For customer service, please call 1-800-620-2790.
www.rocketshproducts.com
Distributed by Best Buy Purchasing, LLC
7601 Penn Avenue South, Richeld, MN 55423-3645 USA
© 2010 BBY Solutions, Inc., All Rights Reserved. ROCKETFISH is a trademark of BBY Solutions, Inc. All
other products and brand names are trademarks of their respective owners.
Best Buy Imports, S. de R.L. de C.V. Av. Santa Fe 485, Segundo Piso, Colonia Cruz Manca, Programa
Parcial de Desarrollo Santa Fe, Delegación Cuajimalpa, Distrito Federal, México 05349
© 2010 Best Buy UK Distributions Limited. All rights reserved. Distributed by Best Buy Europe
Distributions Limited. 1 Portal Way, LondonW3 6RS
ENGLISH 10-1049
Transmitter
Receiver
32.8 ft.
(10 m)
82° 82°
16.4 ft.
(5 m)
16.4 ft.
(5 m)
Transmitter Receiver
32.8 ft.
(10 m)
47°
47°
16.4 ft. (5 m)
16.4 ft. (5 m)
Floor
Other manuals for RF-WHD200

4

Other Rocket Fish Switch manuals

Rocket Fish RF-G1185 User manual

Rocket Fish

Rocket Fish RF-G1185 User manual

Rocket Fish RF-RBKIT User manual

Rocket Fish

Rocket Fish RF-RBKIT User manual

Rocket Fish RF-G1185 Parts list manual

Rocket Fish

Rocket Fish RF-G1185 Parts list manual

Rocket Fish RF-GPS31301 Parts list manual

Rocket Fish

Rocket Fish RF-GPS31301 Parts list manual

Rocket Fish RF-ACRHB User manual

Rocket Fish

Rocket Fish RF-ACRHB User manual

Rocket Fish RF-NBSKHBB User manual

Rocket Fish

Rocket Fish RF-NBSKHBB User manual

Rocket Fish RF-HTC4818 User manual

Rocket Fish

Rocket Fish RF-HTC4818 User manual

Rocket Fish RF-ACRHB Quick start guide

Rocket Fish

Rocket Fish RF-ACRHB Quick start guide

Rocket Fish RF-GPS31301 Installation and operation manual

Rocket Fish

Rocket Fish RF-GPS31301 Installation and operation manual

Rocket Fish RF-HTN102 User manual

Rocket Fish

Rocket Fish RF-HTN102 User manual

Rocket Fish RF-NBSKHBGR User manual

Rocket Fish

Rocket Fish RF-NBSKHBGR User manual

Rocket Fish RF-NBSKHBGR User manual

Rocket Fish

Rocket Fish RF-NBSKHBGR User manual

Rocket Fish RF-G1185 User manual

Rocket Fish

Rocket Fish RF-G1185 User manual

Rocket Fish RF-G1501 User manual

Rocket Fish

Rocket Fish RF-G1501 User manual

Rocket Fish RF-NBSKHBB User manual

Rocket Fish

Rocket Fish RF-NBSKHBB User manual

Rocket Fish RF-G1501 User manual

Rocket Fish

Rocket Fish RF-G1501 User manual

Rocket Fish RF-30HUB7 User manual

Rocket Fish

Rocket Fish RF-30HUB7 User manual

Rocket Fish RF-NBSKHBB Instruction Manual

Rocket Fish

Rocket Fish RF-NBSKHBB Instruction Manual

Rocket Fish RF-G1182 User manual

Rocket Fish

Rocket Fish RF-G1182 User manual

Rocket Fish RF-HDMI4 User manual

Rocket Fish

Rocket Fish RF-HDMI4 User manual

Rocket Fish RF-ACRHB Quick start guide

Rocket Fish

Rocket Fish RF-ACRHB Quick start guide

Rocket Fish RF-G1185 User manual

Rocket Fish

Rocket Fish RF-G1185 User manual

Rocket Fish RF-HDMI4 User manual

Rocket Fish

Rocket Fish RF-HDMI4 User manual

Rocket Fish RF-RBKIT User manual

Rocket Fish

Rocket Fish RF-RBKIT User manual

Popular Switch manuals by other brands

DRUID Debut HUB quick start

DRUID

DRUID Debut HUB quick start

Belden Hirschmann SPIDER 8TX EEC Installation

Belden

Belden Hirschmann SPIDER 8TX EEC Installation

Siemens SCALANCE X-100 Commissioning manual

Siemens

Siemens SCALANCE X-100 Commissioning manual

NETGEAR MS60 quick start

NETGEAR

NETGEAR MS60 quick start

Dagan HDCN40 user manual

Dagan

Dagan HDCN40 user manual

Emerson SCKM120 user manual

Emerson

Emerson SCKM120 user manual

Festo VPEV-1/8 operating instructions

Festo

Festo VPEV-1/8 operating instructions

Siemens SCALANCE MM900 Compact operating instructions

Siemens

Siemens SCALANCE MM900 Compact operating instructions

Oase ProMax operating instructions

Oase

Oase ProMax operating instructions

Contemporary Controls CTRLink EIDX MP Series installation guide

Contemporary Controls

Contemporary Controls CTRLink EIDX MP Series installation guide

Fostex 3011 user guide

Fostex

Fostex 3011 user guide

CyberData 11187 Installation quick reference

CyberData

CyberData 11187 Installation quick reference

Crestron DigitalMedia DM-MD6X1 Operation guide

Crestron

Crestron DigitalMedia DM-MD6X1 Operation guide

Eusso UPE5408-GE user manual

Eusso

Eusso UPE5408-GE user manual

COMEPI SM Series use instructions

COMEPI

COMEPI SM Series use instructions

SMC Networks 8504T FICHE user guide

SMC Networks

SMC Networks 8504T FICHE user guide

Marmitek Connect TS21 user manual

Marmitek

Marmitek Connect TS21 user manual

TRENDnet TEG-S80TXE - Copper Gigabit Switch Specifications

TRENDnet

TRENDnet TEG-S80TXE - Copper Gigabit Switch Specifications

manuals.online logo
manuals.online logoBrands
  • About & Mission
  • Contact us
  • Privacy Policy
  • Terms and Conditions

Copyright 2025 Manuals.Online. All Rights Reserved.