Rokonet ORBIT-PRO RP-296 User manual

user manual
1
1
Section 1: Let’s Get Acquainted
INTRODUCTION
LED KEYPAD
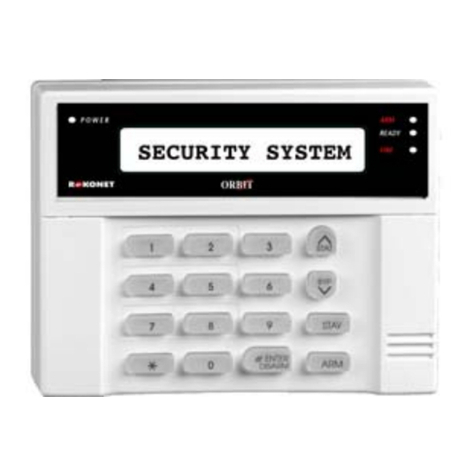
LCD KEYPAD
Congratulations on your purchase of Rokonet’s
ORBIT-PRO Security System. The ORBIT-PRO
has been specifically designed to meet a wide
range of security needs for many residential and
commercial applications.
You communicate with your ORBIT-PRO through
its keypad(s). There are two types of keypads: one
with LEDs display, and the other with LCD display.
Using its keys, you can issue commands to your
system. In turn, the system can communicate
information to you via its display, indicators and by
the sounds it makes.
Your ORBIT-PRO security system also consists of
a variety of sensors, detectors, and contacts
placed throughout the premises and designed to
recognize abnormal conditions. Typically, your
system protects against intrusion. Some systems
may also have fire protection or environmental
protection (such as gas or water level sensors)
All of your system's detectors, sensors, and
contacts are wired to the control panel. As such,
your system always knows the status of any
protected door, window, hallway, room, or area.
Similarly, it knows if a smoke detector has been
activated.
The control panel, which contains the system's
electronics and backup battery, functions in the
background and, for purposes of security, is
installed out of sight.

user manual
2
SOME DEFINITIONS There are a few terms with which you should
become familiar. Knowing them will help you to
better understand and use your system
Zone A single detector, or group of detectors, usually
relating to a certain area of the premises or type of
protection. Zones that use devices designed to
detect break-ins are called intrusion zones.
Another kind of zone may contain one or more
Smoke Detectors. Such zones are called fire
zones. An environmental zone typically protects
the premises from gas leaks and/or flooding.
24-Hour Zone A 24-Hour intrusion zone is always armed and is
usually assigned to openings, which should never
be disturbed-like fixed glass and non-movable
skylights.
Central Stations Your system is set up to report alarms to a
Central Station–a facility which continually
monitors the activities of many security systems,
usually via the telephone network, and dispatch the
proper authorities.
Chimes The chime is a series of short keypad tones, which
can be set up to annunciate, during the disarmed
period, the violation of selected intrusion zone(s).
The chime tone can be used to annunciate the
arrival of a customer each time the front door
opens. The chime can be disabled or enabled at
your discretion.
Trouble Reporting If desired, your security system may also report to
the Central Station any troubles or malfunctions it
senses, so that a service call can be made.
Utility Outputs In addition to your system's normal operation, it's
possible to place a household appliance or
premises lighting under the control of the ORBIT-
PRO where it can be conveniently turned on and
off automatically, or by User command from any
system keypad
Key-switch Your system may also be equipped with a
keyswitch, useful for simple arming and disarming
operations - usually at a remote location.
Arming
Your System
Arming your system enables its intrusion
detectors to trigger an alarm when violated.
Remember, fire protection and the protection
offered by the keypad's emergency keys are
always armed and always available

user manual
3
1
Secured or
Bypassed
Before you arm your system, all of its zones must
either be secured or bypassed.
Full Arming and
Home Arming
Your ORBIT-PRO offers two kinds of system
arming. Full Arming prepares all of the system's
intrusion detectors to sound an alarm, if violated,
Home Arming (or Stay Arming) allows individuals
to remain inside and move about the premises
even after the system is armed
Quick Arming and
Code Arming
Your ORBIT-PRO also offers two methods of
arming. Quick Arming achieves the result with just
the press of a single key (either or ).
Code Arming requires that a valid Master Code or
User Code be entered first.
Entry/Exit Delays Your security system must incorporate an
Entry/Exit Delay to allow proper entry and exit to
and from the premises without causing inadvertent
alarms.
Arming with the
Front Door Open
If set up by your alarm company, the ORBIT-PRO
allows you the convenience of arming your system
with the front door open. After which you must
close the door as you leave the premises. With
such a door open (and all other zones secure), the
system is considered "ready to arm"; the Zone LED
corresponding to the opened door will be lit, and
the keypad's READY LED will flash.
Follow me In addition to the standard alarm reporting to the
Center Station, the system can generate alarm
tones to a designated system user.
Scheduling Through the use of the system's built-in clock, it's
possible to schedule automatic operations
including arming and disarming.
Partitions One of the ORBIT-PRO advantages is its ability to
divide any system into a number of partitions.
Think of each partition as a separate security
system that can be armed and disarmed
individually.
System Expansion As your needs grow, your system can be readily
expanded by adding modules, up to 96 zones, 16
keypads, and 33 utility outputs (to operate lights,
cameras, etc.) without changing the main system.

user manual
4
Section 2: Your Keypad
VISUAL
INDICATORS
As a user of your security system, you'll need to be
primarily concerned with the keypad. This section
discusses the keypad's visual indicators and the
use of its keys.
Each keypad in your
system reports its status
via its LED (lighted)
indicators at the right.
Through its keys, you can
enter commands to "arm"
and "disarm" the system,
bypass intrusion zones,
report emergencies, etc.
NOTE:
The keys and the LED
indicators (except the
Zones LED indicators)
are the same in both
types of keypads.
The five LED indicators found at the upper right
provide typical system indications, as discussed
below and on the next page. Some indicators have
additional functions, explained later on.
POWER LED
CONDITION
(see note at left) EXPLANATION
ON The system is operating properly
from commercial (AC) power; its
backup battery is in good
condition
OFF The system is inoperative due to
lack of power (from both
commercial AC and backup
battery); servicing will be required
RAPID
FLASH
(about 4 times per
second)
Indicates a trouble condition; for
more information, see Section 6:
System Troubles.
SLOW
FLASH
(About once every
2
second)
Indicates the system is in the User
Functions mode (see Section 5 for
more information on User
Functions)
The POWER LED is a
useful indicator
reflecting the system's
operation.
NOTE: If a trouble
condition exists, the
POWER LED will flash
only when the system
is in its disarmed state.
Once the system is
armed, a previously
flashing POWER LED
will light steadily.

user manual
5
2
ARM LED
CONDITION EXPLANATION
ON The system's intrusion detectors are
armed; subsequent violations of a
protected point or area (e.g. a door,
a window, unauthorized motion) will
result in a burglar alarm
OFF The intrusion function of the system
is disarmed
SLOW
FLASH
(About once
every 2 sec.)
indicates the system is in its
Exit Delay period
The ARM LED
indicates whether or
not the system's
intrusion detectors
are armed.
RAPID
FLASH
(about 4 times
per second)
Indicates alarm condition, and
occurs after disarming alarmed
system during the display in alarm
memory mode. To restore the
display to normal, press
READY LED
CONDITION EXPLANATION
ON All intrusion zones are secure; the
system is ready to be armed
OFF One or more intrusion zones are not
secure and the system is not ready
to be armed; before the system can
be armed, the condition must be
addressed
The READY LED
indicates whether or
not the system's
intrusion zones are
secured and ready
to be armed.
SLOW
FLASH
(About once
every sec.)
Indicates the system is ready to be
armed while a specially designated
entry/exit door remains open, and
when a forced arm zone is open.

user manual
6
FIRE LED
CONDITION EXPLANATION
ON A fire alarm or fire emergency is
in progress or has recently
occurred
OFF All fire zones are operating
normally
When lit, the FIRE LED
indicates that the
system is experiencing
a fire alarm. When
flashing, a problem has
been detected on the
fire circuit, and must be
serviced. FLASHING A problem has been detected on
the fire circuit and must be
serviced.
BYPASS LED
CONDITION EXPLANATION
ON At least one intrusion zone is
bypassed, or when STAY mode is
selected
The BYPASS LED is
normally lit when STAY
mode is selected
OFF All zones are operating normally
and the system is in ARM mode.
TAMPER LED
CONDITION EXPLANATION
ON A zone, keypad, or an external
module used by the system has
been physically disturbed or
tampered with. If disarmed without
fixing the problem, will silent the
sound only.
The TAMPER LED
indicates that a zone, a
keypad or an external
module has been
tampered with, and
requires resetting. In
some cases a technician
code is required to
restore. OFF All zones are operating normally
ZONE LED ( LED keypad only)
EXPLANATION
CONDITION SYSTEM DISARMED SYSTEM ARMED
OFF The corresponding zone is secured
FLASHING The indicated
zone is
not secured
N/A
The ZONE LEDs
indicate the status of
each of the system’s
intrusion zones.
FOR LCD KEYPAD the
display indicates the
zone's number and
label.
ON N/A An alarm has
occurred on the
indicated zone

user manual
7
2
KEYS The keys on the keypad can be used for a variety
of functions. Each is explained below:
Used to input the numeric codes which may be
required for arming, disarming, triggering
emergency alarms, along with several other
special functions
NORMAL
OPERATION
Used to enter the User Functions mode
USER
FUNCTIONS Used to exit from the current menu and return to
normal operation.
NORMAL
OPERATION Activates AWAY mode and Quick Arming.
USER
FUNCTIONS Used to change data.
NORMAL
OPERATION
Activates the STAY mode and Quick Arming
USER
FUNCTIONS
Used to change data.
NORMAL
OPERATION
Used to disarm the system after the User Code is
entered
USER
FUNCTIONS
Terminates commands and confirms data to be
stored
Provides System Status.
NORMAL
OPERATION To perform bypass, and to provide information on
bypassed zones (must be pressed after entering a
User Code).
Scrolls up a list
Moves the cursor to the left
USER
FUNCTIONS Scrolls down a list
Moves the cursor to the right

user manual
8
Section 3: Operating Your System
In this section, you'll learn how to perform most of the functions needed to
properly operate your ORBIT-PRO and to get the most out of your security
system.
EMERGENCY KEYS
Your keypad provides three sets of keys, which can be pushed at any time the
police, fire department, or auxiliary assistance is required.
Police Emergency Pressing and simultaneously,
and for at least two seconds, will activate a
Police Emergency alarm (Panic alarm).
Fire Emergency Pressing and simultaneously,
and for at least two seconds, will activate a
Fire Emergency alarm.
Auxiliary Emergency Pressing and simultaneously,
and for at least two seconds, will activate an
Auxiliary Emergency.
The annunciation that results during these emergency alarms, along with other
system sounds, is covered in Section 4.
If your system has been programmed to do so, it will communicate any or all of
these alarms to the Central Station monitoring your installation. System
programming also determines whether these emergency alarms will be audible
and/or capable of being communicated to the Central Station.
Keyswitches
If your system is equipped with a special keyswitch, it can, with the twist of a
key, be toggled through ARM (Away) and DISARM modes.
Note: Hidden Display
It is desired for some systems, that the keypad will not display the status of the
system. (If set in this mode) the ARM, READY & BYPASS LEDS will not
function and the LCD display Enter code: After entering a valid user code the
system will work and display the normal mode. One minute after the last
operation, the system will automatically switch to the Hidden Display Mode.

user manual
9
4
USER CODES
AUTHORITY
GRAND MASTER
All operations for all
partitions.
MANAGER
Same as above, except
changing the Grand
Master Code.
MASTER
Same as for Manager,
but limited to designated
partitions.
USER
Only basic operations to
one or more partitions.
ARM ONLY
Arming one or more
partitions.
MAID
Used only for one-time
arming and disarming,
after which the code is
automatically erased and
should be re-defined.
To perform many of the ORBIT-PRO's
functions, a security code (often called a User
Code) must be entered at the keypad.
Each individual using the system is assigned a
User Code, which, in turn, is linked to an
Authority Level. Those with a "higher
authority" have access to a greater number of
system functions, while those with a "lower
authority" are more restricted in what they may
do. There are six different Authority Levels
available for users of the ORBIT-Pro.
Note that the User Codes having the lower
Authority Levels (i.e. User, Arm Only, and
Maid) may have variable lengths up to the
chosen Code Length. A user code can have up
to 6 digits.
Your ORBIT-Pro can support up to 99 different
User Codes, identified with index numbers from
"00" through "98".
Your ORBIT-PRO was given a Grand
Master Code of 1–2–3–4 during manufacturing.
Unless your alarm company has already
changed it to suit your preference, it's best to
modify this code to one which is unique and
personalized. To change the Master Code,
and/or to set up User Codes, follow the steps
on the next page.

user manual
10
SETTING/CHANGING ACCESS CODES
STEP DESCRIPTION
1 The system must be disarmed).
Enter the User Functions Mode (✱) and select Codes (5):
2 Enter the 4-digit (or 6) Master (or higher authority) Code, and
press [ENTER]
3 Enter the two digit User Index number 00 to 98
Note: the index number 00 belongs to the Grand Master
Example:
For User Code 6, press
For User Code 12, press
4 Carefully enter the new code and press [ENTER]
If successful, you will hear a single confirming beep.
If not, you'll hear three quick error beeps;
5 Repeat steps 3 and 4 for additional codes until
complete.
6 When all codes are entered press key twice quickly
to reset and exit user function mode.

user manual
11
4
DELETING USER CODES
At times, it may be desirable to completely delete a User Code. Note that it is
impossible to delete the Master Code (although it can be changed).
STEP DESCRIPTION
1 The system must be disarmed. Enter the
User Functions Mode (✱) and choose Codes (5):
2 Enter the current Master Code and press [ENTER]:
3 To delete any other User Code, enter the User Code's index
number you wish to delete (2-digit),
for example:
for User Code 6, press
4 Press 0 followed by [ENTER]
If successful, you will hear a single confirming beep.
If not, you'll hear three quick error beeps
5 Repeat steps 3 and 4 for additional codes until complete.
6 When all required codes are deleted press key twice
quickly to reset and exit user function mode.

user manual
12
ARMING YOUR SYSTEM
STEP DESCRIPTION
1 Check the READY LED on your keypad. If lit or flashing,
the system is READY.
If NOT lit or flashing, the system is NOT ready to be armed.
Secure or bypass the violated zone(s) and then proceed.
2 Choose among one of the following arming types:
3 Arming when Leaving the Premises Empty:
Enter your User Code and press [ARM] key
NOTE: If you make a mistake the keypad will produce three
short beeps. If so, press (✱✱) quickly and re-enter the above
sequence correctly
If your system has Quick Arming, simply press .
4 All persons are to exit except the person arming the system.
Leave the premises and close the door. The keypad will beep
as counts down the Exit Delay period, and the ARM LED
flashes for the above duration, and than light steadily.
If LCD KP is in use, its display will indicate the remaining Exit
Delay time, at the end of this period, it displays ARMED.
3
Arming with the Premises Occupied
Enter your User Code and press [STAY] key
If your system has Quick Arming, simply press .
Note: Pressing [STAY] twice will cancel the entry delay time.
Pressing [✱] during exit time will silence the beeps on the
keypad.
4 If required, leave the premises and close the door. The keypad
will beep as it counts down the Exit Delay period, and the ARM
LED flashes for the above duration will than light steadily. The
BYPASS LED will light, indicating that the interior zones are
being bypassed.
If LCD keypad is in use, its display will indicate the remaining
Exit Delay time, and at the end of this period, it displays AT
HOME ARMED.

user manual
13
4
ZONE BYPASSING
Warning: A bypassed
zone may reduce the
system's security
capability.
When an intrusion zone is not secured, the
keypad's READY LED will not light nor can the
system be readily armed. It may be convenient to
have one (or more) of the zones in your installation
bypassed–and thus ignored by your system.
BYPASSING/ UNBYPASSING A ZONE(S)
STEP DESCRIPTION
1 If the system is not ready, identify the violated zone as
follow:
For LED KP - the above zone(s) is identified by
noting which zone LED(s) are flashing at the keypad's
ZONES area.
For LCD KP – Enter user code followed by to
identify the violated zone(s), (scroll Up and Down with
arrow keys to view all Not ready zones)
2
To bypass such a zone(s) and cause it to be ignored by the
system:
Enter your [code] and press ( Bypass LED will be lit)
Note: If you make a mistake when entering your User Code,
the keypad will produce three short beeps. Re-enter if
necessary.
3 Enter the two digit zone number from 01 to 96
Repeating the zone number will un-bypass it (toggle action)
An additional zone(s) can be bypassed at the same time by
adding its two-digit number to the sequence.
4
When done, press .
Note: all zones will be automatically un-bypassed when the
panel is armed and then disarmed again.
Bypass LED will turn off when arming in AWAY mode.
Example:
To bypass zones 2 and 13 using code 1234
Enter- 1-2-3-4 [BYP] 02 13 [ENTER]
To un-bypass zone 2 only using code 1234
Enter – 1-2-3-4 [BYP] 02 [ENTER]

user manual
14
VIEW (NOT READY ZONE STATUS)
If the system is not ready to arm, there is at least one zone that is not secured.
For LED Keypad the numbers corresponding to any unsecured zone will be
illuminated and flashing on the LED ZONES area.
For LCD Keypad, proceed with the following:
STEP DESCRIPTION
1
Enter your User Code and press
Note: the keypad will display “Not ready” zones that belong to
this user code only.
2 Scroll the list Up and Down with arrow keys (STAT and BYP)
to view the Not-ready zones' status.
Quick view With Quick view, it's possible to view any Not ready zone(s)
that is assigned to this keypad (only) without the need to first
enter a User Code
Just press and scroll the list.

user manual
15
4
DISARMING AN ARMED SYSTEM AND/OR SILENCING AN ALARM
STEP DESCRIPTION
1 If outside the premises, open an "entry" door. The keypad(s) will
beep—indicating that the Entry Delay period has begun.
2 Disarming an armed system
Before the Entry Delay expires,
Enter your User Code and press .
NOTE: If you make a mistake when entering your User Code,
the keypad will produce three short beeps. If so, re-enter the
above sequence correctly.
2
Silencing an alarm
Observe the keypad. If any of the following conditions is evident,
an alarm has occurred:
For LED KP:
·•The ARM LED is flashing.
·•A Zone LED is lit steadily.
·•The FIRE LED is lit steadily.
For LCD KP: the ARM LED is flashing, and the display will show
the disturbed zone
Enter your User Code and press .
If an alarm occurred, the ARM LED and the corresponding zone-
LED will flash for Alarm memory period of about 60 sec.
If using LCD keypad scroll through the list of alarmed zones
To exit alarm memory before timeout expired press [*]
Note: It's best to leave the premises. Only after police
investigation should you consider that the burglar is no longer in
your premises and you can re-enter.
In special cases (if programmed so during installation) arming
the system after an alarm, requires a technician code. On the
LCD display a message "Not ready-technician reset" will appear.
3 IMPORTANT!
If the alarm was caused by a tripped Smoke Detector(s), the
keypad's FIRE LED will remain lit—providing an indication that
the fire system must be reset before it will be capable of
detecting subsequent alarms. Furthermore, until reset, you will
be prevented from arming your system.
To reset smoke detector press [∗] [2] [2] [user code] [ENTER]
And press [∗] [∗]to exit user function mode.

user manual
16
DURESS DISARMING If you are ever coerced into disarming your
system, you can comply with the intruder's
wishes while sending a silent, duress alarm to
the Central Station. To do so, you must use a
special Duress Code. Which when used, will
disarm the system in the regular manner, while
simultaneously transmitting the duress alarm.
For Duress code add 1 to the last digit of your
user cod.
Example:
if your code is 1-2-3-4 your duress code is 1-2-
3-5
If your user code is 5-6-7-8 your duress code is
5-6-7-9
If user code is 6-7-8-9 duress code is 6-7-8-0
Under no circumstances must the Duress Code
be used haphazardly or without reason. Central
Stations, along with Police Departments, treat
Duress Codes very seriously and take
immediate action.
DISARMING BY USING THE DURESS CODE
STEP DESCRIPTION
1 If outside the premises, open an "entry" door. The keypad(s) will
beep—indicating that the Entry Delay period has begun.
2 Enter your Duress Code, and press [ENTER]:
Once entered, it will disarm your system and send a silent alarm
to the Central Station.

user manual
17
4
Section 4: Partitioned Systems
INTRODUCTION
The ORBIT-Pro system can be divided into partitions. Each partition may be
viewed as a separate security system, each one can be armed and disarmed
separately regardless the condition of the other.
Partitions can be armed/disarmed one at a time, or all at once.
Keypads and Partitions - Each keypad is assigned to different partition(s).
Grand Master and manager , with access to all partitions, can use any keypad to
access any partition. Other users can use only designated keypads.
Common Zones - partitioned systems have to share common zones, for
example the front door of certain two family house, must be available to both
families and is therefore shared between them.
A common zone is armed only if all partitions sharing the zone are armed.
The common zone(s) is disarmed if any of the partitions, which the zone(s) is
assigned, is disarm.
ARMING MULTIPLE PARTITIONS
Only users that have defined so during the system installation can operate
more than one partition, and arm/disarm all partitions at once.
STEP DESCRIPTION
1 If the system is NOT ready to be armed.
Secure or bypass the violated zone(s) and then proceed.
2 Enter your User Code and press [ARM].
3 Enter the partition(s) number you wish to arm (1 or 2 up until
8).
(Partition “0” relates to ALL partitions, to arm all partitions at
once enter 0)
For LCD Keypad you can scroll with the or the
keys to the desired partition (or enter the partition's number).
The first item in the list will be ALL (partition number 0)
4
Press to arm the selected partition(s).

user manual
18
Repeat the above for other partitions to be armed.
Example: To arm partition 3
with code 1234, enter: 1-2-3-4 [ARM] [3] [ARM]
To arm ALL partitions: 1-2-3-4-[ARM] [0] [ARM]
To arm partitions 3 and 4: 1-2-3-4 [ARM] [3] [4] [ARM]
5
To arm in STAY mode: 1-2-3-4 [STAY] [3] [STAY]
DISARMING MULTIPLE PARTITIONS
STEP DESCRIPTION
1
Enter your User Code and press [ENTER/DISARM]
2 Select the partition number (1-8)
To disarm all partitions at once select “0”
For LCD Keypad scroll with the or the keys to the
desired partition (or enter the partition's number).
The first item in the list will be ALL (partition number 0).
3
Press . to confirm, and confirmation message will be
displayed for several seconds.
Repeat the above for other partitions to be disarmed.
Example: To disarm
partition 3 with code 1234,
enter: 1-2-3-4 [DISARM] [3] [DISARM]
To disarm ALL partitions: 1-2-3-4-[DISARM] [0] [DISARM]
To disarm partitions 3 and
4: 1-2-3-4 [DISARM] [3] [4] [DISARM]
4
Note: ALL partitions relate to all partitions that are authorized
by the security code in use.
If the ARM LED is flashing after disarming, check the display
for activated (alarmed) zones before proceeding

user manual
19
5
Section 5: System Sounds
Besides the visual indications provided by your keypad(s), your system is
designed to produce audible annunciation after certain events. Depending on
the circumstance, such sounds may be made by your system's keypad(s), its
external sounder (e.g. a siren or bell),
EVENT KEYPAD SOUND
SIREN/
BELL
Intrusion
Alarm
Rapid beeping
(see Note 5)
YES
(continuous)
Fire Alarm Rapid beeping
(see Note 3)
YES
(staggered)
Keypad
Police
Emergency
A momentary chirp MAYBE
(see Note 2)
Keypad Fire
Emergency
Rapid beeping
(see Note 3)
YES
(staggered)
Keypad
Auxiliary
Emergency
A momentary chirp no sound
Arming or
disarming
A one second tone if
completed correctly;
three rapid error beeps
if incorrect (see Note 3)
no sound
Entering an
incorrect key
sequence
Three rapid beeps
(see Note 3) no sound
Entry Delay
countdown
Slowly repeating tones
until the entry delay
period expires (see Note
3)
no sound
Exit Delay
countdown
Slowly repeating tones
until the exit delay
period expires (see Note
3)
MAYBE
(see Note 1)
Entering data
into the User
Functions
mode
(see page 20)
A one second tone if
completed correctly;
three rapid error beeps
if incorrect (see Note 3)
no sound
NOTE 1:
If selected during the installation,
a brief "chirp" may be heard from
the siren when the Exit Delay
period expires.
NOTE 2:
Whether or not the Police
Emergency alarm is annunciated
by the external sounder is
determined by the alarm
company during your system's
installation.
NOTE 3:
Keypad beeps in response to
Entry/Exit Delay countdowns,
Keypad Fire Emergencies, and
keypad errors and confirmations
are typically enabled. At the
user's discretion, such beeps
may be disabled.
NOTE 4:
Any intrusion zone, if selected for
the chime feature, will, when
violated during the disarmed
period, cause the keypad to
annunciate the event (), the
chime can also be disabled when
not desired.
NOTE 5:
Based on decisions made at the
time your alarm system was
installed, keypad(s) may beep
during this type of alarm. Bell Circuit
Failure or
Fire Loop
Trouble
Three rapid beeps at
10 sec intervals. no sound

user manual
20
Section 6: User Functions
Your ORBIT-PRO comes with a variety of selectable User Functions.
By entering the User Functions mode, a number of options become available,
To enter User Functions mode press [∗] followed by the Function index (see the
table below) and user code. To exit user function mode and return to normal
operation press [∗] [∗]quickly.
Example: To activate “Switch Auxiliary” press: [∗] [2] [2] [1-2-3-4] [ENTER]
To view trouble press [∗] [3] [1] [1-2-3-4] [ENTER]
Quick
Key Item Explanation
1 Bypass
1 Bypass Zones Provides the ability to bypass any of the system's intrusion
zones.
2 Bypass Reset Removes any bypass(es) previously placed on intrusion zone(s).
3 Bypass Recall Recalls the most recent zone bypass(es)
2Activities
1
Utility Output
Allows user control of previously designated external devices
(e.g. an appliance, a motor-driven garage door, etc.)
[∗] [2] [1] [user code] [ENTER] [Output number] [ENTER]
in some cases only a code followed by ENTER required to
activate UO (i.e. to open a door).
2 Switch
Auxiliary
Interrupts the power supplied to the system's smoke detector(s)
for a predetermined interval, thus resetting and "readying" them
for subsequent alarms.
3
Terminate FM
If Follow Me Phone Number(s) were chosen, their operation can
be terminated. Use this function when an alarm has been tripped
and there is no need to utilize the Follow-Me phone call.
4 Initiate Call By initiating a call to your alarm company, allows them to
perform a remote programming operation on your system.
5
Hand Over
Similar in intent to Initiate Call (above), Hand Over allows your
alarm company to call you and, during the call, "hand over" to
them, the control of your security system.
6 Void Rep Prg For Installer Use Only
DO NOT USE
Table of contents
Other Rokonet Security System manuals

Rokonet
Rokonet ORBiT-14 User manual

Rokonet
Rokonet WisDom User manual

Rokonet
Rokonet WisDom User manual

Rokonet
Rokonet Rokonet ORBIT-6 RP-206 User manual

Rokonet
Rokonet WisDom Assembly instructions

Rokonet
Rokonet WAVESYS Programming manual

Rokonet
Rokonet Rokonet ORBIT-6 RP-206 User manual

Rokonet
Rokonet ORBIT-PRO RP296MUD User manual
Rokonet
Rokonet Rokonet ORBIT-6 RP-206 User guide

Rokonet
Rokonet WisDom User manual