7
• Children should be supervised to prevent them from using the
unit as a toy.
• Do not use the unit if there is any damage in the coffee maker
body, power cord or power plug.
• If the power cord is damaged, it should be replaced by the man-
ufacturer, a maintenance service, or similar qualified personnel
to avoid danger.
• Do not repair the unit by yourself. Do not disassemble the unit by
yourself, by any malfunction or after the unit has been dropped,
disconnect it from the electrical outlet and contact any autho-
rized (designated) service center at the contact addresses in the
warranty card and on the website www.rondell.ru.
• Transport the unit in the original packaging only.
• Keep the unit in a dry cool place out of reach of children and dis-
abled persons.
THIS UNIT IS INTENDED FOR HOUSEHOLD USE ONLY. ANY
COMMERCIAL USAGE AND USAGE IN PRODUCTION AREAS AND
WORK SPACES IS PROHIBITED.
BEFORE THE FIRST USE
After transporting or storing the unit at a low temperature,
keep it at room temperature for at least three hours.
– Take the coffee machine out of the packaging and remove the
packing materials.
– Check the unit for damages; do not use it in case of any.
– Make sure that the coffee machine operating voltage corre-
sponds to the mains voltage.
– The unit is designed to operate with 50 Hz alternative current;
when the unit is running at the required rated frequency no set-
ting is required.
– Before using the coffee machine for the first time, rinse all
removable parts (8, 7, 10, 13) with warm water and a neutral
detergent and dry.
OPERATION PREPARATION
Read before the first use
– Check and make sure that the brewing unit (10), the used cof-
fee grounds container (13) and drip tray (7) are installed cor-
rectly.
– Fill the tank (8) with clean water.
– Add coffee beans (over 30 g) to the bean container (1) before
using for the first time.
Notes: Only coffee beans can be placed in the container (1), please
do not add water, ground coffee, coffee beans mixed with solid par-
ticles, otherwise the grinder millstones will be damaged.
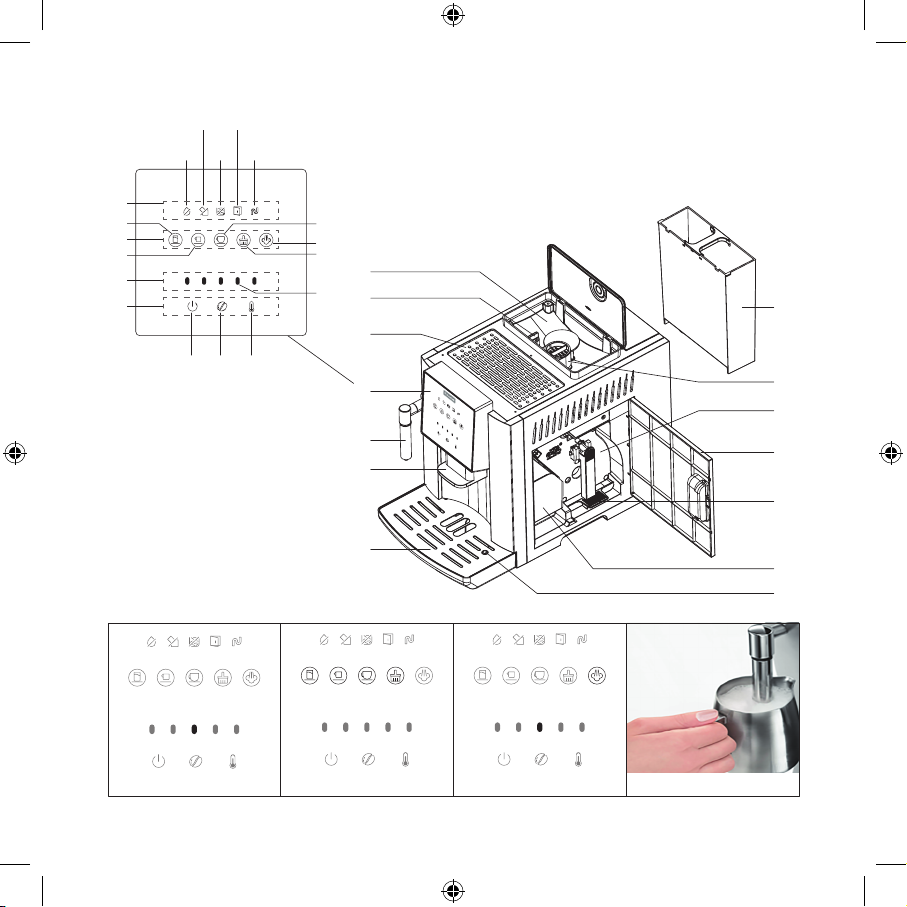
Drip tray (7)
When the level of the drained liquid rises to the upper limit, the
float water level indicator (14) emerges, after that it is necessary to
empty the drip tray.
Brewing unit (10)
Please do not open the shutter or move the brewing unit while mak-
ing coffee. If the display shows the icon indicating that the brew-
ing unit (10) is missing, please remove and then reinsert it until it
stops clicking.
Used coffee grounds container (13)
If the display shows the icon indicating that the container is full,
please empty the container (13).
OPERATION AND FUNCTIONALITY
Activating the coffee machine
Insert the power cord into the socket on the panel back and connect
the unit to the mains. The indicator (28) will light up in the center of
the control panel (4) (fig. 1).
Press the button (30) , the coffee machine will be activated and
start self-diagnosis, heating and self-cleaning. When the above
processes are completed, the coffee machine will be ready for
use (fig. 2).
Note: The operating mode buttons on the control panel (4) are
touch-sensitive, to activate the desired operating mode, just touch
the button.
Espresso/Lungo/hot water/cleaning
To prepare an Espresso, press the button (23) .
To prepare a Lungo, press the button (24) .
To pour hot water, press the button (22) .
To start the internal rinsing, press the button (25) .
To cancel any of the above processes, press the button of the
selected function again.
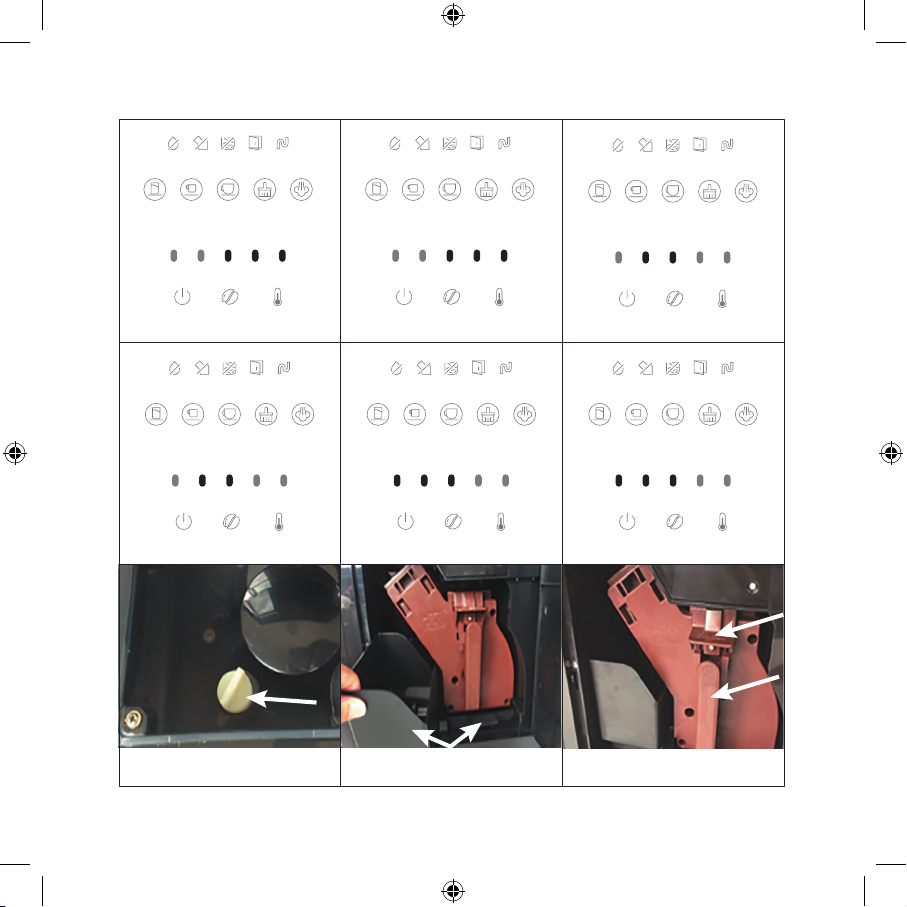
Function for frothing milk with steam
1. Press the button (26) , and the button indicator starts flashing
blue (fig. 3). Wait for the internal boiler to heat up and the indica-
tor of the button (26) turns constant blue .
2. To froth milk with steam, press the button (26). Dip the steam
outlet pipe (5) in the milk (fig. 4). To stop the steam production,
press the button (26) again.
Note: Do not touch the outlet pipe (5) after using the steam froth-
ing function. We suggest that the users do a short steaming again to
push the remaining milk out of the pipe (5) and then use a cleaning
cloth to wipe the milk off the surface.
3. At the end of the steam function, press the hot water button (22)
, the coffee machine will automatically start to cool down to
the coffee brewing temperature. The hot water icon (22) and the
steam icon (26) will flash alternately during the cooling process.
The indication icons will also light up alternately (fig. 5).
4. Do not switch the coffee machine on and wait until the alternat-
ing blinking of icons and indicators stops and the buttons (22,
23, 24, 25, 26) light up constant blue (fig. 6), after that the coffee
machine is ready to prepare coffee or hot water again.