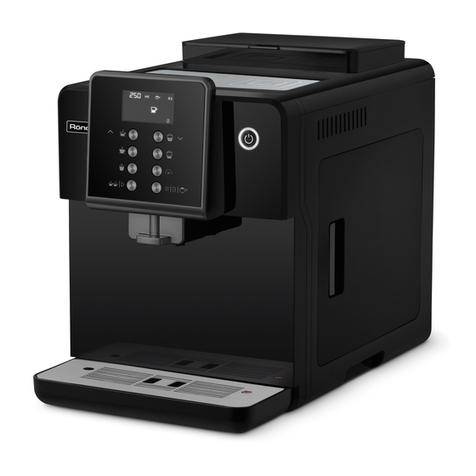
RONDELL RDE-1106 User manual

RDE-1106

6
5
4
3
2
17
1
8
7
9
10
14
16
15
13
12
18 19 20 21 22 11

11GB MANUAL INSTRUCTION
18DE DIE BETRIEBSANWEISUNG
4RUS ИНСТРУКЦИЯ ПО ЭКСПЛУАТАЦИИ
www.rondell.ru
КОФЕВАРКА
COFFEE MAKER
RDE-1106

4
КОФЕВАРКА RDE-1106
Кофеварка предназначена для приготовления: «Эспрессо»,
«Лунго», «Капучино», «Латте» и горячей воды.
ОПИСАНИЕ
1. Крышка ёмкости для воды
2. Емкость для воды
3. Ручка регулятора подачи пара
4. Трубка-капучинатор
5. Съёмный наконечник
6. Поддон для капель
7. Индикатор заполнения поддона для капель
8. Решетка поддона для капель
9. Ручка держателя фильтра
10. Панель управления
11. Площадка для подогрева чашек
12. Держатель фильтра для кофе
13. Фиксатор фильтра для кофе
14. Фильтр для одной порции кофе
15. Фильтр для двойной порции кофе
16. Мерная ложка с функцией темпера
17. Клапан емкости для воды
Панель управления (10)
18. Кнопка включения/отключения « »
19. Кнопка приготовления одной порции
кофе эспрессо « »
20. Кнопка приготовления двойной порции
кофе эспрессо « »
21. Кнопка ручного режима подачи воды « »
22. Кнопка включения подачи пара « »
ВНИМАНИЕ!
Для дополнительной защиты в цепи питания целесообразно
установить устройство защитного отключения (УЗО) с номи-
нальным током срабатывания, не превышающим 30 мА. Для
установки УЗО обратитесь к специалисту.
РЕКОМЕНДАЦИИ ПО ЭКСПЛУАТАЦИИ И МЕРАМ
БЕЗОПАСНОСТИ
Перед использованием устройства внимательно ознакомь-
тесь с руководством по эксплуатации. Сохраняйте данное
руководство в течение всего срока эксплуатации.
• Неправильное обращение с устройством может приве-
сти к его поломке, причинению вреда пользователю или
его имуществу.
• Перед первым включением убедитесь в том, что рабочее
напряжение кофеварки соответствует напряжению в элек-
трической сети.
• Сетевой шнур снабжён «евровилкой»; включайте её в элек-
трическую розетку, имеющую надёжный контакт зазем-
ления.
• Во избежание риска возникновения пожара не исполь-
зуйте переходники при подключении кофеварки к элек-
трической розетке.
• Используйте кофеварку только по её прямому назначению.
• Не используйте устройство вне помещений.
• Никогда не оставляйте и не храните кофеварку в помеще-
ниях с температурой ниже 0 °C.
• Устанавливайте кофеварку на сухой ровной устойчивой
поверхности, не ставьте устройство на край стола.
• Не ставьте кофеварку на горячие поверхности.
• Следите, чтобы на кофеварку не попадали прямые сол-
нечные лучи.
• Не используйте кофеварку в непосредственной близости
от источников тепла, влаги или открытого пламени.
• При установке кофеварки оставляйте по 10 см свободного
пространства с каждой из сторон устройства для обеспе-
чения его эффективного охлаждения.
• Не допускайте, чтобы сетевой шнур свешивался со стола,
а также следите, чтобы он не касался горячих поверхно-
стей и острых кромок мебели.
• Соблюдайте осторожность во время работы с горячей
водой.
• Во избежание удара электрическим током не погружайте
кофеварку, сетевой шнур или вилку сетевого шнура в воду
или в любые другие жидкости.
• Во избежание травм не трогайте руками движущиеся
детали устройства, такие как кофемолка и заварочный
блок, в процессе работы.
• Запрещается двигать кофеварку или снимать защитные
элементы (например, вынимать держатель фильтра для
кофе (12)) в процессе приготовления напитков и промывки.
• Используйте только принадлежности, входящие в ком-
плект поставки.
• Не включайте кофеварку без воды.
• Используйте только чистую воду, рекомендуется исполь-
зовать воду, прошедшую дополнительную очистку быто-
выми фильтрами для воды.
• Перед включением кофеварки убедитесь, что все съемные
детали установлены правильно.
• Никогда не оставляйте работающую кофеварку без при-
смотра.
• Не дотрагивайтесь до сетевого шнура, вилки сетевого
шнура, корпуса кофеварки мокрыми руками.
• Во избежание ожога не дотрагивайтесь до горячих поверх-
ностей кофеварки (блок подачи кофе, бойлер) в процессе
приготовления кофе и сразу после выключения устрой-

5
ства. Поверхность нагревательного элемента остается
горячей после использования.
• Дайте устройству полностью остыть перед снятием при-
надлежностей или чисткой.
• Отключайте кофеварку от электрической сети перед чист-
кой или в случае, если вы устройством не пользуетесь.
• Отключая устройство от электрической сети, не тяните
за сетевой шнур, а держитесь за вилку сетевого шнура.
• Запрещается выключать устройство и отключать его от
сети в процессе приготовления напитков и чистки системы.
• Из соображений безопасности детей не оставляйте поли-
этиленовые пакеты, используемые в качестве упаковки,
без присмотра.
Внимание! Не разрешайте детям играть с полиэтиленовыми
пакетами или упаковочной плёнкой. Опасность удушья!
• Данное устройство не предназначено для использова-
ния детьми.
• Во время работы и остывания размещайте устройство в
местах, недоступных для детей.
• Не разрешайте детям прикасаться к устройству и к сете-
вому шнуру во время работы устройства.
• Прибор не предназначен для использования лицами (вклю-
чая детей) с пониженными физическими, сенсорными или
умственными способностями или при отсутствии у них жиз-
ненного опыта или знаний, если они не находятся под при-
смотром или не проинструктированы об использовании
прибора лицом, ответственным за их безопасность.
• Дети должны находиться под присмотром для недопуще-
ния игр с прибором.
• Запрещается пользоваться устройством при наличии
каких-либо повреждений корпуса кофеварки, шнура пита-
ния или вилки сетевого шнура питания.
• Во избежание утечки на электрический соединитель при
возникновении любых неисправностей, а также после
падения устройства выключите прибор из электрической
розетки и обратитесь в любой авторизованный (уполномо-
ченный) сервисный центр.
• При повреждении шнура питания его замену во избежание
потенциальных травм должны производить изготовитель,
сервисная служба или подобный квалифицированный
персонал.
• Во избежание потенциальных травм, запрещается само-
стоятельно ремонтировать прибор. Не разбирайте прибор
самостоятельно, при возникновении любых неисправно-
стей, а также после падения устройства выключите прибор
из электрической розетки и обратитесь в любой автори-
зованный (уполномоченный) сервисный центр по контакт-
ным адресам, указанным в гарантийном талоне и на сайте
www.rondell.ru.
• Перевозите устройство только в заводской упаковке.
• Храните устройство в сухом прохладном месте, недоступ-
ном для детей и людей с ограниченными возможностями.
ДАННЫЙ ПРИБОР ПРЕДНАЗНАЧЕН ДЛЯ ИСПОЛЬЗОВАНИЯ
ТОЛЬКО В БЫТОВЫХ УСЛОВИЯХ. ЗАПРЕЩАЕТСЯ КОММЕР-
ЧЕСКОЕ ИСПОЛЬЗОВАНИЕ И ИСПОЛЬЗОВАНИЕ ПРИБОРА
В ПРОИЗВОДСТВЕННЫХ ЗОНАХ И РАБОЧИХ ПОМЕЩЕНИЯХ.
ПЕРЕД ПЕРВЫМ ИСПОЛЬЗОВАНИЕМ
После транспортировки или хранения устройства при
пониженной температуре необходимо выдержать его
при комнатной температуре не менее трёх часов.
– Извлеките кофеварку из упаковки и удалите упаковочные
материалы.
– Проверьте целостность устройства, при наличии повреж-
дений не пользуйтесь устройством.
– Убедитесь в том, что рабочее напряжение кофеварки
соответствует напряжению в электрической сети.
– Перед первым использованием необходимо снять защит-
ную силиконовую заглушку с клапана подачи воды (17) в
нижней части емкости (2).
– Перед первым использованием кофеварки промойте все
ее съемные части (2, 6, 8, 12, 14, 15, 16) теплой водой с
нейтральным моющим средством и просушите.
ПОДГОТОВКА К РАБОТЕ
Примечания:
– кнопки выбора и установки режимов работы сенсорные,
для включения нужного режима работы, к кнопке доста-
точно прикоснуться, каждое прикосновение к активной
кнопке сопровождается звуковым сигналом.
– если вы включили кофеварку и не совершаете никаких
действий, то прозвучат звуковые сигналы и кофеварка
выключится через 25 минут.
Перед варкой кофе необходимо промыть бойлер кофеварки:
• Снимите ёмкость (2), наполните ее чистой водой до
отметки «МАХ» и установите на место.
Примечания: В ёмкость (2) можно наливать только чистую
воду комнатной температуры. Запрещено заливать горячую
или ледяную воду и молоко. Несоблюдение данного требо-
вания приведёт к трещинам в емкости и поломке устройства.
• Установите фильтр (14 или 15) в держатель (12) совместив
выступ на фильтре и паз в держателе, поверните фильтр
для фиксации. Не засыпайте молотый кофе в фильтр.
• Установите держатель фильтра (12) в место его установки
на кофеварке. Выступы держателя фильтра (12) должны
совпасть с пазами на бойлере, после чего поверните ручку
держателя фильтра (9) вправо до упора.

6
Примечание: Для облегчения установки держателя филь-
тра на передней панели кофеварки нанесены соответству-
ющие символы.
• Поставьте подходящую чашку на решетку поддона (6).
• Вставьте вилку сетевого шнура в розетку.
• Включите кофеварку нажатием кнопки (18) « », при
этом прозвучит звуковой сигнал, световой индикатор
включится белым цветом и будет мигать. Дождитесь
нагрева воды в бойлере, световой индикатор будет све-
титься постоянно.
• Нажмите кнопку ручной подачи воды (21) « », при
этом помпа включится на 3 секунды, после паузы помпа
включится вновь, и вода будет подаваться постоянно.
После наполнения чашки водой выключите подачу воды
повторно, нажав кнопку (21) « », вылейте воду из чашки.
• В зависимости от объема чашки проведите эту процедуру
несколько раз, после этого бойлер будет промыт.
Затем промойте систему подачи пара:
– Поставьте подходящую чашку под наконечник капучина-
тора (5).
– Убедитесь, что ручка регулятора подачи пара (3) нахо-
дится в положение «0», в противном случае поверните её
по часовой стрелке до упора.
– Нажмите кнопку включения подачи пара (22) « », све-
товой индикатор включится красным цветом и будет
мигать. Дождитесь нагрева воды в бойлере до состоя-
ния пара, световой индикатор при этом будет светиться
постоянно.
– Медленно поверните ручку регулятора подачи пара (3)
против часовой стрелки, пар начнёт выходить из нако-
нечника (5), и в течение 10-15 секунд промойте систему
подачи пара.
– Поверните ручка регулятора подачи пара (3) в положение
«0» по часовой стрелке.
– Выключите подачу пара нажав кнопку (22) « ».
ВНИМАНИЕ!
– Запрещается снимать держатель фильтра (12) во время
работы кофеварки.
– Для снятия держателя фильтра (12) поверните ручку дер-
жателя (9) влево до упора и снимите держатель (12).
ПРИГОТОВЛЕНИЕ КОФЕ ЭСПРЕССО
• Снимите ёмкость (2), наполните ее холодной водой до
отметки «МАХ» и установите на место. Следите за тем,
чтобы уровень воды в ёмкости (2) не опускался ниже
отметки «MIN», регулярно доливайте воду в ёмкость (2).
• Для приготовления одной порции эспрессо выберите
фильтр (14), для приготовления двойной порции эспрессо
выберите фильтр (15).
• Насыпьте молотый кофе в соответствующий фильтр (14
или 15), используйте мерную ложку (16), слегка утрам-
буйте кофе обратной стороной мерной ложки (16).
• Установите держатель фильтра (12) в место его уста-
новки. Выступы держателя фильтра (12) должны совпасть
с пазами на бойлере, после чего поверните ручку держа-
теля фильтра (9) вправо до упора.
• Поставьте чашку на решетку поддона (8).
• Вставьте вилку сетевого шнура в розетку.
• Включите кофеварку нажатием кнопки (18) « », при этом
прозвучит звуковой сигнал, световой индикатор загорится
синим цветом и будет мигать.
• Дождитесь нагрева воды в бойлере, световой индикатор
будет светиться постоянно.
Примечание: используемые чашки необходимо предвари-
тельно подогреть, для этого установите чашки на площадку
для подогрева (11), во время нагрева воды в бойлере пло-
щадка (11) нагревается, подогревая при этом чашки.
• Для приготовления одной порции кофе эспрессо нажмите
кнопку (19) « », при этом помпа включится на 3 секунды
для предварительного смачивания кофе, после паузы
помпа включится вновь, и будет работать 15 секунд, перед
окончанием подачи воды, прозвучат звуковые сигналы.
• Для приготовления двойной порции кофе эспрессо
нажмите кнопку (20) « », в этом случае установите на
решётку (8) чашку большего объёма или две маленьких.
При нажатии кнопки (20) помпа включится на 3 секунды
для предварительного смачивания кофе, после паузы
помпа включится вновь, и будет работать 30 секунд, перед
окончанием подачи воды, прозвучат звуковые сигналы.
ПРИГОТОВЛЕНИЕ КОФЕ В РУЧНОМ РЕЖИМЕ
• Для регулировки объема напитка воспользуйтесь функ-
цией ручного режима подачи воды.
• Для ручного приготовления кофе, нажмите кнопку подачи
воды (21) « », при этом помпа включится на 3 секунды,
после паузы помпа включится вновь, и вода будет пода-
ваться постоянно. После наполнения чашки готовым
кофе, выключите подачу воды повторно, нажав кнопку
(21) « ».
Примечание:
– если во время приготовления кофе эспрессо возникла
необходимость выключить подачу воды, повторно
нажмите кнопку (19 « » или 20 « »);
– повторное приготовление кофе рекомендуется произво-
дить с интервалами в 2-3 минуты;
– следите за заполнением поддона (6), периодически сли-
вайте воду и промывайте поддон (6). Для определения
заполнения поддона (6) предназначен всплывающий
7
индикатор красного цвета (7), расположенный в центре
решётки поддона (8).
• Выключите кофеварку, нажав на кнопку (18) « ».
• Дождитесь остывания кофеварки и снимите держатель
фильтра (12), повернув ручку держателя (9) влево до
упора. Удалите остатки молотого кофе и промойте фильтр.
Для удобства при удалении остатков кофе используйте
фиксатор (13), с помощью которого можно зафиксировать
фильтр от выпадения из держателя (12).
ПОЛЕЗНЫЕ СОВЕТЫ
• Используйте свежемолотый кофе, предназначенный для
кофеварок «эспрессо».
• Слегка утрамбовывайте молотый кофе в фильтре, это
можно сделать обратным концом мерной ложки (16).
• Крепость получаемого кофе будет зависеть от качества
и степени помола кофейных зерен. Если кофе налива-
ется слишком долго, это означает, что кофе очень мелкого
помола или слишком сильно утрамбован.
ПРИГОТОВЛЕНИЕ КАПУЧИНО
ВНИМАНИЕ! Опасайтесь ожогов выходящим горячим паром
из трубки-капучинатора (4) и съёмного наконечника (5).
• Сварите кофе, как описано в разделе «ПРИГОТОВЛЕНИЕ
КОФЕ ЭСПРЕССО», в подогретой чашке, объема кото-
рой будет достаточно для добавления взбитой молоч-
ной пенки.
• Нажмите кнопку включения подачи пара (22) « », при
этом световой индикатор загорится красным цветом и
будет мигать, дождитесь, когда световой индикатор пере-
станет мигать и будет светиться постоянно.
• Подставьте под наконечник (5) подходящую чашку, акку-
ратно поверните регулятор подачи пара (3) против часо-
вой стрелки и слейте остатки воды и конденсата из
трубки-капучинатора (4), убедитесь, что выходящий пар
однородный и без воды.
• Закройте подачу пара, установив регулятор подачи пара
(3) в положение «0»
• Опустите наконечник (5) в ёмкость с холодным молоком
или сливками, наконечник (5) не должен касаться дна
ёмкости, иначе выход пара будет затруднен.
• Медленно поверните ручку регулятора подачи пара (3)
против часовой стрелки и полностью откройте подачу
пара.
Примечание: во избежание выплёскивания молока всегда
погружайте наконечник (5) глубже, чем на 1 см от поверх-
ности молока.
• Выходящий пар создаёт завихрения, способствующие
образованию молочной пенки, периодически приподни-
майте и опускайте ёмкость с молоком относительно нако-
нечника (5) до образования молочной пенки.
• Соблюдайте осторожность во время работы с выходящим
паром, после получения молочной пенки закройте подачу
пара, установив ручку регулятора (3) в положение «0».
• Добавьте молочную пенку в чашку с приготовленным кофе.
• Выключите кофеварку, нажав на кнопку (18) « ».
Примечание:
– рекомендуется приготовить необходимое количество
кофе эспрессо до взбивания молочной пенки, поскольку
в режиме подачи пара вода в бойлере нагревается зна-
чительно выше температуры воды, предназначенной для
приготовления кофе эспрессо, в результате чего готовый
напиток может иметь совсем другой вкус;
– повторно готовить кофе эспрессо рекомендуется не ранее
чем через 5-10 минут после приготовления молочной
пенки;
– можно сократить время ожидания снижения температуры
воды, для этого подставьте чашку под держатель филь-
тра (12) (фильтр для кофе не наполняйте молотым кофе)
и включите ручную подачу воды, нажав кнопку (21) « »,
после наполнения чашки повторно нажмите кнопку (21)
для выключения подачи воды.
– Процесс получения молочной пенки – это искусство.
С первого раза пенка может и не получиться, не отчаи-
вайтесь и экспериментируйте, пока не добьётесь хоро-
шего результата.
ВАЖНО:
– Необходимо, чтобы молоко, используемое для приготов-
ления пенки, было свежим, охлажденным и без консер-
вантов, то есть не так называемое молоко длительного
хранения.
– Используйте обычное цельное молоко жирностью от 4%
до 6%, жирность сливок должна быть не менее 10%.
– Сразу после взбивания молока или сливок прочистите
трубку-капучинатора(4) и наконечник (5) – для этого опу-
стите трубку-капучинатора (4) с наконечником(5) в ста-
кан с чистой водой, включите подачу пара, повернув
ручку регулятора (3) против часовой стрелки, после этого
выключите подачу пара, установив ручку регулятора (3) в
положение «0» и выключите кофеварку.
– Дождитесь остывания кофеварки и снимите наконечник
(5) с трубки-капучинатора (4), протрите трубку-капучина-
тора (4) снаружи влажной, мягкой тканью, сам наконечник
(5) промойте под струей воды.
ПОДОГРЕВ НАПИТКОВ
• Вы можете подогреть напитки, опустив трубку-капучина-
тор (4) без наконечника (5) в чашку.

8
• Включите кофеварку, нажмите кнопку (22) « » и дожди-
тесь нагрева бойлера (световой индикатор будет све-
титься красным цветом постоянно).
• Опустите трубку-капучинатора (4) в чашку c напитком,
который вы хотите подогреть.
• Медленно поверните ручку регулятора подачи пара (3) и
полностью откройте подачу пара.
• Когда напиток нагреется до нужной температуры,
закройте подачу пара, установив ручку регулятора (3) в
положение «0».
• Выключите кофеварку, нажав на кнопку(18) « ».
ПОЛУЧЕНИЕ ГОРЯЧЕЙ ВОДЫ
• Убедитесь, что емкости (2) достаточно воды, а ручка регу-
лятора подачи пара (3) находится в положении «0» и
слегка затянута.
• Поставьте подходящую чашку на решётку поддона (8) и
направьте в нее наконечник (5).
• Нажмите кнопку включения (18), дождитесь когда све-
товой индикатор перестанет мигать и начнёт светиться
постоянно.
• Медленно поверните ручку регулятора подачи пара (3)
против часовой стрелки, а затем нажмите кнопку руч-
ной подачи воды (21) « », при этом помпа включится на
3 секунды, после паузы помпа включится вновь, и горя-
чая вода будет подаваться из наконечника (5) постоянно.
• Выключите подачу воды, нажав на кнопку (21) « » и
поверните ручку (3) по часовой стрелке до упора.
Чистка от накипи (декальцинация)
Для увеличения срока службы кофеварки критически важно
производить своевременную очистку устройства от накипи.
Частота проведения очистки от накипи зависит от уровня
жесткости воды в вашем регионе. Для определения этого
уровня рекомендуем использовать бумажные тестеры-ин-
дикаторы, которые погружаются в воду и меняют свой цвет в
зависимости от объема кальция, магния и железа. На основа-
нии полученных данных необходимо выбрать одну из следую-
щих схем частоты декальцинации:
Уровень Жесткость
воды, мг/л
Необходимость
произвести декальцинацию
(кол-во чашек)
Уровень 1 0-50 880
Уровень 2 51-120 440
Уровень 3 151-250 280
Уровень 4 251-425 220
• В качестве чистящего средства можно использовать поро-
шок или таблетки от кальция, которые предназначены для
автоматических кофемашин и других устройств для приго-
товления еды и напитков.
• Приготовьте раствор для удаления накипи согласно
инструкции на чистящее средство.
• Заполните емкость для воды (2) приготовленным раство-
ром до максимальной отметки и установите в кофеварку.
• Установите фильтр для кофе (14 или 15) в держатель (12).
Установите держатель фильтра (12) в кофеварку. Выступы
держателя (12) должны совпасть с пазами на бойлере,
после чего поверните ручку держателя фильтра(9) вправо
до упора.
• Поставьте подходящую чашку на решетку поддона (8).
• Вставьте вилку сетевого шнура в розетку.
• Включите кофеварку нажатием кнопки (18) « », при этом
прозвучит звуковой сигнал, и световой индикатор белого
цвета будет мигать.
• Дождитесь, когда световой индикатор будет светиться
постоянно.
• Нажмите кнопку ручной подачи воды (21) « » и напол-
ните водой чашку объемом около 100 мл (это необходимо
для того, чтобы удалить воду из бойлера и заполнить его
раствором для удаления накипи), выключите подачу воды,
повторно нажав кнопку (21) « ».
• Снимите наконечник (5) с трубки-капучинатора (4) и под-
ставьте под трубку (4) подходящую посуду. Нажмите
кнопку (22) « » и дождитесь нагрева бойлера (световой
индикатор красного цвета будет светиться постоянно).
Медленно поверните ручку регулятора подачи пара (3) и
откройте на 10-15 секунд подачу пара. Закройте подачу
пара, установив ручку регулятора (3) в положение «0».
• С небольшими перерывами повторите процедуру очистки
бойлера до полного окончания раствора для удаления
накипи в емкости (2).
• Заполните емкость (2) чистой водой и вновь промойте
бойлер до окончания воды в емкости (2).
• Выключите кофеварку, нажав на кнопку (18) « ».
ЧИСТКА
• При чистке фильтра (14/15), если отверстия засорены
осадком молотого кофе, их можно почистить небольшой
кисточкой.
• Протирайте корпус кофеварки мягкой, слегка влажной
тканью, после чего вытрите насухо.
• Для чистки кофеварки не используйте металлические
щетки и абразивные чистящие средства.
• Запрещается погружать сетевой шнур, вилку сетевого шнура
и корпус кофеварки в воду или любые другие жидкости.

9
• Съемные детали кофеварки (2, 6, 8, 12, 14, 15, 16) промы-
вайте теплой водой с нейтральным моющим средством,
сполосните и просушите.
Поддон для капель и решётка
Снимите решетку (8) с поддона, снимите поддон (6) и слейте
из него воду, промойте поддон и установите его на место,
установите решетку (8) на поддон.
НЕИСПРАВНОСТИ, ИХ ПРИЧИНЫ И МЕТОДЫ УСТРАНЕНИЯ
Неисправность Причина Метод устранения
Кофеварка не вклю-
чается
В сетевой розетке отсутствует
напряжение.
Вилка сетевого шнура не до конца
вставлена в розетку.
Убедитесь, что сетевая розетка работает.
Проверьте, до конца ли вставлена вилка в розетку.
Вода вытекает из ниж-
ней части кофеварки
Поддон для воды переполнен. Слейте воду из поддона.
Утечка кофе из держа-
теля фильтра
Неплотное прилегание фильтра
к уплотнителю в бойлере, молотый
кофе попал на края фильтра.
Очистите края фильтра.
Приготовленный кофе
имеет посторонний
запах
Неправильный процесс удаление
накипи в бойлере кофеварки.
Неправильное хранение кофе.
Обратитесь к разделам «Подготовка к работе», «Удале-
ние накипи», и выполните их несколько раз. Используйте
свежемолотый кофе. Храните кофе в сухом, прохладном
месте.
Пар не взбивает
молоко
Низкая температура выходящего
пара.
Емкость слишком большая или не
подходящего размера. Вы исполь-
зовали обезжиренное молоко.
Взбивайте молоко только после того, как загорится ин-
дикатор готовности. Для взбивания молока, используйте
узкую высокую посуду.
Используйте только цельное молоко, жирностью 4-6%.
Вода из емкости (2)
не закачивается в ко-
феварку, кофе не вы-
ливается из рожка
В заварочной системе кофеварки
образовалась воздушная пробка
Воздушную пробку можно устранить следующим
образом:
– дождитесь нагрева кофеварки. Направьте наконечник
капучинатора (5) в пустую чашку и поверните ручку
регулятора подачи пара (3) против часовой стрелки.
Затем нажмите кнопку ручной подачи воды (21).
Дождитесь выхода горячей воды из наконечника (5)
и нажмите кнопку ручной подачи воды (21) ещё раз.
Установите ручку регулятора (3) в положение «0».
– или обратитесь к разделу «Получение горячей воды».
ХРАНЕНИЕ
– Прежде чем убрать устройство на хранение, отключите его
от электросети и дайте ему полностью остыть.
– Произведите чистку устройства.
– Запрещается оставлять и хранить кофеварку в помеще-
ниях с температурой ниже 0 °C.
– Храните устройство в сухом прохладном месте, недо-
ступном для детей и людей с ограниченными возмож-
ностями.
ТРАНСПОРТИРОВКА
– Сохраните заводскую упаковку кофеварки для ее дальней-
шей безопасной транспортировки.
– Удалите всю воду их емкости кофеварки и ее внутренних
частей, вытрите насухо мягкой салфеткой.
КОМПЛЕКТ ПОСТАВКИ
Кофеварка – 1 шт.
Держатель фильтра – 1 шт.

10
Фильтр для кофе – 2 шт.
Мерная ложка – 1 шт.
Инструкция – 1 шт.
ТЕХНИЧЕСКИЕ ХАРАКТЕРИСТИКИ
Электропитание: 220-240 В ~ 50-60 Гц
Номинальная потребляемая мощность: 850 Вт
Объём резервуара для воды: 1,6 л
УТИЛИЗАЦИЯ
В целях защиты окружающей среды, после окончания срока
службы прибора и элементов питания (если входят в ком-
плект), не выбрасывайте их вместе с обычными бытовыми
отходами, передайте прибор и элементы питания в специа-
лизированные пункты для дальнейшей утилизации.
Отходы, образующиеся при утилизации изделий, подлежат
обязательному сбору с последующей утилизацией в уста-
новленном порядке.
Для получения дополнительной информации об утилиза-
ции данного продукта обратитесь в местный муниципалитет,
службу утилизации бытовых отходов или в магазин, где Вы
приобрели данный продукт.
Производитель сохраняет за собой право изменять дизайн,
конструкцию и технические характеристики, не влияющие на
общие принципы работы устройства, без предварительного
уведомления, из-за чего между инструкцией и изделием
могут наблюдаться незначительные различия. Если пользо-
ватель обнаружил такие несоответствия, просим сообщить
об этом по электронной почте [email protected] для получения
обновленной версии инструкции.
Срок службы устройства – 3 года
Данное изделие соответствует всем требуемым
европейским и российским стандартам безопас-
ности и гигиены.
ИЗГОТОВИТЕЛЬ: СТАР ПЛЮС ЛИМИТЕД
(STAR PLUS LIMITED)
МЕСТОНАХОЖДЕНИЕ И ПОЧТОВЫЙ АДРЕС ДЛЯ СВЯЗИ:
ЮНИТ БИ ЭНД СИ, 15Й ЭТАЖ, КЭЙСИ АБЕРДИН ХАУС, №38,
ХЁНГ ИП РОУД, ВОНГ ЧУК ХАНГ, ГОНКОНГ, КНР
ИМПОРТЕР И УПОЛНОМОЧЕННОЕ
ИЗГОТОВИТЕЛЕМ ЛИЦО: ООО «ГИПЕРИОН»
МЕСТОНАХОЖДЕНИЕ И ПОЧТОВЫЙ АДРЕС ДЛЯ СВЯЗИ:
РФ, 117452, Г. МОСКВА, ЧЕРНОМОРСКИЙ БУЛЬВАР, ДОМ 17,
КОРП. 1, ЭТАЖ 4, ОФИС 401, КАБ. 2.
Тел.: +7 (499) 685-17-81, e-mail: info@rondell.ru
Ответственность за несоответствие продукции требованиям
технических регламентов Таможенного союза возложена
на уполномоченное изготовителем лицо.
www.rondell.ru
ТЕЛЕФОН ДЛЯ СПРАВОК: 8-800-100-18-30
СДЕЛАНО В КНР

11
COFFEE MAKER RDE-1106
Coffee maker is intended for making: «Espresso», «Lungo»,
«Cappuccino», «Latte» and hot water.
DESCRIPTION
1. Water tank lid
2. Water tank
3. Steam supply control handle
4. Cappuccinator pipe
5. Removable tip
6. Drip tray
7. Drip tray fill indicator
8. Drip tray grid
9. Filter holder handle
10. Control panel
11. Cup warming tray
12. Coffee filter holder
13. Coffee filter lock
14. Filter for one cup of coffee
15. Filter for two cups of coffee
16. Measuring spoon with tempera function
17. Water tank valve
Control panel (10)
18. ON/OFF button « »
19. Button for making one cup of espresso coffee « »
20. Button for making two cups of espresso coffee « »
21. Manual water supply mode button « »
22. Steam supply on button « »
ATTENTION!
For additional safety protection of the power circuit, install-
ing a residual current device (RCD) with the nominal op-
eration current not exceeding 30 mA is recommended. To
install the RCD contact an expert.
OPERATION AND SAFETY RECOMMENDATIONS
Read these instructions carefully before using the unit. Keep
this manual for the entire usage period.
• Mishandling the unit can lead to its breakage and cause
harm to the user or damage to his/her property.
• Before switching the unit on for the first time, make sure
that the operating voltage of the coffee maker corre-
sponds to the voltage of your mains.
• The power cord is equipped with the «europlug»; plug it
into the socket with a reliable grounding contact.
• To avoid the risk of fire, do not use adapters for connect-
ing the coffee maker to the mains socket.
• Use the coffee maker according to its intended pur-
pose only.
• Do not use the unit outdoors.
• Never leave or keep the coffee maker in places with the
temperature below 0°C.
• Place the coffee maker on a dry flat stable surface; do not
place it on the edge of the table.
• Do not place the coffee maker on hot surfaces.
• Make sure that the coffee maker does not get direct
sunlight.
• Do not use the coffee maker near heat and moisture
sources and near open flame.
• When installing the coffee maker, leave 10 cm of free
space on each side of the unit to ensure its effective
cooling.
• Do not let the power cord hang from the edge of the table
and make sure it does not touch hot surfaces or sharp
edges of furniture.
• Be careful while handling hot water.
• To avoid electric shock, do not immerse the coffee maker,
power cord or power plug into water or other liquids.
• To avoid injury, do not touch with your hands moving
parts of the unit, such as the coffee grinder or the brew-
ing block, while the unit is in use.
• It is forbidden to move the coffee maker or remove the
protective elements (for example, remove the coffee fil-
ter holder (12)) during preparation of drinks and rinsing.
• Use only the accessories supplied.
• Do not switch the coffee maker on if the water tank is
empty.
• Fill the tank with clean water only, it is recommended
to use water additionally cleaned with domestic water
filters.
• Before switching the coffee maker on, make sure that all
removable parts are installed properly.
• Never leave the operating coffee maker unattended.
• Do not touch the power cord, the plug and the coffee
maker body with wet hands.
• To avoid burns, do not touch the hot surfaces of the cof-
fee maker (coffee supply unit, boiler) during preparation
of coffee and immediately after turning off the unit. The
surface of the heating element remains hot after use.
• Let the unit cool down completely before cleaning it or
removing the accessories.

12
• Unplug the coffee maker before cleaning or when you
are not using it.
• When unplugging the unit, pull the plug but not the cord.
• It is forbidden to turn off the unit and disconnect it from
the mains during the process of preparing drinks and
cleaning the system.
• For child safety reasons do not leave polyethylene bags,
used as packaging, unattended.
Attention! Do not allow children to play with polyethylene
bags or packaging film. Danger of suffocation!
• This unit is not intended for usage by children.
• Place the unit out of reach of children during the opera-
tion and cooling down.
• Do not allow children to touch the unit and the power cord
during the unit operation.
• The unit is not intended to be used by people (including
children) with any physical, sensory or mental disabilities
or by persons lacking life experience or knowledge if they
are not under supervision of a person who is responsible
for their safety or if they are not instructed by this person
on the usage of the unit.
• Do not leave children unattended to avoid them using
the unit as a toy.
• Do not use the unit if the coffee maker body, the power
cord or the power plug is damaged.
• To avoid leakage to the electrical connector, if any mal-
functions occur, or if the device is dropped, turn the
device off from the mains socket and contact any autho-
rized service center.
• If the power cord is damaged, it must be replaced by the
manufacturer, service department or similar qualified
personnel to avoid potential injuries.
• In order to avoid potential injuries, it is forbidden to
repair the device yourself. Do not disassemble the unit
by yourself, if any malfunction is detected or after it
was dropped, unplug the unit and apply to any autho-
rized service center from the contact address list
given in the warranty certificate and on the website
www.rondell.ru.
• Transport the unit in the original packaging only.
• Keep the unit in a dry cool place out of reach of children
and disabled persons.
THIS UNIT IS INTENDED FOR HOUSEHOLD USE ONLY.
COMMERCIAL USAGE AND USAGE IN PRODUCTION AR-
EAS AND WORK SPACES IS PROHIBITED.
BEFORE THE FIRST USE
After unit transportation or storage at low temperature
keep it for at least three hours at room temperature be-
fore switching on.
– Take the coffee maker out of the package and remove the
packaging materials.
– Check the unit for damage, do not use it if it is damaged.
– Make sure that operating voltage of the coffee maker cor-
responds to the voltage of your mains.
– Before the first use, it is necessary to remove the protec-
tive silicone plug from the water supply valve (17) at the
bottom of the tank (2).
– Before using the coffee maker for the first time, rinse
all its removable parts (2, 6, 8, 12, 14, 15, 16) with warm
water using a neutral detergent and dry them.
OPERATION PREPARATION
Notes:
– the operation mode selection and setting buttons are
sensory, you just need to touch the button to switch the
necessary operation mode on, every touch of the active
button is accompanied by a sound signal.
– if you switch the coffee maker on and don’t do anything,
you will hear sound signals and the coffee maker will be
switched off in 25 minutes.
Before brewing coffee, it is necessary to rinse the boiler of
the coffee maker:
• Remove the water tank (2), fill it with cold water up to the
«MAX» mark and install it back to its place.
Notes: Only clean water at room temperature can be
poured into the tank (2). Do not fill it with hot or ice water
and milk. Failure to comply with this requirement will cause
the tank to crack and damage the unit.
• Install the filter (14 or 15) in the holder (12) matching the
ledge on the filter with the slot in the holder, turn the fil-
ter to lock. Do not add ground coffee into the filter
• Install the filter holder (12) in the place where it is
installed on the coffee maker. The filter holder (12)
ledges should match the groves on the boiler, after
that turn the filter holder (9) handle to the utmost right
position.
Note: To facilitate the installation of the filter holder, the
appropriate symbols are applied on the front panel of the
coffee maker.
• Place a suitable cup on the tray grid (6).
• Insert the power plug into the socket.

13
•
Turn on the coffee maker by pressing the button (18) « »,
you will hear a sound signal, the light indicator will light up
white and will flash. Wait until water in the boiler heats up,
the light indicator will be glowing constantly.
•
Press the manual water supply button (21) « », and the
pump will turn on for 3 seconds, after a pause the pump will
turn on again, and the water will be supplied continuously.
After the cup is filled with water, switch the water supply
off by pressing the button (21) « » again, pour the water
out of the cup.
•
Depending on the cup capacity repeat this procedure sev-
eral times until the boiler is clean.
Then wash the steam supply system:
–
Place a suitable cup under the cappuccinator tip (5).
–
Make sure that the steam supply control handle (3) is in
the position «0», otherwise turn it clockwise until bumping.
–
Press the steam supply button (22) « », the light indica-
tor will light up red and will flash. Wait for the water in the
boiler to heat up to the steam state, the light indicator will
light up constantly.
–
Slowly turn the steam supply control handle (3) counter-
clockwise, steam will start coming out of the tip (5), and rinse
the steam supply system for 10-15 seconds.
–
Turn the steam supply control handle (3) to the position «0»
clockwise.
–
Switch the steam supply off by pressing the button (20)
« ».
ATTENTION!
–
Do not remove the filter holder (12) during coffee maker
operation.
–
To remove the filter holder (12) turn the filter holder han-
dle (9) to the left until bumping and remove the holder (12).
MAKING ESPRESSO
•
Remove the water tank (2), fill it with cold water up to the
«MAX» mark and install it back to its place. Make sure that
the water level in the tank (2) is not below the mark «MIN»,
regularly add water to the tank (2).
•
To prepare one cup of espresso, select the filter (14), to pre-
pare two cups of espresso, select the filter (15).
•
Add the ground coffee into the appropriate filter (14 or 15),
use the measuring spoon (16), slightly tamp the coffee with
the back side of the measuring spoon (16).
•
Install the filter holder (7) back to its installation place. The
filter holder (10) ledges should match the groves on the
boiler, after that turn the filter holder (9) handle to the utmost
right position.
•
Place the cup on the tray grid (8).
•
Insert the power plug into the socket.
•
Turn on the coffee maker by pressing the button (18) « »,
you will hear a sound signal, the light indicator will light up
blue and will flash.
•
Wait until water in the boiler heats up, the light indicator will
be glowing constantly.
Note: warm the cups that you want to use first; to do this, place
the cups on the cup warming tray (11), while water heats up in
the boiler, the tray (11) heats up too, thus warming the cups.
•
To prepare one cup of espresso coffee, press the button
(19) « », while the pump will turn on for 3 seconds for pre-
liminary soaking of coffee, after a pause the pump will turn
on again, and will work for 15 seconds, before the end of the
water supply, you will hear sound signals.
•
To make two cups of espresso press the button (20) « », in
this case set one big or two small cups on the grid (8). When
you press the button (20), the pump will switch on for 3 sec-
onds for preliminary soaking of coffee; after a pause the
pump will be switched on again and operate for 30 seconds,
before the water supply stops you will hear sound signals.
MAKING COFFEE IN THE MANUAL MODE
•
To adjust the volume of the drink, use the function of the
manual water supply mode.
•
For manual coffee preparation, press the water supply but-
ton (21) « », and the pump will turn on for 3 seconds,
after a pause the pump will turn on again, and water will be
supplied constantly. After the cup is filled with ready cof-
fee, switch the water supply off again by pressing the but-
ton (21) « ».
Note:
–
if you need to switch the water supply off during the
espresso making, press the button (19 « » or 20 « »)
again;
–
successive making of coffee should be performed with
2-3 min intervals;
•
control the tray (6) filling, periodically pour out the water and
wash the tray (6). A red pop-up indicator (7) in the center of
the tray (8) grid shows the tray (6) filling.
•
Switch the coffee maker off by pressing the button (18)
« ».
•
Wait until the coffee maker cools down and remove the
filter holder (12), turning the holder (9) handle to the left

14
until bumping. Remove the ground coffee remnants and
wash the filter. For easy removing of the coffee remnants
use the clamp (13) to prevent the filter from falling off the
holder (12).
TIPS
•
Use fresh ground coffee for «espresso» coffee makers.
•
Slightly tamp the ground coffee in the filter, you can do it with
the back side of the measuring spoon (16).
•
Coffee strength depends on the quality and grinding
degree of coffee beans. If coffee is poured for too long,
this means the coffee powder is too fine or it is tamped
too strongly.
MAKING CAPPUCCINO
ATTENTION! Be careful not to get burns by the outgoing steam
from the cappuccinator pipe (4) and the removable tip (5).
•
Make coffee as described in the chapter «MAKING
ESPRESSO» in the warmed cup with enough capacity to
add frothed milk.
•
Press the steam supply button (22) « », the light indicator
will light up red and start flashing. Wait until the light indicator
stops flashing and glows constantly.
•
Place a suitable cup under the tip (5), carefully turn the
steam supply control handle (3) counterclockwise and drain
the remaining water and condensed moisture from the cap-
puccinator pipe (4), make sure that the outgoing steam is
homogeneous and without water.
•
Switch the steam supply off by setting the steam supply con-
trol handle (3) to the position «0»
•
Put the tip (5) into the bowl with cold milk or cream, the tip
(5) must not touch the bottom of the bowl as this can prevent
the steam release.
•
Slowly turn the steam supply control handle (3) counter-
clockwise and fully open the steam supply.
Note: to avoid splashing milk always immerse the tip (5) deep-
er than 1 cm from the milk surface.
•
The outgoing steam creates whirls which froths the milk;
from time to time lift and lower the bowl with milk against the
tip (5) to make the milk foam.
•
Be careful while operating with outgoing steam; after you fin-
ish frothing the milk, switch the steam supply off by setting
the control handle (3) to the position «0».
•
Add frothed milk to the cup of ready coffee.
•
Switch the coffee maker off by pressing the button (18)
« ».
Note:
–
it is recommended to make the necessary amount of
espresso before frothing the milk, because the water tem-
perature in the steam supply mode is higher than tempera-
ture of water intended for making espresso, so the ready
drink may taste different;
–
it is recommended to make the next cup of espresso in
5–10 minutes after frothing the milk;
– you can reduce the time of the water temperature decreas-
ing, to do that place a cup under the filter holder (12)
(do not add ground coffee to the filter) and switch the man-
ual water supply on by pressing the button (21) « », after
the cup is filled press the button (21) again to switch the
water supply off.
–
Making the milk foam is an art. You may not make the foam
at the first try, don’t worry and experiment until you achieve
good results.
IMPORTANT:
–
It is important that milk for making foam is fresh, chilled
and without additives, that is, not so-called long-term stor-
age milk.
–
Use regular full-cream milk with fat content from 4% to 6%,
the cream fat content should be not less than 10%.
–
Immediately after frothing the milk or cream, clean the cap-
puccino pipe (4) and the tip (5) - to do this, put the cap-
puccino pipe (4) with the tip (5) into a glass of clean water,
turn on the steam supply by turning the control handle (3)
counterclockwise, then turn the steam supply off by set-
ting the handle (3) to the «0» position and switch the cof-
fee maker off.
–
Wait until the coffee maker cools down and remove the tip
(5) from the cappuccinator pipe (4), wipe the cappuccina-
tor pipe (4) with a soft damp cloth and wash the tip (5) under
running water.
WARMING THE DRINKS
•
You can warm up your drinks by putting the cappuccinator
pipe (4) without the tip (5) into the cup.
•
Switch the coffee maker on, press the button (22) « » and
wait until the boiler heats up (the light indicator will glow red
constantly).
•
Put the cappuccinator pipe (4) into the cup with the drink
you want to warm up.
•
Slowly turn the steam supply control handle (3) and fully
open the steam supply.

15
•
When the drink heats up to the required temperature, switch
the steam supply off by setting the control handle (3) to the
position «0».
•
Switch the coffee maker off by pressing the button (18) « ».
HEATING WATER
•
Make sure that there is enough water in the water tank (2),
and the steam supply handle (3) is set to the position «0»
and slightly tightened.
•
Place a suitable cup on the tray grid (8) and point the tip
(5) into it.
•
Press the power button (18), wait until the indicator light
stops flashing and starts to glow constantly.
•
Slowly turn the steam supply control handle (3) counter-
clockwise, and then press the manual water supply button
(21) « », while the pump will turn on for 3 seconds, after a
pause the pump will turn on again, and hot water will be sup-
plied from the tip (5) constantly.
•
Switch the water supply off by pressing the button (21) « »
and turn the handle (3) clockwise until bumping.
Descaling (decalcination)
To increase the service life of the coffee maker, it is critically
important to perform timely descaling of the unit. The desca-
ling frequency depends on water hardness in your region. To
determine the level, we recommend using paper indicator tes-
ters that are immersed in water and change color depending
on the amount of calcium, magnesium and iron. Based on the
data obtained, it is necessary to choose one of the following
decalcination frequency schemes:
Level Water hardness, mg/l Descale after
(number of cups)
Level 1 0-50 880
Level 2 51-120 440
Level 3 151-250 280
Level 4 251-425 220
•
You can use calcium powder or tablets that are designed for
automatic coffee machines and other food and drink making
devices as a cleaning agent.
•
Prepare the descaling solution according to the instructions
on the cleaning agent.
•
Fill the water tank (2) with the prepared solution to the max-
imum mark and place it in the coffee maker.
•
Install the coffee filter (14 or 15) in the holder (12). Install
the filter holder (12) into the coffee maker. The holder (12)
ledges should match the groves on the boiler, after that turn
the filter holder (9) handle to the right until bumping.
•
Place a suitable cup on the tray grid (8).
•
Insert the power plug into the socket.
•
Turn on the coffee maker by pressing the button (18)
« », you will hear a sound signal, and the white light indi-
cator will flash.
•
Wait until the light indicator glows constantly.
•
Press the manual water supply button (21) « » and fill a
cup with about 100 ml of water (this is necessary in order to
remove water from the boiler and fill it with a descaling solu-
tion), turn off the water supply by repeatedly pressing the
button (21) « ».
•
Remove the tip (5) from the cappuccinator pipe (4) and put
a suitable bowl under the pipe (4). Press the button (22)
« » and wait for the boiler to heat up (the red light indicator
will glow constantly). Slowly turn the steam supply control
handle (3) and open the steam supply for 10-15 seconds.
Close the steam supply by setting the control handle (3) to
the position «0».
•
With small intervals, repeat the boiler cleaning procedure until
the descaling solution in the tank (2) is completely finished.
•
Fill the tank (2) with clean water and wash the boiler again
until the water in the tank (2) runs out.
•
Switch the coffee maker off by pressing the button (18) « ».
CLEANING
•
If during the filter (14/15) cleaning you find out that the open-
ings are blocked with the ground coffee remnants, you can
clean them with a small brush.
•
Clean the coffee maker body with a soft, slightly damp cloth
and then wipe it dry.
•
Do not use metal brushes or abrasives to clean the cof-
fee maker.
•
Do not immerse the power cord, the power plug and the cof-
fee maker body into water or other liquids.
•
Wash the removable parts of the coffee maker
(2, 6, 8, 12,
14, 15, 16)
with warm water and a neutral detergent, then
rinse them and dry.
Drip tray and grid
Remove the grid (8) from the tray, remove the tray (6) and pour
out water, wash the tray and put it back to its place, put the grid
(8) on the tray.

16
TROUBLES AND TROUBLESHOOTING
Malfunction Cause Solution
The coffee maker can’t be
switched on
No voltage in the mains socket.
The power plug is not completely
inserted into the socket.
Make sure that the mains socket is operating.
Check whether the plug is completely inserted into
the socket.
Water leaks from the lower
part of the coffee maker
The water tray is full. Pour out water from the tray.
Coffee leakage from the
filter holder
Untight connection of filter and
boiler gasket, ground coffee got
on the edges of the filter.
Clean the edges of the filter.
Ready coffee has a foreign
smell
Wrong process of scale removal in
the coffee maker boiler.
Improper storage of coffee.
See the chapters «Before using the unit», «Des-
caling» and repeat them several times. Use fresh
ground coffee. Keep coffee in a dry cool place.
Steam doesn’t froth milk Low temperature of outgoing
steam.
The tank is too big or of improper
size. You used defatted milk.
Froth milk only after the ready-to-use indicator lights
up. Use a narrow high container for frothing milk.
Use only full-cream milk with fat content 4-6%.
Water from the tank (2) is
not pumped into the coffee
maker, coffee is not poured
out of the horn
An air block has formed in the
brewing system of the coffee
maker
You can eliminate the air block as follows:
– wait until the coffee maker heats up. Point the
cappuccinator tip (5) into an empty cup and turn
the steam supply control knob (3) counter-
clockwise. Then press the manual water supply
button (21). Wait until hot water pours from the tip
(5) and press the manual water supply button (21)
again. Set the control knob (3) to the position «0».
– or see the chapter “Heating water”.
STORAGE
– Before taking the unit away for storage, unplug it and let
the unit cool down completely.
– Perform cleaning of the unit.
– Do not leave the coffee maker and keep it in places with
the temperature below 0°C.
– Keep the unit in a dry cool place out of reach of children
and disabled persons.
TRANSPORTATION
– Keep the original packaging of the coffee maker for its
further safe transportation.
– Remove all the water from the coffee maker container
and its internal parts, wipe dry with a soft cloth.
DELIVERY SET
Coffee maker – 1 pc.
Filter holder – 1 pc.
Coffee filter – 2 pc.
Measuring spoon – 1 pc.
Instruction manual – 1 pc.
TECHNICAL SPECIFICATIONS
Power supply: 220-240 V ~ 50-60 Hz
Nominal input power: 850 W
Water tank capacity: 1.6 L
The manufacturer preserves the right to change design,
structure and specifications not affecting general princi-

17
ples of the unit operation without a preliminary notification
due to which insignificant differences between the manual
and product may be observed. If the user reveals such dif-
ferences, please report them via e-mail [email protected] for
receipt of an updated manual.
RECYCLING
For environment protection do not throw out the unit and
the batteries (if included), do not discard the unit and the
batteries with usual household waste after the service life
expiration; apply to specialized centers for further recy-
cling.
The waste generated during the disposal of the unit is sub-
ject to mandatory collection and consequent disposal in the
prescribed manner.
For further information about recycling of this product apply
to a local municipal administration, a disposal service or to
the shop where you purchased this product.
Unit operating life is 3 years
Guarantee
Details regarding guarantee conditions can be obtained from
the dealer from whom the appliance was purchased. The bill
of sale or receipt must be produced when making any claim
under the terms of this guarantee.
This product conforms to the EMC Directive 2014/30/
EU and to the Low Voltage Directive 2014/35/EU.

18
KAFFEEMASCHINE RDE-1106
Die Kaffeemaschine ist ausgelegt für die Zubereitung von: «Es-
presso», «Lungo», «Cappuccino», «Latte» und Heißwasser.
BESCHREIBUNG
1. Deckel des Wasserbehälters
2. Wasserbehälter
3. Griff des Dampfreglers
4. Cappuccinatore-Rohr
5. Abnehmbares Endstück
6. Tropfschale
7. Füllanzeige der Tropfschale
8. Gitter der Tropfschale
9. Griff des Filterhalters
10. Bedienungsplatte
11. Aufheizplatte für Tassen
12. Halter des Kaffeelters
13. Arretierung des Kaffeelters
14. Filter für eine Portion Kaffee
15. Filter für eine Doppelportion Kaffee
16. Messlöffel mit Tamperfunktion
17. Ventil des Wasserbehälters
Bedienungsplatte (10)
18. Ein-/Ausschalttaste « »
19. Taste für Zubereitung einer Portion Espresso « »
20. Taste für Zubereitung einer Doppelportion
Espresso « »
21. Taste für manuellen Wasserzulauf « »
22. Dampfzufuhr-Einschalttaste « »
ACHTUNG!
Als zusätzlicher Schutz ist es zweckmäßig, einen FI-Schalter
mit Nennstrom bis maximal 30 mA im Stromversorgungskreis
zu installieren. Wenden Sie sich dafür an einen Spezialisten.
GEBRAUCHS- UND SICHERHEITSHINWEISE
Vor der Nutzung des Geräts lesen Sie diese Bedienungs-
anleitung aufmerksam durch. Bewahren Sie diese Anleitung
während der ganzen Gerätebetriebszeit auf.
• Nicht ordnungsgemäße Nutzung des Geräts kann zu
seiner Störung führen und einen gesundheitlichen oder
materiellen Schaden beim Nutzer hervorrufen.
• Vergewissern Sie sich vor dem ersten Einschalten des
Geräts, dass die Betriebsspannung der Kaffeemaschine
und die Netzspannung übereinstimmen.
• Das Netzkabel ist mit einem „Eurostecker“ ausgestat-
tet; stecken Sie diesen in die Steckdose mit sicherer
Erdung ein.
• Verwenden Sie keine Adapterstecker beim Anschließen
der Kaffeemaschine ans Stromnetz, um das Brandrisiko
zu vermeiden.
• Benutzen Sie die Kaffeemaschine nur bestimmungs-
gemäß.
• Es ist nicht gestattet, das Gerät draußen zu benutzen.
• Lassen oder lagern Sie die Kaffeemaschine in keinen
Räumen mit Temperaturen unter 0°C.
• Stellen Sie die Kaffeemaschine auf einer trockenen, ebe-
nen und standfesten Oberäche auf, stellen Sie das Gerät
an den Tischrand nicht auf.
• Es ist nicht gestattet, die Kaffeemaschine auf heiße
Oberächen zu stellen.
• Schützen Sie die Kaffeemaschine vor direkten
Sonnenstrahlen.
• Benutzen Sie die Kaffeemaschine nicht in direkter Nähe
von Wärme- und Feuchtigkeitsquellen oder offenem
Feuer.
• Beim Aufstellen der Kaffeemaschine sind für wirksame
Abkühlung je 10 cm von allen Seiten des Geräts frei zu
lassen.
• Achten Sie darauf, dass das Netzkabel vom Tisch
nicht herabhängt und heiße Oberächen und scharfe
Möbelkanten nicht berührt.
• Seien Sie vorsichtig, wenn Sie Heißwasser handhaben.
• Um einen Stromschlag zu vermeiden, tauchen Sie die
Kaffeemaschine, das Netzkabel oder den Netzstecker
in Wasser oder jegliche anderen Flüssigkeiten nicht ein.
• Um Verletzungen zu vermeiden, halten Sie Ihre Hände
während des Betriebs von den beweglichen Teilen des
Geräts, wie z. B. Kaffeemühle und Brüheinheit, fern.
• Während der Zubereitung von Getränken bzw. der
Spülung darf man die Kaffeemaschine nicht bewegen
oder die Schutzeinrichtungen abnehmen (z. B. den Halter
des Kaffeelters (12) entnehmen).
• Verwenden Sie nur das mitgelieferte Zubehör.
• Schalten Sie die Kaffeemaschine ohne Wasser nicht ein.
• Verwenden Sie nur reines wasser, es ist empfohlen, das
mit Haushaltswasserltern zusätzlich gereinigte Wasser
zu verwenden.
• Vor der Einschaltung der Kaffeemaschine vergewissern
Sie sich, dass alle abnehmbaren Teile korrekt einge-
baut sind.

19
• Lassen Sie die laufende Kaffeemaschine nie unbeauf-
sichtigt.
• Berühren Sie das Netzkabel, den Netzstecker und das
Kaffeemaschinengehäuse nicht mit nassen Händen.
• Während der Kaffeezubereitung und unmittelbar nach
dem Geräteausschalten berühren Sie keine heißen
Oberächen der Kaffeemaschine (Kaffeeausgabeeinheit,
Boiler), um Verbrennungen zu vermeiden. Oberäche des
Heizkörpers bleibt heiß nach der Nutzung.
• Lassen Sie das Gerät vollständig abkühlen, bevor Sie das
Zubehör entfernen oder das Gerät reinigen.
• Trennen Sie die Kaffeemaschine vor der Reinigung und
wenn Sie das Gerät nicht benutzen vom Stromnetz ab.
• Wenn Sie das Gerät vom Stromnetz abtrennen, zie-
hen Sie das Netzkabel nicht, sondern halten Sie den
Netzstecker.
• Das Gerät darf während der Zubereitung von Getränken
oder der Systemspülung nicht ausgeschaltet bzw. vom
Stromnetz abgetrennt werden.
• Aus Kindersicherheitsgründen lassen Sie die als
Verpackung verwendeten Plastiktüten nie ohne
Aufsicht.
Achtung! Lassen Sie Kinder mit Plastiktüten oder Verpa-
ckungsfolien nicht spielen. Erstickungsgefahr!
• Dieses Gerät darf von Kindern nicht verwendet werden.
• Während des Betriebs und des Abkühlens stellen Sie das
Gerät an einen für Kinder unzugänglichen Ort auf.
• Lassen Sie Kinder das Gerät und das Netzkabel während
des Gerätebetriebs nicht berühren.
• Das Gerät ist nicht zur Verwendung durch Personen (ein-
schließlich Kinder) mit eingeschränkten körperlichen, sen-
sorischen oder geistigen Fähigkeiten oder mangelnder
Lebenserfahrung oder Wissen vorgesehen, soweit sie
sich nicht unter Aufsicht einer für ihre Sicherheit verant-
wortlichen Person benden oder keine entsprechenden
Gerätenutzungsanweisungen bekommen haben.
• Kinder müssen beaufsichtigt werden, damit sie mit dem
Gerät nicht spielen.
• Verwenden Sie das Gerät nicht, wenn das Kaffeema-
schinengehäuse, das Netzkabel oder der Netzstecker
beschädigt sind.
• Um Entweichungen auf den Steckverbinder zu vermei-
den, bei der Feststellung jeglicher Beschädigungen,
sowie im Sturzfall, trennen Sie das Gerät vom Stromnetz
ab und wenden Sie sich an einen autorisierten (befugten)
Kundendienst.
• Wenn das Netzkabel beschädigt ist, soll es vom Hersteller,
Kundendienst oder ähnlich qualiziertem Personal ersetzt
werden, um eventuelle Verletzungen zu vermeiden.
• Um eventuelle Verletzungen zu vermeiden, dürfen Sie
das Gerät nicht selbständig reparieren. Es ist nicht
gestattet, das Gerät selbständig auseinanderzunehmen,
bei der Feststellung jeglicher Beschädigungen oder im
Sturzfall trennen Sie das Gerät von der Steckdose ab
und wenden Sie sich an einen autorisierten (bevoll-
mächtigten) Kundendienst unter Kontaktadressen, die
im Garantieschein und auf der Webseite www.rondell.ru
angegeben sind.
• Transportieren Sie das Gerät nur in der Fabrikverpackung.
• Bewahren Sie das Gerät an einem trockenen, kühlen
und für Kinder und behinderte Personen unzugängli-
chen Ort auf.
DIESES GERÄT IST NUR FÜR DEN HAUSHALTSGE-
BRAUCH BESTIMMT. KOMMERZIELLE NUTZUNG UND
GERÄTEVERWENDUNG IN BETRIEBSBEREICHEN UND
ARBEITSRÄUMEN SIND VERBOTEN.
VOR DER ERSTEN NUTZUNG
Falls das Gerät bei niedrigen Temperaturen transportiert
oder aufbewahrt wurde, lassen Sie es bei der Raumluft-
temperatur nicht weniger als drei Stunden bleiben.
–Nehmen Sie die Kaffeemaschine aus der Verpackung
heraus und entfernen Sie die Verpackungsmaterialien.
–Prüfen Sie die Unversehrtheit des Geräts, wenn das
Gerät beschädigt ist, benutzen Sie es nicht.
–Vergewissern Sie sich, dass die Betriebsspannung
der Kaffeemaschine und die Netzspannung überein-
stimmen.
–Vor der ersten Nutzung ist der Silikon-Schutzstopfen
vom Wasserventil (17) im unteren Teil des Behälters (2)
abzunehmen.
–Vor der ersten Nutzung der Kaffeemaschine waschen
Sie alle abnehmbaren Teile (2, 6, 8, 12, 14, 15, 16) mit
Warmwasser und neutralem Reinigungsmittel und trock-
nen Sie sie ab.
VORBEREITUNG ZUM BETRIEB
Anmerkungen:
–Die Wahltasten und die Betriebseinstellungen sind
Berührungstasten, Sie brauchen sie nur zu berühren,
um den gewünschten Betriebsmodus einzuschalten,

20
jede Berührung einer aktiven Taste wird vom Tonsignal
begleitet.
–Wenn Sie die Kaffeemaschine eingeschaltet haben und
keine weiteren Handlungen vornehmen, dann kommen
Tonsignale und die Kaffeemaschine wird nach 25 Minuten
ausgeschaltet.
Vor dem Kaffeekochen muss der Boiler der Kaffeemaschine
gespült werden:
• Entnehmen Sie den Behälter (2), füllen Sie ihn mit reinem
Wasser bis zur «MAX»-Wasserstandsmarke und setzen
Sie diesen wieder ein.
Anmerkungen: Der Behälter (2) darf nur mit reinem Wasser
von Raumtemperatur gefüllt werden. Es ist verboten, heißes
oder eiskaltes Wasser und Milch in den Behälter zu füllen.
Nichteinhalten dieser Forderung führt zu Behälterrissen und
zum Versagen des Geräts.
• Um den Filter (14 oder 15) in den Halter (12) einzusetzen,
legen Sie den Nocken des Filters in die Nut des Halters
ein und drehen Sie den Filter bis zum Einrasten. Schütten
Sie gemahlenen Kaffee in den Filter nicht ein.
• Setzen Sie den Filterhalter (12) in die entsprechende
Aufnahme in der Kaffeemaschine ein. Die Nocken des
Filterhalters (12) müssen mit den Nuten des Boilers
zusammenpassen, anschließend drehen Sie den Griff des
Filterhalters (9) nach rechts bis zum Anschlag.
Anmerkung: Es gibt auf der Vorderplatte der Kaffeemaschi-
ne entsprechende Symbole, um den Einbau des Filterhalters
zu erleichtern.
• Stellen Sie eine passende Tasse auf das Gitter der
Tropfschale (6).
• Stecken Sie den Netzstecker in die Steckdose ein.
• Schalten Sie die Kaffeemaschine mit der Taste (18) « »
ein, dabei ertönt ein Tonsignal, die Leuchtanzeige leuch-
tet weiß auf und beginnt zu blinken. Warten Sie, bis das
Wasser im Boiler heiß wird, die Leuchtanzeige wird dau-
erhaft leuchten.
• Drücken Sie die Taste für manuellen Wasserzulauf (21)
« », dabei wird die Pumpe für 3 Sekunden eingeschal-
tet, dann nach einer Pause schaltet sich die Pumpe wie-
der ein, und das Wasser wird ständig zulaufen. Nachdem
die Tasse mit Wasser gefüllt ist, drücken sie die Taste (21)
« », um den Wasserzulauf wieder auszuschalten, ent-
leeren Sie die Tasse.
• Je nach dem Fassungsvermögen der Tasse ist dieser
Vorgang mehrmals zu wiederholen, dann ist der Boiler
gespült.
Danach spülen Sie das Dampfzufuhrsystem:
–Stellen Sie eine passende Tasse unter das Endstück des
Cappuccinatores (5).
–Vergewissern Sie sich, dass der Griff des Dampfreglers
(3) in der «0»-Stellung ist, wenn nicht, dann drehen Sie
diesen im Uhrzeigersinn bis zum Anschlag.
–Drücken Sie die Dampfzufuhr-Einschalttaste (22) « »,
die Leuchtanzeige leuchtet rot auf und beginnt zu blin-
ken. Warten Sie, bis das Wasser im Boiler bis zum
Dampfzustand erhitzt ist, die Leuchtanzeige wird dabei
dauerhaft leuchten.
–Drehen Sie den Griff des Dampfreglers (3) langsam gegen
Uhrzeigersinn, der Dampf beginnt aus dem Endstück (5)
auszutreten; spülen Sie das Dampfzufuhrsystem 10 bis
15 Sekunden lang durch.
–Drehen Sie den Griff des Dampfreglers (3) im
Uhrzeigersinn in die «0»-Stellung.
–Drücken Sie die Taste (22) « », um die Dampfzufuhr
auszuschalten.
ACHTUNG!
–Es ist nicht gestattet, den Filterhalter (12) während des
Betriebs der Kaffeemaschine abzunehmen.
–Um den Filterhalter (12) abzunehmen, drehen Sie den
Haltergriff (9) nach links bis zum Anschlag und nehmen
Sie den Halter (12) ab.
ESPRESSOZUBEREITUNG
• Entnehmen Sie den Behälter (2), füllen Sie ihn mit
Kaltwasser bis zur «MAX»-Wasserstandsmarke und set-
zen Sie diesen wieder ein. Achten Sie darauf, dass der
Wasserstand im Behälter (2) nicht unter der «MIN»-Marke
ist, füllen Sie regelmäßig Wasser in den Behälter (2) nach.
• Um eine Portion Espresso zuzubereiten, wählen Sie den
Filter (14) aus, für eine Doppelportion Espresso nehmen
Sie den Filter (15).
• Füllen Sie gemahlenen Kaffee in den jeweiligen Filter
(14 oder 15), benutzen Sie den Messlöffel (16); stamp-
fen Sie den Kaffee mit der Rückseite des Messlöffels
(16) leicht ein.
• Setzen Sie den Filterhalter (12) in die Aufnahme ein.
Die Nocken des Filterhalters (12) müssen mit den
Nuten des Boilers zusammenpassen, anschließend
drehen Sie den Griff des Filterhalters (9) nach rechts
bis zum Anschlag.
• Stellen Sie die Tasse auf das Gitter der Tropfschale (8).
• Stecken Sie den Netzstecker in die Steckdose ein.
Table of contents
Languages:
Other RONDELL Coffee Maker manuals

RONDELL
RONDELL RDE-1109 User manual

RONDELL
RONDELL RDE-1110 User manual

RONDELL
RONDELL RDE-1108 User manual

RONDELL
RONDELL RDE-1107 User manual

RONDELL
RONDELL RDE-1101 User manual

RONDELL
RONDELL RDE-1100 User manual

RONDELL
RONDELL RDE-1103 User manual

RONDELL
RONDELL RDE-1113 User manual

RONDELL
RONDELL RDE-1102 User manual
Popular Coffee Maker manuals by other brands

Bunn
Bunn TWIN APS OPERATING & SERVICE MANUAL

SEVERIN
SEVERIN ZB-8684 Instructions for use

Gastroback
Gastroback DESIGN ESPRESSO MASCHINE ADVANCED CONTROL operating instructions

Ninja
Ninja COFFEE BAR CF095 Series owner's guide

Ninja
Ninja COFFEE BAR CF097C Series owner's guide

Toastmaster
Toastmaster TCM5W Use and care guide