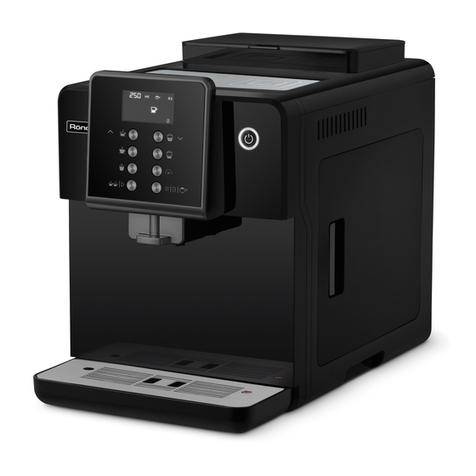
RONDELL RDE-1101 User manual

RDE-1101

7
10
11
1
15
2
3
4
5
6
8
12
13
9
16
17
18
19
27 28 29
14
20 21
24
26
23
25
22

Рис.1 Рис.2 Рис.3
Рис.4 Рис.5 Рис.6
Рис.7
0.5ч 4ч 8ч 12ч ВЫКЛ. Под-
светка Мига-
ние Подсветка
Рис.7а Рис.7б

Мига-
ние Подсветка ПодсветкаПодсветка
Подсветка Подсветка
Мига-
ние Под-
светка
Мига-
ние
Рис.7в Рис.7г Рис.8а
Рис.8б Рис.8в Рис.8г
Рис.9 Рис.10 Рис.11

6GB MANUAL INSTRUCTION
10DE DIE BETRIEBSANWEISUNG
14RUS ИНСТРУКЦИЯ ПО ЭКСПЛУАТАЦИИ
www.rondell.ru
КОФЕМАШИНА АВТОМАТИЧЕСКАЯ
COFFEE MACHINE AUTOMATIC
RDE-1101

6
ENGLISH
COFFEE MACHINE AUTOMATIC RDE-1101
The coffee machine is designed for making «ESPRESSO»,
«LUNGO» and «DOUBLE ESPRESSO».
DESCRIPTION
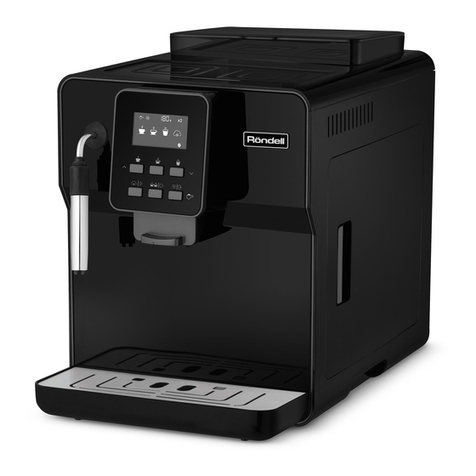
1. Coffee bean container
2. Grind control knob
3. Warming tray
4. Control panel
5. Coffee dispensing unit
6. Removable drip tray
7. Water tank
8. Funnel for a cleaning tablet
9. Brewing unit
10. Side shutter
11. Coffee grounds residue tray
12. Used coffee grounds container
13. Float water level indicator
Control panel (4)
14. Warning icons
15. Lack of water
16. Brewing unit missing/incorrectly installed
17. Used coffee grounds container or removable drip tray
missing/overfilled
18. Side shutter open
19. Brewing unit needs rinsing
20. Functional icons
21. Espresso
22. Lungo
23. Cleaning
24. Indication icons
25. Indicators
26. Network/setting icons
27. Switching-On/Off
28. Coffee beans
29. Temperature
ATTENTION!
For additional protection it is advisable to install a residual cur-
rent device (RCD) with a rated operating current not exceeding
30 mA in the power circuit. To install the RCD contact a specialist.
OPERATION AND SAFETY RECOMMENDATIONS
• Read the instruction manual carefully before using the unit.
Keep this manual for the entire usage period.
• Improper unit handling may result in its breakage and damage
to the user or his/her property.
• Before switching the unit on for the first time, make sure that
the coffee machine operating voltage corresponds to the
mains voltage.
• The power cord is equipped with a «Euro plug»; plug it into an
electrical outlet with a safe ground connection.
• To avoid the risk of fire, do not use adapters when connecting
the coffee machine to an electrical outlet.
• Use the coffee machine only for its intended purpose.
• Do not use the unit outdoors.
• Never leave or store the coffee machine in rooms with tem-
peratures below 0°C.
• Place the coffee machine on a dry, flat, stable surface and not
on the edge of a table.
• Do not place the coffee machine on hot surfaces.
• Do not use the coffee machine near sources of heat, moisture
or open flame.
• Avoid the power cord to hang off a table and keep it away from
hot surfaces and sharp edges of furniture.
• Be careful when handling hot water.
• To avoid electric shock, do not immerse the coffee machine,
the power cord or the power plug in water or any other liquids.
• Use only the accessories supplied.
• Do not run the coffee machine without water.
• Use only clean cold water, it is recommended to use water
additionally cleaned with household water filters.
• Before switching the coffee machine on, make sure that all
removable parts are correctly installed.
• Never leave the coffee machine running unattended.
• Do not touch the power cord, the power plug and the coffee
machine body with wet hands.
• To avoid scalding, do not touch hot surfaces of the coffee
machine (coffee dispensing unit, boiler) during coffee prepa-
ration and immediately after switching the unit off.
• Let the unit cool down completely before removing accesso-
ries or cleaning it.
• Do not remove the coffee dispensing unit and the brewing unit
while the coffee machine is running.
• Disconnect the coffee machine from the mains before clean-
ing or if not used.
• When unplugging the unit from the mains, pull the plug but not
the cord.
• For children safety do not leave polyethylene bags used for
packaging unattended.
Attention! Do not allow children to play with polyethylene bags or
packaging film. Choking hazard!
• This unit is not to be used by children.
• The unit is not intended to be used by persons (including chil-
dren) with reduced physical, sensory or mental capabilities or
lack of life experience or knowledge, unless they are super-

7
ENGLISH
vised or instructed in the use of the unit by a person responsi-
ble for their safety.
• Children should be supervised to prevent them from using the
unit as a toy.
• Do not use the unit if there is any damage in the coffee maker
body, the power cord or the power plug.
• If the power cord is damaged, it should be replaced by the
manufacturer, a maintenance service, or similar qualified per-
sonnel to avoid danger.
• Do not repair the unit by yourself. Do not disassemble the unit by
yourself, by any malfunction or after the unit has been dropped,
disconnect it from the electrical outlet and contact any autho-
rized (designated) service center at the contact addresses in
the warranty card and on the website www.rondell.ru.
• Transport the unit in the original package only.
• Keep the unit in a dry cool place out of reach of children and
disabled persons.
THIS UNIT IS INTENDED FOR HOUSEHOLD USE ONLY. ANY
COMMERCIAL USAGE AND USAGE IN PRODUCTION AREAS AND
WORK SPACES IS PROHIBITED.
BEFORE THE FIRST USE
After transporting or storing the unit at a low temperature,
keep it at room temperature for at least three hours.
– Take the coffee machine out of the packaging and remove the
packing materials.
– Check the unit for damages; do not use it in case of any.
– Make sure that the coffee machine operating voltage corre-
sponds to the mains voltage.
– The unit is designed to operate with a 50 Hz alternative current;
when the unit is running at the required rated frequency no set-
ting is required.
– Before using the coffee machine for the first time, rinse all
removable parts (6, 7, 9, 11, 12) with warm water and a neutral
detergent and dry.
OPERATION PREPARATION
Read before the first use
– Check and make sure that the brewing unit (9), the used cof-
fee grounds container (12) and the drip tray (6) are correctly
installed.
– Fill the tank (7) with clean water.
– Add coffee beans (over 30 g) to the bean container (1) before
using for the first time.
Notes: Only coffee beans can be placed in the container (1),
please do not add water, ground coffee, coffee beans mixed
with solid particles, otherwise the grinder millstones will be
damaged.
Drip tray (6)
When the level of the drained liquid rises to the upper limit, the
float water level indicator (13) emerges, after that it is necessary
to empty the drip tray.
Brewing unit (9)
Please do not open the shutter or move the brewing unit while
making coffee. If the display shows the icon indicating that the
brewing unit (9) is missing, please remove and then reinsert it until
you hear a clicking sound.
Used coffee grounds container (12)
If the display shows the icon indicating that the container is full,
please empty the container (12).
OPERATION AND FUNCTIONALITY
Activating the coffee machine
Insert the power cord into the socket on the panel back and con-
nect the unit to the mains. The indicator (26) will light up in the
center of the control panel (4) (fig. 1).
Press the button (27) , the coffee machine will be activated and
start self-diagnosis, heating and self-cleaning. When the above
processes are completed, the coffee machine will be ready for
use (fig. 2).
Notes: The operating mode buttons on the control panel (4) are
touch-sensitive, to activate the desired operating mode, just
touch the button.
Espresso/Lungo/hot water/cleaning
To prepare an Espresso, press the button (21) .
To prepare a Lungo, press the button (22) .
To start the internal rinsing, press the button (23) .
To cancel any of the above processes, press the button of the
selected function again.
Coffee machine settings
Coffee volume setting
– To set the volume for a cup of coffee:
For an Espresso – press the button (21) ,
For a Lungo – press the button (22) .
– Keep the button pressed for about 5 seconds. The indicator of
the activated function will first flash, then turn constant blue,
and the coffee machine will automatically start preparing the
selected beverage.
– When the coffee reaches the volume desired by the user,
press the button of the selected function again, and the coffee
machine stops dispensing coffee.

8
ENGLISH
– The amount of coffee produced will be saved in the coffee
machine memory, and the machine will produce the same
amount of coffee for the next cup.
Manual descaling
Step 1
Switch the coffee machine on, add the descaling agent to the water
tank (7), then hold down the buttons (21) and (22) simulta-
neously for 5 seconds to start the descaling process (fig. 3).
The indicators will light up alternately, and all setting icons indi-
cators will be constant blue, the pump will run for 30 seconds,
stop for 3 minutes and so on for 9 cycles until the descaling pro-
cess is complete.
After completing the descaling process, all function buttons,
indication icons and setting buttons will be constant blue (fig. 4),
reminding you to change water in the tank (7) with fresh one.
Step 2
After changing water in the tank (7), press the button (22) ,
and the coffee machine will pump 300 ml. clean water to clean
the brewing unit (9) and then automatically complete the decal-
cification (fig. 5).
Notes: The coffee machine decalcification cannot be stopped
until completely finished. The decalcification can be suspended
only by disconnecting the coffee machine from the mains.
Automatic descaling
The coffee machine will also automatically remind the users to
descale, all settings icons will be illuminated, and the button (22)
will flash (fig. 6).
Press the button (22) , and the coffee machine will implement the
descaling according to the previous paragraph «Manual descaling».
Factory settings
To return to the factory settings, press buttons (22) and (23)
simultaneously and hold them down for 5 seconds. The indica-
tors (25) will light up alternately blue. Wait for them to go out. The
buttons (21, 22, 23) will be on, the factory settings will be recov-
ered, and the machine will be ready for use.
Switching-off
Press the button (27) . The coffee machine will be deactivated
and remain in standby mode after self-cleaning.
Setting the automatic switching-off of the coffee machine
To set the coffee machine to switch off automatically, press the
buttons (27, 28, 29) simultaneously . The switching-off
is set with buttons (27, 28) . Select the desired automatic
switching-off interval from the following values: 0.5, 4, 8, 12 hours
and Off after the last operation of the coffee machine (fig. 7). To
confirm the selection, press the button (29) . To exit the setting,
press the button (29) .
Coffee grind volume setting
Press the button (28) to set the coffee grind volume. The
setting is effected with the buttons (27, 28) . Select the
volume you need (fig. 8). To confirm the selection, press the but-
ton (29) . To exit the setting, press the button (29) .
Temperature setting
Press the button (29) to set the coffee machine temperature.
The switching-off is set with buttons (27, 28) . Select the
temperature you need from 4 levels with a 2°C setting increment.
To confirm the selection, press the button (29) . To exit the set-
ting, press the button (29).
Сoffee grinding degree setting
The coffee grinding degree is set while the grinder is running.
Open the container (1) lid. Turn the grind control knob (2) (fig. 9).
If you turn the knob (2) counterclockwise, the grind will be finer
and the coffee stronger, and if clockwise, the grind will be coarser
and the coffee weaker.
Notes: After being set, the specified grinding degree value will be
applied starting from the third cup of coffee.
Warning icons (14) on the control panel (4)
- lack of water (15).
- brewing unit (16) missing/incorrectly installed.
- coffee grounds container or removable drip tray (17) miss-
ing/overfilled.
- side shutter (18) open.
- brewing unit (19) needs rinsing.
- add beans (28).
CLEANING
– Wipe the coffee machine body with a soft, slightly damp cloth
and then wipe dry.
– Do not use metal brushes or abrasive cleaning agents to clean
the coffee machine.
– Do not immerse the power cord, the power plug and the coffee
machine body in water or any other liquids.
– Wash the removable parts of the coffee machine (6, 7, 9, 11,
12) with warm water and a neutral detergent, rinse and dry.
Cleaning and maintaining the brewing unit
The brewing unit (9) should be cleaned at least once every two
weeks.
9
ENGLISH
Attention! Do not remove the brewing unit when the coffee
machine is on.
Disconnect the coffee machine from the mains. Open the side
shutter (10) and remove the coffee grounds container (12)
(fig.10). Empty the container from grounds and residues. Wash
it and dry.
Carefully pull the handle of the brewing unit (9) while holding the
plastic ledge. Take the brewing unit out (fig. 11).
Clean the brewing unit (9) with no detergents that can damage it.
Immerse the brewing unit in water for 5 minutes and then rinse
under running water.
Remove coffee residues from the brewing unit compartment
with a brush.
Drip tray and grid (6)
Remove the grid from the tray (6), remove the tray and drain the
water from it, rinse the tray and install it back, place the grid on
the tray (6).
Water tank (7)
The water tank (7) should be periodically (ca. 2 times per month)
cleaned with a damp cloth and a mild detergent.
STORAGE
– Before taking the unit away for storage, unplug and let it cool
down completely.
– Clean the unit according to the «Cleaning» section.
– Do not leave or store the coffee machine in rooms with tem-
peratures below 0°C.
– Keep the unit in a dry cool place out of reach of children and
disabled persons.
DELIVERY SET
Coffee machine – 1 pc.
Coffee dust brush – 1 pc.
Power cord – 1 pc.
Instruction manual – 1 pc.
Warranty card – 1 pc.
TECHNICAL SPECIFICATIONS
Power supply: 220-240 V ~ 50 Hz
Operating power consumption: 1200-1450 W
Water tank capacity: 1,8 L
RECYCLING
For environment protection do not throw out the unit and the bat-
teries (if included), do not discard the unit and the batteries with
usual household waste after the service life expiration; apply to
specialized centers for further recycling.
The waste generated during the disposal of the unit is subject
to mandatory collection and consequent disposal in the pre-
scribed manner.
For further information about recycling of this product apply to a
local municipal administration, a disposal service or to the shop
where you purchased this product.
The manufacturer preserves the right to change design, struc-
ture and specifications not affecting general principles of the
unit operation without a preliminary notification due to which
insignificant differences between the manual and product may
be observed. If the user reveals such differences, please report
them via e-mail [email protected] for receipt of an updated manual.
Unit operating life is 3 years
Guarantee
Details regarding guarantee conditions can be obtained from the
dealer from whom the appliance was purchased. The bill of sale
or receipt must be produced when making any claim under the
terms of this guarantee.
This product conforms to the EMC Directive 2014/30/EU
and to the Low Voltage Directive 2014/35/EU.

10
DEUTSCH
KAFFEEMASCHINE AUTOMATISCHE RDE-1101
Die Kaffeemaschine ist zum Zubereiten von «ESPRESSO», «LUNGO»
und «DOPPELTEM ESPRESSO» bestimmt.
BESCHREIBUNG
1. Bohnenbehälter
2. Mahlregler
3. Aufheizplatte
4. Bedienungsplatte
5. Kaffeeausgabeeinheit
6. Abnehmbare Tropfschale
7. Wasserbehälter
8. Trichter für Reinigungstablette
9. Brüheinheit
10. Seitentür
11. Auffangschale für Mahlkaffeereste
12. Kaffeesatzbehälter
13. Schwimmerwasserstandsanzeiger
Bedienungsplatte (4)
14. Warnzeichen
15. Wassermangel
16. Fehlen/falsche Aufstellung der Brüheinheit
17. Fehlen/Überfüllung des Kaffeesatzbehälters oder abnehmbarer
Auffangschale
18. Seitentür offen
19. Brüheinheit spülen
20. Funktionszeichen
21. Espresso
22. Lungo
23. Reinigung
24. Anzeigezeichen
25. Anzeigen
26. Stromnetz-/Einstellungszeichen
27. Ein-/Ausschaltung
28. Bohnen
29. Temperatur
ACHTUNG!
Als zusätzlicher Schutz ist es zweckmäßig, einen FI-Schalter mit
Nennstrom maximal bis 30 mA im Stromversorgungskreis aufzustellen.
Wenden Sie sich dafür an einen Spezialisten.
GEBRAUCHS- UND SICHERHEITSHINWEISE
• Lesen Sie die Betriebsanleitung sorgfältig durch, bevor Sie das
Gerät verwenden. Bewahren Sie diese Betriebsanleitung während
der ganzen Gerätebetriebszeit.
• Nicht ordnungsgemäße Gerätenutzung kann zu seiner Störung
führen und einen gesundheitlichen oder materiellen Schaden beim
Nutzer hervorrufen.
• Vergewissern Sie sich vor dem ersten Einschalten, dass die
Betriebsspannung der Kaffeemaschine mit der Netzspannung über-
einstimmt.
• Das Netzkabel ist mit einem „Eurostecker“ ausgestattet; stecken Sie
diesen in die Steckdose mit sicherer Erdung ein.
• Verwenden Sie keine Adapterstecker beim Anschließen der
Kaffeemaschine ans Stromnetz, um Brandgefahr zu vermeiden.
• Benutzen Sie die Kaffeemaschine nur bestimmungsgemäß.
• Es ist nicht gestattet, das Gerät draußen zu benutzen.
• Lassen oder lagern Sie die Kaffeemaschine in keinen Räumen mit
Temperaturen unter 0°C.
• Stellen Sie die Kaffeemaschine auf einer trockenen, ebenen und
standfesten Oberäche und keinem Tischrand auf.
• Stellen Sie die Kaffeemaschine auf keine heißen Oberächen auf.
• Verwenden Sie die Kaffeemaschine in keiner Nähe von Wärme-,
Feuchtigkeitsquellen oder offenem Feuer.
• Achten Sie darauf, dass das Netzkabel vom Tisch nicht herabhängt
und keine heißen Oberächen und scharfen Möbelkanten berührt.
• Seien Sie vorsichtig, wenn Sie Heißwasser handhaben.
• Um einen Stromschlag zu vermeiden, tauchen Sie die
Kaffeemaschine, das Netzkabel oder den Netzstecker in Wasser
oder jegliche andere Flüssigkeiten nicht ein.
• Verwenden Sie nur das mitgelieferte Zubehör.
• Schalten Sie die Kaffeemaschine ohne Wasser nicht ein.
• Verwenden Sie nur sauberes Kaltwasser, es ist empfohlen, das mit
Haushaltswasserltern zusätzlich gereinigte Wasser zu verwenden.
• Vergewissern Sie sich vor dem Einschalten der Kaffeemaschine,
dass alle abnehmbaren Teile korrekt aufgestellt sind.
• Lassen Sie die Kaffeemaschine niemals unbeaufsichtigt laufen.
• Berühren Sie das Netzkabel, den Netzstecker und das
Kaffeemaschinengehäuse mit nassen Händen nicht.
• Während der Kaffeezubereitung und unmittelbar nach dem
Geräteausschalten berühren Sie keine heißen Oberächen der
Kaffeemaschine (Kaffeeausgabeeinheit, Boiler), um Verbrühungen
zu vermeiden.
• Lassen Sie das Gerät vollständig abkühlen, bevor Sie das Zubehör
entfernen oder das Gerät reinigen.
• Entfernen Sie die Kaffeeausgabeeinheit und die Brüheinheit wäh-
rend des Kaffeemaschinenbetriebs nicht.
• Trennen Sie die Kaffeemaschine vor der Reinigung oder bei
Nichtbenutzung vom Stromnetz ab.
• Wenn Sie das Gerät vom Stromnetz abtrennen, ziehen Sie das
Netzkabel nicht, sondern halten Sie den Netzstecker.
• Aus Kindersicherheitsgründen lassen Sie Plastiktüten, die als
Verpackung verwendet werden, nie ohne Aufsicht.
Achtung! Lassen Sie Kinder mit Plastiktüten oder Verpackungsfolien
nicht spielen. Erstickungsgefahr!
• Dieses Gerät soll von Kindern nicht verwendet werden.
• Das Gerät ist nicht zur Verwendung durch Personen (einschließ-
lich Kinder) mit eingeschränkten körperlichen, sensorischen oder

11
DEUTSCH
geistigen Fähigkeiten oder mangelnder Lebenserfahrung oder
Wissen vorgesehen, wenn sie sich unter Aufsicht keiner für ihre
Sicherheit verantwortlichen Person benden oder keine entspre-
chenden Gerätenutzungsanweisungen bekommen haben.
• Kinder sollen beaufsichtigt werden, damit sie mit dem Gerät nicht
spielen.
• Verwenden Sie das Gerät nicht, wenn das Kaffeemaschinenge-
häuse, das Netzkabel oder der Netzstecker beschädigt sind.
• Wenn das Netzkabel beschädigt ist, soll es vom Hersteller,
Kundendienst oder ähnlich qualiziertem Personal ersetzt werden,
um Gefahren zu vermeiden.
• Es ist nicht gestattet, das Gerät selbständig zu reparieren. Es ist
nicht gestattet, das Gerät selbständig auseinanderzunehmen, bei der
Feststellung jeglicher Beschädigungen oder im Sturzfall trennen Sie
das Gerät vom Stromnetz ab und wenden Sie sich an einen autorisier-
ten (bevollmächtigten) Kundendienst an die im Garantieschein und auf
der Webseite www.rondell.ru angegebenen Kontaktadressen.
• Transportieren Sie das Gerät nur in der Fabrikverpackung.
• Bewahren Sie das Gerät an einem trockenen, kühlen und für Kinder
und behinderte Personen unzugänglichen Ort auf.
DIESES GERÄT IST NUR FÜR DEN HAUSHALTSGEBRAUCH
BESTIMMT. KOMMERZIELLE NUTZUNG UND VERWENDUNG DES
GERÄTS IN BETRIEBSBEREICHEN UND ARBEITSRÄUMEN IST
VERBOTEN.
VOR DEM ERSTEN GEBRAUCH
Falls das Gerät bei niedrigen Temperaturen transportiert oder auf-
bewahrt wurde, lassen Sie es bei der Raumlufttemperatur nicht
weniger als drei Stunden bleiben.
– Nehmen Sie die Kaffeemaschine aus der Verpackung heraus und
entfernen Sie das Verpackungsmaterial.
– Prüfen Sie die Unversehrtheit des Geräts, wenn das Gerät beschä-
digt ist, benutzen Sie es nicht.
– Vergewissern Sie sich, dass die Betriebsspannung der
Kaffeemaschine mit der Netzspannung übereinstimmt.
– Betreiben Sie das Gerät bei einer 50-Hz-Wechselstromfrequenz, für
den Gerätebetrieb bei der angemessenen Nennfrequenz ist keine
Einstellung erforderlich.
– Vor dem ersten Kaffeemaschinengebrauch spülen Sie alle abnehm-
baren Teile (6, 7, 9, 11, 12) mit Warmwasser und einem neutralen
Reinigungsmittel und trocknen Sie sie ab.
VORBEREITUNG ZUM BETRIEB
Vor dem ersten Gebrauch lesen
– Prüfen und vergewissern Sie sich, dass die Brüheinheit (9), der
Kaffeesatzbehälter (12) und die Tropfschale (6) korrekt aufgestellt sind.
– Füllen Sie den Behälter (7) mit sauberem Wasser.
– Geben Sie Kaffeebohnen (über 30 g) in den Bohnenbehälter (1) vor
dem ersten Gebrauch zu.
Anmerkungen: Fügen Sie dem Behälter (1) nur Kaffeebohnen und
bitte kein Wasser, keinen gemahlenen Kaffee oder keine mit festen
Partikeln vermischten Kaffeebohnen hinzu, da sonst die Mahlsteine der
Kaffeemühle beschädigt werden.
Tropfschale (6)
Wenn der Füllstand abgelassener Flüssigkeit bis zur Obergrenze anst-
eigt, erscheint der Schwimmerwasserstandsanzeiger (13), danach
muss die Tropfschale entleert werden.
Brüheinheit (9)
Bitte öffnen Sie die Tür nicht und bewegen Sie die Brüheinheit nicht,
wenn Sie Kaffee kochen. Wenn das Fehlzeichen der Brüheinheit (9)
auf dem Bildschirm angezeigt wird, entfernen und setzen Sie sie bitte
erneut, bis sie stoppt und klickt, ein.
Kaffeesatzbehälter (12)
Wenn das Behälter-Füllzeichen auf dem Bildschirm angezeigt wird, lee-
ren Sie bitte den Behälter (12).
BETRIEB UND FUNKTIONALITÄT
Einschalten der Kaffeemaschine
Stecken Sie das Netzkabel in die Steckbuchse auf der Plattenrückseite
ein und schließen Sie das Gerät ans Stromnetz an. In der Mitte der
Bedienungsplatte (4) leuchtet die Anzeige (26) (Abb. 1).
Drücken Sie die Taste (27) , die Kaffeemaschine schaltet sich
ein und startet die Selbstdiagnose, Erwärmung und Selbstreinigung.
Wenn die oben genannten Vorgänge abgeschlossen sind, ist die
Kaffeemaschine betriebsbereit (Abb. 2).
Anmerkung: Die Betriebstasten der Bedienungsplatte (4) sind berüh-
rungsempndlich, um den gewünschten Betrieb zu aktivieren, berüh-
ren Sie einfach die Taste.
Espresso/Lungo/Heißwasser/Reinigung
Um einen Espresso zuzubereiten, drücken Sie die Taste (21) .
Um einen Lungo zuzubereiten, drücken Sie die Taste (22) .
Um die Innenspülung zu starten, drücken Sie die Taste (23) .
Sie können einen der oben genannten Vorgänge durch erneutes
Drücken der Taste gewählter Funktion abbrechen.
Kaffeemaschineneinstellungen
Kaffeevolumeneinstellungen
– Um ein Kaffeetassenvolumen einzustellen:
Für einen Espresso – drücken Sie die Taste (21) ,
Für einen Lungo – drücken Sie die Taste (22) .
– Halten Sie die Taste ca. 5 Sekunden lang gedrückt. Die Anzeige
aktivierter Funktion blinkt zuerst, dann leuchtet sie konstant blau,
und die Kaffeemaschine beginnt, das gewählte Getränk automa-
tisch zu zubereiten.

12
DEUTSCH
– Wenn das vom Benutzer gewünschte Kaffeevolumen erreicht
ist, drücken Sie die Taste gewählter Funktion erneut, und die
Kaffeemaschine gibt keinen Kaffee mehr aus.
– Die ausgegebene Kaffeemenge wird von der Kaffeemaschine gespei-
chert, und sie kocht die gleiche Kaffeemenge für die nächste Tasse.
Manuelle Entkalkung
Schritt 1
Schalten Sie die Kaffeemaschine ein, fügen Sie die Entkalkungslösung
dem Wasserbehälter (7) hinzu und halten Sie die Tasten (21)
und (22) gleichzeitig 5 Sekunden lang gedrückt, um den
Entkalkungsvorgang zu starten (Abb. 3).
Die Anzeigen leuchten abwechselnd, und alle Einstellzeichenanzeigen
leuchten konstant blau, die Pumpe läuft 30 Sekunden lang, dann stoppt
für 3 Minuten und so macht 9 Zyklen weiter, bis der Entkalkungsvor-
gang abgeschlossen ist.
Nach Ablauf des Entkalkungsvorgangs leuchten alle Funktionstasten,
Anzeigezeichen und Einstelltasten konstant blau (Abb. 4), um Sie
daran zu erinnern, dass Sie das Wasser im Behälter (7) durch frisches
Wasser ersetzen müssen.
Schritt 2
Drücken Sie die Taste (22) nach dem Wasserersetzen im Behälter
(7), und die Kaffeemaschine pumpt 300 ml. sauberes Wasser zum
Reinigen der Brüheinheit (9) und beendet den Entkalkungsvorgang
automatisch (Abb. 5).
Anmerkungen: Der Entkalkungsvorgang der Kaffeemaschine kann
nicht im Verlauf gestoppt werden. Der Entkalkungsvorgang kann nur
durchs Abtrennen der Kaffeemaschine vom Stromnetz unterbrochen
werden.
Automatische Entkalkung
Die Kaffeemaschine erinnert den Benutzer an die Entkalkung auto-
matisch, alle Einstellzeichen werden beleuchtet, und die Taste (22)
blinkt (Abb. 6).
Drücken Sie die Taste (22) , und die Kaffeemaschine führt den
Entkalkungsvorgang laut dem Abschnitt «Manuelle Entkalkung» oben
durch.
Werkseinstellungen
Um zu den Werkseinstellungen zurückzukehren, drücken Sie gleich-
zeitig die Tasten (22) und (23) und halten Sie sie 5 Sekunden
lang gedrückt. Die Anzeigen (25) leuchten abwechselnd blau. Warten
Sie ab, bis sie erlöschen. Die Tasten (21, 22, 23) leuchten weiter, der
Werkseinstellungen werden wiederhergestellt, und die Kaffeemaschine
ist betriebsbereit.
Ausschaltung
Drücken Sie die Taste (27) . Die Kaffeemaschine schaltet sich aus
und bleibt nach der Selbstreinigung im Wartebetrieb.
Einstellen der automatischen Kaffeemaschinenausschaltung
Zum Einstellen der automatischen Kaffeemaschinenausschaltung
drücken Sie gleichzeitig die Tasten (27, 28, 29) . Die
Ausschaltung ist mit den Tasten (27, 28) einstellbar. Wählen
Sie das gewünschte automatische Abschaltintervall aus den folgen-
den Werten: 0,5, 4, 8, 12 Stunden und Aus nach dem letzten Betrieb
der Kaffeemaschine (Abb. 7). Bestätigen Sie die Wahl durchs Drücken
der Taste (29) . Beenden Sie die Einstellung durchs Drücken der
Taste (29) .
Einstellen des Mahlkaffeevolumens
Um das Mahlkaffeevolumen einzustellen, drücken Sie die Taste (28)
. Die Einstellung erfolgt mit den Tasten (27, 28) . Wählen
Sie das gewünschte Volumen (Abb. 8). Bestätigen Sie die Wahl
durchs Drücken der Taste (29) . Beenden Sie die Einstellung durchs
Drücken der Taste (29) .
Temperatureinstellungen
Um die Temperatur der Kaffeemaschine einzustellen, drücken Sie
die Taste (29) . Die Ausschaltung ist mit den Tasten (27, 28)
einstellbar. Wählen Sie die gewünschte Temperatur aus
4 mit einem 2°C-Schritt. Bestätigen Sie die Wahl durchs Drücken
der Taste (29) . Beenden Sie die Einstellung durchs Drücken
der Taste (29).
Kaffeemahlgradeinstellung
Der Kaffeemahlgrad wird bei laufender Kaffeemühle eingestellt.
Öffnen Sie den Behälterdeckel (1). Drehen Sie den Mahlgradregler (2)
(Abb. 9). Wenn Sie den Regler (2) entgegen dem Uhrzeigersinn dre-
hen, ist der Mahlgrad feiner und der Kaffeegeschmack stärker, wenn
Sie ihn im Uhrzeigersinn drehen, ist der Mahlgrad gröber und der
Kaffeegeschmack schwächer.
Anmerkungen: Nach der Mahlgradregelung wird der eingestellte Grad
ab der dritten Tasse Kaffee festgehalten.
Warnzeichen (14) auf der Bedienungsplatte (4)
- Wassermangel (15).
- Fehlen/falsche Aufstellung der Brüheinheit (16).
- Fehlen/Überfüllung des Kaffeesatzbehälters oder abnehmbarer
Auffangschale (17).
- die Seitentür (18) offen.
- die Brüheinheit (19) spülen.
- Bohnen hinzufügen (28).
REINIGUNG
– Wischen Sie das Kaffeemaschinengehäuse mit einem weichen,
leicht angefeuchteten Tuch, danach trocknen Sie es ab.
– Verwenden Sie zum Reinigen der Kaffeemaschine keine
Metallbürsten und Scheuermittel.

13
DEUTSCH
– Es ist nicht gestattet, das Netzkabel, den Netzstecker und das
Kaffeemaschinengehäuse in Wasser oder jegliche andere
Flüssigkeiten einzutauchen.
– Waschen Sie die abnehmbaren Teile der Kaffeemaschine (6, 7, 9,
11, 12) mit Warmwasser und einem neutralen Reinigungsmittel,
spülen und trocknen Sie sie ab.
Reinigung und Wartung der Brüheinheit
Die Brüheinheit (9) soll mindestens alle zwei Wochen gereinigt werden.
Achtung! Entfernen Sie die Brüheinheit nicht, wenn die
Kaffeemaschine eingeschaltet ist.
Trennen Sie die Kaffeemaschine vom Stromnetz ab. Öffnen Sie die
Seitentür (10) und entfernen Sie den Kaffeesatzbehälter (12) (Abb. 10).
Reinigen Sie den Behälter von Satz und seinen Rückständen. Spülen
und trocknen Sie ihn ab.
Ziehen Sie vorsichtig am Griff der Brüheinheit (9), indem Sie den
Plastikvorsprung festhalten. Nehmen Sie die Brüheinheit heraus (Abb. 11).
Reinigen Sie die Brüheinheit (9) ohne Waschmittel, die sie beschä-
digen können.
Tauchen Sie die Brüheinheit 5 Minuten lang in Wasser ein und spülen
Sie sie dann unter ießendem Wasser ab.
Entfernen Sie Kaffeereste aus dem Brüheinheitsfach mit einer Bürste.
Tropfschale und Gitter (6)
Nehmen Sie das Gitter von der Tropfschale (6) ab, entfernen Sie
die Tropfschale und gießen Sie Wasser daraus ab, waschen Sie die
Tropfschale ab und stellen Sie sie zurück auf, stellen Sie das Gitter auf
die Tropfschale (6) auf.
Wasserbehälter (7)
Der Wasserbehälter (7) soll regelmäßig (etwa zweimal pro Monat)
mit einem feuchten Tuch und einem milden Reinigungsmittel gerei-
nigt werden.
AUFBEWAHRUNG
– Bevor Sie das Gerät zur Aufbewahrung wegnehmen, trennen Sie es
vom Stromnetz ab und lassen Sie es vollständig abkühlen.
– Reinigen Sie das Gerät laut dem Abschnitt «Reinigung».
– Lassen oder lagern Sie die Kaffeemaschine in keinen Räumen mit
Temperaturen unter 0°C.
– Bewahren Sie das Gerät an einem trockenen, kühlen und für Kinder
und behinderte Personen unzugänglichen Ort auf.
LIEFERUMFANG
Kaffeemaschine – 1 Stk.
Kaffeestaubbürste – 1 Stk.
Netzkabel – 1 Stk.
Betriebsanleitung – 1 Stk.
Garantieschein – 1 Stk.
TECHNISCHE EIGENSCHAFTEN
Stromversorgung: 220-240 V ~ 50 Hz
Nennleistungsaufnahme: 1200-1450 W
Fassungsvermögen des Wasserbehälters: 1,8 L
ENTSORGUNG
Zwecks Umweltschutz nach Beendigung der Nutzungsdauer des
Gerätes und der Batterien (falls mitgeliefert), werfen Sie diese
zusammen mit gewöhnlichen Haushaltsabfällen nicht weg, geben
Sie das Gerät und die Batterien in die Spezialpunkte für weitere
Entsorgung über.
Die bei der Entsorgung der Erzeugnisse entstehenden Abfälle sind
unbedingt zu sammeln und weiter ordnungsmäßig zu entsorgen.
Mehrere Information zur Entsorgung dieses Produkts erhalten Sie bei
Ihrer lokalen Stadtverwaltung, einem Abfallentsorgungsdienst oder
beim Geschäft, wo Sie dieses Produkt gekauft haben.
Der Hersteller behält sich das Recht vor, Design, Konstruktion
und die das gemeine Gerätebetriebsprinzip nicht beeinussende
technische Eigenschaften ohne Vorbenachrichtigung zu verän-
dern, deswegen kann sich die Betriebsanleitung vom Gerät
gering unterscheiden. Bei Feststellung solcher Unterschiede
Betriebsanleitung mit.
Gerätenutzungsdauer beträgt 3 Jahre
Dieses Produkt entspricht der EMV-Richtlinie
2014/30/EU und der Niederspannungsrichtlinie
2014/35/EU.

14
РУССКИЙ
КОФЕМАШИНА АВТОМАТИЧЕСКАЯ RDE-1101
Кофемашина предназначена для приготовления кофе
«ЭСПРЕССО», «ЛУНГО» и «ДВОЙНОЙ ЭСПРЕССО».
ОПИСАНИЕ
1. Контейнер для зерен
2. Регулятор помола
3. Площадка для нагрева
4. Панель управления
5. Выход кофе
6. Съемный поддон для сбора капель
7. Резервуар для воды
8. Воронка для чистящей таблетки
9. Заварочный блок
10. Боковая дверца
11. Поддон для остатков молотого кофе
12. Контейнер для кофейной гущи
13. Поплавковый индикатор уровня воды
Панель управления (4)
14. Предупреждающие значки
15. Недостаток воды
16. Отсутствие/неправильная установка заварочного блока
17. Отсутствие/переполнение контейнера для гущи
или съемного поддона для сбора капель
18. Открытие боковой дверцы
19. Требуется промывка заварочного блока
20. Функциональные значки
21. Эспрессо
22. Лунго
23. Очистка
24. Значки индикации
25. Индикаторы
26. Значки эл. сети/настройки
27. Включение/выключение
28. Зерна
29. Температура
ВНИМАНИЕ!
Для дополнительной защиты в цепи питания целесообразно
установить устройство защитного отключения (УЗО) с номи-
нальным током срабатывания, не превышающим 30 мА. Для
установки УЗО обратитесь к специалисту.
РЕКОМЕНДАЦИИ ПО ЭКСПЛУАТАЦИИ
И МЕРАМ БЕЗОПАСНОСТИ
• Перед использованием устройства внимательно озна-
комьтесь с руководством по эксплуатации. Сохраняйте
данное руководство в течение всего срока эксплуатации.
• Неправильное обращение с устройством может привести
к его поломке, причинению вреда пользователю или его
имуществу.
• Перед первым включением убедитесь в том, что рабочее
напряжение кофемашины соответствует напряжению в
электрической сети.
• Сетевой шнур снабжён «евровилкой»; включайте её в элек-
трическую розетку, имеющую надёжный контакт заземле-
ния.
• Во избежание риска возникновения пожара не исполь-
зуйте переходники при подключении кофемашины к элек-
трической розетке.
• Используйте кофемашину только по её прямому назначе-
нию.
• Не используйте устройство вне помещений.
• Никогда не оставляйте и не храните кофемашину в поме-
щениях с температурой ниже 0°C.
• Устанавливайте кофемашину на сухой ровной устойчивой
поверхности, не ставьте устройство на край стола.
• Не ставьте кофемашину на горячие поверхности.
• Не используйте кофемашину в непосредственной близо-
сти от источников тепла, влаги или открытого пламени.
• Не допускайте, чтобы сетевой шнур свешивался со стола,
а также следите, чтобы он не касался горячих поверхно-
стей и острых кромок мебели.
• Соблюдайте осторожность во время работы с горячей
водой.
• Во избежание удара электрическим током не погружайте
кофемашину, сетевой шнур или вилку сетевого шнура в
воду или в любые другие жидкости.
• Используйте только принадлежности, входящие в ком-
плект поставки.
• Не включайте кофемашину без воды.
• Используйте только чистую холодную воду, рекомендуется
использовать воду, прошедшую дополнительную очистку
бытовыми фильтрами для воды.
• Перед включением кофемашины убедитесь, что все съем-
ные детали установлены правильно.
• Никогда не оставляйте работающую кофемашину без при-
смотра.
• Не дотрагивайтесь до сетевого шнура, вилки сетевого
шнура, корпуса кофемашины мокрыми руками.
• Во избежание ожога не дотрагивайтесь до горячих поверх-
ностей кофемашины (блок подачи кофе, бойлер) в про-
цессе приготовления кофе и сразу после выключения
устройства.
• Дайте устройству полностью остыть перед снятием при-
надлежностей или чисткой.
• Запрещается снимать блок подачи кофе, заварочный блок
во время работы кофемашины.

15
РУССКИЙ
• Отключайте кофемашину от электрической сети перед
чисткой или в случае, если вы устройством не пользуетесь.
• Отключая устройство от электрической сети, не тяните за
сетевой шнур, а держитесь за вилку сетевого шнура.
• Из соображений безопасности детей не оставляйте полиэ-
тиленовые пакеты, используемые в качестве упаковки, без
присмотра.
Внимание! Не разрешайте детям играть с полиэтиленовыми
пакетами или упаковочной плёнкой. Опасность удушья!
• Данное устройство не предназначено для использования
детьми.
• Прибор не предназначен для использования лицами
(включая детей) с пониженными физическими, сенсор-
ными или умственными способностями или при отсут-
ствии у них жизненного опыта или знаний, если они не
находятся под присмотром или не проинструктированы
об использовании прибора лицом, ответственным за их
безопасность.
• Дети должны находиться под присмотром для недопуще-
ния игр с прибором..
• Запрещается пользоваться устройством при наличии
каких-либо повреждений корпуса кофеварки, шнура пита-
ния или вилки сетевого шнура питания.
• При повреждении шнура питания его замену во избежание
опасности должны производить изготовитель, сервисная
служба или подобный квалифицированный персонал.
• Запрещается самостоятельно ремонтировать прибор. Не
разбирайте прибор самостоятельно, при возникновении
любых неисправностей, а также после падения устройства
выключите прибор из электрической розетки и обратитесь
в любой авторизованный (уполномоченный) сервисный
центр по контактным адресам, указанным в гарантийном
талоне и на сайте www.rondell.ru.
• Перевозите устройство только в заводской упаковке.
• Храните устройство в сухом прохладном месте, недоступ-
ном для детей и людей с ограниченными возможностями.
ДАННЫЙ ПРИБОР ПРЕДНАЗНАЧЕН ДЛЯ ИСПОЛЬЗОВАНИЯ
ТОЛЬКО В БЫТОВЫХ УСЛОВИЯХ. ЗАПРЕЩАЕТСЯ КОММЕР-
ЧЕСКОЕ ИСПОЛЬЗОВАНИЕ И ИСПОЛЬЗОВАНИЕ ПРИБОРА
В ПРОИЗВОДСТВЕННЫХ ЗОНАХ И РАБОЧИХ ПОМЕЩЕНИЯХ.
ПЕРЕД ПЕРВЫМ ИСПОЛЬЗОВАНИЕМ
После транспортировки или хранения устройства при
пониженной температуре необходимо выдержать его
при комнатной температуре не менее трёх часов.
– Извлеките кофемашину из упаковки и удалите упаковоч-
ные материалы.
– Проверьте целостность устройства, при наличии повреж-
дений не пользуйтесь устройством.
– Убедитесь в том, что рабочее напряжение кофемашины
соответствует напряжению в электрической сети.
– Устройство предназначено для работы в сети перемен-
ного тока с частотой 50 Гц, для работы устройства при
требуемой номинальной частоте никакая настройка не
требуется.
– Перед первым использованием кофемашины промойте
все ее съемные части (6, 7, 9, 11, 12) теплой водой с ней-
тральным моющим средством и просушите.
ПОДГОТОВКА К РАБОТЕ
Прочтите перед первым использованием
– Проверьте и убедитесь, что заварочный блок (9), контей-
нер для кофейной гущи (12) и поддон для сбора капель (6)
установлены правильно.
– Наполните резервуар (7) чистой водой.
– Добавьте кофейных зерен (более 30 г) в контейнер для
зерен (1) перед первым использованием.
Примечания: В контейнер (1) можно помещать только
кофейные зерна, пожалуйста, не добавляйте воду, молотый
кофе, кофейные зерна, смешанные с твердыми частицами,
иначе жернова кофемолки будут повреждены.
Поддон для сбора капель (6)
Когда уровень слитой жидкости повышается до верхнего пре-
дела, поплавковый индикатор уровня воды (13) всплывает,
после чего требуется опорожнить поддон слива жидкости.
Заварочный блок (9)
Пожалуйста, не открывайте дверцу и не перемещайте зава-
рочный блок во время приготовления кофе. Если на дисплее
отображается значок что заварочный блок (9) отсутствует,
пожалуйста, выньте его, а затем снова вставьте до упора и
щелчка.
Контейнер для кофейной гущи (12)
Когда на дисплее появится значок о заполнении контейнера,
пожалуйста, опорожните контейнер (12).
РАБОТА И ФУНКЦИОНАЛЬНЫЕ ВОЗМОЖНОСТИ
Включение кофемашины
Вставьте сетевой шнур в гнездо на задней стенке панели
и подключите устройство к электрической сети. На панели
управления (4) по центру загорится индикатор (26) (рис. 1).
Нажмите на кнопку (27) , машина включится, запустит
самодиагностику, нагрев и процесс самоочистки. Когда
вышеуказанные процессы будут завершены, машина будет
готова к использованию (рис. 2).

16
РУССКИЙ
Примечание: Кнопки режимов работы на панели управле-
ния (4) сенсорные, для включения нужного режима работы,
к кнопке достаточно прикоснуться.
Эспрессо/лунго/горячая вода/очистка
Для приготовления эспрессо – нажмите кнопку (21) .
Для приготовления лунго – кнопку (22) .
Для того, чтобы запустить внутреннюю промывку – нажмите
кнопку (23) .
Отмена любого из вышеперечисленных процессов повторное
нажатие на кнопку выбранной функции.
НАСТРОЙКИ КОФЕМАШИНЫ
Настройки объема кофе
– Для того чтобы задать объем чашки кофе:
Для эспрессо – нажмите кнопку (21) ,
Для лунго – нажмите кнопку (22) .
– Держите кнопку нажатой, около 5 секунд. Индикатор
включенной функции сначала будет мигать, затем начнет
светиться постоянным синим цветом и кофемашина авто-
матически начнет делать выбранный напиток.
– Когда объем кофе достигнет требуемого пользователем
объема, нажмите на кнопку выбранной функции еще раз,
и машина перестанет подавать кофе.
– Произведенный объем кофе будет запомнен машиной, и
кофемашина будет производить такой же объем кофе из
следующей чашки.
Удаление накипи вручную
Шаг 1
Включите кофемашину, добавьте средство для удаления
накипи в емкость для воды (7), затем удерживайте, одновре-
менно нажатые, кнопки (21) и (22) в течение 5 секунд,
чтобы начать процесс удаления накипи (рис. 3).
Индикаторы будут светиться по очереди, и все индикаторы
значков настройки , будут гореть постоянным синим цветом,
насос будет работать 30 секунд, остановится на 3 минуты и
так проработает 9 циклов до завершения процесса удале-
ния накипи.
После завершения процесса очистки накипи, все функцио-
нальные кнопки, значки индикации и кнопки настроек будут
светиться постоянным синим цветом (рис. 4), напоминая, что
требуется заменить воду в резервуаре (7) на свежую.
Шаг 2
После замены воды в резервуаре (7) нажмите кнопку (22)
и машина перекачает 300 мл. чистой воды для очистки зава-
рочного блока (9) и автоматически завершит процесс декаль-
цинации (рис. 5).
Примечания: Процесс декальцинации кофемашины невоз-
можно остановить до полного завершения. Приостановить
процесс декальцинации , можно только отключив машину
от сети.
Удаление накипи автоматическое
Кофемашина также автоматически напомнит пользователям
о необходимости удаления накипи, все значки настроек будут
подсвечены, а кнопка (22) будет мигать (рис. 6).
Нажмите кнопку (22) и кофемашина проведет процесс
удаления накипи, описанный в предыдущем пункте «Удаление
накипи вручную».
Заводские настройки
Чтобы вернуться к заводским настройкам нажмите одно-
временно кнопки (22) и (23) и удерживайте в тече-
нии 5 секунд. Индикаторы (25) будут загораться по очереди
синим цветом. Дождитесь когда они погаснут. Кнопки (21, 22,
23) продолжат гореть, восстановление заводских настроек
завершится и машина будет готова к работе.
Выключение
Нажмите кнопку (27) . Кофемашина отключится и будет
находиться в режиме ожидания после самоочистки.
Настройка автоматического выключения кофемашины
Чтобы настроить автоматическое выключение кофемашины
нажмите одновременно на кнопки (27, 28, 29) .
Регулировка выключения проводится кнопками (27, 28)
. Выберете нужный вам интервал автоматического
выключения из следующих значений: 0.5, 4, 8, 12 часов и выкл.
после последней работы кофемашины (рис. 7). Подтвердите
выбор нажатием кнопки (29) . Выход из настройки – нажа-
тие кнопки (29) .
Настройки степени объема кофейного помола
Чтобы настроить степень объема кофейного помола кофема-
шины нажмите на кнопку (28) . Регулировка проводится
кнопками (27, 28) . Выберете нужную вам степень объ-
ема (рис. 8). Подтвердите выбор нажатием кнопки (29) .
Выход из настройки – нажатие кнопки (29) .
Настройки степени температуры
Чтобы настроить степень температуры кофемашины нажмите
на кнопку (29) . Регулировка выключения проводится кноп-
ками (27, 28) . Выберете нужную вам температуру
из 4 степеней, каждая степень 2°С. Подтвердите выбор
нажатием кнопки (29) . Выход из настройки – нажатие
кнопки (29) .

17
РУССКИЙ
Регулирование степени помола кофе
Степень помола кофе регулируется во время работы кофе-
молки.
Откройте крышку контейнера (1). Поверните регулятор сте-
пени помола (2) (рис. 9). Если повернуть регулятор (2) про-
тив часовой стрелки, то помол будет более мелким, а вкус
кофе сильнее, а если по часовой стрелке, то более грубым,
а вкус кофе слабым.
Примечания: После регулировки степени помола отрегули-
рованная степень будет сохраняться от третьей чашки кофе.
Предупреждающие значки (14) на панели управле-
ния (4)
- недостаток воды (15).
- отсутствие/ неправильная установка заварочного
блока (16).
- отсутствие/переполнение контейнера для гущи или
съемного поддона для сбора капель (17).
- открытие боковой дверцы (18).
- требуется промывка заварочного блока (19).
- добавьте зерна (28).
ЧИСТКА
– Протирайте корпус кофемашины мягкой, слегка влажной
тканью, после чего вытрите насухо.
– Для чистки кофемашины не используйте металлические
щетки и абразивные чистящие средства.
– Запрещается погружать сетевой шнур, вилку сетевого
шнура и корпус кофемашины в воду или любые другие
жидкости.
– Съемные детали кофемашины (6, 7, 9, 11, 12) промывайте
теплой водой с нейтральным моющим средством, спо-
лосните и просушите.
Очистка и обслуживание заварочного блока
• Прочищать заварочный блок (9) следует не реже одного
раза в две недели.
Внимание! Нельзя вынимать заварочный блок при вклю-
ченной машине.
• Отключите кофемашину от сети. Откройте боковую
дверцу (10) и достаньте контейнер для кофейной гущи (12)
(рис. 10). Освободите контейнер от гущи и ее остатков.
Промойте его и просушите.
• Аккуратно потяните за ручку заварочного блока (9), при-
держивая за пластиковый выступ. Выньте заварочный
блок (рис. 11).
• Чистите заварочный блок (9) без использования моющих
средств, которые могут его повредить.
• Погрузить заварочный узел на 5 минут в воду, а затем про-
мыть под струей воды.
• С помощью кисточки удалить остатки кофе из отсека зава-
рочного блока.
Поддон для капель и решётка (6)
Снимите решетку с поддона (6), снимите поддон и слейте из
него воду, промойте поддон и установите его на место, уста-
новите решетку на поддон (6).
Резервуар для воды (7)
Емкость для воды (7) следует периодически (примерно 2 раза
в месяц) очищать с помощью влажной тряпки и мягкого мою-
щего средства.
ХРАНЕНИЕ
– Прежде чем убрать устройство на хранение, отключите его
от электросети и дайте ему полностью остыть.
– Произведите чистку устройства, как это описано в пун-
кте «Чистка».
– Запрещается оставлять и хранить кофемашину в помеще-
ниях с температурой ниже 0°C.
– Храните устройство в сухом прохладном месте, недоступ-
ном для детей и людей с ограниченными возможностями.
КОМПЛЕКТ ПОСТАВКИ
Кофемашина – 1 шт.
Щеточка для очистки от кофейной пыли – 1 шт.
Кабель питания – 1 шт.
Инструкция – 1 шт.
Гарантийный талон – 1 шт.
ТЕХНИЧЕСКИЕ ХАРАКТЕРИСТИКИ
Электропитание: 220-240 В ~ 50 Гц
Номинальная потребляемая мощность: 1200-1450 Вт
Объём резервуара для воды: 1, 8 л
УТИЛИЗАЦИЯ
В целях защиты окружающей среды, после окончания срока
службы прибора и элементов питания (если входят в ком-
плект), не выбрасывайте их вместе с обычными бытовыми
отходами, передайте прибор и элементы питания в специа-
лизированные пункты для дальнейшей утилизации.
Отходы, образующиеся при утилизации изделий, подлежат
обязательному сбору с последующей утилизацией в уста-
новленном порядке.

18
РУССКИЙ
Для получения дополнительной информации об утилиза-
ции данного продукта обратитесь в местный муниципалитет,
службу утилизации бытовых отходов или в магазин, где Вы
приобрели данный продукт.
Производитель сохраняет за собой право изменять дизайн,
конструкцию и технические характеристики, не влияющие на
общие принципы работы устройства, без предварительного
уведомления, из-за чего между инструкцией и изделием
могут наблюдаться незначительные различия. Если пользо-
ватель обнаружил такие несоответствия, просим сообщить
об этом по электронной почте [email protected] для получения
обновленной версии инструкции.
Срок службы устройства – 3 года
Данное изделие соответствует всем требуемым
европейским и российским стандартам безопас-
ности и гигиены.
ИЗГОТОВИТЕЛЬ: СТАР ПЛЮС ЛИМИТЕД
(STAR PLUS LIMITED)
МЕСТОНАХОЖДЕНИЕ И ПОЧТОВЫЙ АДРЕС ДЛЯ СВЯЗИ:
ЮНИТ БИ ЭНД СИ, 15Й ЭТАЖ, КЭЙСИ АБЕРДИН ХАУС, №38,
ХЁНГ ИП РОУД, ВОНГ ЧУК ХАНГ, ГОНКОНГ, КНР
ИМПОРТЕР И УПОЛНОМОЧЕННОЕ
ИЗГОТОВИТЕЛЕМ ЛИЦО: ООО «ГИПЕРИОН»
МЕСТОНАХОЖДЕНИЕ И ПОЧТОВЫЙ АДРЕС ДЛЯ СВЯЗИ:
РФ, 117452, Г. МОСКВА, ЧЕРНОМОРСКИЙ БУЛЬВАР, ДОМ 17,
КОРП. 1, ЭТАЖ 4, ОФИС 401, КАБ. 2.
Тел.: +7 (499) 685-17-81, e-mail: [email protected]
Ответственность за несоответствие продукции требованиям
технических регламентов Таможенного союза возложена
на уполномоченное изготовителем лицо.
www.rondell.ru
ТЕЛЕФОН ДЛЯ СПРАВОК: 8-800-100-18-30
СДЕЛАНО В КНР

ГАРАНТИЙНЫЙ ТАЛОН
условия гарантийного обслуживания
Уважаемые покупатели!
Требуйте от продавца заполнения гарантийного талона, включая отрывные купоны.
ЕДИНАЯ СПРАВОЧНАЯ СЛУЖБА/CALL CENTER:
+7 (495) 921-01-70

Dear Customer!
RÖNDELL
appreciates your choice and guaranties the high quality
of the purchased appliance operation under keeping of service rules.
The guarantee period for all devices is 12 months from the date of purchase. By this guarantee book the manufacturer
confirms the good working condition of the device and undertakes the obligation to repair any defects which may arise
through the fault of the manufacturer free of charge. Warranty service is available at any authorized serviсe center enlisted
on the site www.rondell.ru.
Guarantee service conditions
1. The guarantee is valid if the following issuance conditions are observed:
• correct and precise filling in the original
RÖNDELL
warranty card with mentioning model name, its serial number,
date of sale, with seal of Seller and signature of Seller’s representative in the warranty card, seals on each tear-off
coupon, Buyer’s signature;
The manufacturer retains the right to refuse guarantee service in case of failure to submit the above-mentioned docu-
ments, or if the information they contain is incomplete, illegible or contradictory.
2. The guarantee is valid if the following operating conditions are observed:
• the device is used in strict accordance with the operating instructions;
• the safety rules and requirements are observed.
3. Warranty does not include periodic maintenance, cleaning, installation, adjustment of device at the owner’s home, as
well as natural device wear and tear.
4. Cases not covered by the guarantee:
• mechanical impairments;
• non-observance of operating conditions or faulty action of the owner;
• incorrect installation or transportation;
• natural hazards (lightning, fire, flooding etc.), as well as other causes beyond the control of the seller and manufac-
turer;
• penetration of external objects, liquids or insects into the device;
• repair work or structural alterations carried out by unauthorised persons;
• use of the device for professional purposes (whereby the load exceeds the domestic application level);
• connection of the device to power supply, telecommunication and cable-based networks incompatible with the
State Technical Standards;
• cleaning of audio heads, different media readout drives
• breakdown of the accessories of the unit listed below, if their replacement is specified by the construction and does
not require disassembly of the unit:
а) the remote control, the accumulator batteries, batteries, external power blocks and charging devices;
b) the consumable products and accessories (packing, cases, belts, bags, grids, blades, flasks, plates, supports,
racks, roasting racks, hoses, tubes, brushes, attachments, dust containers, filters, odor absorbers).
• for battery-operated devices: use of incompatible or discharged batteries, or any impairments caused by dis-
charged or leaky batteries (we recommend to use only high-quality batteries);
• for battery powered devices – any damages coursed by battery charging and recharging rules violation.
• for shavers: crumpled or ruptured safety mesh;
5. This guarantee is provided by the manufacturer in addition to the customer’s rights, stipulated by the current legisla-
tion, and does not restrict them.
6. The manufacturer is not responsible for possible harm, caused directly or indirectly by
«
RÖNDELL
»
products to people,
pets, consumer’s property and/or other third parties in case if it has happened due to violation of rules and operating
conditions, installation of the unit; intended and/or careless actions (inactions) of a consumer and/or other third par-
ties, the effect of force majeure circumstances.
English
Table of contents
Languages:
Other RONDELL Coffee Maker manuals

RONDELL
RONDELL RDE-1102 User manual

RONDELL
RONDELL RDE-1110 User manual

RONDELL
RONDELL RDE-1100 User manual

RONDELL
RONDELL RDE-1109 User manual

RONDELL
RONDELL RDE-1107 User manual

RONDELL
RONDELL RDE-1103 User manual

RONDELL
RONDELL RDE-1113 User manual

RONDELL
RONDELL RDE-1106 User manual

RONDELL
RONDELL RDE-1108 User manual