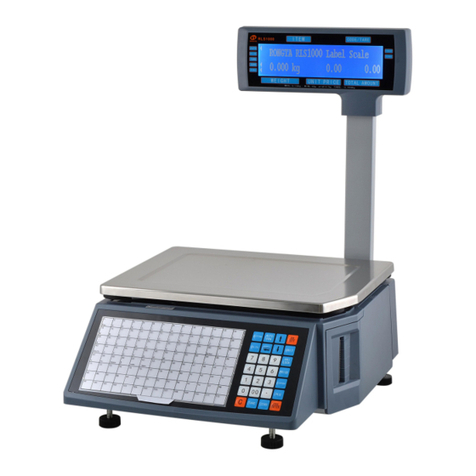
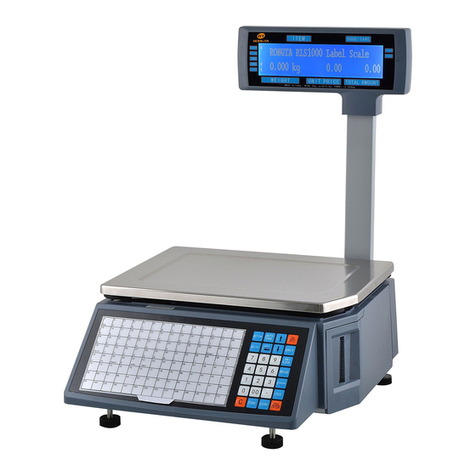
Rongta Technology LS015 User manual

Rongta Technology (Xiamen) Group Co., Ltd.
www.rongtatech.com
V1.1
LS015 Barcode label scale
User Manual

C
C
Contents
Introduction...................................................................................................................1
1. The Label scale’s specification............................................................................. 2
2. Features Summary................................................................................................. 3
2.1 Unique and powerful network..................................................................... 3
2.2 Usage is easy to learn................................................................................. 3
2.3 Advanced functions and durable quality....................................................3
3. Label scale installation steps................................................................................ 4
3.1 Installation......................................................................................................4
3.2 The installation of the thermal label paper................................................5
3.3 Keyboard........................................................................................................6
3.4 Description of label paper............................................................................6
4. Overall Appearance................................................................................................ 6
5. Common easy-to -use operations........................................................................ 7
5.1 Switch on and off.......................................................................................... 7
5.2 Weighing and pricing....................................................................................7
5.3 Tare operation................................................................................................8
5.4 Discount......................................................................................................... 8
5.5 Price Changing..............................................................................................8
5.5.1 Permanent Changing........................................................................8
5.5.2 Temporary Changing.........................................................................9
5.6 Choosing Unit of Weight.............................................................................. 9
5.7 Charging by Piece........................................................................................ 9
5.8 Automatic fast packaging.............................................................................9
5.9 Operation button in common use.............................................................10
6. Wireless Label Scale Setting Instruction...........................................................10
6.1 Network connection mode.........................................................................10
6.2 Router set up...............................................................................................10
6.3 Label Scale Setting.....................................................................................11
6.4 Computer RLS1000 software settings.....................................................11
7. Function setting..................................................................................................... 11
7.1 Input settings of single item.......................................................................11
7.2 System set up............................................................................................. 12
7.3 Lock.............................................................................................................. 13
8. Troubleshooting.....................................................................................................14
8.1 Scales crash................................................................................................14
8.2 Print related issues.....................................................................................14
8.3 The key issues............................................................................................ 17
8.4 Weigh problem............................................................................................ 17
8.5 Communication problem........................................................................... 18
8.6 Display problem.......................................................................................... 18
8.7 Error code.................................................................................................... 18
8.8 Other problems........................................................................................... 19
9. The acceleration of gravity revised table.......................................................... 20
1
Introduction
Thank you for choosing our Label scale LS015. In order to operate LS015 correctly, User manual is
detailed in function and operation method of LS015 , which help user with doubt quickly when come up
against mechanical fault .
Rongta research, develop, produce and sale LS015 independently, which is high-performance
barcode label scale.
LS015 is the best choice for user in label printing business line with fashion appearance, power
function and high durable, which make LS015 more popular in store ,fresh food supermarket ,farmers
market and so on.
Note : this product information are subject to change without prior notice.
This information is for reference only. In addition to China's existing laws and regulations, the company
does not undertake any due to the direct or indirect losses caused by use of this information.
The company reserves the final interpretation.

2
1. The Label scale’s specification
The Weighing range and accuracy.
LS015
Max weight: 15kg Min weight: 40g
0kg to 6kg * 0.002kg (e=2g) 6kg to 15kg * 0.005kg (e=5g)
The accuracy grade:
Resolution:
Input sensitivity: greater than or equal to 50u V/D
zero-point adjustment range: ±60MV
temperature coefficient: ±0.0012%CTYP
[Zero] ±(0.2μV+0.0008% of Dead Load)/℃TYP
Nonlinearity: 0.01%F.S.
A/D resolution: Max 30000 resolution
Display resolution: 1/3000
A/D conversion rate: 6 times/second
LCD display board:
Info/weight: 5byte(APHA)
simple lattice: 8 byte
Total lattice: 8byte
Unit of weight: g. kg
Regular:
Power supply: 100V-240V~, 50/60Hz
Power consumption: Standby 3W, line printing 50W
operating temperature: 0 ℃~40 ℃

3
2. Features Summary
2.1 Unique and powerful network
a. Use the Ethernet interface technology and the data transfer rate has been improved drastically
Advice: When you use the Ethernet interface, suggest using the shielded cable.
2.2 Usage is easy to learn
a. Operate the PLU by single bond to make fast sales, and the front desk staff could use it without
training.
b. 60 direct buttons and 120 hot buttons can be set up, and the common goods can be specified to hot
buttons mostly.
2.3 Advanced functions and durable quality
a. The under machine program can be upgraded by PC, the program will be the latest version and the
function would be the most perfect forever.
b. The design of the Printer structure is exquisite, is not easy to roll the paper.
c. Barcode rotation could extend the lifetime of the print head, and the printer mechanism could be
adjusted according to the paper’s sensitivity.
d. Having the function of weighing and pricing for the various packages, along with special designed
barcode printing.
e. Function: It can use a few goods to make up to platter, fruit basket, etc.
f. Each PLU could be set to multiple tags.
g. Each PLU could be used by separated barcode encoding formats, which could solve the
encoding problem from distribution and consignment sales.
h. Each PLU could use separated units.
i. The unit of quantity could be self defined, such as block, packages, etc.
j. PLU has abundant information, Including barcode format, fresh code, package type, information
provision, etc.
k. Rotational printing the whole label.
l. Support Ean-8, Ean-13 and 18 code, completely solving the problem of fresh commodities code.
m. Unique bar code type to manage the fresh commodities by batch.

4
3. Label scale installation steps
3.1 Installation
a.Connect air fittings
b.put the air fittings
inside the display bar
c.Install the display
bar and put the tray
d. Adjust the feet to make the level
tool inside the little circle

5
3.2 The installation of the thermal label paper
a. Open the dust cover.
b. Open the print head
d.Remove first few labels, and then
loading the roll
e.Thread the front of new label roll
through the filter plate and wrap in pick-up
clamp ,and close the printing head (As
shown in the figure)
f. Press [] button to roll the label paper
h. Close the dust cover and place the scale
pan.

6
3.3 Keyboard
Press [] button to adjust label position and long press [] button to align paper.
3.4 Description of label paper
The label which is used at RONGTA Label Scale is: Thermal Seam Marking Label. As shown below:
Height:60mm,width:(30~60)mm,Max outside diameter: 100mm,Minimum inner diameter:40mm or
26.8mm.
4. Overall Appearance
a. Host
b. Tray
c. Display group(A liquid crystal display,
display bar, the four screws)
d. Thermal label paper
e. One fuses
f. User manual
g. Serial cable
h. Power cable
Inner diameter 26.8mm
Inner diameter 40mm
Match the corresponding roll mandrel
(default 40mm, 26.8mm optional)

7
5. Common easy-to -use operations
5.1 Switch on and off
Hard disk switch on/turn on: After connecting power supply, switch on the power button at the bottom
of the scale. After the screen shows one by one the information of edition No., IP address, self-test
countdown “0 、1、2、……8”,the scale enter into sale pattern.
Attention: under self-test situation, please do not press any button and make sure nothing is on
the scale, otherwise it can’t work normally.
Soft disk switch on/off: Please switch on the power button, then press the button [ON/OFF] for 2 seconds.
5.2 Weighing and pricing
There are three methods for weighing and pricing. If the PLU information has been downloaded from
PC or edited in the scale in advance, take the Method 1 and Method 2. If not, take the Method 3.
1. Under the “automatic printing” situation, once the weight is stable system will print label, if the weight
and unit price is not zero showed.
2. When the “AUTO” arrow lights on screen , it means the system is in the state of auto printing .Press the
[AUTO PRN]can switch the state.( You can set whether to auto print or not when starting in the
[SETTING] , the operation is according to the 7.2 system setting .
3. If nothing is on the scale tray or pressing the “zero” button even something on the tray and the light
“zero point” is on, it means the scale is under zero point condition.
4. The following operations, including peeling, pricing with piece, discount and changing price, are based
on automatic printing. If the scale is not under automatic printing condition (automatic printing light is
off), you need to press the button [PRN/ENTER] for label printing.
Method 1: hotkey operation
Example: sale green onion 2kg. Suppose the hotkey is 1 and the unit price is €1.50/kg.
Operation procedure: press the button [ZERO] (if the screen already shows zero, the action can be
slipped) put 2kg green onion on the scale tray press the hotkey 1. Now, the relevant weight, unit
price and total amount will be shown on the screen and the label will be printed. (PS : In the non-auto
printing status , you need to press the key [PRN/ENTER])
120 hotkeys in total and is changeable and can be printed by control PC.
The above operation is suitable for hotkey 1-60 as for hot button 61-120, the operation is pressing the

8
button [PLU] + the corresponding hotkey.
For easy operation, all the PLU can print the latest illustration. The printing function is set by PC.
Method 2: general operation
Example: sale green onion 2kg. The Fresh Commodity Code is 10 and the unit price is €1.50/kg
Operation procedure: press the button [ZERO] (if the screen already shows zero, the action can be
slipped), put 2kg goods on the scale press the button [PLU] input the LF code 10 Press
the button [PLU]. Now, the relevant weight’ unit price, total price will be showed on the screen and the
label will be printed.( PS : In the non-auto printing status , you need to press the key [PRN/ENTER])
5.3 Tare operation
The operation is just suitable for the goods need to be packed, e.g. egg, beans etc. There are two
methods used for the following situation:1.package and good separated; 2.Package and goods
non-separated.
Method 1: suitable for package and good separated
Example: sale one box of apple. Suppose the apple’s unit price is €6.0/kg, the hotkey is 05, and the
weight is 2.0kg.
Operation procedure: put a container or package box supposed 1.0kg on the scale press the
button [TARE] put on one box of apple press apple’s hotkey 05 after weighting, take
off the products and then press the button [TARE] again for elimination.
Method 2: suitable for the tare weight known and the package and goods non-separated
Example: sale one box of apple. The unit price is €6.0/kg, tare weight 1.0kg, and the apple and box
weighs 2.0kg in total.
Operation procedure: press the button [ZERO] (if the screen already shows zero, the action can be
slipped) input the tare weight Press the button [TARE] put on one box of apple press
the hotkey 05 after weighting, press the button [TARE] again for elimination.
5.4 Discount
Discount operation:The discount function can be locked via setting password through PC
background server. Password can be changed through background at any time.
Operation: Discount in proportion
Example: Vegetable is priced at € 8.0 / kg and 5% off, and vegetable's hotkey is 12.
Procedure: Enter discount 95% on the keypad press button [DISCOUNT] put the
vegetables on scale enter the hotkey 12.( PS : In the non-auto printing status , you need to press the
key [PRN/ENTER]).
5.5 Price Changing
5.5.1 Permanent Changing
Method 1:
Example: before changing, apple's unit price is €4.00/kg, after changing, its unit price is €3.00/kg.
And hotkey is 05.
Steps: press the apple's hoykey 05 press button[PRICE] input new price €3.00/kg
press button[PRN/ENTER] weighing and pricing.

9
Method 2:
Example: before changing, apple's unit price is €4.00/kg, after changing, its unit price is €3.00/kg.
fresh commodity code is 15.
Steps: press button[PRICE] input the apple's fresh commodity code 15 press
button[PRN/ENTER] input new price €3.00/kg press button[PRN/ENTER] weighing and
pricing.
5.5.2 Temporary Changing
Method 1:
Example: before changing, cabbage's unit price is €1.40/kg, then temporarily changing to €2.00/kg.
Fresh commodity code is 13.
Steps: put on 2.00kg cabbage input the fresh commodity code 13 press button[PRICE]
input new price €3.00/kg press button[PRN/ENTER]
5.6 Choosing Unit of Weight
Method:
press and hold the button[UNIT] for 1 second (hear beeper) choose new charge unit. e.g.
choose "g" as unit and no operation for 2 seconds means confirm the new unit.
5.7 Charging by Piece
(P.S. for following operation, need to open the "charging by piece" function, with weight is 0 and turn
off permanent price changing function. If using [NET CHECK/SET AMT] button, specified total amount
function need to be ON)
for single item-Method 1:
input relevant item's fresh commodity code (or press the hotkey) (P.S.in the non-auto printing
status, you need to press button[PRN/ENTER] )
for single item-Method 2:
input single item's price press button[NET CHECK/SET AMT] input relevant item's fresh
commodity code (or press the hotkey) (P.S.in the non-auto printing status, you need to press
button[PRN/ENTER] )
for multiple items-Method 1:
input item's quantity(number) press button[UNIT/X] input single item's price press
button[NET CHECK/SET AMT] input relevant item's fresh commodity code (or press the hotkey)
(P.S.in the non-auto printing status, you need to press button[PRN/ENTER] )
for multiple items-Method 2:
input single item's price press button[NET CHECK/SET AMT] input item's quantity(number)
press button[UNIT/X] input relevant item's fresh commodity code (or press the hotkey)
(P.S.in the non-auto printing status, you need to press button[PRN/ENTER] )
5.8 Automatic fast packaging
This function can be applied to high-volume label of similar but different weight of the product.
Procedure: Activate the [AUTO PRN] and [PRI LOCK] function choose a single product or enter
a unit price put the goods on the scale tray one by one, and the scale will start to print label

10
automatically.
If when to operate fast, recommend to proceed as following procedure.
Procedure: Put item 1 on the scale tray, it will print label automatically put item 2 on and take off
item 1 take the label and stick it on item 1, next label will be printed automatically put item 3 on and
take off item 2 take the label and stick it on item 2, next label will be printed automatically
repeat the procedure, it can save time.
5.9 Operation button in common use
Auto Print: Switch to automatic print, otherwise need to press button [PRN / ENTER] to print
Charge unit: Press button [UNIT] 2 seconds to switch charge unit kg or g.
Price Locking: Press button [PRI LOCK] to continuously print label of same product (product name
will not disappear). Press again to unlock.
Price change: Press any hotkey press button [PRICE] and input price.
Discount: Enter the discount rate (e.g.: enter 80 for 80% discount) and press button [DISCOUNT] to
calculate Enter hotkey of the goods put good on the scale and start printing
Zero: press button [ZERO] to make zero of all the data.
Peeling/Tare: weight the tare and press button [TARE] put goods on the scale enter
corresponding hotkey after printing, press button [TARE] to clear the tare weight.
Clear: this button commonly used to clear the unit price and abnormal screen or an error message to
keep the normal running of the system.
Setting: press button [SETTING] 2 seconds to enter Setting interface, where you can reset basic
setting and parameters of the printer and scale. Such as IP setting, restore factory setting, print
barcode type setting, WIFI setting, etc. Press [] []button to select function setting, press confirm to
enter setting interface, then set it.
Note: when wrong operation cause system crash, need to restart the scale.
6. Wireless Label Scale Setting Instruction
6.1 Network connection mode
6.2 Router set up
1. Set the SSID name of the router (No more than 15 characters)
2. set the type of router’s authentication, encryption algorithm, password,
Encryption type set as : WPA2-PSK
Encryption algorithm set as: AES
Password: no more than 15 characters
Computer
Ethernet wired connection
Router
Wireless connection
WIFI Label Scale

11
6.3 Label Scale Setting
1. Long press the set button, enter the settings menu
2. Select IP settings, set the IP address of the label scale (And need to be same network of routers which
is the same IP address)
3. Select “SET WiFi” menu.
4. Enter the SSID WIFI set menu: input router’s SSID Name.
5. Enter the “WiFi password mode” select menu: select the WPA2-PSK/AES option (need to be same as
router encryption type).
6. Enter the "WiFi password" setting menu, enter the router password (the router password).
7. After finish settings and restart the label scale,computer and label scale can be wireless
communications.
6.4 Computer RLS1000 software settings
Set label scale corresponding to the IP address, after setting, Use software’s “test network” icon for
network testing, then connectivity can be normal communication, if it’s failure, please check and make
sure PC’s IP address is in the same segment.
7. Function setting
This function can be locked with a password. Password can be set and reset through PC.
7.1 Input settings of single item
Step One: press button [PLU] until screen shows "single item edit" to enter the edit mode.
Step Two: Type 6 digits of fresh commodity code and press button [PRN/ENTER] to confirm. When the
screen shows "Product Name", enter price. (Meanwhile, can press [][]button to select the needed item,
or enter corresponding letter shown in below sheet, if enter “N” means to edit item name.)
Nsingle item name: You can use the keyboard to enter the name of a single item, up to 36 digits.
Lsingle item Fresh Commodity code: Enter fresh commodity code within 6-digit.
Csingle item Model: Enter Item No. within 10 digits.
PPrice: Enter the unit price of goods no more than 7 digits.
Ucharge unit: Use button [] []to select g or Kg.
FExpiration: enter expiration date between 0~365.
TTare: Input tare weight within maximum.
BBar Code Type: Select the barcode type from 0-99.
Ddepartment code: Enter the department code within 0-99.
WPackage weight: Enter PLU packaging weight.
YPackage Type: Select packaging type with the left and right buttons (0: Normal, 1: fixed weight, 2:
fixed price, 3: fixed weight & price).
E: Package Tolerance: (0-20%).
MInformation 1: input selected information code (0-197).
GInformation 2: input selected information code (0-197).
Isingle item’s label setting: 8 bits, 0: A0,1: A1,2: B0, 3: B1,4: C0,5: C1,6: D0,7: D1.
Rdiscount setting: (- 10 ~ -125) (- 10 ~ -1) corresponding to discount of type 10-1. (1 ~ 125)
corresponding to a percentage discount.
VChinese price unit setting (PCS TYPE).

12
SSave for changes.
HHotkey setting: Up to three numbers, while preserving the changes of PLU.
7.2 System set up
That operation can be lock by password. The password is set in PC and can be change at anytime.
Step 1: press [set] key and hold on 3s to enter system setting status.
Step 2: press []/[]or direct number key accordingly to select item.
Step 3: press [PRN/ENTER] key to confirm.
Special note: In menu, 0=not, 1=yes, if others, will note.
Set menu items as below:
@IP address: set IP address of label scale.
Dprint density set: press []/[]to select 0~7,from low to high, total 8 levels.
Vprint speed set: press []/[]to select 0~7, from low to high, total 8 levels.
Sselect paper type: press []/[]to select 0~3, total 4 types: 0:label,1:label,no recycle, 3:bottomless
label.
Apaper position fine-tuning: press []/[ ]to select -8~+8 , total 17 offset, adjust to most suitable
starting position.
[]/[]Label style selection: D0 or D1 tag with / style []/[].
Tdate adjusting;set current date and time.
Ndate format: set date format 0:DDMMYY,1:MMDDYY,2:YYMMDD.
[]/[]whether to print weight unit: select to print weight unit or not.
[]/[]whether to print price unit: select to print price unit or not.
J decimal digits in unit price: set decimal digits in unit price.
[]/[]set default barcode type: set barcode type(0~99, the details refer to appendix two in software
user manual).
Xtotal price precision: set total price precision(1:N.N0,2:N.NN,3:N.N).
[]/[]total price carry set: set carry value(for example round, that is 5).
Wprint time: set print time or not(time format is hour and minute).
Yyear digits: set year format(0:YY,1:YYYY).
Guse after discount price or not: set barcode to print after discount price or not.
[]/[]display items in weight field: set 0:weight, 1:quantity.
Qprint delete line mark: set 0: print, 1: not.
[]/[]select barcode width: 0: wide, 1: narrow.
EThe supplementary of default information 1 :0 means not default information1.
FThe supplementary of default information 2 :0 means not default information2.
[]/[ ]discount goods belong to special department: setting if discount goods belong to special
department or not.
RIP setting on the host machine: using this scale as the host machine to set IP address, to connect
other scales.
Pstatistics function mode: Choosing “yes” or “not ” to open statistics function mode for sales goods.
[]/[]running account overflowing alarm: Alarming or not when the running account overflow.
[]/[ ]summation printing: print summation label, total amount/total quantity/quantity of total

13
label(clicking twice (set)to set).
[]/[]sum all quantity of single goods’ label: print all information of all sales goods((clicking twice
(set)to set)).
[]/[]clear all the summation data: clean up all the summation data((clicking twice (set)to set)).
[]/[]fine tuning of paper-out position: adjust paper's offset value: 0~16.
Zzero print: whether to start zero print price tag.
[]/[]printing self test page or not: printing self test page or not.
[]/[]auto printing: setting default auto printing when it open or not.
[]/[]paper-fetching detection on and off: set if turning off paper-fetching detection.
[]/[]adjust AD of paper-fetching detection: auto-detection or manual set up(31-253).
[]/[]print label page number: set if print label page number or clear.
[]/[]display unit field: set if display the unit field.
[]/[]barcode type: set all barcodes' type.
[]/[]brightness of LED back light: press[[]/[]to select 0~4 from high to low, total 5 levels.
[]/[ ]number+AMT to print immediately: set if turn on the function of number+AMT to print
immediately.
[]/[]clean up all data: set if clean up all the data.
[]/[]reset to factory settings: set if reset Scale to factory settings.
[]/[]set Wifi: set the Wifi SSID, Wifi password mode and wifi's password.
[]/[]ABOUT: check this device's model and version numbers.
7.3 Lock
SETTING, PLU, DISCOUNT, PRICE, and TARE functions can be locked via pass code. Password of each
function is independent, which can be set via pc software then download to each scale, and it can be
change at any time. more details please check the security item in the function setting II which is in the
software operating instructions .
Open (before shutdown by software, Function after opening is always valid)
Open choose the function you would like to open
For example:
Open “SETTING” function
Click [SETTING] key for 2 seconds to come into the system setting status, system remind that enter
pass code, it means that entering the pass code which is set via pc software.
Open “PLU” function
Click [PLU] key for 2 seconds to come into the PLU editing status, system remind that enter pass
code, it means that entering the pass code which is set via pc software.
Open “DISCOUNT” function
Click [DISCOUNT] key for 2 seconds to come into the discount status, system remind that enter pass
code, it means that entering the pass code which is set via pc software.
Open “PRICE” function
Click [PRICE] key for 2 seconds to come into the price setting status, system remind that enter pass
code, it means that entering the pass code which is set via pc software.
Open “TARE” function

14
Click [TARE] key for 2 seconds to come into the tare setting status, system remind that enter pass
code, it means that entering the pass code which is set via pc software.
Restored lock
Click [ON/OFF] key for 2 seconds to turn off the scale click [ON/OFF] to turn on the scale.
8. Troubleshooting
8.1 Scales crash
Boot up without any response
Reasons:
a. bad contact between the power plug and socket.
b. the power cord is disconnected.
c. Filtering group Fuse is disconnected.
d. Transformer is broken.
e. Motherboard is broken.
Solutions: use millimeter to check them one by one, use method of exclusion to find the solution.
Boot up without any sound, No display, backlight.
Reasons: the spark generated by the power plug impact the program.
Solutions: Replace the Motherboard, reset the number, and download all the files.
Boot up without any sound, display “Update”
Reasons:
a. Program downloads error.
b. Misoperation during the downloading of the program (such as halfway power outage).
Solutions:
a. Reload the correct procedures.Setting IP (default is 192.168.1.87),when update by
Ethernet.And if update by serial port input any number as the scale's ID(the max baud rate
is 115200 ).
b. Ditto.
8.2 Print related issues
Print a blank label, paper orientation is normal.
Reasons:
Setting label type error. Usually the label type computer download is D0, so label type of
label scale printing should be set D0. Or the printed label is blank.
Solutions:
a. adjust the settings in following key order (on the scale).
[SETTING] Enter the system setting Press hotkey[ L ] Enter the select label
type(0:D0;1:D1)Press [PRN/Enter]
b. It’s also available to adjust software on computer. Open label scale , input serial number
of the scale. Change label type to D0 in set function, then carry out function set command.
Print half or a half label, paper orientation is abnormal.
Reasons:
a. Set paper type detection error.

15
b. Printer rear photwas damage.oelectric has slanting direction or is dust.
c. Photoelectric pair of printer rear photoelectric is bad.
Solutions:
a. adjust the settings in following key order on the scale
[SETTING] Enter the system setting Press hotkey[S ] Enter the select label
type(0:label;1:receipt 2: label, without recycle paper roll)Press [PRN/ENTER]
It’s also available to adjust software on computer. Open label scale , set paper type to
“Label” in set function, the pass the setting to error scale.
b. Check whether printer rear photoelectric has slanting direction or is dust.
c. If the problem still can’t be solved, consider changing photoelectric pair. It is better to
handle this step by professional person of our company.
d. Wash the rubber roller.
Wash the rubber roller pictures show:
1. loose switch wrench and recycle paper spring, disboard print paper.
2. set label scale as paper feed menu, long press paper feed menu and let rubber covered
roller in idle status.
3. Take a clean cotton swab dipping alcohol and cleaning the roller back and forth.

16
Fuzzy print and it is not black enough
Reasons:
a. printer head has not been fasten well.
b. Thermal head is dirty.
c. Print density is too low.
Solutions:
a. Re-fasten the printer head well.
b. Wipe the thermal head with a soft cloth glued alcohol gently.
c. Increase print density.
Print a label with half clear and half fuzzy or even blank.
Reasons:
a. printer head has not been fasten well.
b. Thermal head is dirty.
c. The print head deformation.
Solutions:
a. Re-fasten the printer head well.
b. Wipe the thermal head with a soft cloth glued alcohol gently.
c. If the problem still can’t be solved by above method, then cause of the error is the print
head deformation, need to change printer. Bad printer should be handled by professional
person of our company.
d. Replace the mainboard
e. Re-plug and replace the head piece wire harness.
Wash the thermal head pictures show:
Weird character show on label or character can’t be printed out(including Chinese and English)
Reasons:
a. Haven’t download fonts or single-byte character.
b. Font conflict.
Solutions:
a. Re-download fonts (including single-byte and double-byte character.)
b. Re-select single-byte and double-byte fonts by files/option/label scale fonts, then
download Chinese and English fonts.
Rotating orange
handle to open
the print head
Dip in with soft dry
cloth to wipe the
small amount of
alcohol thermal head

17
8.3 The key issues
Keys have been ringing, display is normal
Reasons:
a. Line piece of key cause short circuit.
b. Sharp object resist the key.
Solutions:
a. Change line piece of the key.
b. Move the sharp object.
Some keys do not ring
Reasons:
a. The ribbon cable connected between the key board and the mother board is not plugged
in.
b. The Mylar button FPC ribbon cable is not plugged in.
c. The key is damaged.
Solutions:
a. Check out key ribbon cable, re-insert properly.
b. The Mylar button FPC ribbon cable is re-plugged in or pulled out.
c. If the problem still can’t be solved by above method, then maybe the key is damaged,
change it.
8.4 Weigh problem
Weigh inaccurately
Reasons:
a. The rubber mat supporting scale pan is touching the top cover.
b. Damp, module aging, or regional differences to make the weigh inaccurately.
c. The load cell damaged due to the overload.
d. Not adjust the Gravitational acceleration.
Solutions:
a. Check the top cover is installed well, or not. If yes, reinstall load cell’s support frame.
b. Leaning the Zero/Full weigh again. Replace the mainboard, AD board, even load cell if
the problem could not be solved.
c. Replace the load cell and support frame.
d. Adjust the Gravitational acceleration.
PS: Generally, the scale should be returned back to our company due to the problems of AD board
and load cell.
Zero point instability
Reasons:
a. Environmental impact, such as vibration, wind or strong magnetic interference.
b. Weighing electric circuit gets damp.
c. The wind resistance function has not opened.

18
d. The leveling mat is not leveling.
Solutions:
a. Exclude the interference factors.
b. Replace the mainboard.
c. Open the wind resistance function(set it in function set).
d. Adjust the leveling mat to be leveling.
e. If still not, return back the scale to our company.
Unable to weigh
Reasons: Bad mainboard, bad AD board or bad load cell.
Solutions:
a. Replace the mainboard.
b. Check the AD board is OK, or not, return back to our company if this problem could not
be solved.
8.5 Communication problem
Unable to communicate
Reasons:
a. Communication ports are set up incorrectly.
b. The incorrect serial number of scale,or the incorrect IP address.
c. The incorrect connection of interface, or problem on Ethernet cable.
d. The error on power board or mainboard.
Solutions:
a. Confirm the available communication ports.
b. Confirm the same serial number in scale , and same IP address in scale.
c. Check if the network cable is damaged and the network port is securely inserted.
d.Please replace mainboard or power board to confirm the error, if there are not the
problems mentioned above.
8.6 Display problem
No display or display but no characters
Reasons:
a. Display pole is not installed well, result in poor contact with control board.
b. Water in display pole base, cause shorting and corrosion on circuit board.
c. Display damage.
Solutions:
a. Install display pole, lock fixed bolt.
b. Change circuit board or display pole.
c. Change display pole.
8.7 Error code
Er-01:Total Price Over
Er-02:Label Height Over 90mm
Er-03:None Label to Be Copy
Er-04:NO Find Label Gap
Er-05:Weight Error
Table of contents
Other Rongta Technology Scale manuals

Rongta Technology
Rongta Technology AURORA S1 User manual

Rongta Technology
Rongta Technology C1 User manual

Rongta Technology
Rongta Technology RLS Series User manual

Rongta Technology
Rongta Technology RLS Series User manual

Rongta Technology
Rongta Technology RLS1515 User manual

Rongta Technology
Rongta Technology RLS1000 User manual

Rongta Technology
Rongta Technology RLS Series User manual

Rongta Technology
Rongta Technology RLS1000 User manual

Rongta Technology
Rongta Technology AURORA Y1 User manual