Rongta Technology AURORA Y1 User manual

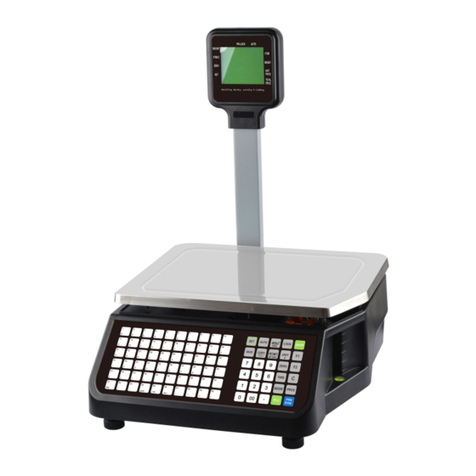
AURORA Y1 PC SCALE
Rongta Technology (Xiamen) Group Co., Ltd.
www.rongtatech.com
V1.1
User Manual

1
Contents
Introduction...................................................................................................................2
1. Specification of PC scale register.........................................................................3
2. Standard configuration of PC scale register....................................................... 4
3. PC scale installation steps.....................................................................................4
3.1 Assembly step............................................................................................... 4
3.2 The installation of the thermal receipt paper............................................ 5
4. Overall Appearance................................................................................................ 6
4.1 Front view.......................................................................................................6
4.2 Rear view....................................................................................................... 6
5. Common easy-to -use operations........................................................................ 7
5.1 Switch on and off.......................................................................................... 7
5.2 Communication interface.............................................................................7
6. Troubleshooting of PC scale register...................................................................7
6.1 Crash or fail to start...................................................................................... 7
6.2 The main display screen or customer display screen does not display
or the display screen is blurred......................................................................... 8
6.3 The touch screen cannot be used or is not sensitive..............................8
6.4 Unable to print............................................................................................... 8
6.5 Unable to weigh properly (please contact the After-sales Service)...... 8
7. Appendix Comparison Table of Gravitational Acceleration Corrected Value.9

2
Introduction
Thank you for choosing our PC Scale. In order to operate AURORA Y1 PC Scale
correctly, User manual is detailed in function and operation method of AURORA Y1 PC
Scale, which help user with doubt quickly when come up against mechanical fault .
Rongta research, develop, produce and sale the PC Scale independently, which is
high-performance PC Scale.
AURORA Y1 PC Scale is the best choice for user in label printing business line with
fashion appearance, power function and high durable, which make AURORA Y1 PC scale
more popular in store ,fresh food supermarket ,farmers market and so on.
Note : this product information are subject to change without prior notice.
This information is for reference only. In addition to China's existing laws and regulations,
the company does not undertake any due to the direct or indirect losses caused by use of
this information.
The company reserves the final interpretation.

3
1. Specification of PC scale register
The Weighing range and accuracy:
Max weight: 15kg
Min weight: 40g
0kg to 6kg * 0.002kg (e=2g)
6kg to 15kg * 0.00 5kg (e= 5g)
The accuracy grade:
Resolution
Input sensitivity:greater than or equal to50μV/D
zero-point adjustment range: ±60MV
temperature coefficient: ±0.0012%CTYP
[Zero] ±(0.2μV+0.0008% of Dead Load)/℃TYP
Nonlinearity: 0.01%F.S.
A/D resolution: Max 30000 resolution
Display resolution: 1/3000
A/D conversion rate: 10 times/second
Regular:
Power supply:AC110~240V,50/60Hz
Power consumption:Standby25W, printing45W
operating temperature: 0℃-40℃
Physical appearance:372×450×500mm

4
2. Standard configuration of PC scale register
3. PC scale installation steps
3.1 Assembly step
1.Place the scale in a level
and stable place and remove the
three transport protection screws
from the scale pan bracket.
2.Observe the level vial,Adjust the feet
to make the level tool inside the little
circle,Place the scale pan horizontally
on the scale body
Quick Installation Guide
Paper roll
Power adaptor
Power cable
Scale tray
The illustrations and text used in this Manual may differ from the actual product.
Machine

5
3.2 The installation of the thermal receipt paper
●Put the paper roll into the paper
warehouse as shown in the figure
●Close the cover of the printer,
press upward gently until the cover
closed with a "click" sound.
●Pull the Open Cover to open
the paper warehouse.
●Open the side cover, remove the
paper roll press block
●Unscrew the head piece pressure
lever and load paper as shown in
the figure.
●Close the paper roll press block, tighten the paper winding shaft, screw the
head piece pressure lever, close the side cover of printer, then long press
FEED button to roll the paper

6
4. Overall Appearance
4.1 Front view
4.2 Rear view

7
5. Common easy-to -use operations
5.1 Switch on and off
Hard disk switch:
After connecting power supply,long press the black POWER button on the
front of PC scale register for 3s until the display is turned on. After entering the
normal operation screen, the program will automatically run and perform
self-test counting to verify whether the CRC is correct. If verification fails, the
scale cannot work normally.
Attention: Under self-test situation, please do not press any button
and make sure nothing is on the scale, otherwise it can’t
work normally
Soft disk switch on/off:
Touch [Power Off] in the system or Please switch on the power button, then
press the button [ON/OFF] for 3 seconds.
5.2 Communication interface
The factory communication interface of the product is fixed at COM2 and
cannot be changed through other software. Communicating through other
interfaces is also not supported.
6. Troubleshooting of PC scale register
6.1 Crash or fail to start
Reasons:a.Power board error
b. Power line and interface error
c. Main board error
Solutions:a. Re-plug the power line
b. Press the [Power] button for 3 seconds. If the printer indicator is off,
it means the power board is abnormal; otherwise, the main board is
abnormal
8
6.2 The main display screen or customer display screen does
not display or the display screen is blurred
Reasons:a. Screen line error
b. Poor contact of screen line connector
c. The display screen is damaged, or the main board is damaged
Solutions:a. Reconnect the screen line aerial connector and confirm that the
line sequence is correct
b. Re-plug the screen line connector
c. If it still fails, it may be caused by screen damage or
main board damage
6.3 The touch screen cannot be used or is not sensitive
Reasons:a. Display cable error.
b. Display driver error.
Solutions:a. Reconnect the screen line aerial connector and confirm that the line
sequence is correct
b. Reinstall the correct driver
6.4 Unable to print
Reasons:
a. Print wire error.
b. The driver is not installed correctly.
c. Print board error.
Solutions:
a.If the printer indicator is off after turned on, it means the wires are
defective.
b.Reinstall the correct driver.
c.Press and hold FEED button to print the self-test page.
6.5 Unable to weigh properly (please contact the After-sales
Service)
Reasons::The main board or AD board fails, sensor fails, or CRC check fails.
Solutions :Please contact with us, we will provide you new version AD
boardprogram or weighing software.

9
7. Appendix Comparison Table of Gravitational
Acceleration Corrected Value
COUNTRY
CITY
G(m/sec2)
COUNTRY
CITY
G(m/sec2)
Greece
Athens
9.800
Scotland
Glasgow
9.816
South
Cape town
9.796
Spain
Madrid
9.800
Netherland
Amsterdam
9.813
Singapore
Singapore
9.781
Norway
Oslo
9.815
Argentina
Buenos Aires
9.797
New
Auckland,NZ
9.799
United
London,Greenw
9.812
New
Wellington,NZ
9.801
Australia
Melbourne
9.800
Taiwan
Taichung
9.789
Australia
Sydney
9.797
Taiwan
Taiwan
9.788
Italy
Milano
9.806
Taiwan
Taipei
9.790
Italy
Rome
9.803
Denmark
Copenhagen
9.815
India
Calcutta
9.788
Germany
Fankfurt
9.810
Japan
Tokyo
9.798
Mexico
Mexico City
9.779
Canada
Ottawa
9.806
U.S.A
Birmingham
9.813
Canada
Vancouver,BC
9.809
U.S.A
Chicago
9.803
Cuba
Havana
9.788
U.S.A
Los Angles
9.796
Kuwait
Kuwait
9.795
U.S.A
New York
9.802
Cyprus
Nicosia
9.797
U.S.A
San Francisco
9.800
Thailand
Bangkok
9.783
U.S.A
Washington,DC
9.784
Portugal
Lisbon
9.801
Belgium
Brussels
9.811
France
Paris
9.809
Brazil
Rio de Janeiro
9.786
Finland
Helsinki
9.819
Sweden
Stockholm
9.818
Philippines
Manila
9.784
Switzerlan
Zurich
9.807
COUNTRY
CITY
G(m/sec2)
COUNTRY
CITY
G(m/sec2)
Greece
Athens
9.800
Scotland
Glasgow
9.816
South
Africa
Cape town
9.796
Spain
Madrid
9.800
Netherland
Amsterdam
9.813
Singapore
Singapore
9.781
Norway
Oslo
9.815
Argentina
Buenos Aires
9.797
New
Auckland,NZ
9.799
United
London,Greenw
9.812
New
Wellington,NZ
9.801
Australia
Melbourne
9.800
Taiwan
Taichung
9.789
Australia
Sydney
9.797
Taiwan
Taiwan
9.788
Italy
Milano
9.806
Taiwan
Taipei
9.790
Italy
Rome
9.803
Denmark
Copenhagen
9.815
India
Calcutta
9.788
Germany
Frankfurt
9.810
Japan
Tokyo
9.798
Mexico
Mexico City
9.779
Canada
Ottawa
9.806
U.S.A
Birmingham
9.813
Canada
Vancouver,BC
9.809
U.S.A
Chicago
9.803
Cuba
Havana
9.788
It should be handled by person in our company or dealers if want to adjust
acceleration of gravity

10
Table of contents
Other Rongta Technology Scale manuals

Rongta Technology
Rongta Technology C1 User manual

Rongta Technology
Rongta Technology RLS Series User manual

Rongta Technology
Rongta Technology RLS Series User manual

Rongta Technology
Rongta Technology LS015 User manual

Rongta Technology
Rongta Technology RLS1000 User manual

Rongta Technology
Rongta Technology RLS Series User manual

Rongta Technology
Rongta Technology RLS1515 User manual

Rongta Technology
Rongta Technology RLS1000 User manual

Rongta Technology
Rongta Technology AURORA S1 User manual