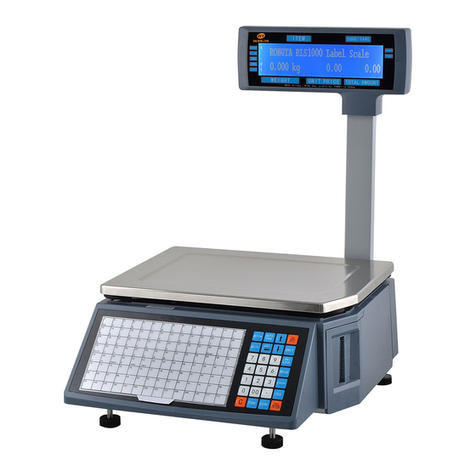
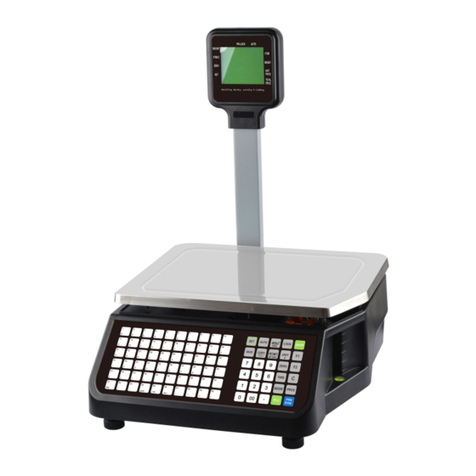
Rongta Technology RLS1000 User manual

Barcode Label Scale
RLS1000 Software User Manual
xiamen rongta technology Co.,LTD
ADD:Building,Gaoqi Industrial Area,No.195 Gaoqi Beisan
Road,Dianqian,Huli,Xiamen,China.361006
TEL:0592-5666129 FAX:0592-5659169
service hotline:400-800-0596
website:www.rongtatech.com

Contents
1 Software user manual............................................................................................. 1
1.1 Software installation.......................................................................................1
1.2 Use RLS1000................................................................................................. 4
1.3 Create label...................................................................................................10
1.4 Create PLU data........................................................................................... 13
2 Connection manual...............................................................................................20
2.1 RLS1000 suite interface overview............................................................... 20
2.2 RLS1000 based on TCP / IP protocol interface specification...................... 21
2.3 Label scale and background handshake flowchart.......................................23
2.4 Data packet format....................................................................................... 23
2.5 Message mechanism interaction for RLS1000.............................................25
AppendixⅠ. TXP(TXU) file...................................................................................... 27
AppendixⅡ. Barcode coding table............................................................................. 28
AppendixⅢ. Fresh commodities batch management................................................. 31
AppendixⅣ. Revised table of gravity acceleration in China’s major cities............... 33
1
1 Software user manual
1.1 Software installation
Firstly, put the CD into PC driver. Then, open the document, double click the installation
package with the logo ,and then appear following image: Image
1.0:
Image 1.0
Select the language to use during the installation, click the “OK” , and then appear
following image: Image 1.1:
Image 1.1

2
Click “next” to select default installation path of program Files of C drive, or select
“browse” to choose self-definition installation path. Such as installed to G drive, and then appear
Image 1.2:
Image 1.2
Click “next”, and then appear Image 1.3:
Image 1.3

3
Click “Next”, then appear Image 1.4:
Image 1.4
Click “Next”, then appear Image 1.5:
Image 1.5
click “Install” to continue next step, then start to install. the interface after finishing
installation is as below:

4
Image 1.6
After finishing, can choose to operate RLS1000 or not.
1.2 Use RLS1000
RLS1000 Main function:
a. Download program
b. Download Character Font
c. Download PLU
d. Download Label
e. Download hotkey
f. Download function parameter
Creat Connection
On above image:
A,input the name of label scale department
B,double click to select
C,input the name of Label scale
D,input the IP add. of label scale
E,Click D0 label column, double click to select label in I area.
F,Click D1 column,double click to select label in I area.
G,(*.TXP)click PLU column, double to select PLU in I area.
A B C D E F G H I

5
H,(*.TXU)click PLU updated column ,double click to select PLU in I area.
I,(*.KEY) click hotkey column, double click to select hotkey in I area.
operation process:
a,download program:
set up connection first, network update software (choose *.hex file)
b,download Character Font :
set up connection first, network Download data, choose single byte
character font and check box before double byte fresh common character font
c,PLU download PLU:
set up connection first, network download PLU
d,download label:
set up connection first, network Download data, choose D0, check box
before D1,then confirm.
e,download hotkey:
set up connection first, network Download hotkey.
f,download function parameter:
set up connection first, network Download data, select check box on front of
function set key, then set
other:
update PLU:set up connection first, network Update PLU
( F )File
new connection
open existed connection
save
build new file to save
additional funciton set,as picture parameter option
function parameter set ,as picture set function
change RLS1000 chartlet
set font
Chenc the lf code
Print lf code
exit RLS 1000

6
parameter option foundation set page
explanation:
work directory:set default directory(influence area I)。
System decimal position:0,1,2。Set PLU decimal digit of PLU manger.
Auto download hotkey:download;Don’t download
Auto download discount data: Don’t download; download
Image [parameter option]weighing unit page

7
explanation:
self-definition;
The unit defined is corresponding with the unit in PLU manager.
Image (parameter)label scale font page
explanation:
Set the font of downloading to label scale
Image (parameter option)product name update time

8
explanation:
set RLS1000 to download and update PLU(set G,H area first)
Image[Setting] (part 1)
common functions:
paper type:0: label;1: receipt;2: no-rewinder。
barcode type:0~99(refer to barcode type table)。
date format:0:DDMMYY;1:MMDDYY;2:YYMMDD(D,date;M,month;Y,year)。
decimal position:0,1,2;set price decimal digit。
rounding:set round carry digit。
Message2:0~197 default message. If PLU data hasn’t set message,this PLU data will be the
default.
Display: Reserved.
Label type: 6:D0;7:D1;0~5: Reserved.
Package tolerance:1~20。.
Year format.:0:YY;1:YYYY。
Total price precision:1,N.N0;2,N.NN;3,N.N。
message1:0~197 default message,if PLU data hasn’t set message ,this PLU data will be the
default.
barcode printing format : 0,standard grid2/5;1,narrow grid 2/5
2,Ean128;3,narrowEan128。

9
Image[Setting](part 2)
Directions:
Advanced function block:
Printing density: Retain
Paper fine tuning: adjust print location deviation -8~+8
Horizontal-shift:Retain
AD (full weight calibration):Retain
Back steps:Retain
Printing speed:0~7. 0 represents the fastest printing speed, while 7 represents the slowest
printing speed. Printing performance is better in slow printing speed, but lifespan of print head
is shorter.
Account type:Remain
Correction(full weight calibration):Retain
Safety function blocks:
Set up function of lower machine to lock password
Weight unit
Select weight unit of lower machine
Custom barcode 99:

10
Set up download function:
Internetdownload dataset up tick function, confirm
Non-Ethernet scales retain
Internet menu.
Update program to lower machine
Test Connection
Retain factory test
Retain factory test
Update program to all lower machine
Download PLU, barcode, function parameters etc.
Download PLU
Download PLU hot keys.
Update PLU
Update price
Retain
Retain
Retain
Retain
Save Security Log
Check Security Log
Program menu:
Label editor; Start label editor
PLU management; Start PLU management
Note:
You can view the appropriate files once double click files’ name in area of E,F,G,
H,I.
Please do not use functions where there marks “retain”. It means these functions are not
allowed setting up or just for factory use.
1.3 Create label
Open RTLabel.exe
StartProgramRLS1000RTlable
Or start from RLS1000 program menuLabel editor

11
After starting, the program automatically transfers to the default label, as below:
If you want to create a new label, operate as below:
filesnew-built, then a tip box appears
Input paper width of label in millimeters, maximum width is 56mm. Then click OK button,
another tip box appears.
Input paper height of label in millimeters, then click OK.
***If you need to change the size of label, click filesmodify label size, then follow the prompt
to input width and height.
Filling label:
Click “place component” on the left, then component bar, after that click label again. It’s
allowed to put the component on the label, click and hold component on the label, then it can be
dragged to any position. Place tail information component, if tail information is blank (that is
to say not setting tail information content), it will be replaced by machine number once label

12
print out. If tail information is not blank (that is to say tail information is being setting), then the
setting
content will be printed out while printing label.
A,Barcode B,Nane C,Unit Price D,Weight E,Total price F,Period of validity
G,Packaging date H,information 1 I,information2 J,Fresh Commodity Code K,Header
information L,Tail information M,Total price discount
N,Unit price discount
Click “edit background” on the left, then function component bar, after that set up font etc.
It’s allowed to edit character, line, background etc. As below:
A,Select B,Eraser C,Pencil D,Character E,Filling F ,Straight lin
G,Rectangle H,Filled rectangle I,Rounded-square J,Filled rounded-square
K,Circle L,Filled circle
a, Line thickness b,Fill Type c,Character font d,Character size c,Bold f,Italic g,Underline
Paste Custom BMP graphics
Editpaste from, select BMP graphics, then “open”. After that the graphics can be dragged
to any position
A B C D E F G H I J K L M N
A B C D E F G H I J K L
a b c d e f g

13
D0,D1:means label format stored in the machine, it needs to be selected upload or download.
Save files.
FilesSave, input non-space name, then “save”
Remark: Image and character can be dragged to any position through using “select”. It will
be saved as image format every time leaving location of character editing.
1.4 Create PLU data
Open PLU manager
StartProgramRLS1000RTPLU
Or start from RLS1000 program menu PLU manager
一、PLU table basic fields are explained as follows:
Hotkey→input hotkey(1-112*2)
PLU Name→input PLU name within 36 characters
Fresh Commodity Code→input number within 6-figure which means Fresh Commodity
Code, do not repeat
PLU item no.(Code)→input number within 10-figure which means PLU item no.
Barcode Type→input barcode type(0-99)
Unit Price→input unit price
Weight Unit→press space, then select required weight unit
Quantity unit ( PCS Type) →input unit of quantity(0-15), pls set the unit of quantity in
RLS1000.
Department →Input a two-digit to represent department
Tare → Input tare weight, within 15kg after logic conversion.
Shelf time →Input shelf time (0~365)
Two ways for Shelf time unit, (0~365) means unit is day; (-365~0) means unit is hour.
Package Type → press space bar to select the packing type.
Package Weight →Input package weight, within 15kg after logic conversion.
Package Tolerance →Input package tolerance in percentage(0-20).
Message 1 →Input the selected message No. (0~197) use this message
Message2 →Input the selected message No. (0~197) use this message

14
Multi Label →Select label type, can choose variety of label type at the same time. A0:
unable to modify the unit price on the label scales.
D0, D1: set the two user-defined labels in Label Editor.
Discount →Input the discount rate. Range of discount (-10~125 ) : -1~-10 for
model1~model 10 in discount schedule models. 0-125 for discount rate, such as 80 means
20% off. 120 means, 20% up.
Account → Account is the sales amount of the single item when uploading the PLU.
二、Explanation of file menu:
Establish PLU data, open new file
Open PLU file
Save revised PLU file
save as revised PLU file
Import PLU data from excel file, refer to Picture [Excel] in below.
Export PLU data from Excel file, refer to Picture references.
Refer to Picture [Preferences]
Refer to [page setting]
Refer to [Print PLU]
Refer to [font selection of label scales]
Check hotkey sheet
Select to print hotkey p sheet
Exit PLU manager
figure Excel
Explaination:
The following function requires Microsoft Excel 2000 or later to install and run.
Choose which fields to establish corresponding relationship to Excel column.
Choose which column to start from and which column to end in Ecxel

15
Choose the beginning of PLU manager.
figure [preferences 1]
Auto download hotkey
ask me first. (When downloading, a prompt frame will appear.)
Always yes. (When downloading there is not prompt frame appear.)
No, thanks, Don’t download hotkey
hotkey sheet type
Pls choose 112*2
figure [Preferences]
Explanation: Self-define PLU field name.
figure [page setting1]

16
Explanation: PLU print-out page setting
figure [page setting2]
Explanation: choose to print the content of PLU file
figure [Page setting3]
Explanation
PLU print-out header and footer setting
Figure [Page setting]

17
Explanation
Press Options to select Printer and Paper:
There are two levels of Fresh Commodity Codes on each hotkey. Two lines up and down.
Note:
when use the second level on the hotkey table, the hotkey of 113-224 is below the horizontal
line.
Fifure [hotkey sheet preview]
Explanation
Preview the hotkey sheet after seting, adjust the character’s font until it’s suitable.
PLU menu explanation:

18
PLU manager
Normal setting when edit PLU files
Insert and Delet
Sort by name
Sort by LFCode
Sort by item No.
choose single PLU file
choose single column (eg. Hotkey cloumn
choose all the files
fill the same content in the single column
clear the selected image.
Incremental automatically generate hotkey .Select the hotkey then click
New hotkey can “create hot key”. Same way to “create LF-code”,
“create item number”.
Edit the header and footer of the label. The label header is use as slogan on the
LCD.
Edit message. Refers to figure message
Edit the discount schedule. Refers to the figure [schedule]
Set the character’s font of PLU manager
Other manuals for RLS1000
1
Table of contents
Other Rongta Technology Scale manuals

Rongta Technology
Rongta Technology C1 User manual

Rongta Technology
Rongta Technology AURORA S1 User manual

Rongta Technology
Rongta Technology RLS Series User manual

Rongta Technology
Rongta Technology RLS1515 User manual

Rongta Technology
Rongta Technology LS015 User manual

Rongta Technology
Rongta Technology RLS Series User manual

Rongta Technology
Rongta Technology RLS1000 User manual

Rongta Technology
Rongta Technology AURORA Y1 User manual

Rongta Technology
Rongta Technology RLS Series User manual