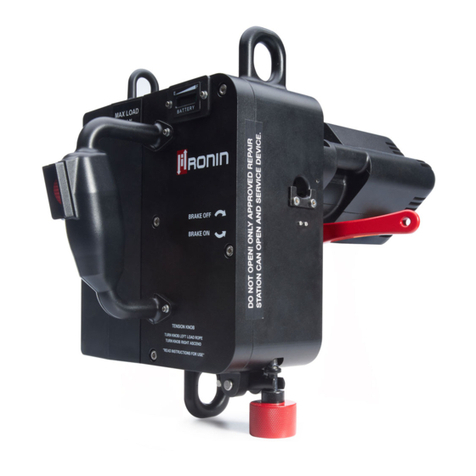
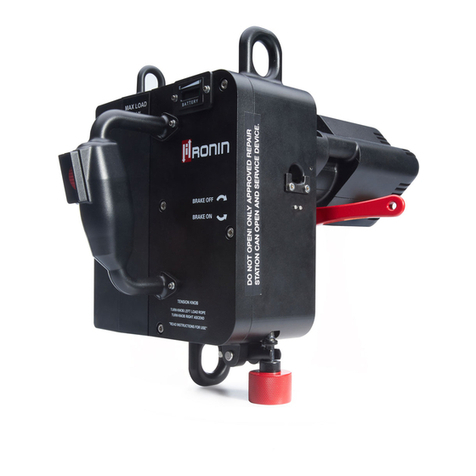
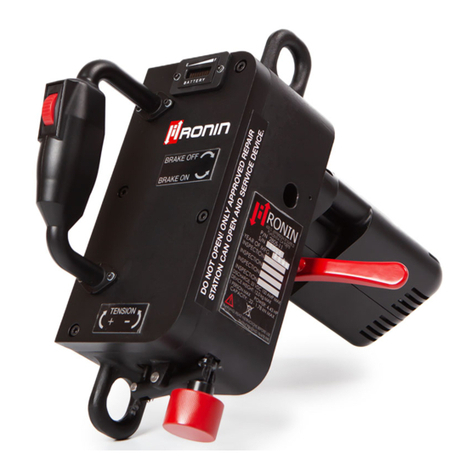
Ronin 2805-11 User manual

System Overview
Battery Indicator
Brake Handle
Tensioner Knob
Carabineer Clip
Attachment Point
Machine Guarded
Handle
Thumbwheel
Motor & Gearbox
Rope Exit Hole
Rope Inlet Hole
Deadman Trigger
Handle Optional
Upgrade
REV. Q: DATE: DEC 10 2020
Ronin Lift User Guide
PN: 2805-11

2
Install the battery onto the Ronin lift, by sliding down from the top of the
Ronin with some force. Be sure the battery is fully seated with the retaining clip
being locked in place. Make sure the Battery Indicator is showing the current
battery charge reading. (Note: The battery indicator light should be Green in
color. If the light is Amber or Red, then charge the battery, before use.)
Check motor function by slowly rolling the thumbwheel down.
Check if the motor increases speed, with full rotation of
thumbwheel? When thumbwheel is released, does it spring back to
neutral and stop the motor? (Note: If the Ronin fails either test, then
discontinue use of the Ronin and send in for service). (Note: If Ronin
is equipped with the Deadman Trigger option, then make sure you
cannot perform any of the above steps without pulling the trigger.)
Inspect Cam Cinch (Brake) head and pick out any debris stuck
in the teeth.
Inspect the carabineer clip attachment points and ensure there
are no cracks or deformation.(Note:Scratches and/or general wear &
tear is acceptable).
Ronin Lift New User Guide
PN: 2805-11
Prior to use, please go through the equipment checklist below. This User
Guide is for Ronin Lift’s with Serial Numbers 3201-R or higher.
Equipment Inspection
Variable
Speed
Thumbwheel.
Roll down to
activate.
Cinch
Teeth
Lower
Carabineer
Attachment
Point
REV. Q: DATE: DEC 10 2020

Ronin Lift New User Guide
PN: 2805-11
General inspection of device to ensure there is no major damage or deformation. (Note:
Scratches
and/or general wear &tear is acceptable).
Inspect rope prior to use and ensure rope is in acceptable climbing condition. Be sure BOTH
ends
of your rope are properly burned with any tape or markers removed. No inner core should
be
exposed and BOTH rope tips should be coned. (Note: If you have aTech-Nora or Kevlar
sheathed
rope, then ask Ronin about the Perfect Burn Tip).
Inspect all PPE (Personal Protective Equipment) before use.
Ronin Approved Ropes
3
REV. Q: DATE: DEC 10 2020
1: Ronin HP Rope (MFG. Marlow) –11.5 mm Dia.
2: Marlow –ProTech 500 –11.0 mm Dia.
3: Sterling –Tech 125 –½” Dia.
4: Yale Cordage –R.I.N.G. –11.5 mm Dia.
5: Yale Cordage –Scandere –11.7 mm Dia.
6: Sterling HTP Red –13mm Dia.
7: Sterling WorkPro –½” Dia.
8: Teufelberger – X-Static –11.7 mm Dia.
9: Teufelberger –KM III Max –11 mm Dia.
10: Pelican Rope –White Rope –11 mm Dia.
11: Sterling –Element –½” Dia.
12: Yale Cordage –Calamine –11.7 mm Dia.
13: Sterling –Element –½” Dia.
14. Sterling –Scion –11.5 mm Dia.
15. PMI – E-Z Bend –11 mm Dia.
16: Pelican Rope –1WPP-160L54-001 –½” Dia.
17. Teufelberger –Platinum Protect PES/PA –11 mm Dia.
18: Yale Cordage –XTC-16 –13 mm Dia.
19. PMI –EZ Bend Hudson Classic -12.5 mm Dia.
20. Scion –Arbor Climbing Line –12.5 mm Dia.
•Rope Type:Static Rope
•Rope Diameter:10 mm –13 mm
•Rope Diameter Shrinkage:Cannot
shrink below 10 mm under loaded
conditions
•Sheath Construction: Tech-
Nora/Aramid Preferred
(Kernmantle is acceptable)
•Rope Elongation: Less than or equal
to 2% at 300 lbs. for 10 mm –11.5
mm. Less than or equal to 3.3% at
300 lbs. for 11.6 mm –13.0 mm
•Plait Count: Preferred 32 or 48 Plait
(16 and 24 are acceptable)
Contact info@ronin.inc for any
questions you have.
Minimum
Requirements
For Untested
Ropes

REV. Q: DATE: DEC 10 2020 4
Rotate the Red Tensioner Knob fully to the Left, until the lever
arm is bottomed out on the main housing.
Insert the rope into the “Rope Inlet” hole. Push the rope into
the rope inlet hole and TAP the thumbwheel. The rope should pull
into the system 2-3 inches.
Now open the brake slightly and slowly roll down the
thumbwheel, until the rope comes out of the rope exit hole (Pull
Deadman trigger, if unit is equipped with this option).
Note: Do not pull the brake fully open or this will activate reverse
function. If this happens, then repeat the previous step
Once rope has fed out the exit hole, turn the Red Tensi oner
Knob to the Right, until hand tight, before ascending.
Ronin Lift New User Guide
PN: 2805-11
Rope Loading
Turn knob Fully to the Left
Rope Inlet Hole
Brake
Handle
Turn knob right
until you start to
feel resistance
and then go hand
tight

Ensure all personal protective equipment is inspected and in place prior to ascending with
the
Ronin Lift.
Ensure you are using a secondary rope grab system as a
backup,
with a second independent rope.
Attach your harness to the lower attachment point on the Ronin, with a carabiner. Roll down
the
thumbwheel slowly and remove the slack from the climbing line. Now sit down into your
harness
and hang from the Ronin. Ensure that your brake is holding you in place and is not slipping.
Rotate the thumbwheel down and ascend approx. 10ft, then stop. Make sure the system is
not
slipping on the rope. The Ronin is ano slip system, so if the system starts to slip on the rope,
then
stop. Turn the Red Tensioner Knob 1-2 additional turns to the Right, until the system no
longer
slips and continue your ascent.
Ronin Lift New User Guide
PN: 2805-11
Ascending
Descending
To descend… Pull down on the red brake handle with your left hand and simultaneously TAP
the thumbwheel trigger with your right hand to dislodge the brake wedge. (Note: If you do not
descend, this is due to over tensioning the system for more weight than you are lifting. Slowly turn
the Red Tensioner Knob to the Left, while holding the brake open, until you start to descend.)
Keeping the brake fully open, now tend the rope with your right hand. Pull down on the rope
to slow and stop. Once stopped, release the brake handle to hold in place. (Note: You can always
just release the brake at any time to stop but this will add additional wear to your rope overtime.)
5
REV. Q: DATE: DEC 10 2020

Hold the brake fully open (Down) and roll down on the thumbwheel.Holding the brake fully
open puts the motor into reverse and the rope will start to eject from the system.(Note:You must
hold the brake completely open, or the Ronin will not stay in Reverse).
Ronin Lift New User Guide
PN: 2805-11
Removing Rope From The System
Remove the battery by pulling back on the top attachment clip with your left hand, while
simultaneously pulling up on the bottom of the battery with your right hand. (Note: You never
want to store the Ronin with the battery connected). Charge the battery, if necessary (Be sure to
remove the battery from the Ronin, before charging).
Store you Ronin and accessories in the Ronin hard case.
Equipment Storage
6
REV. Q: DATE: DEC 10 2020
Ronin Revolution Corporation
600 S. Jefferson St. Unit D
Placentia, CA 92870 USA
Tel: +1-657-444-2557
Email: info@ronin.inc
Other manuals for 2805-11
1
Table of contents
Other Ronin Lifting System manuals
Popular Lifting System manuals by other brands

CHICAGO
CHICAGO 90582 Assembly and operating instructions

Guldmann
Guldmann GLS5.1 quick guide

Herkules Hebetechnik GmbH
Herkules Hebetechnik GmbH K1200-HLS-11 Operating manual and test record

Bohle
Bohle BO 600.1G operating instructions

R. Beck Maschinenbau
R. Beck Maschinenbau HS 1000/FH operating manual

Guldmann
Guldmann GL5.2 quick guide