Rostra Precision Controls, Inc. - 2519 Dana Dr. - Laurinburg, NC 28352 - 800-782-3379 - rostra.com Page 4
Testing and Reassembly
Testing
1. Reconnect the negative battery cable and torque to 3 ft-lbs.
2. Re-enter any theft deterrent information (if applicable).
3. Turn the ignition switch to the ON position.
4. Shift the vehicle into reverse and confirm video feed to your device.
Note: If there is no picture present, re-check all harness connections.
Reassembly
1. Reinstall all trim pieces taking special care to ensure harnesses and wiring connections are properly secured.
2. Make sure no harnesses are bent or pinched by trim pieces.
3. Reconnect all disconnected bulbs and check for function.
Installation Tips
•Confirm proper cable extension connector orientation and always verify proper ends are routed in correct
direction.
•It is a good idea to dry-fit all pieces in this kit before permanently attaching them to ensure proper
orientation and operation before beginning installation for familiarization with components.
•Always treat any metal exposed during installation with a rust preventative compound to prevent system
failure due to rust and/or corrosion.
•Always seal any holes drilled with the provided sealing putty to prevent water infiltration through
unprotected areas.
•Confirm integrity of mechanical and electrical connections before moving to next installation sequence.
Installation Notes
_____________________________________________________________________________
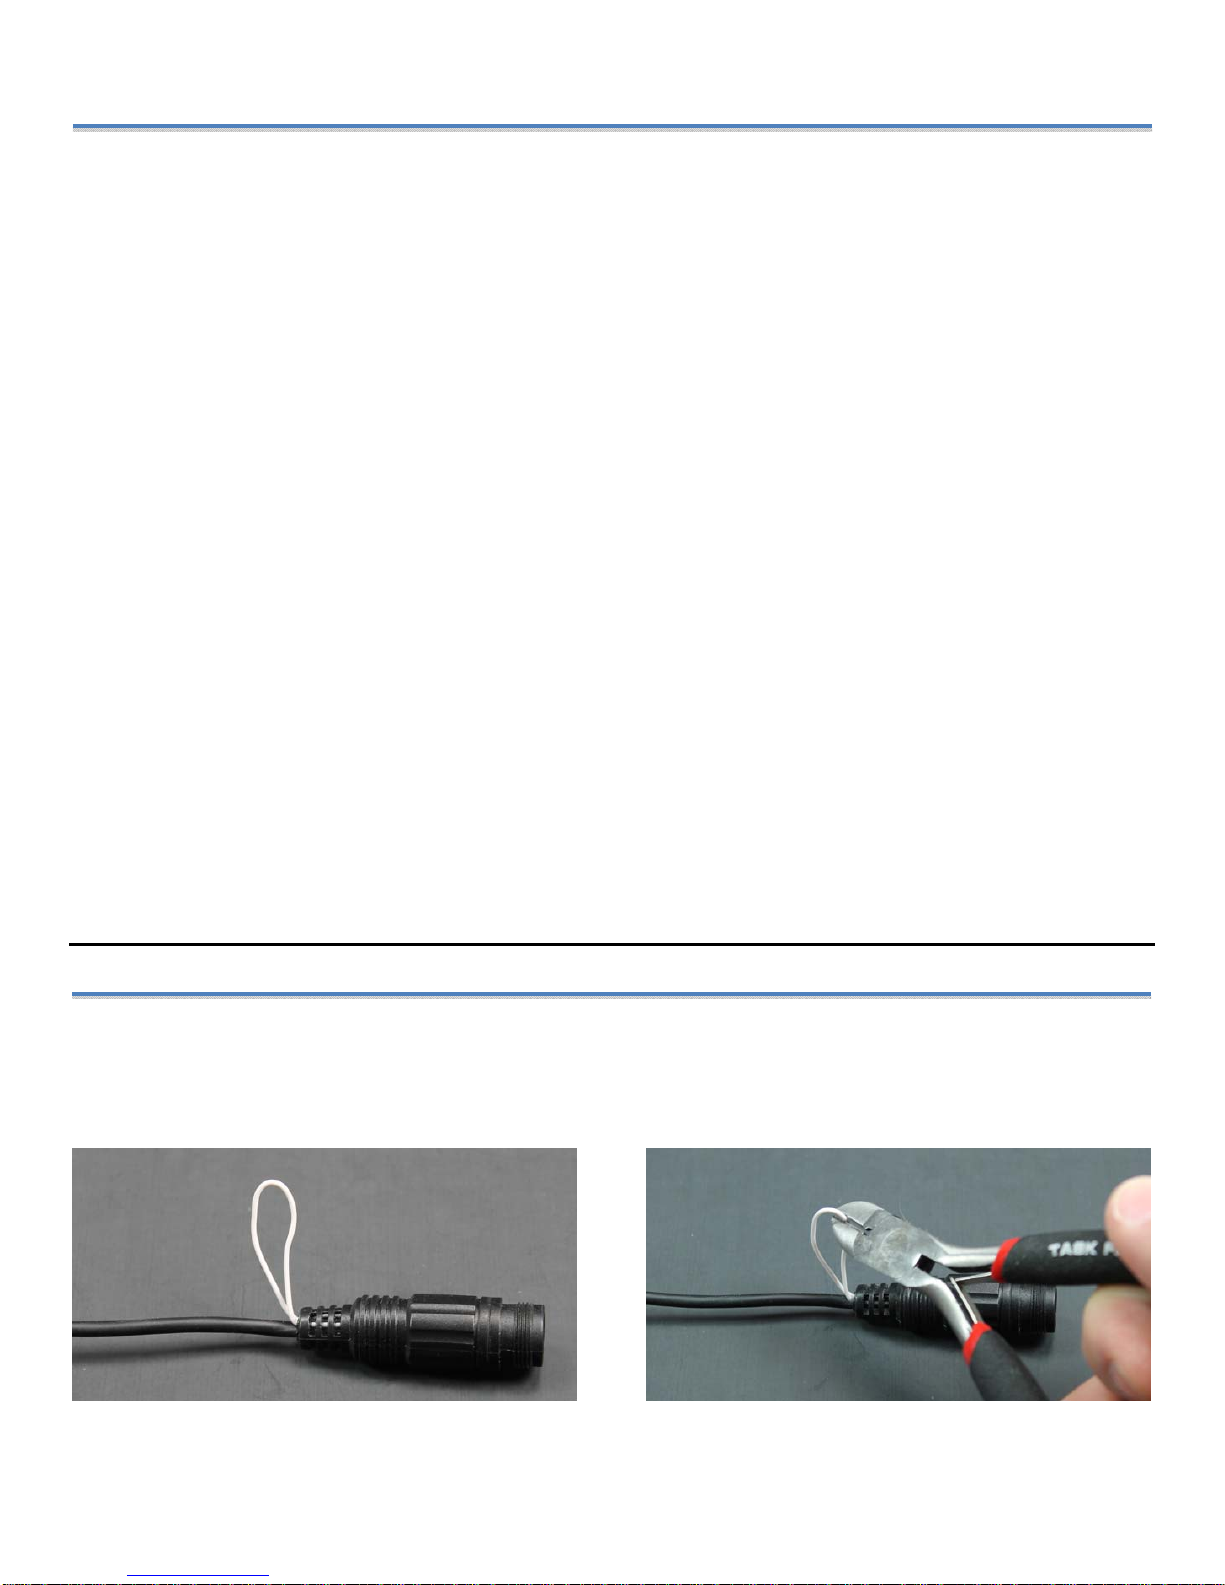
Parking Gridlines Note
This camera includes parking gridlines overlaid on the video feed by default to assist when
parking in reverse. If the driver does not wish for gridlines to be included, simply locate loop
wire connected to the camera harness (figure 1) and cut it in half (figure 2).
Figure1 Figure2