Pièces & quincailleries - Parts & hardware Instructions
IMPORTANT: Assurez-vous de mettre le beau côté du piètement
(sans rainure) vers l’extérieur
Make sure to place the legs with the smooth side
(without groove) outward.
Pieces for double 42'' high table / Pièces pour table double 42'' haut
(42W-42Y-42Z)
Three hand plate / Trois plaques à part
TA**XXXX
W42
X : x = 23,55''
TA**XXXX
Y42
X : x = 29,55''
TA**XXXX
Z42
X : x = 35,55''
Quincaillerie
48 x Vis 1/4-20 x 3/4'' tête plate
18 x Vis #12 x 2''
6 x niveleurs
Hardware
48 x Screw 1/4-20 x 3/4'' flat head
18 x Wood screw #12 x 2''
6 x glides
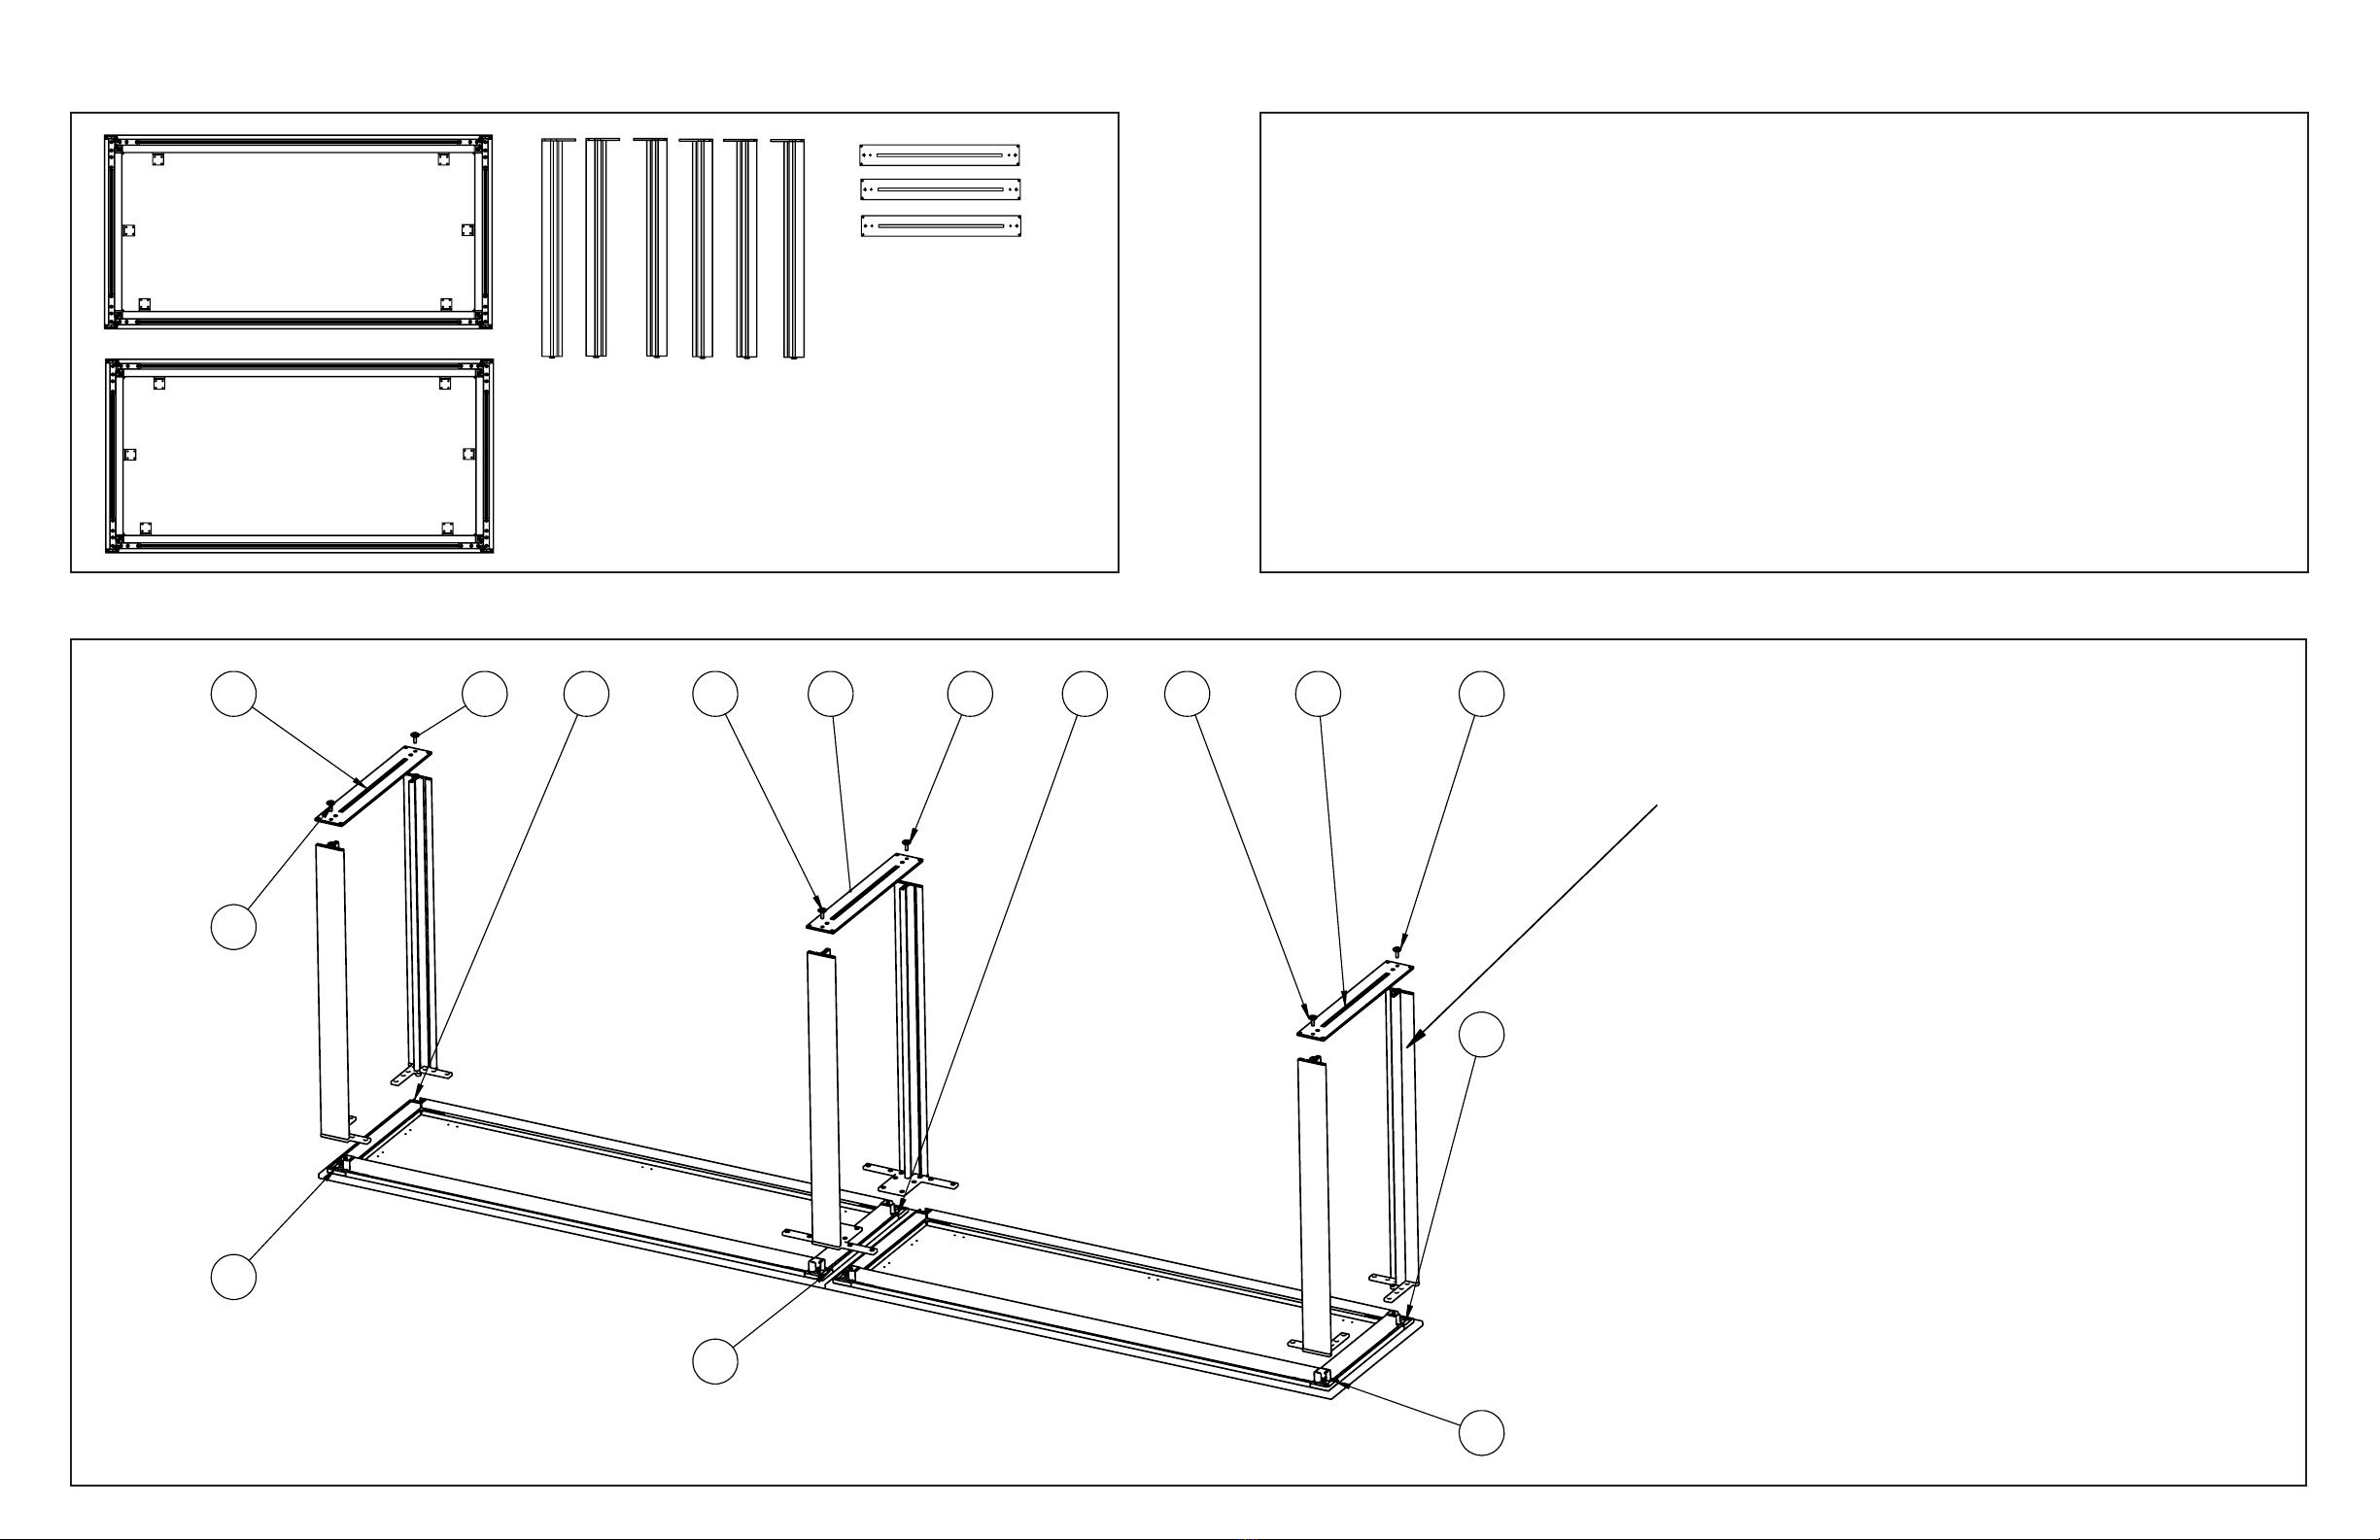
STEP 1
: Screw the 6 legs to the structure
with 1/4-20 x 3/4'' round head screw
(shared leg will assemble the both tables together)
B
STEP 2
:Screw the plate to the legs
with Wood screw #12 x 2''
STEP 3
:Screw the glides through the plate
in the legs
ÉTAPE 1:
Fixez les 6 pattes à la structure
avec les vis 1/4-20 x 3/4'' tête ronde
(Les piètements mitoyens assembleront les deux tables ensembles)
ÉTAPE 2
:
Vissez les plaques aux
piètements avecles vis #12 x 2''
ÉTAPE 3
:
Vissez les glides dans les piètements
en passant au travers des plaques
1
1
1
1
1
12 2 23 33 3 3
3
Installation instruction / Instructions d'assemblage
(42W-42Y-42Z)
Make sure to place the legs with the smooth side
(without groove) outward.
Assurez vous de mettre le beau côté du piètement
(sans rainure) vers l'extérieur
ÉTAPE 1: F /- /’’
(L )
ÉTAPE 2: V # ’’
ÉTAPE 3: V
STEP 1: S /- /’’
( )
STEP 2 : S # ’’
STEP 3 : S
4
4
4
41
3
1. Assemble the both table with the
flat bar, srew it with the 3/8'' allen screw.
Then asssemble the shared leg with one washer
each side and 1/4-20 x 5/8'' screw
2
2. Assemble each corner leg with
1/4-20 3/4'' screw
1:10
2014-12-19
Échelle/scale
Unités/Units
Date
Par/By
Design creation:
Dessiné/Draw by:
Nom/Name
Pièce
#
/Part
#
2/2
Page:
Code R&D
Achat/Purchase
Projet/Project
Quincaillerie
V /- /’’
V # ’’
Hardware
/- /’’
W # ’’’


