manuals.online logo
Brands
  1. Home
  2. •
  3. Brands
  4. •
  5. Rowenta
  6. •
  7. Electric Heater
  8. •
  9. Rowenta AQUA EXCEL SO9080 User manual

Rowenta AQUA EXCEL SO9080 User manual

Other Rowenta Electric Heater manuals

Rowenta VECTISSIMO 2400 User manual

Rowenta

Rowenta VECTISSIMO 2400 User manual

Rowenta AUTO COMFORT BU7500 User manual

Rowenta

Rowenta AUTO COMFORT BU7500 User manual

Rowenta AUTO COMFORT BU7500F0 User manual

Rowenta

Rowenta AUTO COMFORT BU7500F0 User manual

Rowenta OR 260 User manual

Rowenta

Rowenta OR 260 User manual

Rowenta DUALIO 029659 - 38/02 FR050 User manual

Rowenta

Rowenta DUALIO 029659 - 38/02 FR050 User manual

Popular Electric Heater manuals by other brands

Heatrex 240 Series owner's manual

Heatrex

Heatrex 240 Series owner's manual

U-Line H-6100 quick start guide

U-Line

U-Line H-6100 quick start guide

EINHELL QHT 1500 operating instructions

EINHELL

EINHELL QHT 1500 operating instructions

CONVECTAIR FOR Installation and user guide

CONVECTAIR

CONVECTAIR FOR Installation and user guide

Kogan KAHTP20BLKA quick start guide

Kogan

Kogan KAHTP20BLKA quick start guide

Black & Decker STANLEY ST-02-230-E manual

Black & Decker

Black & Decker STANLEY ST-02-230-E manual

Heatscope PURE Installation and instruction manual

Heatscope

Heatscope PURE Installation and instruction manual

Heylo DE 2 XL user manual

Heylo

Heylo DE 2 XL user manual

Harvia GL70 Instructions for installation and use

Harvia

Harvia GL70 Instructions for installation and use

Heylo DE 20 SH user manual

Heylo

Heylo DE 20 SH user manual

Harvia PP70SP Instructions for installation and use

Harvia

Harvia PP70SP Instructions for installation and use

Sunbeam Calentador SFH457A instruction manual

Sunbeam

Sunbeam Calentador SFH457A instruction manual

Harvia K10.5GS Instructions for installation and use

Harvia

Harvia K10.5GS Instructions for installation and use

THERMEx Frame E Wi-Fi Series user manual

THERMEx

THERMEx Frame E Wi-Fi Series user manual

Creda Heating Solution brochure

Creda

Creda Heating Solution brochure

SHUFT UniMAX-R 1400VE EC Technical manual

SHUFT

SHUFT UniMAX-R 1400VE EC Technical manual

HUUM CLIFF Series Installation and operation manual

HUUM

HUUM CLIFF Series Installation and operation manual

Harvia HL70S Instructions for installation and use

Harvia

Harvia HL70S Instructions for installation and use

manuals.online logo
manuals.online logoBrands
  • About & Mission
  • Contact us
  • Privacy Policy
  • Terms and Conditions

Copyright 2025 Manuals.Online. All Rights Reserved.

SO9080
NC00021193/03 - 12/13
A Q U A E X C E L
FR
DE
EN
NL
IT
ES
PT
EL
SV
DA
FI
NO
RO
BG
SL
HR
SR
BS
PL
ET
LT
LV
CS
SK
HU
TR
HK
G
C
I
1
E
H
2
A
D
C
B
3
F
4
3
1
2
F
4a
3 - CLIC
1
2
F
4b
A. Schalter zur Auswahl der Funktionen
B. Schalter zur instellung der Temperatur:
Thermostat
C. Kontrollleuchte
D. instellung des Schwingmechanismus
. Luftansauggitter
F. Abnehmbarer und waschbarer Filter zum
Schutz des Luftauslassgitters
G. Luftauslassgitter
H. Transportgriff
I. Abdeckung zum Spritzschutz
D
A. Bouton de sélection des fonctions
B. Bouton de réglage de température :
Thermostat
C. Voyant mise sous tension
D. Commande d’oscillation
. Grille d’entrée d’air
F. Filtre amovible et lavable protégeant la
grille d’entrée d’air
G. Grille de sortie d’air
H. Poignée de transport
I. Couvercle de protection contre les chutes d’eau
FR
A. Functieschakelaar
B. Temperatuurschakelaar: thermostaat
C. Controlelampje ‘aan/uit’
D. Knop voor draaiende beweging
. Luchtuitlaat-rooster
F. Losse en afwasbare filter ter
bescherming van het luchttoevoerrooster
G. Luchttuitlaat-rooster
H. Handgreep
I. Beschermkap tegen vallend water
NL
A. Function selection switch
B. Temperature control switch: Thermostat
C. On/Off indicator
D. Oscillation control
. Air intake grille
F. Removable, washable filter protecting the air
inlet grille
G. Air outlet grille
H. Carry handle
I. Protective splash cover
N
Бутон за въртене
Comandă de oscilaţie
I. Capac de protecţie împotri a căderilor de apă
EL
Εντολή ταλάντωσης
I. Καπάκι προστασίας από το πιτσίλισμα νερού
A. Manopola di selezione delle funzioni
B. Manopola di regolazione della temperatura :
Termostato
C. Spia luminosa di collegamento alla rete elettrica
D. Comando dell’oscillazione
. Griglia di entrata dell’aria
F. Filtro amovibile e lavabile a protezione della
griglia di ingresso dell'aria
G. Griglia di uscita dell’aria
H. Impugnatura di trasporto
I. Coperchio di protezione contro le cadute d’acqua
IT
A. Botão selector de funções
B. Botão de regulação da temperatura:
Termóstato
C. Indicador luminoso de funcionamento
D. Comando da oscilação
. Grelha de entrada de ar
F. Filtro amovível e lavável que protege a
grelha de entrada do ar
G. Grelha de saída de ar
H. Pega de transporte
I. Tampa de protecção contra as quedas de água
PT
A. Botón de selección de las funciones
B. Botón de regulación de temperatura: Termostato
C. Indicador luminoso de corriente
D. Mando de la oscilación
. Rejilla de entrada de aire
F. Filtro extraíble y lavable que protege la rejilla de
entrada de aire
G. Rejilla de salida de aire
H. Asa de transporte
I. Tapa de protección contra los saltos de agua
S
DASV
FI NO
A. Knapp for valg av funksjoner
B. Knapp for regulering av temperatur: Termostat
C. Lampe for strømtilførsel
D. Viftekontroll
. Rist for luftinntak
F. Avtakbart og vaskbart filter som
beskytter grillen for luftinntak
G. Rist for luftuttak
H. Bærehåndtak
I. Beskyttende deksel mot rennende vann
A. Funktionsvalsreglage
B. Temperaturkontrollreglage: Termostat
C. På/av-indikator
D. Oscillationskommando
. Luftintagsgaller
F. Löstagbart och tvättbart filter som
skyddar tilluftsgallret
G. Luftutsläppsgaller
H. Transporthandtag
I. Skyddskåpa mot vattenstänk
A. Funktionsvælger
B. Temperaturvalg: Termostat
C. Tænd/Sluk
D. Svingningsbetjening
. Luftindtagsgitter
F. Udtageligt og vaskbart filter til
luftindsugningsgitteret
G. Luftudblæsningsgitter
H. Håndtag
I. Beskyttelseslåg mod vandsprøjt
A. Toimintavalitsin
B. Lämpötilan säädin: Termostaatti
C. Katkaisin
D. Heilahduskomento
. Ilmanottosuojus
F. Irrotettava ja pestävä suodatin, joka
suojelee ilmanottoritilää
G. Ilmanpoistosuojus
H. Kuljetuskahva
I. Veden tippumista estävä suojakansi
CS
O ládání oscilace
I. Ochranný kryt proti stříkání ody
Gumb za namještanje oscilacije
Nasta ite nihanja
Sterowanie funkcją oscylacji
I. Pokrywa ochronna zapobiegająca wydostawaniu
się wody
Döndürme kumandası
I. Su dökülmesine karşı koruma sağlayan kapak
HU
Pásztázó kapcsoló
I. Víz lecsorgását megakadályozó édőfedél
O ládanie oscilácie
I. Ochranný kryt proti striekaniu odyt
A. Prekidač za izbor funkcije
B. Prekidač za podešavanje temperature: Termostat
C. Pokazivač Uk j/Isk j
D. Dugme za okretanje
E. Pregrada za usisavanje vazduha
F. Odvojivi, perivi fi ter štiti rešetku za usis vazduha
G. Pregrada za izbacivanje vazduha
H. Ručka za nošenje
I. Zaštitni pokopac protiv u aska vode
SR
A. Funktsiooniva iku nupp
B. Temperatuuri seadistamise nupp: Termostaat
C. Seame voo utoitest teavitav märgutu i
D. võnkumise regu eerimise nupp
E. Õhuvõtu avad
F. Õhu sisse askevõret kaitsev eema datav ja
pestav fi ter
G. Õhu puhumise avad
H. Kandekäepide
I. Veepritsmetevastane kaitsekate
T
A. Prekidač za izbor funkcije
B. Prekidač za podešavanje temperature: Termostat
C. Pokazivač Uk j/Isk j
D. Dugme za odabir smjera puhanja
E. Pregrada za usisavanje vazduha
F. Odvojivi, perivi fitar štiti rešetku usisa zraka
G. Pregrada za izbacivanje vazduha
H. Ručka za nošenje
I. Pok opac za zaštitu pred vodom
BS
A. Funkciju izvē es poga
B. Temperatūras regu ēšanas poga: termostats
C. Darba ampiņa
D. svārstīšanās mehānisma s ēdzis
E. Režģis gaisa iep ūšanai
F. Noņemams un mazgājams fi trs, kas aizsargā
režģi gaisa iep ūšanai
G. Režģis gaisa izp ūšanai
H. Rokturis ierīces pārnēsāšanai
I. Pārsegs aizsardzībai pret ūdeni
LV
A. Funkcijų parinkimo mygtukas
B. Temperatūros regu iavimo mygtukas –
termostatas
C. Įjungimo emputė
D. Vibravimo regu iavimo mygtukas
E. Oro įsiurbimo grote ės
F. Išimamas fi tras, kurį ga ima p auti ir kuris
apsaugo oro įsiurbimo grote es
G. Oro išpūtimo grote ės
H. Ki nojimo rankena
I. Apsaugos nuo vandens dangte is
LT
HK
1
Lisez attentivement le mode d’emploi ainsi que les consignes de sécurité avant toute utilisation.
1 - AV RTISS M NTS
Il est essentiel de lire attentivement cette notice et d'observer les recommandations suivantes:
• Pour votre sécurité, cet appareil est conforme aux normes et réglementations applicables (Directives Basse Tension, Compatibilité lectromagnétique,
nvironnement, ...)
• Cet appareil est destiné à un usage domestique uniquement. Il ne peut donc pas être utilisé pour une application industrielle.
• La garantie sera annulée en cas d’éventuels dommages résultant d’une mauvaise utilisation.
• Ne pas placer votre appareil juste en dessous d’une prise de courant murale.
• Ne pas faire fonctionner votre appareil dans un local empoussiéré ou un local présentant des risques d’incendie.
• Avant chaque utilisation, vérifier le bon état général de l’appareil, de la prise et du cordon.
• Ne jamais introduire d’objet à l’intérieur de l’appareil (ex : aiguilles…)
• Si le câble d’alimentation est endommagé, il doit être remplacé par le fabricant, son service après-vente ou une personne de qualification similaire afin
d’éviter tout danger.
• Cet appareil n’est pas prévu pour être utilisé par des personnes (y compris les enfants) dont les capacités physiques, sensorielles ou mentales sont réduites,
ou des personnes dénuées d’expérience ou de connaissance, sauf si elles ont pu bénéficier, par l’intermédiaire d’une personne responsable de leur sécurité,
d’une surveillance ou d’instructions préalables concernant l’utilisation de l’appareil. Il convient de surveiller les enfants pour s’assurer qu’ils ne jouent pas
avec l’appareil.
• Ne pas tirer le câble d’alimentation ou l’appareil, même pour débrancher la prise de courant du socle mural.
• Dérouler complètement le cordon avant chaque utilisation.
2 - TRÈS IMPORTANT
• A EN ION : Afin d’éviter des risques de surchauffe, NE JAMAIS COUVRIR L’APPAREIL :
• Ne pas toucher l'appareil avec les mains humides.
• Ne jamais laisser de l'eau s'introduire dans l'appareil.
• Ne pas utiliser cet appareil à proximité d’une baignoire, douche, lavabo, piscine.
• Ne pas utiliser l’appareil à proximité d’objets et de produits inflammables (rideaux, aérosols, solvants, etc.)
• Ne jamais utiliser l’appareil incliné ou couché.
• NE PAS FORCER L’OSCILLA ION A LA MAIN.
• En cas d’absence prolongée en positionnant le bouton A sur et débrancher.
• Ne jamais utiliser l appareil sans son filtre.
• L installation électrique de la pièce, l installation de l appareil et son utilisation doivent cependant être conformes aux normes en vigueur dans votre pays.
3- UTILISATION N SALL D BAINS (protection contre les chutes d’eau)
La construction de cet appareil « IP21 » permet son utilisation dans toutes les pièces de la maison, y compris celles présentant
des risques de chutes d’eau verticales (cuisine, salle de bains, etc.).
n France, la Norme NFC15100 régit les règles de sécurité d’installation. lles définissent 4 volumes dans la salle de bains.
Cet appareil doit être installé uniquement dans le volume 3 d’une telle pièce, afin que les boutons de sélection ne puissent pas
être touchés par une personne utilisant la baignoire ou la douche.
4 - T NSION
• Avant la première utilisation, vérifiez que la tension de votre installation corresponde bien à celle marquée sur l’appareil et que votre installation soit adap-
tée à la puissance marquée sur l’appareil.
• Votre appareil peut fonctionner avec une prise de courant sans contact de terre. C’est un appareil de classe II (double isolation électrique
).
5 - S CURIT
• n cas d'échauffement anormal, un dispositif de sécurité coupe le fonctionnement de l'appareil puis le remet en route automatiquement après refroidisse-
ment. Si le défaut persiste ou s'amplifie un fusible thermique arrête définitivement l'appareil, celui-ci doit alors être amené à un centre service agréé.
6 - FONCTIONN M NT
Assurez-vous avant la mise en marche de votre appareil que:
- Le positionnement de l'appareil décrit dans cette notice est respecté
- Les grilles d'entrée et de sortie d'air sont totalement dégagées
- L'appareil est placé sur un plan horizontal et stable
• Choix de la fonction :
Sélectionner la fonction désirée, à l’aide du bouton A (fig.3), en plaçant le repère du bouton en face du symbole :
: arrêt
: Ventilation froide
: 1000W
: 2000W
• Voyant :
- Voyant de mise sous tension C (fig.1), il est allumé dés que votre appareil est mis sous tension.
• Thermostat :
Le réglage de la température se fait en fonction de votre sensation de confort en tournant le bouton B (fig.3)
• Position hors gel :
Cette position vous permet de maintenir automatiquement la température au dessus de 0°C dans un local normalement isolé et dont le volume correspond à
la puissance de votre appareil.
Branchez votre appareil et tournez le bouton B (fig.3) afin de placer le repère du bouton en face du symbole « » et tourner le bouton A (fig. 3) afin de sélectionner
l'une des fonctions suivantes : 1000W ou 2000W.
• Ventilation froide :
lle vous permet d'utiliser votre radiateur soufflant comme ventilateur d'appoint en été.
• Oscillation :
Le bouton d’oscillation D (fig. 3) vous permet de faire osciller votre appareil afin d’optimiser la diffusion de l’air chaud dans la pièce.
FR
2
7 - NTR TI N
• Votre appareil doit être débranché avant toute opération d'entretien.
• Vous pouvez le nettoyer avec un chiffon légèrement humide.
• IMPORTANT: ne jamais utiliser de produits abrasifs qui risqueraient de détériorer les revêtements.
• Votre appareil est équipé d’un filtre à poussières amovible et lavable (eau tiède et savon) qui doit être nettoyé régulièrement. (voir fig.4a : Démontage et fig.
4b : Remontage).
• Prenez toujours soin de faire sécher le filtre avant de le remettre en place.
• Ne jamais utiliser l appareil sans son filtre.
8 - RANG M NT
• Il est impératif de bien laisser refroidir votre appareil avant de le ranger.
• Lorsque vous n’utilisez pas l’appareil, celui-ci doit être placé dans un local à l’abri de l’humidité.
9 - N CAS D PROBL M
• Ne démontez jamais votre appareil vous-même. Un appareil mal réparé peut présenter des risques pour l’utilisateur.
• Avant de contacter un Centre Service agréé de notre réseau, assurez-vous :
- que l’appareil est en position normale de fonctionnement ;
- que les grilles d’entrée et de sortie d’air sont totalement dégagées.
10 - PARTICIPONS À LA PROT CTION D L’ NVIRONN M NT!
Votre appareil contient de nombreux matériaux valorisables ou recyclables.
Confiez celui-ci dans un point de collecte ou à défaut dans un centre service agréé pour que son traitement soit effectué.
FR
3
Bitte lesen Sie die vorliegende Anleitung un edingt aufmerksam durch und eachten Sie folgende Empfehlungen.
1 - HINW IS
• Um Ihre Sicherheit zu gewährleisten, entspricht dieses Gerät den gültigen Normen und Richtlinien (Niederspannung, lektromagnetische Verträglichkeit,
Umweltverträglichkeit,…).
• Dieses Gerät ist ausschließlich für den Haushaltsgebrauch bestimmt. s darf nicht für industrielle Anwendungen benutzt werden.
• Bei Beschädigungen durch unsachgemäße Verwendung erlischt der Garantieanspruch.
• Bringen Sie das Gerät nicht direkt unterhalb einer Wandsteckdose an.
• Benutzen Sie das Gerät nicht in staubigen Räumen oder in Räumen mit Brandgefahr.
• Überprüfen Sie vor jeder Benutzung das Gerät, den Stecker und das Kabel auf einwandfreien Zustand.
• Stecken Sie niemals Gegenstände (z.B.: Nadeln...) in das Gerät hinein.
• Dieses Gerät darf nicht von Personen (inbegriffen Kindern) mit eingeschränkten körperlichen, sensorischen oder geistigen Fähigkeiten benutzt werden. Das Gleiche gilt für
Personen, die keine rfahrung mit dem Gerät besitzen oder sich mit ihm nicht auskennen, außer wenn sie von einer für ihre Sicherheit verantwortlichen Person beaufsichtigt
werden oder von dieser mit dem Gebrauch des Gerät vertraut gemacht wurden. Kinder müssen beaufsichtigt werden, damit sie nicht mit dem Gerät spielen.
• Während des Betriebs ist das Gerät außerhalb der Reichweite von Kleinkindern, Tieren und Personen mit bestimmten Behinderungen zu halten.
• Ziehen Sie nicht am Stromkabel oder an dem Gerät. Ziehen Sie den Stecker nicht am Stromkabel aus der Wandsteckdose.
• Wickeln Sie das Netzkabel vor jeder Benutzung vollständig ab.
2 - ÄUSS RST WICHTIG
• Achtung: Um Überhitzungen zu vermeiden, DARF DAS GERÄT NIEMALS ABGEDECKT WERDEN.
• Achten Sie darauf, dass keine losen Gegenstände (Papier, Tücher, Vorhänge, etc.) angesaugt werden können.
• Verwenden Sie im Badezimmer kein Verlängerungskabel. Kabel müssen so verlegt werden, dass sich keine Stolperfallen bilden.
• Dieses Gerät nicht in der Nähe einer Badewanne, Dusche, eines Waschbeckens oder eines Schwimmbads benutzen.
• Benutzen Sie den Heizkörper niemals in der Nähe von brennbaren Gegenständen oder Produkten (Vorhänge, Spraydosen, Lösungsmittel usw.)
• Betreiben Sie das Gerät niemals in geneigtem oder liegendem Zustand.
• Das Gerät nicht mit feuchten Händen anfassen.
• Es darf niemals Wasser in das Gerät eindringen.
• Das Gerät darf nicht ohne Filter in Betrieb genommen werden.
• Bei längerer Abwesenheit: Stellen Sie den Schalter A auf Position „ ” und ziehen Sie den Stecker heraus.
• Die elektrische Installation des Raums, die Installation des Geräts und dessen Verwendungs-zweck müssen mit den in Ihrem Land geltenden Normen übe-
reinstimmen.
3 - B NUTZUNG IM BAD ZIMM R (Schutz gegen Spritzwasser)
Die Konzeption des „IPS21” Geräts erlaubt seine Benutzung in allen Räumen des Hauses einschließlich der Zimmer, in denen vertikale Wasserspritzer zu erwarten sind (Küche,
Badezimmer, usw.).
4 - SPANNUNG
• Überprüfen Sie vor der ersten Inbetriebnahme, dass die Netzspannung der auf dem Gerät angegebenen Spannung entspricht und dass Ihre lektroinstallation für die auf dem
Gerät angegebene Leistung geeignet ist.
• Das Gerät kann an eine nicht geerdete Steckdose angeschlossen werden. s entspricht der Klasse II (doppelte elektrische Isolation ).
5 -SICH RH IT
• Bei Überhitzung schaltet die Sicherheitsvorrichtung des Geräts aus und setzt es automatisch wieder in Gang, wenn es abgekühlt ist. Sollte der defekt erneut auftreten oder
sich verschlimmern, wird das Gerät durch eine Schmelzsicherung definitiv ausgeschaltet. Das Gerät muss in diesem Fall zu einer zugelassenen Kundendienststelle gebracht
werden.
6 - B TRI B
Vergewissern Sie sich vor der Inbetriebnahme des Geräts, dass:
- die in dieser Anleitung beschriebene Position des Geräts eingehalten wird.
- die Gitter für Lufteinlass und Luftauslass vollkommen frei sind.
- sich das Gerät auf einer stabilen horizontalen bene befindet.
• Auswahl einer Funktion :
Wählen Sie die gewünschte Funktion mit Hilfe des Schalters A (Abb. 3), indem Sie die Markierung des Schalters auf eines der folgenden Symbole drehen :
: Aus : 1000W
: Gebläse Kaltluft : 2000W
• Anzeigeleuchte :
- Kontrollleuchte C (Abb. 1): leuchtet, wenn das Gerät eingeschaltet ist.
- Anzeigeleuchte “Signal Protect” D (Abb. 3): leuchtet bei anormaler Überhitzung oder beim Kippen des Geräts.
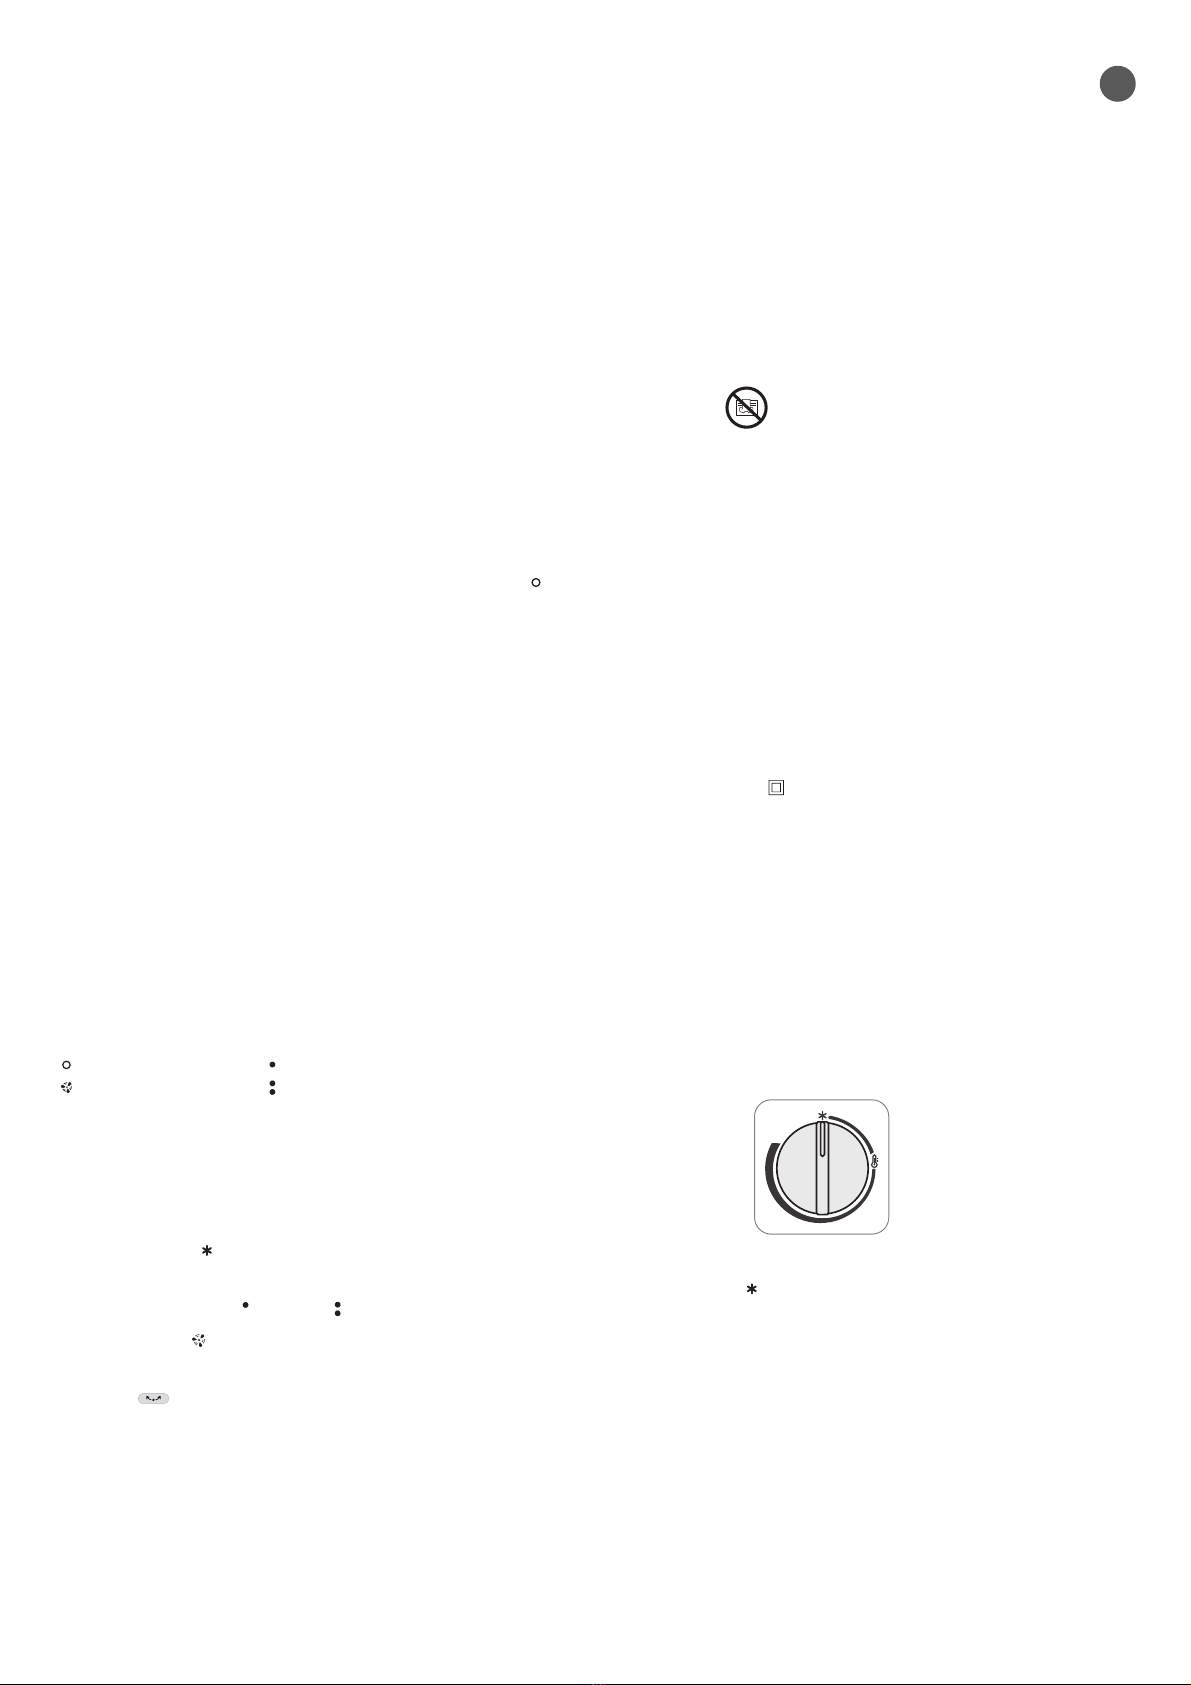
• Thermostat :
Die instellung de Temperatur erfolgt nach Ihrem Wunsch durch Drehen des Schalters B (Abb.3).
• Frostschutz-Stellung :
In dieser Funktion kann die Temperatur in einem normal isolierten Raum mit einer der Geräteleistung entsprechenden Größe automatisch über 0°C gehalten werden.
Schließen Sie das Gerät an und drehen Sie den Schalter B (Abb. 3), bis die Markierung des Schalters auf das Symbol “ ” zeigt. Drehen Sie den Schalter A (Abb. 3), um eine der folgen-
den Funktionen auszuwählen : 1000W oder 2000W.
• Stellung nur Lüften :
Diese Funktion ermöglicht Ihnen die Verwendung des Heizlüfters als Ventilator im Sommer.
• Oszillation
:
Mit dem Oszillationsknopf D (Abb. 3) kann das Gerät auf Oszillationsbetrieb eingestellt werden, der die warme Luft bestmöglich im Raum verteilt.
7 - PFL G
• Vor der Durchführung von Pflegearbeiten ist unbedingt der Netzstecker herauszuziehen.
• Sie können das Gerät mit einem feuchten Tuch reinigen.
• WICHTIG: Niemals Schleifmittel benutzen, da diese die Oberflächen Ihres Gerät beschädigen könnten.
• Ihr Gerät ist mit einem abnehmbaren und mit lauwarmem Wasser und Seife waschbaren Staubfilter ausgerüstet, der regelmäßig gereinigt werden muss (Abb.4 / Abb.4b).
• Vor dem Wiedereinsetzen muss der Filter sorgfältig getrocknet werden.
•
Das Gerät darf nicht ohne Filter in Betrieb genommen werden.
D
4
8 - UNT RBRINGUNG
• Bevor das Gerät weggestellt wird, muss es vollständig abgekühlt sein.
• Wenn Sie das Gerät nicht benutzen, muß es in einem vor Feuchtigkeit geschützten Raum aufbewahrt werden.
9 - B I STÖRUNG N
• Nehmen Sie das Gerät niemals selbst auseinander. in falsch repariertes Gerät kann für den Benutzer eine große Gefahr darstellen.
• Bevor Sie sich an unseren Kundendienst wenden, stellen Sie sicher:
– daß sich das Gerät in normaler Betriebsposition befindet ;
– daß die Lufteintritts- und Luftaustrittsgitter vollständig frei sind.
10 - D NK N SI AN D N SCHUTZ D R UMW LT!
Ihr Gerät enthält wertvolle Rohstoffe, die wieder verwertet werden können.
Geben Sie Ihr Gerät deshalb bitte bei einer Sammelstelle Ihrer Stadt oder Gemeinde ab.
D
5
It is essential that you read these instructions and observe the following recommendations
1 - WARNINGS
• For your safety, this appliance complies with the applicable standards and regulations or commercial (Low Voltage, lectromagnetic Compatibility,
nvironmental Directives, etc.)
• The warranty will be invalid in the event of damage arising from incorrect use.
• Do not place your appliance immediately below a socket outlet.
• Do not operate your appliance in a dusty room or if there is a risk of fire.
• ach time before use, check that in general the appliance is in good condition, as well as the plug and the cord.
• Never insert any objects inside the appliance (e.g.: needles)
• If the power cord is damaged, it must be changed by the manufacturer, the After Sales Service or a similarly qualified person in order to avoid any danger.
• This appliance is not intended for use by persons (including children) with reduced physical, sensory or mental capabilities, or lack of experience and know-
ledge, unless they have been given supervision or instruction concerning use of the appliance by a person responsible for their safety. Children should be
supervised to ensure that they do not play with the appliance.
• Do not pull the power cord or the appliance, even to unplug it from the wall socket.
• Completely unwind the cord each time before use.
• This product has been designed for domestic use only. Any commercial use, inappropriate use or failure to comply with the instructions, the manufacturer
accepts no responsibility and the guarantee will not apply.
2 - V RY IMPORTANT
• WARNING : IN ORDER O AVOID OVERHEA ING DO NO COVER HE HEA ER
• Do not touch the appliance with wet hands.
• Do not let water get into the appliance.
• Do not use this appliance near baths, showers, sinks or swimming pools.
• Do not use the appliance near inflammable objects and products (curtains, aerosols, solvents, etc.).
• Do not use the appliance when tilted or laid flat.
• DO NO FORCE HE OSCILLA ION BY HAND.
• In the event of prolonged absences: stop the appliance using button A position " " and unplug it.
• Never use the appliance without its filter.
• However, the electrical installation in the room, the installation of the unit and the way the unit is used must all comply with the safety standards in force in your country.
3 - US IN TH BATHROOM (protection against splashing with water)
• This “IP21“ unit has been specially designed so that it can be used in any room in your house, including those where there is a risk of water being splashed
onto it from above (kitchen, bathroom, etc.).
4 - VOLTAG
• Before first use, make sure that the voltage being used corresponds to what is indicated on the unit and that the electrical installation is adapted to the
power level indicated.
• Your appliance can be used with a power plug without an earth connection. It is a class II appliance (double insulation ).
5 - SAF TY
• In the event of abnormal overheating, a safety device shuts down the appliance and then automatically restarts it once it has cooled. If the fault persists
or gets worse, a thermal fuse shuts the appliance down completely and it must then be taken to an approved service centre.
6 - OP RATION
Before turning the unit on, make sure:
• it is positioned as described in these instructions,
• that it is placed on a flat and horizontal surface, and;
• that the air intake and outlet grilles are free of all obstacles.
• Function Selection :
Select the desired function by turning switch A (3) to line up the marking on the switch with one of the following symbols:
: on : 1000W
: cooling : 2000W
• Indicator:
- On/Off indicator C (3), lights up when the unit is turned on.
• Thermostat:
Adjust the temperature setting, according to your own comfort, by turning button B (3).
• Frost-free setting :
This setting enables you to automatically maintain the temperature above 0°C in a normally insulated room, whose volume corresponds to the power of your
appliance.
Plug in the unit and turn switch B (3) to line up the marking on the switch with the “ ” symbol and turn switch A (3) to select one of the following:
1000W or 2000W.
• Cold ventilation setting :
This setting enables you to use your fan heater as a cooling fan in summer.
• Rotation :
The rotation button D (fig. 3) allows you to rotate your appliance in order to optimise the diffusion of hot air in the room.
7 - CL ANING
• Your appliance must be unplugged before proceeding with any cleaning work.
• You can clean it with a slightly damp cloth.
• IMPORTANT: Never use abrasive products which might damage the appearance of your appliance.
• Your appliance is fitted whith a removable and washable dust filter (soap and warm water), which has to be cleaned regularly (Fig. 4a and 4b).
• Always ensure that the filter is thoroughly dry before replacing it.
• Never use the appliance without its filter.
N
6
8 - STORAG
• It is extremely important that the unit be allowed to cool down before it is put away.
• When you are not using your appliance, store it in a dry place.
9 - IN TH V NT OF PROBL MS
• Never dismantle your appliance yourself. A poorly repaired appliance may be dangerous for the user.
• Before contacting one of our Approved Service Centres, ensure that:
– the appliance is set to normal operating mode;
– the air inlet and outlet grilles are totally clear.
10 - NVIRONN M NT PROT CTION FIRST!
Your appliance contains valuable materials which can be recovered or recycled. Leave it at a collection point.
N