manuals.online logo
Brands
  1. Home
  2. •
  3. Brands
  4. •
  5. RTA
  6. •
  7. Indoor Furnishing
  8. •
  9. RTA Techni Mobili RTA-BC19 User manual

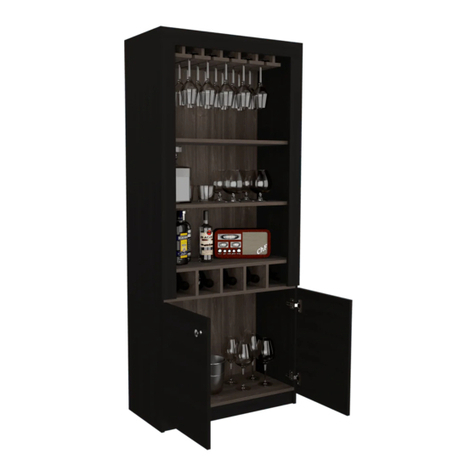
RTA Techni Mobili RTA-BC19 User manual

MODEL RTA-BC19
Thanks for purchasing one of our products.
lease read carefully the assembly instructions before the installation.
lease save this manual for future reference.
ASSEMBLY INSTRUCTIONS
P.1 P.1
RTA-BC19
P.2 P.2
Top Shelf,
x1
Right Top Side
Panel, x1
Left Top Side
Panel, x1
Right Bottom Side Panel, x1
Left Bottom Side Panel, x1
Shelves,
x3
Middle Shelf,
x1
Top Horizontal
Panel, x1
Bottom Horizontal
Panel, x1
Bac panels,
x5
Bottom Shelf,
x1
⚠ATTENTION:
LEASE READ THESE TI S AND WARNINGS BEFORE YOU START THE ASSEMBLY.
☛Do a quic inventory to ma e sure the product contains all the parts and hardware.
☛Missing, damaged and defective parts can be replaced at no cost to you. Please
refer to the CONTACT and the WARRANTY cards included with the product.
☛If during assembly you find an issue or need clarification, please contact our Customer
Service for assistance. Please refer to the CONTACT card included with the product.
☛On each step read the instructions and analyze the illustrations thoroughly before
proceeding to do the assembly.
☛To avoid misalignments, always leave the screws loose and tighten them until all pieces
are positioned correctly.
☛Do not overtighten or force the screws as they might brea , strip, damage the threads
of the holes or get stuc inside the part.
☛Sometimes the laminate might cover partially or entirely the hole on a panel, but the
hole should still be located under the laminate.
☛If there is no visible hole for the screw, pass and press the tip of your finger over the
area where the hole should be located to feel the indentation, and once found, carefully
pierce the laminate to reveal the hole underneath.
☛If the hole seems too small for the screw, first ma e sure you are using the correct size
of screw, and that it’s been installed in the correct hole. If the hole still appears to be too
small, carefully pierce the laminate to reveal the hole’s actual size.
☛This unit uses cam bolts and loc s. The following page explains how to wor with this
ind of hardware.
☛Ma e sure you understand which hardware will be used on each step. Using the wrong
size of screw, bolt or pin might cause damage to the panel in which it is being used.
RTA-BC19
P.3 P.3
HOW TO ASSEMBLE ARTS USING CAM BOLTS AND CAM LOCKS.
☛This is not an assembly step; it is a guide for when you are
actually doing the assembly using this kind of hardware.
RTA-BC19
P.4 P.4
Cam Bolt Cam Loc
1. Screw the bolt into
the corresponding
panel.
2. Join the panel with the
panel that has the hole for
the cam loc and insert the
cam loc ma ing sure it is
aligned to engage with the
bolt.
ALIGNMENT
DIRECTION
3. The panels might have a
very small gap which is
normal; turn the cam loc
cloc wise to loc the parts
together.
Insert the wooden pins (D) into the corresponding holes on panels (1), (2), (4),
(5), (6), (7) and (8) as shown.
Ma e sure to use the correct holes as the other holes are intended for
screws or bolts on other steps.
☛
RTA-BC19
P.5 P.5
Join panel (5) to panel (1) as shown.
Assemble panel (8) to panels (1) and (2) using screws (C) as shown, then
cover the screw holes with (G).
RTA-BC19
P.6 P.6
Position the parts assembled in STEP 3 upright, and insert the bac panel
(11) as shown.
Assemble panel (7) to panels (1) and (2) using screws (C) as shown, then
cover the screw holes with (G).
RTA-BC19
P.7 P.7
Place the parts assembled in STEP 5 as shown, and insert the bac panel (11).
Screw the bolts (A) to the middle shelf (3) as shown.
Refer to PAGE 4 if you are not sure how to use this ind of hardware.
RTA-BC19
P.8 P.8
☛
Assemble the panel (3) to the parts assembled in STEP 6 using screws (C)
as shown.
Join panel (6) to panel (4) as shown.
RTA-BC19
P.9 P.9
☛The top section assembled in this step will be used until STEP 14 in PAGE 12.
Assemble the panel (10) to panels (2) and (4) using screws (C) as shown,
then cover the screw holes with (G).
Place the parts assembled in STEP 10 as shown and insert the panels (11).
RTA-BC19
P.10 P.10
Assemble the panel (9) to panels (2) and (4) using screws (C) as shown,
then cover the screw holes with (G).
Place the parts assembled in STEP 12 as shown and insert the panel (11).
RTA-BC19
P.11 P.11
1ST: Join the 2 sections that were assembled in steps 8 and 13 as shown.
2ND: Align and insert the cam loc s (B) into panels (9) and (10), then turn
them to loc the 2 sections together as explained in PAGE 4.
3RD: Cover the cam loc holes with (G).
4TH: Attach the nail studs (F) at the bottom of panels (9) and (10) as shown.
RTA-BC19
P.12 P.12
2nd
3rd
1st
4th
☛KEE THE UNIT LAYING DOWN ON THE FLOOR FOR THE NEXT STE .
Attach the wall brac ets ( I) to the top panel (1) using screws (H) as shown.
RTA-BC19
P.13 P.13
With the help of at least ONE MORE PERSON, carefully lift the unit upright and
bring it close to the wall where it will stand.
With a power driller (not provided) open the holes on the drywall that match
the holes on the brac ets. Then insert the wall anchors in the holes. Then
place the unit against the wall and secure the brac ets with screws (J).
RTA-BC19
P.14 P.14
☛DO NOT CLIMB ON THE UNIT’S SHELVES!!! Use a ladder if necessary.
TI OVER WARNING !
RTA-BC19
P.15 P.15
lease keep your children and yourself safe. Tip-over accidents can result in
serious INJURIES or even cause DEATH to small children.
REVENT TI -OVER ACCIDENTS BY FOLLOWING THESE RECOMMENDATIONS:
1) Secure the unit by anchoring it to the wall. The anchoring device has been
provided with the unit, and must be installed by following the instructions
shown on AGES 13 and 14 of this manual.
2) Once the unit has been anchored, load the heavier objects onto the lower
shelves, and the lighter objects to the upper shelves.
3) Never reach the objects on the upper shelves by climbing on the lower shelves.
4) Do not let children climb or play inside any of the shelves.
CARE, MAINTENANCE AND WARNINGS:
⚠Do not expose the surfaces to direct sunlight or to extreme environmental conditions.
Damages caused by this ind of exposure is not covered by the product’s warranty.
iClean the surfaces preferable with a soft cloth damped with a solution of mild soap
and water, then dry with a clean towel.
⚠Do not use solvents or abrasive materials to clean any part of the unit.
⚠Do not allow children to play inside the unit, nor climb any of the shelves. Never let
small children reach into the unit unsupervised.
iBefore moving or transporting the unit:
a) Detach the unit from the anchoring device.
b) Remove all objects from the shelves that are heavy or might fall off.
b) The unit must be handled by at least 2 persons.
c) To lift the unit, use both of your hands and bend your nees, not your bac s.
iMa ing any modification to the unit will void the warranty on it.
RTA-BC19
P.16 P.16

Other RTA Indoor Furnishing manuals

RTA Báltica BLW1459 User manual

RTA

RTA Báltica BLW1459 User manual

RTA Techni Mobili RTA-B005 User manual

RTA

RTA Techni Mobili RTA-B005 User manual

RTA BLM4057 User manual

RTA

RTA BLM4057 User manual

RTA FLAMENCO CHP4302 User manual

RTA

RTA FLAMENCO CHP4302 User manual

RTA BMP4458 User manual

RTA

RTA BMP4458 User manual

RTA LaBelle User manual

RTA

RTA LaBelle User manual

RTA AVM-005 User manual

RTA

RTA AVM-005 User manual

RTA MEW2973 User manual

RTA

RTA MEW2973 User manual
RTA BLW2330 User manual

RTA

RTA BLW2330 User manual
RTA LETO User manual

RTA

RTA LETO User manual

RTA EDP5825 User manual

RTA

RTA EDP5825 User manual

RTA BILBAO EMW4284 User manual

RTA

RTA BILBAO EMW4284 User manual

RTA PRUNUS BAR CABINET User manual

RTA

RTA PRUNUS BAR CABINET User manual

RTA Techni Mobili RTA-1460 User manual

RTA

RTA Techni Mobili RTA-1460 User manual

RTA MEW 2972 User manual

RTA

RTA MEW 2972 User manual

RTA Techni Mobili RTA-B018 User manual

RTA

RTA Techni Mobili RTA-B018 User manual

RTA Techni Mobili RTA-00397B User manual

RTA

RTA Techni Mobili RTA-00397B User manual

RTA ALCAMO VLE2088 Operation instructions

RTA

RTA ALCAMO VLE2088 Operation instructions

RTA Athina MBR2439 User manual

RTA

RTA Athina MBR2439 User manual

RTA Monarca MNG4962 User manual

RTA

RTA Monarca MNG4962 User manual

RTA RLA 2674 User manual

RTA

RTA RLA 2674 User manual

RTA AXIS User manual

RTA

RTA AXIS User manual

RTA Techni Mobili RTA-8407 User manual

RTA

RTA Techni Mobili RTA-8407 User manual

RTA Techni Mobili RTA-3841SU User manual

RTA

RTA Techni Mobili RTA-3841SU User manual

Popular Indoor Furnishing manuals by other brands

Beurer BS 69 Instructions for use

Beurer

Beurer BS 69 Instructions for use

Niche Flip Flop FF2822 Series Assembly instructions

Niche

Niche Flip Flop FF2822 Series Assembly instructions

LeGer Home Loana 2 Assembly instructions

LeGer Home

LeGer Home Loana 2 Assembly instructions

Stressless Sam Safety and operating instructions

Stressless

Stressless Sam Safety and operating instructions

Style selections 143654W-DS user manual

Style selections

Style selections 143654W-DS user manual

Glas Italia I MASSI MENSOLE Assembling and use instruction

Glas Italia

Glas Italia I MASSI MENSOLE Assembling and use instruction

TEMPLE & WEBSTER Ruben SBSRDONT Assembly instructions

TEMPLE & WEBSTER

TEMPLE & WEBSTER Ruben SBSRDONT Assembly instructions

BLACK RED WHITE MARSELLE B161-LOZ140x200 manual

BLACK RED WHITE

BLACK RED WHITE MARSELLE B161-LOZ140x200 manual

LumiSource BOOMCHAIR SVC owner's manual

LumiSource

LumiSource BOOMCHAIR SVC owner's manual

ASH & EMBER Capri 899607 user manual

ASH & EMBER

ASH & EMBER Capri 899607 user manual

iRIZE K-240 installation guide

iRIZE

iRIZE K-240 installation guide

antoniolupi AL Studio MODULO6 installation manual

antoniolupi

antoniolupi AL Studio MODULO6 installation manual

Mincey Marble Manufacturing FR-03 installation instructions

Mincey Marble Manufacturing

Mincey Marble Manufacturing FR-03 installation instructions

Rauch M2593 Assembly instructions

Rauch

Rauch M2593 Assembly instructions

Astonica 50104074 instruction manual

Astonica

Astonica 50104074 instruction manual

Wholesale Interiors 5018 Assembly instructions

Wholesale Interiors

Wholesale Interiors 5018 Assembly instructions

REV.247 REV1200 Assembly manual

REV.247

REV.247 REV1200 Assembly manual

Monarch Specialties I 3464 Assembly instructions

Monarch Specialties

Monarch Specialties I 3464 Assembly instructions

manuals.online logo
manuals.online logoBrands
  • About & Mission
  • Contact us
  • Privacy Policy
  • Terms and Conditions

Copyright 2025 Manuals.Online. All Rights Reserved.