Copyright © 2010 Ruckus Wireless, Inc.
Published September 2010, Part Number 800-70295-001 REV A
STEP 4: CUSTOMIZE THE WIRELESS SETTINGS
1On the Web interface menu, click Configuration > Wireless.
The Configure::Wireless::Common options appear.
2Verify that the following options are active:
•Channel: SmartSelect
•Country Code: If you are not located in the United
States, select your current country.
3Click Update Settings if you made any changes.
4Click any of the eight “Wireless #” tabs.
5In Wireless Availability, click Enabled.
6Delete the text in the SSID field, and then type the name
of your network. If your network does not have a “name,”
type a short name that will help your users identify the AP
in their wireless network connection application.
7Click Update Settings to save your changes.
8Repeat Step 4-7 for each Wireless # interface that you
want to enable.
9Click Logout to exit the Ruckus Web Admin interface.
10 When the Web Admin login page reappears, you can exit
your browser.
11 Disconnect the AP from the computer and from the cur-
rent power source, and then restore your computer’s origi-
nal network settings.
STEP 5: RESTORE YOUR COMPUTER’SNETWORK
SETTINGS
1Click Start > Settings > Network Connections.
(If Windows 7, click Start > Control Panel > Network and
Sharing Center > Change Adapter Settings.)
2When the Network Connections window appears, right-
click the icon for the “Local Area Connection” and choose
Properties.
3When the Local Area Connection Properties dialog box
appears, select Internet Protocol (TCP/IP) from the scroll-
ing list, and click Properties.
The TCP/IP Properties dialog box appears.
4Replace the recent AP connection entries with the entries
from your original network configuration.
5Click OK to save your settings and exit first the TCP/IP
Properties dialog box, then the Local Area Connection
Properties dialog box.
Your computer is now ready for normal network use.
STEP 6: MOUNT THE AP TO THE WALL
1Remove the outlet box cover from the outlet box.
2Align the mounting bracket with the outlet box so that the
two screw holes line up, and pull the Ethernet cable
through the center of the mounting bracket.
3Affix the mounting bracket to the outlet box using the two
mounting screws provided.
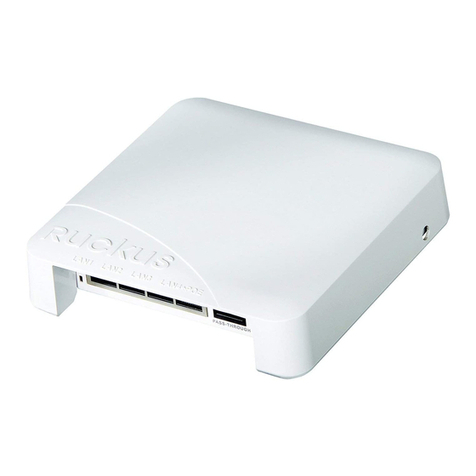
4Connect the uplink Ethernet cable to the PoE In LAN 5 /
Uplink port on the rear of the AP. Alternatively, if an RJ-45
connector is not used, you can connect PoE wiring directly
to the punch-down block.
5Verify that the Power and LAN 5 LEDs are lit.
6Bundle or coil any excess wiring so that it does not pro-
trude or impede AP placement.
7Snap the AP onto the mounting bracket by hooking the
two locking tabs on one side of the mounting bracket into
the two cutouts in the plastic housing on one side of the
AP, then push the other side of the AP in toward the wall
until it snaps in place.
You have completed the physical installation.
STEP 7: VERIFY THE INSTALLATION
1Using any wireless-enabled computer or mobile device,
search for and select the wireless network you previously con-
figured.
2If you can connect, open a browser and link to any public
Web site.
Congratulations! Your wireless network is active and ready for
use.
FOR MORE INFORMATION
Refer to the ZoneFlex 7025 User Guide for more detailed
configuration and management information.
Default AP Settings (For Your Reference)
Network Names (SSIDs) Wireless1—Wireless8
Security (Encryption
method)
Disabled for each wireless
interface
Default Management IP
Address
192.168.0.1
IF YOUR COMPUTER CANNOT CONNECT TO THE AP
• Disconnect the AP from the power source, wait 5 seconds,
then reconnect it—and wait 60 seconds before attempting a
reconnection.
• Disconnect and reconnect the AP and the computer.
• Replace the Ethernet cable with a new one if the relevant
LAN port LED is not illuminated. (LEDs in each port light up
during a successful connection.)
OPTIONAL: IF YOU WANT TO SWITCH FROM DHCP
(DEFAULT)
A. On the menu, click Configuration > Internet.
B. Click the Static IP option.
C. Fill in the IP Address and Mask fields.
D. Click Update Settings to save your changes.
OPTIONAL: TO ENABLE/DISABLE LAN PORTS
E. On the menu, click Configuration > LAN Ports.
F. Click the check boxes next to the ports you want to enable;
uncheck the boxes next to the ports you want to disable.
G. Segment traffic entering LAN ports into VLANs, if needed.
H. Click Update Settings to save your changes.
BEFORE YOU BEGIN: Ensure that you have a Cat5e or better
Ethernet cable supplying PoE power and LAN connectivity
running to the outlet box where the AP will be installed.
Rear view
RJ45 Punch-down
block
PoE In
110
