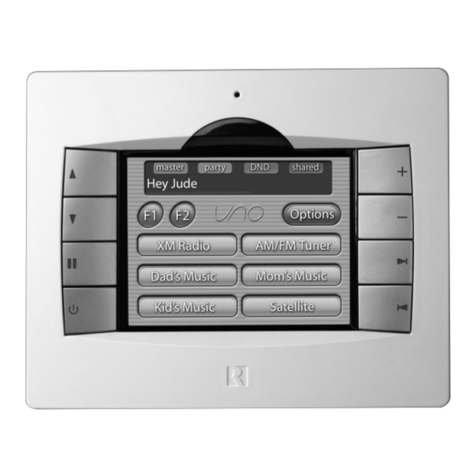
Russound Sphere E Series User manual

8.4” Color Touchscreen
TSV-E5 Premier products for Russound
Sphere™ Certified Professionals
E-Series
Installation Manual

2Russound TSV-E5 Installation Manual
The lightning flash with arrowhead symbol, within an
equilateral triangle, is intended to alert the user to the
presence of uninsulated 'dangerous voltage' within the
product’s enclosure that may be of sufficient magnitude to
constitute a risk of electric shock to persons.
The exclamation point within an equilateral triangle
is intended to alert the user to the presence of important
operating and maintenance (servicing) instructions in the
literature accompanying the appliance.
POWER CORD NOTICE FOR INTERNATIONAL OPERATION:
For 240V, 50Hz operation please select the power cord for your
area. Select the plug for your area at one end and a IEC320
connector at the other. It is not necessary to make any other
changes. If you have any questions, please call Russound at
1.800.638.8055 or 603.659.5170.
Safety Instructions:
For your safety, please read and follow these precautions
before installing or using this product:
Read instructions. Read and understand all the applicable1.
instructions before installing or operating the product.
Retain instructions. Keep this manual in a convenient2.
place for reference.
Heed warnings. Be aware and heed all warnings on the3.
product and in the instructions.
Follow instructions. Install and use this product only as4.
described in the instructions. Don’t try to use this product
in ways it wasn’t designed for.
Use indoors only. Don’t expose this product to the5.
weather or harsh environmental conditions such as
continuous sunlight, excessive humidity, or rain.
SAFETY INSTRUCTIONS
Keep product dry. Don’t use the product near water; for6.
example, near a bathtub, washbowl, kitchen sink, laundry
tub, in a wet basement, or near a swimming pool. Also,
do not handle the product when your hands are wet or
damp.
Mounting options. This product should be mounted7.
to a wall, desk stand, or VESA compliant mount as
recommended by the manufacturer.
Avoid heat. Locate the product away from heat sources8.
such as radiators, heat registers, stoves or other
appliances (including amplifiers) that produce heat.
Maintain ventilation. Locate the product so as not to9.
interfere with its proper ventilation. Don’t use the product
on a bed, sofa, rug, or similar surface that may block the
ventilation openings, or in a bookcase or cabinet that may
impede the flow of air through the ventilation openings.
Spacing of 1-2 inches above and below the unit should
be sufficient.
Use the right power source. Don’t connect the product
10.
directly to electrical line voltage. Use only the power
adapter provided with the product, described in the
operating instructions, or as marked on the product.
Ground product properly. Make sure the product’s means11.
of grounding or polarization is not defeated.
Cable protection. Cables should be routed so that they12.
are not likely to be walked on or pinched by items placed
upon or against them, paying particular attention to
cords at wall ports and the point where they exit from
the appliance.
Non-use Periods. The power cord of the appliance should13.
be unplugged from the outlet when left unused for a long
period of time. To remove all power (supply mains) from
the appliance, remove the plug from the wall outlet.
Keep product clean. From time to time, wipe off the14.
product with a clean soft cloth. Don’t use abrasive
materials, thinners, alcohol or other chemical solvents or
materials. Spray the cleaner on the cloth, not directly on
the unit.
Avoid spills and foreign objects. Make sure liquids and
15.
objects don’t get into the product enclosure through any
openings, or around the buttons on the face of the unit.
Get professional service. Have the product serviced only16.
by qualified service personnel when:
The cables or the plug has been damaged•
Liquids have spilled or objects have fallen into the•
product
The product doesn’t appear to operate normally•
The product is damaged•
Don’t attempt to service the product yourself. Doing so will
void the warranty.
Precautions:
Power – WARNING: BEFORE TURNING ON•
THE POWER FOR THE FIRST TIME, READ THE
FOLLOWING SECTION CAREFULLY.
Do Not Touch The Unit With Wet Hands – Do not handle•
the unit or power cord when your hands are wet or damp.
If water or any other liquid enters the unit’s cabinet, take
it to a qualified service person for inspection.
Location of Unit – Place the unit in a well-ventilated•
location. If ventilation is blocked, the unit may overheat
and malfunction. Do not expose the unit to direct sun
light or heating units as the unit internal components
temperature may rise and shorten the life of the
components. Avoid damp and dusty places.
Care – The TSV-E5 screen area is a touch sensitive•
LCD (liquid crystal display) screen. It is important to
take proper care of the screen to maintain the best
image contrast and color viewing for the product’s
life. Do not use sharp objects to touch the screen.
To clean the touchscreen, periodically wipe off the
front panel with a soft, dry cloth. Do not use rough
material, thinners, alcohol or other chemical solvents
or cloths since this may damage the finish.
If you have any questions, call Russound at 1.866.888.7466
or 603.659.5170.
WARNING: TO REDUCE THE RISK OF FIRE
OR ELECTRIC SHOCK, DO NOT EXPOSE
THIS APPLIANCE TO RAIN OR MOISTURE.
CAUTION: TO REDUCE THE RISK OF ELECTRIC
SHOCK, DO NOT REMOVE THE COVER. NO USER-
SERVICEABLE PARTS INSIDE. REFER SERVICING
TO QUALIFIED SERVICE PERSONNEL.

Russound TSV-E5 Installation Manual 3
TABLE OF CONTENTS
Installation
Safety Information .....................................................................................................2
Product Overview .....................................................................................................4
Install Requirements .................................................................................................5
Installation Prewiring ................................................................................................6
Front Panel Diagram.................................................................................................7
Rear Panel Diagram..................................................................................................8
Typical System Configuration.................................................................................9
System Configuration with Pass-through IR.................................................... 10
Installation Connections ....................................................................................... 11
On-wall Mounting................................................................................................... 12
Setup and Start-up ................................................................................................ 13
System Controls / Tools .................................................................................14-15
Installer Options .....................................................................................................16
Widget Creation / Configuration........................................................................ 17
Widget Creation - IP Camera ............................................................................18
Widget Creation - Favorites / Web ................................................................... 19
Operation
System Operation............................................................................................20-21
Source Control .................................................................................................22-25
Widget Information ...................................................................................................... 25
Technical Specs ........................................................................................................... 26
Warranty......................................................................................................................... 27

4Russound TSV-E5 Installation Manual
PRODUCT OVERVIEW
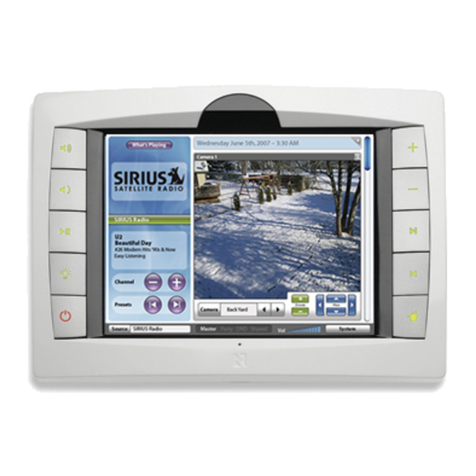
The TSV-E5 is a full-featured color touchscreen for Russound E-Series
multiroom systems. It includes a comprehensive suite of features with enhanced
source control functions and display options. Mounting options allow the TSV-E5
to be conveniently located virtually anywhere.
Intended for use as an integrated control interface for the multiroom system,
the TSV-E5 allows complete control of all sources from one location. Its display
is large enough to provide easy access to all system features, yet small enough
to fit most multiroom applications.
For maximum convenience, TSV-E5 touchscreens can be used anywhere
system keypads would be. Using Power over Ethernet (PoE), the TSV-E5
connects with a single CAT-5e cable to provide enhanced information and zone
control.
The touchscreen will also support IR commands sent with the HHR-E5 and
RFR-E5 (in local IR mode) remote controls.
The TSV-E5 offers the following features:
Large-format 8.4" (21.3 cm) color display•
Alarm Clock and Sleep Timer•
IP Camera support•
Connection via single CAT-5e cable•
Remote IR receiver input•
IR pass-through connection with second CAT-5e cable (wall mount only)•
Optional plasma filter•
Unique to the TSV-E5:
Can display digital video feeds from IP-based cameras•
In conjunction with the SMS3, you can add, change, or delete selections•
from pre-existing themes, as well as change the ratings to play songs
more or less often
A number of web widgets to show news, weather and sports•
Very little configuration to function as soon as it is powered up with a•
previously configured ACA-E5 system
Considerations
Images from several models of IP-based cameras can be viewed and
controlled from the TSV-E5. They can be also assigned to two doorbell events
enabling the user to view images from the camera when a doorbell is pressed.
There is a system limit of 4 IP cameras, with no more than two camera widgets
displayed per TSV-E5.
To utilize the pass-through IR signals the TSV-E5 will need to be connected
to the keypad port corresponding to its assigned zone. If there is another keypad
on that same zone a Russound SA-ZX3 splitter must be used. Pass-through IR
signals and an exterior IR receiver are only available if the TSV-E5 is mounted
on the wall.
The ACA-E5 must be fully programmed and configured with the SCS-E5
software BEFORE initializing the TSV-E5. A DHCP router with a NAT/Firewall
must be utilized as the network connection, and it should also have an outside
internet connection to allow for system updates and support.
New terms
Widget: A widget is a means of having information or controls in a convenient
one touch tool. Common examples of widgets include weather guides, news
feeds, sports score trackers, clocks, and system controls, as well as a means of
monitoring your IP cameras. The TSV-E5 has a select group of widgets available
to be configured on the home screen.
Ferrite Bead: Keeps any signal noise or interference from traveling down
the cable and affecting adjacent equipment. The included ferrite bead must be
attached to the CAT-5e cable close to the connection with the TSV-E5.
PoE: Power over Ethernet technology allows power for the touchscreen to be
carried over a single CAT-5e cable. The power supply can be located anywhere
between the router and the TSV-E5, wherever a suitable AC outlet is available.
One PoE power supply is included and required for each TSV-E5 in operation.
The maximum distance between the router and the TSV-E5 is 250' (76.2 m), and
includes the connection to the PoE power supply.

Russound TSV-E5 Installation Manual 5
INSTALLATION REQUIREMENTS
Installation Requirements
Prior to installation of the TSV-E5, plan for the following:
Cabling
CAT-5e cable for system control and information (a pre-finished stranded•
cable with RJ-45 termination is suggested for best operation for non wall-
mounted options between the wall port and TSV-E5)
Optional: CAT-5e cable for IR pass-through from remote controls to•
sources (on-wall mounting only)
Optional: Shielded 4-conductor, 2-twisted-pair signal cable for connecting•
a remote IR receiver (on-wall mounting only)
Local network
DHCP (Dynamic Host Configuration Protocol) Router with NAT/Firewall -•
should be 100 Base T or greater speed - gigabit recommended
The network router must have enough ports to provide one for each•
TSV-E5, the ACA-E5, all IP cameras, and any other IP addressed devices
on the system - the router can be expanded with the addition of a multiport
switch
Power
An AC receptacle at the router for the included 48-volt PoE power supply•
(1 for each TSV-E5)
Note: The power supply is not IEEE 802.3af compliant.
Location
The TSV-E5 should be located where it would be most convenient for the
user to view and use. For most users, a wall-mounted unit would typically be at
standard thermostat height of 58-60" (1.5 m). Additional mounting options are
available.
The body of the TSV-E5 extends beyond each edge of the back box. Refer to
the placement detail at right for dimensions. An open space above and below
the unit shall be left unobstructed to provide proper ventilation for the unit.
During operation the back of the touchscreen will be warm to the touch. This is
normal and does not indicate a product malfunction.
Placement Dimensions
(Minimum Clearance)
Back Box
TSV-E5
Clearance for ventilation
2"
(5 cm)
2" (5 cm)
1.75" (4.4 cm)
1.25" (3.2 cm)
2"
(5 cm)
Clearance for ventilation
1" (2.5 cm)

6Russound TSV-E5 Installation Manual
INSTALLATION
Prewiring
The TSV-E5 uses one CAT-5e Ethernet cable for all zone and system
functions. A second CAT-5e cable can be connected to pass IR signals to source
equipment and other devices such as lighting and environmental controls. This
option is only available for a wall-mounted TSV-E5.
Important: The total length of the control CAT-5e cable(s) between the
TSV-E5 and the router can not exceed 250' (76.2m)
Run a CAT-5e cable from the router to the PoE power supply, then to the1.
location of the TSV-E5. If using IR pass-through, run a second CAT-5e
cable from the system controller to the touchscreen location.
To use a remote IR receiver with the TSV-E5, run shielded 4-conductor,2.
2-twisted-pair signal cable from the IR receiver to the touchscreen. (This
option is only applicable with the in-wall mounting option.)
Label all cables at both ends to identify them.3.
For a desktop or VESA mounted installation, run the CAT-5e cable from4.
the router to an RJ-45 wall plate near the touchscreen location.
Note: When running CAT-5e and signal cables, avoid AC power wiring. If you
have to run the cables parallel to electrical wiring, space the cables more than
12" (0.3 m) from the AC power lines.

Russound TSV-E5 Installation Manual 7
FRONT PANEL
Note: The screen will time out (go black) after a period of non-use
(1 hour). Touch the screen or press the 'Light' button to restore.
Front Panel Features / Functions
Plus
Function varies with active source
Minus
Function varies with active source
Previous
Chooses previous selection on
active source
Next
Chooses next selection on
active source
Home
Displays and toggles the Source
and Widget Home Screen views
Volume Up
Raises the audio volume
in the zone
Volume Down
Lowers the audio volume
in the zone
Play/Pause
Toggles between playing and
pausing or muting the active source
Light
Cycles through the screen
brightness settings: High, Medium,
Low, and Off. (When screen is
'Off' press the button or touch the
screen to restore)
Power
Turns the touchscreen and zone on
or off; also turns all zones on or off
when pressed and held
IR Receiver
Receives infrared signals from remote controls and
passes them to the controller and sources
Display
Full-color touchscreen
Link Light (behind bezel)
Green LED indicates valid network connection
Activity Light (behind bezel)
Red LED indicates network activity
Reset Button (behind bezel)
Resets the TSV-E5
Now Playing Source Info
Current selection and source control
'Source' Home screen view
Allows easy access to sources

8Russound TSV-E5 Installation Manual
REAR PANEL
Rear Panel
Note: The rear metal housing of the TSV-E5 may feel
warm to the touch. This is normal and does not indicate a
product malfunction.
STAT US
SIGNAL
GND
+12V
IR
Receiver
Ethernet/Power
IR Passthrough
Made in China
IR Receiver Connector
Socket for included screw-
terminal block for connecting an
external IR receiver
IR Pass-through Connector
RJ-45 jack for connection to a zone keypad port on the controller; used
for passing IR signals to source components
Ethernet/Power Connector
RJ-45 jack for connection to the PoE power
supply; delivers both power and data
Vents – provides ventilation
and cooling for the unit
Bracket Mounting Slots
Insert mounting bracket
tabs into slots and push unit
down to lock in place

Russound TSV-E5 Installation Manual 9
TYPICAL INSTALLATION
TSV-E5 connection diagram
(Typical configuration)
ACA-E5 Multizone Controller
RJ-45 Patch Cable
RJ-45 Patch Cable
or CAT-5e Cable
CAT-5e Cable
DHCP Router with
NAT/Firewall
RJ-45 Patch Cable
Internet
TSV-E5 Touchscreen PoE Power Supply
STATUS
SIGNAL
GND
+12V
IR
Receiver
Ethernet/Power
IR Passthrough
Made in China
CAT-5e Cable
TSV-E5 Touchscreen
IP Camera
IP Camera
CAT-5e Cable
PoE Power Supply
STATUS
SIGNAL
GND
+12V
IR
Receiver
Ethernet/Power
IR Passthrough
Made in China
Note: The total length of the control CAT-5e cable(s) between the
TSV-E5 and the router can not exceed 250' (76.2m). The length of
the CAT-5e cable between the router and the ACA-E5 can not exceed
250' (76.2m).

10 Russound TSV-E5 Installation Manual
WALL MOUNTED INSTALLATION WITH IR PASS-THROUGH
TSV-E5 connection diagram
(Wall Mount with optional IR Receiver and IR pass-through)
STATUS
SIGNAL
GND
+12V
IR
Receiver
Ethernet/Power
IR Passthrough
Made in China
DHCP Router with NAT/Firewall
PoE Power Supply
858 IR Receiver
TSV-E5 Touchscreen
ACA-E5 Multizone Controller
RJ-45 Patch Cable
RJ-45 Patch Cable or CAT-5e Cable
CAT-5e Cables
Shielded 2-Pair Cable
Note: The total length of the control CAT-5e cable(s) between the
TSV-E5 and the router can not exceed 250' (76.2m). The length of
the CAT-5e cable between the router and the ACA-E5 can not exceed
250' (76.2m).

Russound TSV-E5 Installation Manual 11
INSTALLATION
Connections
Note: Before making any connections, make sure the multiroom system is
powered off.
Important: For each CAT-5e cable, crimp an RJ-45 connector on each end of
the cable, following the T568A standard. The total length of the control CAT-5e
cable(s) between the TSV-E5 and the router can not exceed 250' (76.2m)
CAT-5e cable -- TSV to PoE power supply
Connect one end of the cable to the Ethernet/Power jack on the TSV-E5. (If
using a wall plate for a desktop or VESA installation, use a single pre-terminated
stranded CAT-5e cable between the TSV-E5 and the wall plate.) Plug the other
end of the cable into the PoE power supply’s DATA/PWR jack. At the TSV-E5
end of the cable, snap the included ferrite bead around the cable 2" (5 cm) from
the connector as shown in the instructions on page 12.
CAT-5e cable -- PoE to router
Connect one end of a CAT-5e cable to the DATA jack on the PoE power
supply, and the other end to an available port on the router.
CAT-5e cable -- Router to ACA-E5
Connect one end of a CAT-5e cable from an available port on the router, and
the other end to the Ethernet port of the controller. Cable should not exceed
250' (76.2m). The master ACA-E5 must be connected to the same router that
the PoE power supply is connected.
Note: In a multi-controller setting, there should only be one master ACA-E5
in the installation.
CAT-5e cable -- IR pass-through
If using an IR pass-through CAT-5e (or CAT-5) cable, plug it into the zone
keypad jack on the system controller corresponding to the zone in which the
TSV-E5 is located. Cable should not exceed 250' (76.2m). If there is also a
keypad plugged into that zone on the controller, an SA-ZX3 splitter must be
used.
IR Signal cable
To connect a remote IR receiver, connect the signal cable wires to the screw
terminals on the IR receiver connector as shown. Use one twisted pair for voltage
and ground, and the other twisted pair for IR signal and status. After connecting
the wires, plug the connector into the socket on the rear of the TSV-E5.
Connect the other end of the signal cable to the leads or terminals of the
IR receiver according to its installation instructions. Leave the cable shield
disconnected at the IR receiver.
Note: When using an external IR receiver, you should disable the touch-
screen’s internal IR receiver to avoid conflicting signals. Select the Enable/
Disable IR screen in Installer Options accessible from the System Screen, then
press 'Disable'. A confirmation message will appear.
Power cord (PoE Power Supply)
Plug one end of the power cord into the IEC receptacle on the PoE power
supply and the other end into an AC wall receptacle, surge protector, or power
conditioner.
RJ-45 Using T568A
Wiring Standard
WHITE
GREEN
BLACK + SHIELD
RED

12 Russound TSV-E5 Installation Manual
INSTALLATION
On-Wall Mounting
The TSV-E5 comes with a mounting bracket, ready to mount to a 3-gang wall
box. To mount the touchscreen on the wall:
Install a UL/CSA-approved 3-gang (53 ci.) plastic wall box where you1.
want to install the touchscreen, with the applicable cable(s) pulled into
the box. See detail on page 5 for clearance dimensions. Allow 3" (7.5 cm)
above and below, and 2" (5 cm) on both sides.
Attach the mounting bracket to the wall box with the four screws provided,2.
making sure the locking tab is at the top.
Approximately 2" (5 cm) from the RJ-45 plug, close the ferrite bead around3.
the data/power cable, making sure the locking tabs are fully engaged.
Connect the cable(s) to the touchscreen. Tuck any excess into the wall4.
box.
Engage the slots on the rear of the touchscreen with the hooks on the5.
mounting bracket and press down until the locking tab secures the
touchscreen in place.
To remove the touchscreen, use your finger to reach over the top of the unit
and press the locking tab back toward the wall. Lift the touchscreen off the
mounting bracket.
The ferrite bead needs to be
fully closed around cable with
locking tabs engaged.
Ferrite Bead
CAT-5e Cable
Wall Mount Assembly
Wallboard 3-Gang Wall Box
Locking Tab
Mounting Bracket
Touchscreen
Mounting Bracket Rear of Touchscreen
Touchscreen Bezel Removal: You will need a flat
screwdriver to remove the bezel from the front of an
installed touchscreen. Place the screwdriver blade in
the slot between the bezel and the molding, located
below the “R” on the bottom edge of the bezel.
Twist the blade until you see the bezel locking tabs
releasing from the frame catch. The bezel can now
be lifted from the touchscreen. To replace the bezel,
center it over the front of the touchscreen and press
firmly until the bezel clicks into place.

Russound TSV-E5 Installation Manual 13
INSTALLATION
Setup Preparation
Use the SCS-E5 programming software to complete the system controller and
source setup BEFORE powering up the TSV-E5. Check for the latest firmware
versions of RNET source components by logging into the Doc Center at
www.russound.com. E-series component firmware updates are available at www.
russoundsphere.com. Perform any applicable updates to the system BEFORE
continuing with the TSV-E5 setup.
Use the widget information worksheet at the back of this manual to record
IP addresses for cameras or other IP devices accessed by the TSV-E5. IP
cameras must have static addresses assigned to them. Also note any applicable
information about the web widgets configured on the touchscreen.
Initial Startup
After connecting and mounting the TSV-E5, turn the system controller on.
The TSV-E5 will first display a Russound main screen with a progress bar at
the bottom. If the TSV-E5 cannot establish a network connection, it will display
'Searching for controller' and will continue trying to connect.
After booting up, the TSV-E5 will search the network for the system controller.
If the TSV-E5 cannot find the controller, it will display an error message and try
again. You will see a progress bar at the bottom of the screen as the TSV-E5 is
loading system information.
After locating the system controller, the default Zone Assignment screen
will appear on the display. Touch the appropriate name/number to assign the
TSV-E5 to a zone on the system, and press 'Set'. The TSV-E5 will continue the
pairing process and will then finish by turning the zone off. Press the 'power'
button to turn the zone on to continue with the setup.
Setup
Touch the 'System' button on the bottom bar to access the system screen.
This screen provides several tools for selecting system options and setting up
features.
Note: There is an slight color change on the button when the touchscreen
recognizes a touch.
IP Address
After the installer verifies all sources are present on the source screen, the
following sequence is recommended to continue the setup:
IP camera widget creation and doorbell assignment if applicable1.
Widget creation - choose widgets to appear on each TSV-E52.
Home screen configuration - move widgets to desired layout on screen3.
Test system controls (Sound Controls, Alarm Clock, Modes)4.
Explain operation to the users5.
The following pages will give you a brief description of the elements available
on the System screen and then how to add widgets to the home screens.
System Screen
Press to view
system screen

14 Russound TSV-E5 Installation Manual
SYSTEM CONTROLS / TOOLS
System Controls and Tools
All system controls and settings are accessible from the 'System' button on
the lower right corner of the screen.
Modes
Touch the appropriate mode button to set the mode. The state will be visible
on the system bar at the bottom of the screen.
Master—Starts a party and sets this TSV-E5 as the master, or moves master
control of the system from another keypad or touchscreen to this TSV-E5 when
in Party mode.
Party—When the system is not in Party mode, places the system in Party
mode and sets this TSV-E5 as the master. When Party mode is active, will
remove this TSV-E5 from participating in Party mode.
DND—Sets the local zone in Do Not Disturb mode.
Sound Controls
Treble and Bass—Touch '–' to decrease or '+' to increase the level.
Balance—Touch '--' to shift the balance to the left speaker or '+' to shift it to
the right speaker.
Loudness—Touch 'On' for loudness compensation or 'Off' to turn it off.
Turn On Volume—Touch '–' to decrease or '+' to increase the volume heard
when the zone is turned on.
Favorites List
The user can create a list of up to 32 favorites. These can be themes, sources,
or preset channels. Add to the list as follows:
Save a favorite - A press and hold of the 'Star' button, saves currently•
playing source, channel or theme. The keyboard will appear for name
changes if you choose. Press 'Save', and a confirmation message will
confirm the favorite is saved.
Edit or Delete favorite - Press a purple button next to the favorite's name•
and the keyboard will appear for edits to be made and saved. Pressing
the purple 'Delete' button removes it from the list.
View Favorites - Press the 'Star' button or the 'Enter' button on the•
Favorites box on the system screen.
Once the entries are in the list of favorites they can be assigned to a favorites
widget (see Widget Creation). If the list is full a favorite must be deleted before
a new one can be added.
Favorites button
Access from the
System Screen
Favorites screen

Russound TSV-E5 Installation Manual 15
SYSTEM CONTROLS / TOOLS
Snooze - Activate by touching the 'Snooze' area of the screen, the >ll hard
button or the pause button on the HHR-E5 or RFR-E5 remote control.
Turn Alarm Off - Press the 'power' hard button on the panel or the remote.
Sleep Timer
From the System screen, touch the appropriate button (15, 30, 45, 60) to set
the timer to turn off the zone. The message line above the buttons will indicate
the remaining time before the zone turns off.
System Messages
From the system screen you can see if there are any system messages.
Text above the enter button will show if there are messages to be viewed.
Press 'Enter' to access the messages. Press the 'closed envelope' to view the
message. Press the envelope icon to close the message. Press the 'Delete'
button to remove the message.
Firmware Updates
From the System page, you can check for any updates for the TSV-E5. Press
the 'Enter' button, and the system will check for updates and automatically install
them. This should be done periodically (3 month interval suggested). If there are
no new updates to install, the screen will display the message "Your TSV-E5 is
currently up to date" and display a large Exit button to press.
If there are new updates, the TSV-E5 will download and check the files, then
display a Reboot button. Press the 'Reboot' button and do not power off during
the update and reboot.
Remote Zone Control
Touch 'Enter' to access the Remote Zone Control screen. From this screen
the user can remotely power another zone on or off, change the source or adjust
the volume from the touchscreen. Press 'Close' to return to the System screen.
Alarm Clock
Touch 'Enter' in the Alarm Clock Widget to access the Alarm Clock screen
and set the alarm functions.
Alarm Setting screen
Sets alarm
volume to match
the current
volume level.
Touch for source
list when setting
'Wake To Music'
Choose options
Press green
buttons to
change values
Close window
Change volume
level
Touch for favorites
list when setting
'Wake To Favorite'

16 Russound TSV-E5 Installation Manual
INSTALLER OPTIONS
Installer Options
The installer options can be accessed by a press and hold of the Installer
Options 'Enter' button on the system page.
Screen Calibration
Calibrates the accuracy of touches on the screen. The touchscreen was
tested and calibrated at the factory. It may be necessary to recalibrate the screen
after a significant period of use. A stylus will be needed to complete the process.
Touching 'Run' will bring up the calibration screen. Follow the instructions and
upon finishing the system will automatically reset and take you back to the home
screen.
Configure TSV-E5 Zone
If it is necessary to move the TSV-E5 to another zone, this option will allow
assignment to the new zone. Press 'Zone', choose the zone and press 'Set'.
Enable / Disable IR
This option allows the internal IR receiver to be disabled or re-enabled.
The default setting is IR enabled. Press 'Enable' or 'Disable' and select the
appropriate option. A confirmation message will appear after a state change.
Support Tunnel
This allows a support tunnel to be opened to the system. Press 'Open'. A
support key is shown and should be given to the installer or support technician.
After the session is finished, press 'Close' to exit.
Note: The Factory initialization and Production tests options are shown but
are utilized at Russound prior to shipment. Performing a factory initialization will
return the TSV-E5 to its factory defaults. If you do a factory initialization, follow
the prompts to run through the tests, or skip them as appropriate. Production
tests can be utilized to troubleshoot potential hardware problems.
Saving Settings
When you have finished setting up all the TSV-E5s on the system, use the
SCS-E5 software to back up the system configuration.
In SCS-E5, you must be in Online Mode and select Complete System Backup
from the Tools menu. The TSV-E5 settings will be saved along with the controller
settings. Write down all IP addresses for the cameras or any other IP devices
that are connected to the system. Give the camera information to the user in
case the widgets are accidentally deleted.
Installer Options Screen

Russound TSV-E5 Installation Manual 17
WIDGETS - CREATION
Widgets
Widgets can be shortcuts to favorites, news and weather information,
selected RSS feeds, as well as a means of monitoring the IP cameras. Widgets
can be added or deleted from individual units or all the TSV-E5s on the system.
The home screen has two options/views: the source view or the widget view. A
repeated press of the 'Home' button will toggle between views, and the system
will remember which was the last choice. If the widget view is the desired option,
the customer may want the Home Screen configuration customized for each
TSV-E5 on the system. Keep that in consideration when adding widgets.
All widget additions, deletions, and layout configurations are accessed by first
pressing the 'System' button, then pressing 'Enter' in the Home Configuration
box.
Add Widgets - To add a widget, touch the appropriate widget type from
the list on the left. Press 'add a new version' if it appears (shows if there are
other versions of that widget type already active on the system). The widget will
appear on the active screen. Add information to configure the widget. (e.g., for
the weather widget - type in the zip code in the zip code field and then a name
to identify it). There is an option to Cancel, Save, or Save to All. The 'Save to All'
option will make the widget visible on all TSV-E5 screens on the system. The
'Save' option just adds the widget to the screen you are using.
Remove Widgets - To remove a widget from the touchscreen, touch the 'x' on
the upper left border of the widget. This will remove the widget from the home
screen, but not delete the widget type from the list.
Customize Layout - Once all of the widgets have been added to the screen,
the layout can be customized. While still in the Home Configuration, the widget
has an arrow on each border. Touch the arrows and move the widget to the
desired location. The specific home screen layout is not communicated to other
TSV-E5s. The initial layout will be any widgets that are added to all TSV's. Go to
each TSV-E5 to change that layout.
Exit Configuration Page - Press the 'Close' button at the top of the screen
to return you to the system page. The changes you made to the configuration will
be saved. Press the 'Home' button to view the widget screen.
Linked text - The web widgets may display links. Touching a link will bring up
a browser window to view more information. To return to the home screen, press
the 'Close' button on the browser window.
Home Screen Configuration
Press arrows to move widgets to desired location
Home Screen Configuration
View widget information

18 Russound TSV-E5 Installation Manual
WIDGETS - IP CAMERA SETUP
IP Camera Widget Creation
You will need the IP address information for each of the cameras. There
is a four camera limit per ACA-E5 system and a two camera widget limit per
TSV-E5.
From the System Main Screen, choose Home Screen Configuration.1.
Choose IP Camera.
Enter the name of the camera, the IP address, and choose the model from2.
the list.
Choose 'Save' or 'Save to All'. 'Save to All' will create a camera widget3.
for this camera on all TSV-E5s on the system. Once added to the system,
each camera is available in the IP camera configuration screen. You can
add or delete the camera widgets from each TSV-E5 home screen.
Repeat for all cameras. You can have up to two camera widgets on screen4.
or you can have one widget and use the arrow keys on the widget to cycle
through the cameras.
Home Screen Configuration
Add a new IP camera widget
Doorbell Cameras
Access this feature from the System screen. A widget for this camera must
already have been created. Cameras can be selected for one or both doorbell
stations. A doorbell event will cause the image from the camera to appear on
the TSV-E5 for 40 seconds. Touching the image while on screen will keep the
image there.
Choose Doorbell Camera Setup
Select Doorbell 1 or 2.1.
Choose the camera from the list.2.
Repeat for the second doorbell if applicable. Close the window.3.
Doorbell configuration (optional)
Access from the system screen
Important: Back up the ACA-E5 configuration with the SCS-E5 software
after finishing all widget and home screen configurations on the TSV-E5s in the
system.
In SCS-E5, you must be in Online Mode and select Complete System Backup
from the Tools menu. The TSV-E5 settings will be saved along with the controller
settings. When configuring the cameras, they need to have static IP addresses,
so the TSV-E5 will recognize them. Write down all IP addresses for the cameras
or any other IP devices that are connected to the system. Give the camera
information to the user in case the widgets are accidentally deleted.
The zone must have doorbell events enabled in the SCS-E5 configuration
software to allow sound and visibility of that event on the TSV. No other
programming is necessary other than the assignment of the cameras to the
doorbells above.

Russound TSV-E5 Installation Manual 19
WIDGET CREATION
Favorites Widget
Create a widget to allow quick access to your favorites. You must have
previously saved your favorite themes, channels, and presets to the Favorites
list. You can create multiple 'favorite' widgets and give them custom names (e.g.,
Dad's Favorites):
Press the 'System' button to bring up the System screen.1.
Press the 'Enter' button in the Home Configuration box.2.
Select the Favorites widget from the list at left. Press 'Add a New Version'3.
if applicable.
Touch the name box and the keyboard will appear. Name the widget and4.
press 'Save'.
Pressing 'Add a Favorite' will bring up the list of favorites. Touching an5.
item from the list adds it to the widget. Repeat as needed.
Choose from 'Save to All' or 'Save' to add the Widget to the TSV-E56.
home screen.
Favorites can be added to an existing widget by pressing the 'i' button7.
in the Home Screen Configuration screen - then pressing the 'Update'
button.
Web Widgets
Add a weather or news widget to the home screen. Choose one of the web
widgets by pressing the appropriate box. Choose selections from a dropdown
list if provided. If prompted for a name - press on the white box and the keyboard
will appear on the screen. Type in the entry and then press 'Save'. Finish with the
option in the box and press 'Save' or 'Save to All' and the widget will be placed
on the screen.
To configure the Weather widget, type the zip code in the zip code field•
then enter an identifying name.
The RSS Reader allows the user to create a custom RSS feed widget.•
Type in a name, press 'next' and then type in the full address for the
feed.
Existing widgets can be edited by pressing the 'i' button and making•
changes - then pressing the 'Update' button.
No guarantees are made for the longevity of the feed addresses. If a feed•
becomes unavailable there will be a notification on the screen.
Home Screen Configuration
Add a new favorites widget
Home Screen Configuration
Add a news feed widget

20 Russound TSV-E5 Installation Manual
SYSTEM OPERATION
Playing Music
Choose the source by pressing either one of the source buttons on the Home
Page (Source view) or the source button (lower left) and the desired source
from the list. The source will start playing and the display on the left third of the
screen will change to reflect the now playing selection. If saved as a system
Favorite, a tuner preset, theme or source can also be played by pressing the
'star' button on the lower system bar and choosing the appropriate favorite.
Source views for the RNET components can be expanded by pressing the
'Full Screen' button. This will allow searches for additional music, control of
playlists, tuning, accessing the channel guides, etc.
Power
ON
Press the 'power' button. The zone will turn on and return to the last source
playing when the zone was powered off. Source control and information will be
shown on the left third of the screen and the remaining area will show the home
screen.
ALL ON can be achieved by first turning the zone on, and then a press and
hold of the 'power' button until all enabled zones respond.
OFF
Press the 'power' button. The touchscreen and zone will turn off. If there is
another keypad or zone active on the system the power button will remain lit.
ALL OFF can be achieved by first turning the zone off, and then a press and
hold of the 'power' button until all zones respond.
Operation
Use your finger to touch any button or off-color linked text to change sources
or view information. There is an slight color change on the button when the
touchscreen recognizes a touch. A soft stylus may also be used.
A press of the 'Home' hard button (lower right) will toggle the source screen
to the widget screen. In both options the left third of the screen will show the
'Now Playing' source with applicable song information and/or control.
Source View Home Screen
Press to select source - choose from list
Press button to
select source -
selection
shows as
darker color
Other manuals for Sphere E Series
5
This manual suits for next models
1
Table of contents
Other Russound Touchscreen manuals