RUTEC VARDAFLEX Select User manual

Select
Der LED-Strip ist nur für die Installation in tro ckenen
Innenr umen geeignet.
Stromschlaggefahr!
Beauftragen Sie mit der Installation eine Elektrofach kraft.
Für Leuchten, die nicht gem ß den euro p ischen
Sicherheitsrichtlinien installiert wurden, entf llt jeder
Haftungsanspruch.
Achtung!
LED-Strip nur an geeignetes Netzger t
(24 V DC) anschließen.
Nur komplett abgerollt betreiben.
LED-Strips in Parallelschaltung verbinden.
Lieferumfang
1 x 5 Meter LED-Strip
Technische Daten
Spannungsversorgung 24 V Netzger t mit konstanter
Ausgangsspannung
Leistung 41,5 W
Stromst rke 1,73 A
Ausstrahlwinkel 120°
Anzahl LED 1200
L nge Maximal 5 Meter pro Anschluss
Abmessungen 5000 x 10 x 1,5 mm
Biegedurchmesser 60 mm
CE-konform mit den zutreffenden
europ ischen Richtlinien
Schutzklasse 3 - Schutzkleinspannung
Nur für den Innenbereich geeignet
Do not cover lamps with heat-
i
Ensure that minimum
c
Use HO3VVH2-F 2x 0.75 mm cable only
f
Use low-pressure halogen
l
The lamp is suitable for moun-
t
T
L
Protection class 3 – Low-voltage 12 V.
U
Use low-voltage traction relief (except
f
H
This is only possible with specially
m
Protection class 2 – high vol-
t
Switch off voltage prior to installation.
E
Do not touch the halogen lamp with
y
Do not cover lamps with heat-
i
Ensure that minimum
c
Use HO3VVH2-F 2x 0.75 mm cable only
f
Use low-pressure halogen
l
The lamp is suitable for moun-
t
T
L
Protection class 3 – Low-voltage 12 V.
U
Use low-voltage traction relief (except
f
H
This is only possible with specially
m
Protection class 2 – high vol-
t
Switch off voltage prior to installation.
E
DD
Carl-Zeiss-Str. 15
28857 Syke
Select_BA_81729_08/2018
Montage
Stromschlaggefahr!
Vor der Installation Spannung abschalten. Sicherstellen, dass
die Spannung nicht versehentlich wieder eingeschaltet werden
kann.
LED-Strip erst an einen Controller und dann an
das Netzger t anschließen (nicht im Lieferumfang enthalten).
Achtung!
Bei stromführenden Oberfl chen Isolierschicht zwischen
LED-Strip und Oberfl che anbringen. Ober -
fl chen müssen eben, staub- und fettfrei sowie trocken sein.
1. Oberfl che vorbereiten.
2. LED-Strip, falls erforderlich, kürzen (Bild 1).
3. Schutzfolie abziehen und LED-Strip mit leichtem
Druck anpressen, dabei nicht direkt auf die elektronischen
Bauteile drücken.
4.
LED-Strip an Spannungsversorgung anschließen.
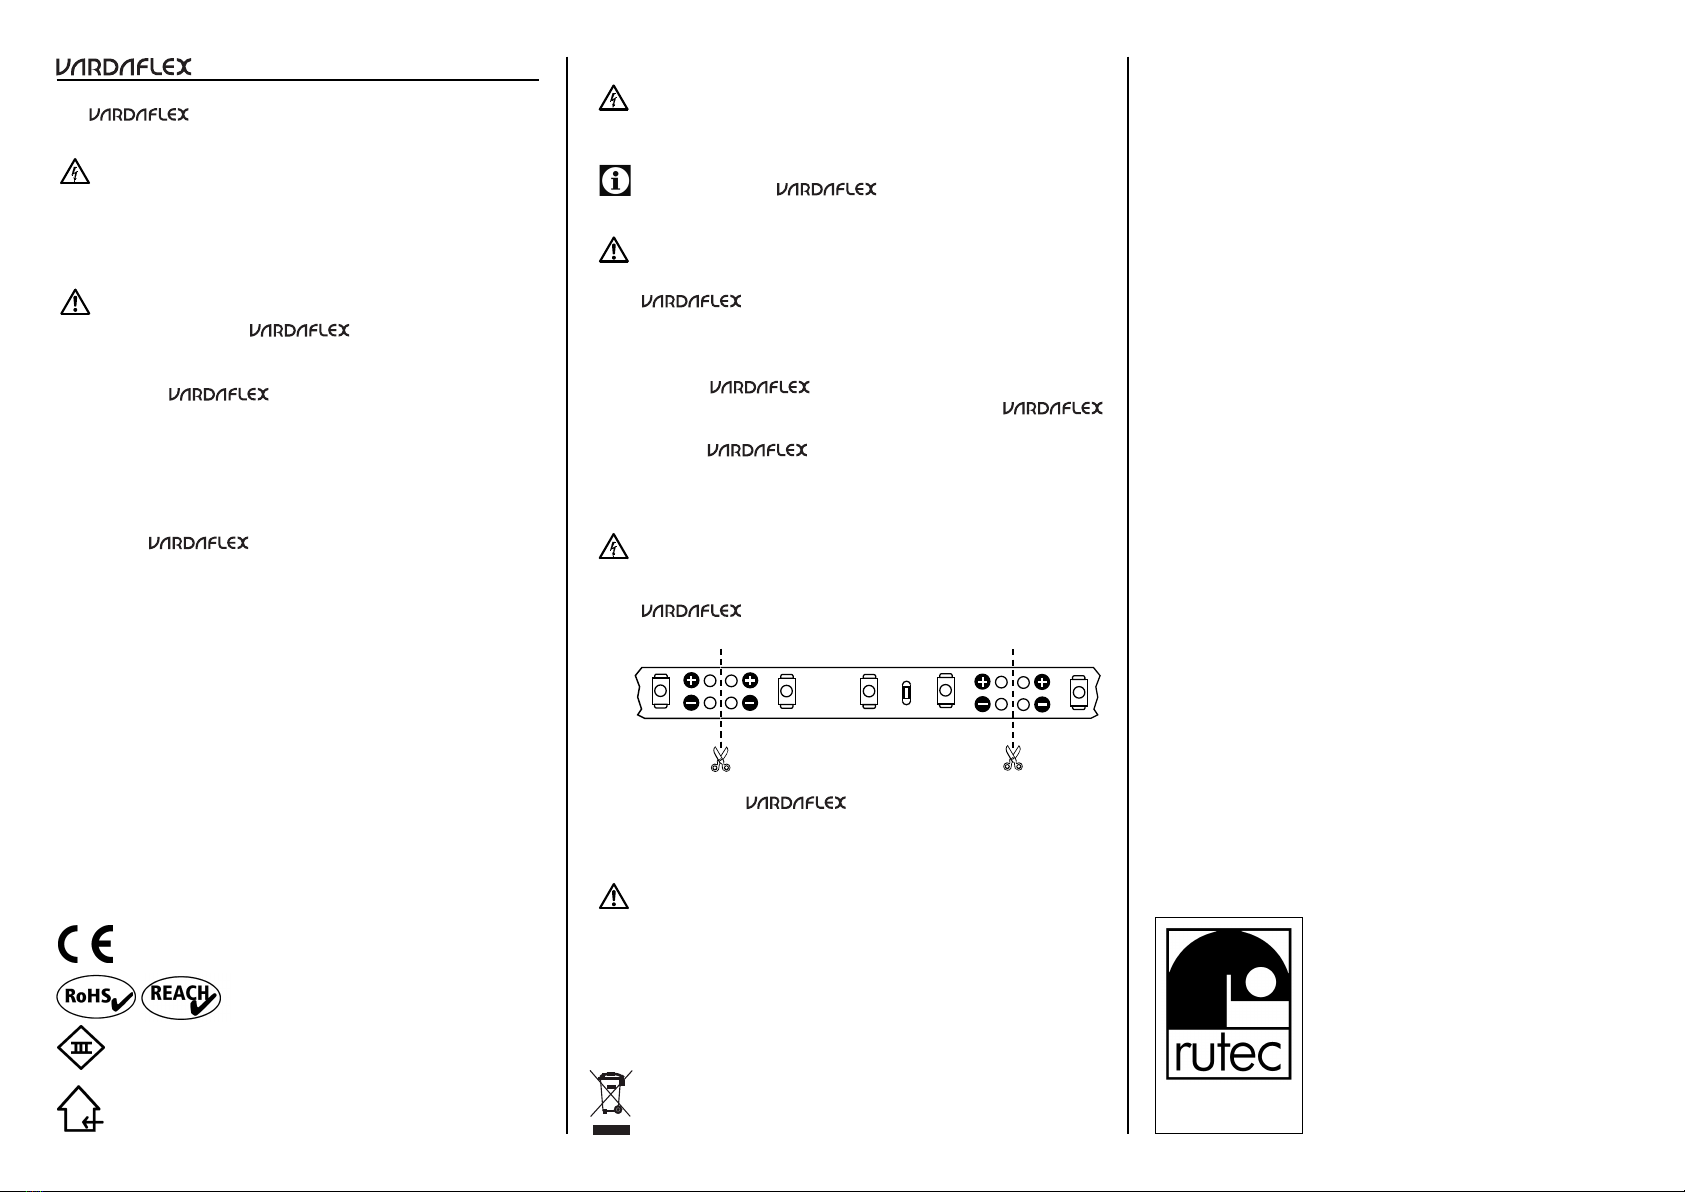
LED-Platine ürzen
Stromschlaggefahr!
Vor dem Kürzen immer spannungsfrei schalten.
LED-Strip kann jeweils nach zwölf LEDs (50 mm)
getrennt werden (Bild 1).
LED-Strip an der markierten Stelle trennen.
Bei eng bestückten LED-Strips wird ein Mikroseitenschneider
oder optional ein Cutter benötigt
!
Do not cover lamps with heat-
i
Ensure that minimum
c
Use HO3VVH2-F 2x 0.75 mm cable only
f
Use low-pressure halogen
l
The lamp is suitable for moun-
t
T
L
Protection class 3 – Low-voltage 12 V.
U
Use low-voltage traction relief (except
f
H
This is only possible with specially
m
Protection class 2 – high vol-
t
Switch off voltage prior to installation.
E
Do not touch the halogen lamp with
y
Do not cover lamps with heat-
i
Ensure that minimum
c
Use HO3VVH2-F 2x 0.75 mm cable only
f
Use low-pressure halogen
l
The lamp is suitable for moun-
t
T
L
Protection class 3 – Low-voltage 12 V.
U
Use low-voltage traction relief (except
f
H
This is only possible with specially
m
Protection class 2 – high vol-
t
Switch off voltage prior to installation.
E
Bild 1
Beispielabbildung
Achtung!
Bei Lötverbindungen beachten: Löttemperatur 260° C und
Lötdauer maximal 10 Sekunden.
Es ist ausschließlich neutral vernetztes Silikon zu verwenden
(keinesfalls essighaltiges Silikon verwenden!).
Entsorgung
Entsorgen Sie elektrische und elektronische Ger te umweltge-
recht. N here Informationen erhalten Sie bei Ihrer zust ndigen
Behörde.
Do not cover lamps with heat-
i
Ensure that minimum
c
Use HO3VVH2-F 2x 0.75 mm cable only
f
Use low-pressure halogen
l
The lamp is suitable for moun-
t
T
L
Protection class 3 – Low-voltage 12 V.
U
Use low-voltage traction relief (except
f
H
Protection class 2 – high vol-
t
Do not touch the halogen lamp with
y

Select
The LED strip
is only suitable for installation in dry
indoor rooms.
Ris of electric shoc !
Be sure to have a professional electrician complete
in stallation. There is no warranty coverage for any lights
installed without observing european safety directives.
Caution!
Only connect the LED strip to a suitable
power supply (24 V DC).
Only operate when completely unrolled.
Connect LED strips in parallel.
Delivery includes
1 x 5 metre LED strip
Technical data
Power supply 24 V power supply with constant
output voltage
Power 41,5 W
Current strength 1,73 A
Radiation angle 120°
Quantity LED 1200
Length maximum 5 metres per connection
Abmessungen 5000 x 10 x 1,5 mm
Bending diameter 60 mm
Compliant with the applicable
european CE directives
Safety class 3 - low voltage protection
Suitable for indoor use only
Do not cover lamps with heat-
i
Ensure that minimum
c
Use HO3VVH2-F 2x 0.75 mm cable only
f
Use low-pressure halogen
l
The lamp is suitable for moun-
t
T
L
Protection class 3 – Low-voltage 12 V.
U
Use low-voltage traction relief (except
f
H
This is only possible with specially
m
Protection class 2 – high vol-
t
Switch off voltage prior to installation.
E
Do not touch the halogen lamp with
y
Do not cover lamps with heat-
i
Ensure that minimum
c
Use HO3VVH2-F 2x 0.75 mm cable only
f
Use low-pressure halogen
l
The lamp is suitable for moun-
t
T
L
Protection class 3 – Low-voltage 12 V.
U
Use low-voltage traction relief (except
f
H
This is only possible with specially
m
Protection class 2 – high vol-
t
Switch off voltage prior to installation.
E
GG
Carl-Zeiss-Str. 15
28857 Syke
Installation
Ris of electric shoc !
Switch off voltage prior to installation. Ensure that voltage
cannot be accidentally switched on again.
First connect the LED strip to an controller and
then to the power supply (not included in the scope of delivery).
Caution!
On conducting surfaces, place an insulation layer between the
LED strip and surface. Surfaces must be flat, free
of dust, grease and dry.
1. Prepare surface.
2. Shorten LED strip if necessary (Fig. 1).
3. Peel off adhesive film and gently press on
LED strip, do not press directly on the LEDs.
4. Connect
LED strip
to power supply.
Shortening the LED strip
Ris of electric shoc !
Always disconnect the mains plug before shortening.
LED strip can be separated in each case after
twelve LEDs (50 mm) (Fig. 1).
Separate the LED strip at the marked position.
For a tightly assembled LED strip is a micro side cutter or an
optional cutter required.
Caution!
With soldered connections note that the soldering
tem perature is 260° C and the soldering duration a
maximum of 10 seconds per soldering point.
Only use neutral cross-linked silicon (never use silicon which
includes vinegar!).
Disposal
Dispose of electrical and electronic equipment in an
environmentally friendly manner. Please contact your local
council for further information.
Do not cover lamps with heat-
i
Ensure that minimum
c
Use HO3VVH2-F 2x 0.75 mm cable only
f
Use low-pressure halogen
l
The lamp is suitable for moun-
t
T
L
Protection class 3 – Low-voltage 12 V.
U
Use low-voltage traction relief (except
f
H
This is only possible with specially
m
Protection class 2 – high vol-
t
Switch off voltage prior to installation.
E
Do not touch the halogen lamp with
y
Do not cover lamps with heat-
i
Ensure that minimum
c
Use HO3VVH2-F 2x 0.75 mm cable only
f
Use low-pressure halogen
l
The lamp is suitable for moun-
t
T
L
Protection class 3 – Low-voltage 12 V.
U
Use low-voltage traction relief (except
f
H
This is only possible with specially
m
Protection class 2 – high vol-
t
Switch off voltage prior to installation.
E
Do not cover lamps with heat-
i
Ensure that minimum
c
Use HO3VVH2-F 2x 0.75 mm cable only
f
Use low-pressure halogen
l
The lamp is suitable for moun-
t
T
L
Protection class 3 – Low-voltage 12 V.
U
Use low-voltage traction relief (except
f
H
This is only possible with specially
m
Switch off voltage prior to installation.
E
Do not touch the halogen lamp with
y
Figure 1
example figure
Table of contents
Languages:
Other RUTEC Lighting Equipment manuals

RUTEC
RUTEC VARDAFLEX Select Ultra User manual

RUTEC
RUTEC VARDAFLEX Platin SVQ User manual

RUTEC
RUTEC VARDAFLEX Black Plus Profi User manual

RUTEC
RUTEC WARDAFLEX Wallpaper Plus User manual

RUTEC
RUTEC VARDAflex COB R-to-R Plus User manual

RUTEC
RUTEC VARDAFLEX Para UV User manual

RUTEC
RUTEC VARDAFLEX EX Outdoor 6500 K User manual

RUTEC
RUTEC VARDAflex Paket 5 RGBW User manual

RUTEC
RUTEC VARDAFLEX Select User manual

RUTEC
RUTEC VARDAFLEX Quantum Plus User manual