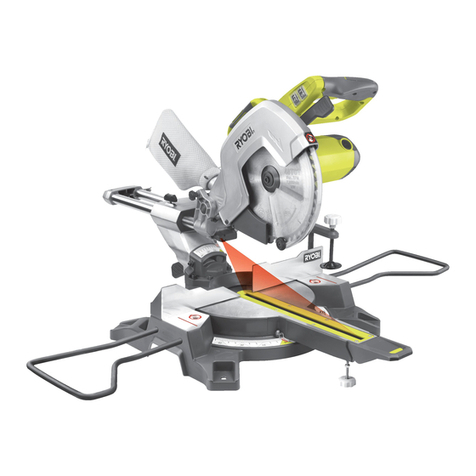
Ryobi EMS-1221 Operation manual

210MM MITRE SAW
OWNER’S OPERATING MANUAL
N197
EMS-1221
EMS-1221 manual(SAA).indd A1EMS-1221 manual(SAA).indd A1 8/6/07 2:16:52 PM8/6/07 2:16:52 PM

1
6
818 10
17
21
15
4
19
18
17 12
14
13
2
22
7
3
11
16
20
21
Fig.1 Fig.2 Fig.3
EMS-1221 manual(SAA).indd A3EMS-1221 manual(SAA).indd A3 8/6/07 2:16:58 PM8/6/07 2:16:58 PM

a
a
a
a
b
b
b
b
a x b
115 x 45mm
90
0/90
0/90 45
45
45
45
90
115 x 22 mm
80 x 40 mm
80 x 22 mm
Fig.4 Fig.5 Fig.6
Fig.7
EMS-1221 manual(SAA).indd A4EMS-1221 manual(SAA).indd A4 8/6/07 2:17:05 PM8/6/07 2:17:05 PM

4
THANK YOU FOR BUYING A RYOBI PRODUCT.
To ensure your safety and satisfaction, carefully read this
OWNER’S MANUAL and the SAFETY INSTRUCTIONS
before using this product.
DESCRIPTION
1. Trigger switch
2. Low guard lock lever
3. Bench
4. Fence
5. Arbor Bolt
6. Bevel cut adjuster
7. Lower guard
8. Saw head lock bolt
9. Flange
10. Dust port
11. Bolt holes for attachment to base
12. Saw head
13. Livetool Indicator
14. Handle
15. Spanner
16. Sleeve Wrench
17. Dust bag
18. Bevel lock button
19. Lock lever
20. Hex Wrench
21. Rear Anti-Tip
22. Extension Arm
Keep this MANUAL in a handy place and read before
operating the saw.
TECHNICAL SPECIFICATIONS
Input 240V ~ 50 Hz
Power 1200W
Safety class IP20
Tilt angle max. 45°
Speed 4500/ min
Cut depth at 90° max. 45 mm
Cut width at 90° max. 115 mm
Saw blade max. diameter 210 mm
bore 16 mm
Weight 7 kg
INSTRUCTIONS FOR SAFE HANDLING
USE:
Stationary, precise cutting of wood and wood- product of
varying lengths and shapes in a domestic environment.
The tool and accessories should be used only as
intended.
GENERAL SAFETY INSTRUCTIONS FOR USING
ELECTRIC POWER TOOLS
WARNING!
When using electric power tools, follow these guidelines
to protect yourself from electric shocks, injury and the
risk of fire.
Read and follow all these instructions before using
this electric power tool. Pay attention to the safety
instructions.
■ For safe working:
■ Keep your work area tidy.
■ An untidy work area can lead to accidents.
■ Operate tool in a suitable area.
■ Do not use electric power tools in the rain. Do not use
electric power tools in a wet or damp environment.
Ensure you have good lighting. Do not use electric
power tools close to flammable liquids or gases.
■ Protect yourself from electrical shocks.
Avoid touching earthed items such as pipes, heaters,
ovens or refrigerators.
■ Keep children away.
Do not allow other people to touch the electric power
tool or cable. Keep other people away from your work
area.
■ Keep your electric power tools safe.
Unused power tools should be stored in a dry, elevated
or locked place out of the reach of children.
■ Do not overload electric power tools.
You will work better and safer within the specified
limits.
Use the dust collector.
If you have accessories for attaching dust suction and
collection devices, make sure these are attached and
used correctly.
■ Use the correct electric power tool for the job.
Do not use low-power tools for heavy work. Use the
tool only for the intended purpose.
■ Wear suitable clothing.
Do not wear loose clothing or jewellery which
could catch in moving parts. Non-slip footwear are
recommended for outdoor work. If you have long hair,
tie it back.
■ Wear protective glasses.
Use a face mask if producing a lot of dust.
EMS-1221 manual(SAA).indd Sec1:4EMS-1221 manual(SAA).indd Sec1:4 8/6/07 2:17:09PM8/6/07 2:17:09PM

5
INSTRUCTIONS FOR SAFE HANDLING
■ Use the power cable only as intended.
Never carry the tool by its cable. Do not use the cable
to pull the plug from the power socket. Protect the
cable from heat, oil and sharp edges.
■ Secure the workpiece.
Use clamps or a vice to prevent the workpiece from
moving. This is safer than holding it by hand, and
leaves both hands free to operate the tool.
■ Take care of your tools.
Keep your accessories sharp and clean so you
can work better and safer. Follow the maintenance
instructions and tool change guidelines. Check the
power cable regularly. If it is damaged, have it replaced
by an approved specialist.
Check any extension leads and replace if damaged.
Keep handles free of oil and grease.
■ When not in use, remove the plug from the power
outlet.
■ Avoid accidental starting.
Do not carry power tools with your finger on the starter
switch, if they are connected to the mains. Make sure
that the switch is OFF when you insert the plug in the
power outlet.
■ Extension leads outdoors
If working outdoors, use only extenson leads approved
and labelled for that purpose.
■ Stay alert.
Keep an eye on what you are doing. Use
commonsense when working. Do not use electric
power tools if you concentration is wandering.
■ Check the tool for any damage.
Before continuing to use the tool, make sure that
protective devices or slightly damaged parts are
working perfectly and as intended. Check that moving
parts are working properly and are not jamming or
damaged. All parts must be mounted correctly and
work as intended so that the tool operates perfectly.
Damaged safety devices and other components must
be professionally repaired or replaced by an authorised
workshop, unless otherwise indicated in the operating
instructions.
Damaged switches must be replaced at a customer
service workshop. Do not use electric power tools if
the ON/OFF switch is not working.
WARNING
■ Use only those accessories and add-ons specified
in the user manual. The use of other attachments or
accessories can be dangerous.
■ Have your electric power tool repair by an electrical
specialist.
■ This tool has been manufactured in accordance with
current safety regulations. To avoid user accidents,
repairs should be carried out only by an electrical
specialist using only original replacement parts.
WARNING
■ Your reactions can be impaired by alcohol
consumption, medication, drugs, illness, fever and
tiredness. If any of these conditions applies, do not
use electrical power tools!
SPECIAL SAFETY INSTRUCTIONS
■ The tool must be connected to an earthed, 230 V
power outlet and have a minimum 10 A fuse.
■ Do not expose the tool to rain or damp conditions.
■ Check the condition of the tool before use.
■ Do not use saw blades made of high-alloy, high-speed
steel (HSS).
■ Do not use saw blades which do not correspond to the
specifications given in this user manual.
■ Ensure that all moving parts of the blade protector
operate without jamming.
■ Use only sharp, undamaged blades and suitable
accessories.
■ Clamp workpieces firmly before starting. Never hold
them by hand.
■ For large workpieces, use the mounts supplied.
■ Do not use flanges or flange nuts whose bore is larger
or smaller than that of the saw blade.
■ Do not use damaged or deformed saw blades.
■ Use the blade only if protective devices are on hand
and installed.
■ Replace bench inserts if worn.
■ Be careful when cutting vertically.
■ Do not slow the blade by hand.
■ Attach the tool to a stable base before use.
■ The saw head must move freely and return to its top
starting position when released.
■ Do not jam the trigger switch in position.
■ The tool must come to a halt within 10 seconds of the
switch being released.
■ In the case of dusty work, wear a face mask and
protective glasses, do not smoke and stay clear of
open fires.
■ Always attach the dust collector.
■ Warning: Use the saw blades supplied only for wood
and wood products!
Warning: Use the saw blades supplied only for
wood and wood products!
EMS-1221 manual(SAA).indd Sec1:5EMS-1221 manual(SAA).indd Sec1:5 8/6/07 2:17:09PM8/6/07 2:17:09PM

6
INSTRUCTIONS FOR SAFE HANDLING
LIVETOOL INDICATOR
When the machine is connected with the power supply,
the livetool indicator(13) always glow. If not, please
check the supply.
PREPARATION
■ The tool should always be mounted securely using bolt
holes (11) on a firm surface such as a workbench.
Warning: Use the tool only in dry, well-lit
surroundings. Pull out saw head lock bolts (8) and
guide saw head (12) up to its starting position.
■ Insert the Rear Anti-Tip(21) into the hole then use the
screw(a) to fix it.(Fig.3)
■ Insert Extension Arm(22) for large workpieces into the
left and right holes on the base then use the screw(a)
to fix it.(Fig.7)
Press the workpiece firmly against fence (4).
OPERATING INSTRUCTIONS
Fix both large and small workpieces in position. Do not
remove workpieces from the bench until the tool has
come to a stop.
SWITCHING ON
Press and hold trigger switch (1). Allow tool to reach
maximum speed. Pull lower guard lock lever (2) and
slowly bring saw head (12) to the workpiece. Use light
pressure to cut.
SWITCHING OFF
Release the switch (1) and use handle (14) to guide saw
head (12) back to its starting position.
SETTING CUT ANGLE
Switch tool OFF and remove power cord from outlet.
■ Vertical bevel cut 45°-90°/0°
Release lock lever (19) and use handle (14) to turn
bench (3) left or right, until the mark aligns over the
desired angle.
■ Horizontal bevel cut 45°-90°/0°
Slacken off lock (18) on back of tool. Swing saw head
horizontally to desired cut angle. Retighten lock.
Note: Capacity of bevel can be changed from 45~90/0
degree to 45~-10 degree by adjusting the bevel cut
adjuster(6).
CHANGING BLADES Fig.q4&5
Remove power cord from the outlet before attempting
to change the blade. Bring saw head (12) to starting
position. Remove lower guard (7) by operate the lower
guard lock lever (2), then loose screws a + b (Fig. 4) and
remove the cover.
Use the provided spanner(15) to hold the flange(9),
and use the provided sleeve wrench(16) to unscrew the
arbor bolt(5), then change the blade. Reverse steps to
remount.
TRANSPORT AND STORAGE
Remove power cord from outlet. For transport and
storage, lower the saw head (12) and lock it in that
position by inserting the saw head lock bolt(8) in the
hole.
DUST COLLECTION
Attach dust bag (17) with clamp to dust port (10).
Tip: The dust catcher will be more efficient if you empty
the bag frequently. When you finish working, wash out
the empty bag with a mild soap solution and leave to dry.
MAINTENANCE
Remove power cord from outlet. Remove dust and wood
chips regularly from under the safety cover. Keep
ventilation slits and dust outlets clear. Clean with a damp
cloth. Do not use solvents. Dry well.
SERVICE TIPS
■ Store the tool, user manual and any accessories
in the original packaging. That way you’ll have all
information and parts within easy reach.
■ To clean the housing, all you need is a damp cloth.
Never immerse electric tools in water. See user
manual for further guidelines.
■ Please provide a brief description of the fault to help
speed up fault detection and repair time. If the tool is
still under warranty, please enclose the warranty card
and sales docket.
IMPORTANT: Opening the tool will void the warranty.
To avoid transport damage, pack the tool securely or use
the original packaging.
EMS-1221 manual(SAA).indd Sec1:6EMS-1221 manual(SAA).indd Sec1:6 8/6/07 2:17:10 PM8/6/07 2:17:10 PM

4%#(42/.)#).$5342)%3!5342!,)!049,)-)4%$
'5!2!.4%%
!".
#ONTACT DURING NORMAL BUSINESS HOURS
!5#+,!.$ #LEMOW $RIVE -T 7ELLINGTON .:
#ONTACT DURING NORMAL BUSINESS HOURS
!,,!5342!,)!.%.15)2)%34%,
7%34!5342!,)!.%.15)2)%34%,
!
0URCHASED&ROM
DDRESS /F $EALER
0RESENT 4HIS &ORM 7ITH 9OUR 0URCHASE $OCKET 7HEN 'UARANTEE 3ERVICE )S 2EQUIRED
4EL &AX WWWRYOBICOMAU
4EL &REE #ALL &AX WWWRYOBICONZ
&OR YOUR RECORD AND TO ASSIST IN ESTABLISHING DATE OF PURCHASE NECESSARY FOR INGUARANTEE SERVICE
PLEASE KEEP YOUR PURCHASE DOCKET AND THIS FORM COMPLETED WITH THE FOLLOWING PARTICULARS
4HIS 'UARANTEE &ORM 3HOULD "E 2ETAINED "Y 4HE #USTOMER !T !LL 4IMES
$ATE -ODEL .O 3ERIAL .O
39$.%9"UILDING"2OSEHILL)NDUSTRIAL%STATE3HIRLEY3TREET2OSEHILL.37
4%#(42/.)#).$5342)%3!5342!,)!049,)-)4%$
4%#(42/.)#).$5342)%3.:,)-)4%$
3UBJECT TO THE GUARANTEE CONDITION BELOW THIS 2YOBI
TOOLHEREINAFTERCALLEDhTHEPRODUCTvISGUARANTEEDBY
4%#(42/.)# ).$5342)%3 !5342!,)! 049
,)-)4%$HEREINAFTERCALLEDhTHE#OMPANYvTOBEFREE
FROMDEFECTSINMATERIALORWORKMANSHIPFORAPERIODOF
MONTHSFROMTHEDATEOFORIGINALPURCHASECOVERING
BOTHPARTSANDLABOUR5NDERTHETERMSOFTHISGUARAN
TEETHEREPAIRORREPLACEMENTOFANYPARTSHALLBETHE
OPINION OF THE #OMPANY OR ITS AUTHORISED 3ERVICE
CENTRE3HOULDSERVICEBECOMENECESSARYDURINGTHE
WARRANTY PERIOD THE OWNER SHOULD CONTACT THE
CUSTOMERSERVICE(%,0,).%ORCONTACT
THERETAILERFROMWHOMTHEPRODUCTWASPURCHASED
)NORDERTOOBTAINGUARANTEESERVICETHEOWNERMUST
PRESENTTHESALESDOCKETAND'UARANTEE#ERTIFICATETO
CONFIRMDATEOFPURCHASE4HISPRODUCTISSOLDBYTHE
DEALER OR 3ERVICE CENTRE AS PRINCIPAL AND THE DEALER
HAS NO AUTHORITY FROM THE #OMPANY TO GIVE ANY
ADDITIONALGUARANTEEONTHE#OMPANYSBEHALFEXCEPT
ASHEREINCONTAINEDORHEREINREFERREDTO
'UARANTEE#ONDITIONS
4HISGUARANTEEONLYAPPLIESPROVIDEDTHATTHE0RODUCT
HASBEENUSEDINACCORDANCEWITHTHEMANUFACTURERS
RECOMMENDATIONSUNDERNORMAL USE AND REASONABLE
CAREINTHEOPINIONOFTHE#OMPANYANDSUCH
GUARAN
TEE DOES NOT COVER DAMAGE MALFUNCTION OR FAILURE
RESULTING FROM MISUSE NEGLECT ABUSE OR USED FOR A
PURPOSEFORWHICHITWASNOTDESIGNEDORISNOTSUITED
ANDNOREPAIRSALTERATIONSORMODIFICATIONSHAVEBEEN
ATTEMPTEDBYOTHERTHANAN!UTHORISED3ERVICECENTRE
4HISGUARANTEEWILLNOTAPPLYIFTHETOOLISDAMAGEDBY
ACCIDENTORIFREPAIRSARISEFROMNORMALWEARANDTEAR
4HE#OMPANYACCEPTSNOADDITIONALLIABILITYPURSUANT
TOTHISGUARANTEEFORTHECOSTSOFTRAVELLINGORTRANSPOR
TATIONOFTHE0RODUCTORPARTSTOANDFROMTHESERVICE
DEALEROR3ERVICECENTRESUCHCOSTSARENOTINCLUDED
INTHISGUARANTEE
#ERTAINLEGISLATIONINCLUDINGTHE4RADE0RACTICES
!CT AS AMENDED AND OTHER STATE AND
TERRITORIALLAWSGIVERIGHTSTOTHEBUYERANDIMPOSE
LIABILITYONTHESELLERINCERTAINCIRCUMSTANCES.OTHING
HEREINSHALLHAVETHEEFFECTOFEXCLUDINGRESTRICTINGOR
MODIFYING ANY CONDITION GUARANTEE RIGHT OR LIABILITY
IMPOSED TO THE EXTENT ONLY THAT SUCH EXCLUSION
RESTRICTION OR MODIFICATION WOULD RENDER ANY TERM
HEREINVOID
EMS-1221 manual(SAA).indd Sec1:7EMS-1221 manual(SAA).indd Sec1:7 8/6/07 2:17:11 PM8/6/07 2:17:11 PM
Table of contents
Other Ryobi Saw manuals

Ryobi
Ryobi CSB123 Quick setup guide

Ryobi
Ryobi 18V ONE+ P517 User manual

Ryobi
Ryobi P552 User manual

Ryobi
Ryobi CSB1308 User manual

Ryobi
Ryobi BT-3000 User manual

Ryobi
Ryobi P500 Configuration guide

Ryobi
Ryobi R18MS216 User manual

Ryobi
Ryobi BS904 User manual

Ryobi
Ryobi R18CS User manual

Ryobi
Ryobi BTS10S User manual

Ryobi
Ryobi ECO2335HG User manual

Ryobi
Ryobi TS1553 User manual

Ryobi
Ryobi OPS18 User manual

Ryobi
Ryobi RTS30 Configuration guide

Ryobi
Ryobi P815 User manual

Ryobi
Ryobi EMS1422LRG User manual

Ryobi
Ryobi RCS5133CB User manual

Ryobi
Ryobi TS1342LBF User manual

Ryobi
Ryobi RCS1935 User manual

Ryobi
Ryobi EMS2431SCL Instructions for use