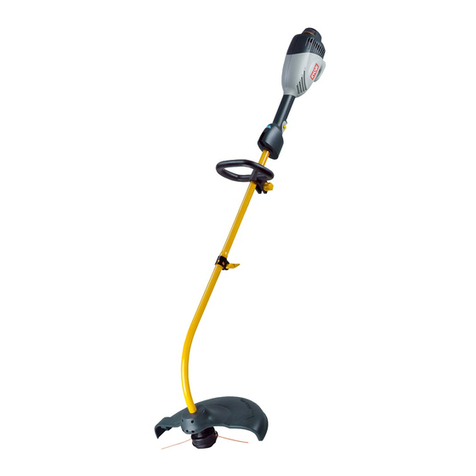
Ryobi RLT-800 Operation manual

6986295 (STD)
06-11
RLT-800

1
RLT-800
Your new line trimmer has been engineered and manufactured to Ryobi’s high
standard of dependability, ease of operation, and operator safety. Properly
cared for, it will give you years of rugged, trouble free performance. If you use
your line trimmer properly and only for what it is intended, you will enjoy years
of safe, reliable service.
ELECTRIC LINE TRIMMER
CAUTION: Carefully read through this entire owner’s
manual, pay close attention to the general
safety rules and rules for safe operation,
before using.
THANK YOU FOR BUYING A RYOBI
ELECTRIC LINE TRIMMER
Voltage ………………………………………230V~50Hz
Power input ……………………………………… 800W
Cutting blade speed………………………… 10500min-1
Cutting diameter ……………………………… 290mm
Diameter of line ………………………………… 2.0mm
Net weight ………………………………………… 3.0kg

2
SAFETY ALERT SYMBOL
Indicates danger, caution or warning.
May be used in conjunction with other
symbols or pictures.

3

SPECIFIC SAFETY RULES FOR LINE TRIMMER
1. Your line trimmer is a high-speed, fast cutting
power tool. The electrical connection and cutting
tools are potential sources of danger. Therefore,
special safety precautions must be taken to re-
duce the risk of personal injury.
2. Never allow children or people unfamiliar with
these instructions to use the line trimmer.
3. The operator or user of this line trimmer is re-
sponsible for accidents or hazards occurring to
other people or their property.
4. Keep children and bystanders away. Never trim
while people are close by.
5. Always wear proper footwear and long trousers.
6. Do not operate this line trimmer when barefoot or
wearing open sandals.
7. Never use the line trimmer with a damaged guard
or without the guard in place.
8. Never work with line trimmer while under the in-
uence of alcohol or drugs.
9. Never attempt to modify your line trimmer in any
way since it may increase the risk of personal
injury. Do not use wire or metal reinforced line.
We shall not be liable to any personal injury or
damage to property caused by a modication of
the tool.
10. Do not run with the line trimmer.
11. Only use your line trimmer for cutting grass and
weeds, never for other purposes.
12. Only use the line trimmer in daylight or strong
articial light.
13. We recommend, using a Residual Current De-
vice (RCD) with a tripping current of not more
than 30mA.
14. Use only extension cables suitable for outdoor
use, preferably with a high visibility cord. Speci-
cation as below:
For extension cables up to 15 meters, use a
wire with a cross section of 1.5mm2
For extension cables over 15 meters and less
than 40 meters, use a wire with a cross section
of 2.5mm2
15. Before use, check the line trimmer is in good
condition and that it is operating properly. Pay
Special attention to extension cable, power out-
let, switch, and cutting head.
16. Before use, check the line and extension cords.
Do not use the line trimmer if the cord is dam-
aged or worn.
17. Protect your extension cable from sharp objects,
excessive heat, and damp or wet locations.
18. Keep the extension cord away from rotating ny-
lon line.
19. If the insulation on the power cable or extension
cable is damaged during use, disconnect the
power supply immediately and have the dam-
aged cable replaced. Do not touch the cable be-
fore disconnecting the supply!
20. Switch on the line trimmer according to these
instructions and keep you hands and feet well
away from the cutting line!
21. Always hold your line trimmer rmly, make sure
you always maintain a good balance and secure
footing.
22. Make sure the open side of the protection guard
is pointing away from yourself before you switch
on the line trimmer.
23. Do not operate the line trimmer on wet grass, or
under damp conditions.
24. Take special care in slippery conditions on slopes
and uneven ground.
25. Watch for hidden obstacles such as tree stumps
and roots to avoid stumbling.
26. Check the cutting head at regular intervals. If the
behavior changes (excessive noise, vibration
etc.) immediately:
Switch off!
Holding the trimmer rmly press the head
against the ground and bring to a complete
stop.
Disconnect the mains supply.
Check the condition of the cutting head; look
for damage, missing parts and cracks.
27. Have the damaged cutting head replaced imme-
diately even if it only has supercial cracks. Nev-
er attempt to repair a damaged cutting head.
28. Only use original cutting heads and replacement
spools. Never use metal cutting lines.
29. Warning!
Danger of injury by the line cutting device. Af-
ter replacing a spool, be sure to bring the unit
into normal working position before turning it on
again.
30. Clean the plastic parts with damp cloth only.
31. Never leave your grass trimmer outdoors in the
rain. Store your tool in a dry place, keep out of
reach of children.
4
5
SPECIFIC SAFETY RULES FOR LINE TRIMMER
32. Warning!
1) The nylon line continues to rotate after the
motor is switched off.
2) Do not put your hands or feet near or under
the rotating parts when the machine is turned
on.
3) Switch off the trimmer and disconnect the
power supply :
Before you leave the machine.
Before checking, cleaning and working on the
machine.
After striking a foreign object. Inspect the tool
for damage.
If the grass trimmer starts to vibrate abnor-
mally.
33. Always ensure that ventilation openings are kept
clear of debris.
34. Take care against injury from the blade tted for
trimming the cutting line.
Warning!
There is a sharp blade tted to the guard for cut-
ting the line to length. Keep your ngers clear.
35. After extending new cutting line always return
the machine to its normal position before switch-
ing on.

DESCRIPTION
1. Rear handle
2. Cable strain relief arm
3. Safety button
4. Trigger switch
5. Auxiliary handle
6. Auxiliary handle locking knob
7. Edging coupler
8. Knob for height adjustment
9. Telescopic tube
10. Motor housing
11. Edge guide
12. Foot pedal for head angle adjustment
13. Safety guard
14. Cutting head
15. Manual line feed button
STANDARD ACCESSORIES
Safety guard, Screw(4pcs)
6
513
4
2
8
9
12
13
10
11
14
7
6

ASSEMBLY
Warning! Do not connect the machine to the mains socket before it is completely assembled.
FITTING GUARD (Fig.1)
1. Put the safety guard (13) in place.
2. Secure the safety guard onto the motor housing (10)
with screws provided.
ADJUSTING AUXILIARY HANDLE (Fig. 2)
1. Loosen the auxiliary handle locking knob (6),
and adjust the angle of the auxiliary handle.
2. Turn the knob until the handle is securely
tightened
Note: For trimming, adjust the handle upward. For
edging adjust it downward.
ADJUST HEIGHT (Fig. 3)
1. Loosen the knob for height adjustment (8), and
slide the telescopic tube (9) to desired position.
2. Tighten the knob
7
Fig. 2
5
6
Fig. 3
8
9
Fig. 1
13
10

CAUTION: Always wear eye protection.
ON / OFF SWITCH (Fig.6)
To switch on the trimmer, press the safety button (3)
and pull the trigger switch (4). Release the switch
to stop.
8
OPERATION
ASSEMBLY
ADJUSTING PIVOT HEAD (Fig. 4)
1. Depress the foot pedal for head angle
adjustment (12), and move the trimmer head up
or down to desired position and release the foot
pedal.
2. Make sure the head is securely locked into place
with click.
ROTATING REAR HANDLE TO EDGING
POSITION (Fig. 5)
1. Push down edging coupler (7) and turn rear
handle (1) end counter-clockwise.
2. Release edging boom coupler when handle has
been rotated 180°and locked into place.
Fig. 6
4
3
Fig. 4
12
Fig. 5
7
1

Fig. 10
11
OPERATION
TRIMMING
1. Use the trimmer at an angle of approximately
15-degree to the working area (Fig.7).
2. Slowly swing the trimmer from side to side. (Fig.8)
3. Do not overload your trimmer, take small “bites”
this will keep machine operating at high speed
and will greatly improve cutting efficiency,
(Fig.9).
4. Cutting close to a wall
Use the outside edge of the guard as a guide
when cutting close to an edge.
9
Fig. 7
Fig. 8
Fig. 9
EDGING (Fig. 10)
Rotate the rear handle to edging position, and
flip up the edge guide (11).

OPERATION
10
MANUALLY FEED LINE (Fig. 11)
If required line can be fed out manually, press and
release manual line feed button (15), whilst gently
pull out the lines until the lines reach the line cutter.
When the required amount of line is fed out, gently
pull on the second line (there is no need to press
the manual line feed button again)
If the line extends past the line cutter, too much
line has been fed out.
If too much line is fed out, remove the spool cap
and click spool anti-clockwise until the line is at the
desired length.
Fig. 11
15
REPLACING THREAD SPOOL (Fig. 12)
Use original manufacturer’s replacement thread spool for best performance.
1. Press the locking tab on both sides of the spool cover (a), and remove it.
2. Remove the spool (b).
3. Make sure the two lines are captured in the slot opposite each other on the thread cover (c) of new spool, and the
end of each line is extended approximately 15cm beyond each slot.
4. Install the new spool so that the lines and slots align with the eyelets in the line head. Thread the lines into the
eyelets, and pull them extending from the slots in the thread cover.
5. Reinstall the spool cover by depressing tabs into slots and pushing down until the spool cover clicks into place.
Fig. 12
d
c
b
a

11
OPERATION
REPLACING CUTTING LINE IN SPOOL (Fig. 13)
Use 2.0mm diameter round nylon line.
1. Remove the thread spool, and remove any old line remaining on the spool.
2. Bend a new thread in the middle, and hook into the spool. (Fig.13-A)
3. Place the thread cover on the spool, and make sure the two lines are captured in the slot opposite each other on
the thread cover. (Fig.13-B)
4. Hold the thread cover tight and wind the thread spool in the counterclockwise direction until leaving 15cm
extended beyond the slot. (Fig.13-C)
5. Thread the lines into the eyelets, and pull them extending from the slots on the thread cover. (Fig.13-D)
6. Reinstall the spool cover by depressing tabs into slots and pushing down until the spool cover clicks into place.
CAUTION: Pay attention to the winding direction.
Fig. 13
A B C D

12
MAINTENANCE
Be sure the tool is unplugged.
1. Your grass trimmer requires no additional lubrication or maintenance. There are no user serviceable parts
in your power tool.
2. Your trimmer line can dry out over time. To keep your line in top condition, store spare pre-wound
spools or bulk line in plastic, sealable bag with a tablespoon of water.
3. Never use water or chemical cleaners to clean your grass trimmer. Wipe clean with a dry cloth.
4. Plastic parts may be cleaned by using a mild soap and damp rag.
5. Always store your grass trimmer in a dry place. No not allow any liquid to get inside it.
6. Keep the motor ventilation slots clean.
7. If you see some sparks ashing in the ventilation slots, this is normal and will not damage your power tool.
8. There are no user serviceable parts in the trimmer. If a fault is suspected return the trimmer to an
authorized dealer for repair.
IMPORTANT : To assure product safety and reliability, repairs, maintenance and adjustment should be
performed by RYOBI authorized service centers or other qualified service organization,
always using identical replacement parts.
TROUBLESHOOTING
1. If trimmer will not operate, check power at mains plug
2. If the trimmer is not cutting properly check the nylon line length and lengthen or replace line.
3. If you experience regular line breakage rewind the spool uniformly.

13
NOTES

14
NOTES

RYOBI POWER EQUIPMENT
WARRANTY
Subject to the warranty conditions below, this
RYOBI tool (hereinafter called “the Product”),
is warranted by Ryobi (herein called “the
Company”) to be free from defects in material
or workmanship for a period of 24 months
from the date of original purchase covering
both parts and labour. Under the terms of
this warranty, the repair or replacement of
any part shall be the opinion of the Company
or its authorised agent. Should service
become necessary during the warranty
period, the owner should contact the
authorised Ryobi retailer from whom the
product was purchased, or the nearest
Company branch office. In order to obtain
warranty service, the owner must include the
Sales Docket and Warranty Certificate to
confirm date of purchase. This Product is
sold by the dealer or agent as principal and
the dealer has no authority from the Company
to give any additional warranty or guarantee
on the Company’s behalf except as herein
contained or herein referred to.
Warranty Conditions
This warranty only applies provided that the
Product has been used in accordance with
the manufacturer's recommendations under
normal use and reasonable care (in the
opinion of the Company) and such warranty
does not cover consumable components,
damage, malfunction or failure resulting from
misuse, neglect, abuse, or used for a purpose
for which it was not designed, or is not suited
and no repairs, alterations or modifications
have been attempted by other than an
Authorised Service Agent. This guarantee
will not apply if the tool is damaged by
accident or if repairs arise from normal wear
and tear.
Accessories such as bits,blades, sanding
discs, cutting lines, etc., are excluded from
this guarantee. Normal consumable parts,
such as carbon brushes, bearings, chucks,
cord assembly’s, spark plugs, recoil pulleys
and bump head assembly’s are specifically
excluded from this guarantee.
The Company accepts no additional liability
pursuant to this warranty for the costs of
traveling or transportation of the Product or
parts to and from the sevice dealer or agent
- which costs are not included in the warranty.
Nothing herein shall have the effect of
excluding, restricting or modifying any
conditions, warranty, right or liability imposed,
to the extent only that such exclusion,
restriction or modification would render any
term herein void.
THIS WARRANTY FORM
SHOULD BE RETAINED BY THE CUSTOMER AT ALL TIMES.
For your record and to assist in establishing date of purchase (necessary for in-warranty service), please
keep your purchase docket and this form, completed with the following particulars.
PURCHASED FROM:.........................................................................................................
ADDRESS OF DEALER:....................................................................................................
DATE:......................... MODEL NO................................ SERIAL NO.................................
Present this form with your Purchase Docket when Warranty Service is required.
STEVENS & CO (Pty) Ltd
604, 16th Street, Randjespark
Midrand, South Africa
Tel: +27 (11) 357-9600
Fax: +27 (11) 805-5541
email: [email protected]
P O Box 4059
HALFWAY HOUSE
1685, South Africa
Table of contents
Other Ryobi Trimmer manuals

Ryobi
Ryobi RHT1851R15 User manual

Ryobi
Ryobi RY24600 User manual

Ryobi
Ryobi RBC52FSBHO User manual

Ryobi
Ryobi OLT1831S User manual

Ryobi
Ryobi RHT5555RS User manual

Ryobi
Ryobi RLT1831H20 User manual

Ryobi
Ryobi RY24602 User manual

Ryobi
Ryobi RY39505 User manual

Ryobi
Ryobi RY15525 User manual

Ryobi
Ryobi RLT-300 Operation manual

Ryobi
Ryobi RHT500R User manual

Ryobi
Ryobi RY4CSS User manual

Ryobi
Ryobi RBC47SEO User manual

Ryobi
Ryobi P20015 User manual

Ryobi
Ryobi RPT400G User manual

Ryobi
Ryobi AHF-03 User manual

Ryobi
Ryobi RY40003 User manual

Ryobi
Ryobi RY13016 User manual

Ryobi
Ryobi RY34426 User manual

Ryobi
Ryobi RHT2660DAG User manual