7
EN
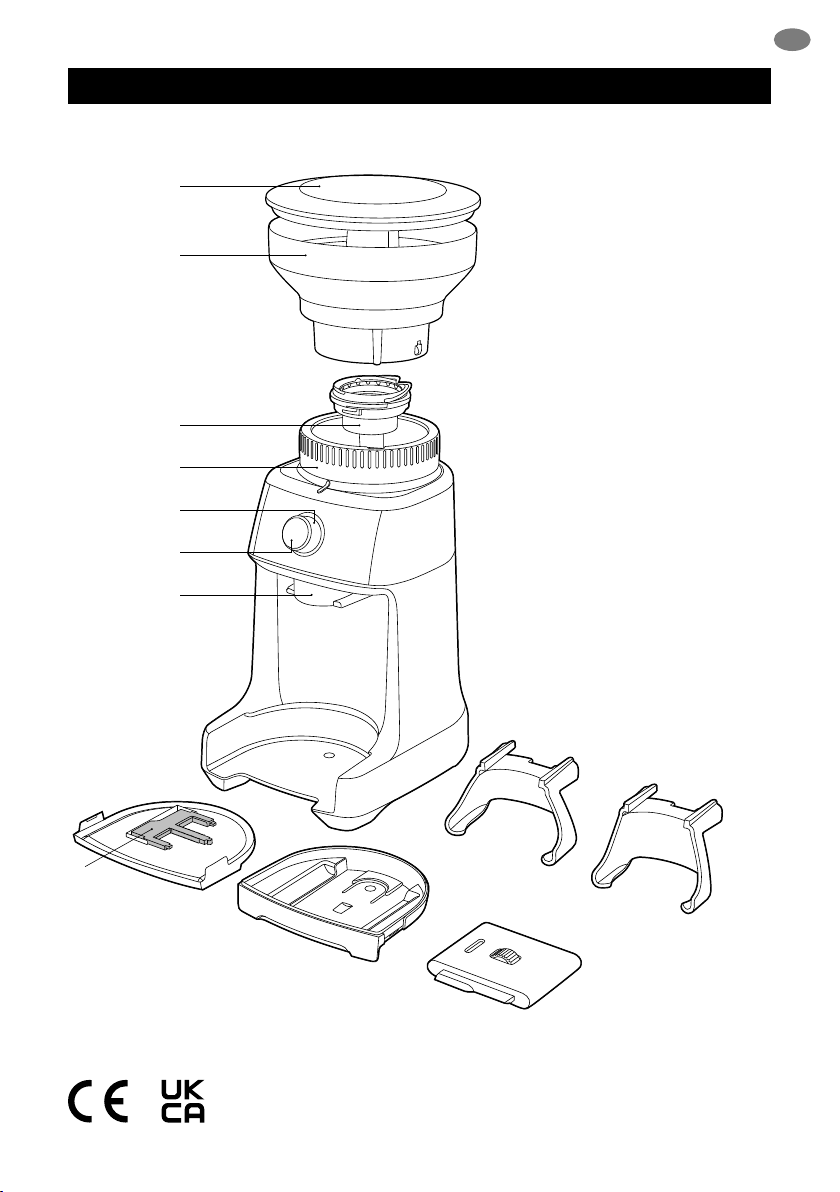
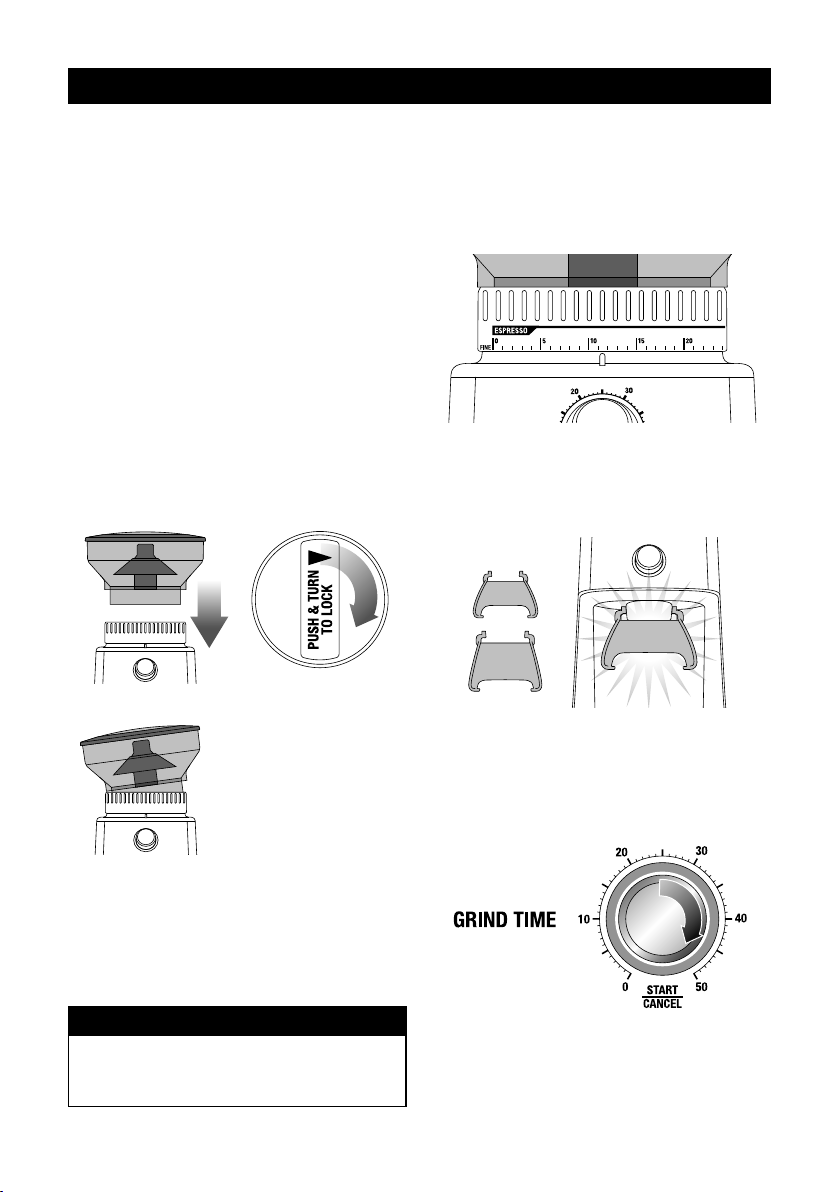
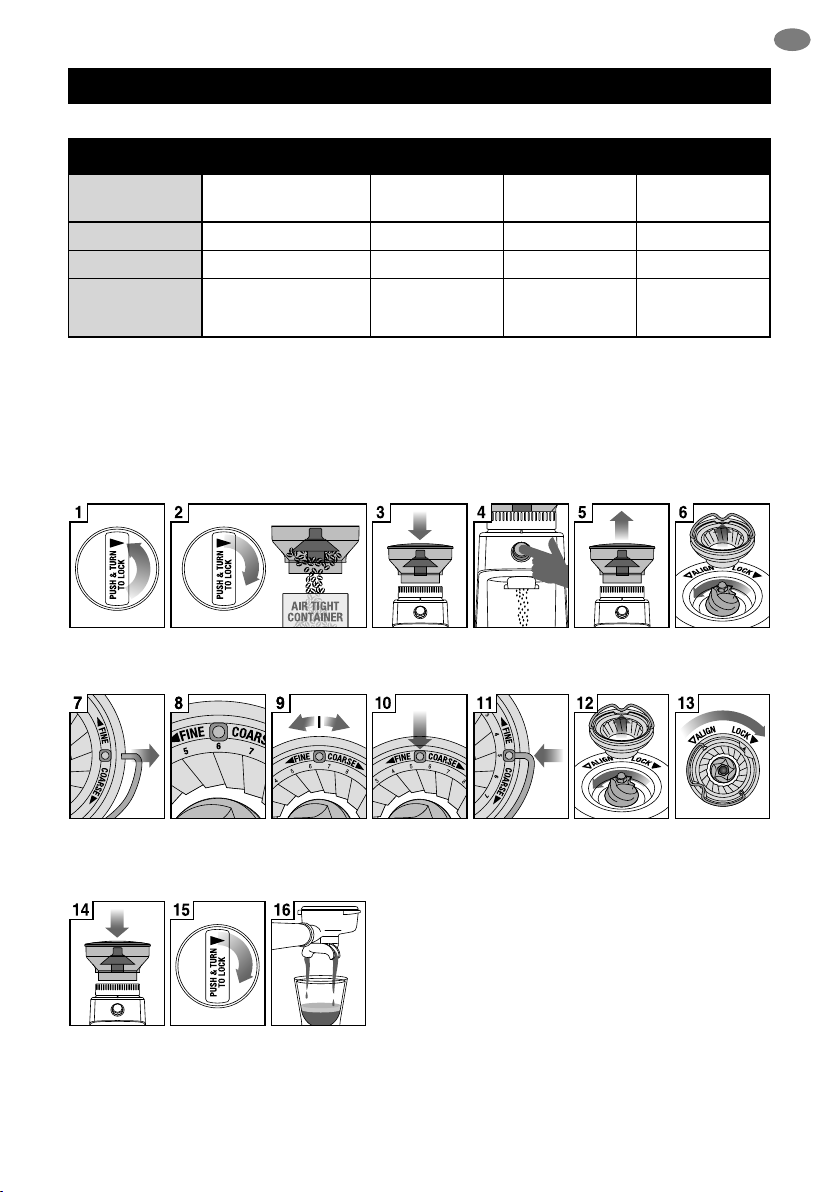
OPERATING YOUR NEW APPLIANCE
Step 4:
Trimming the Dose
The adjustable Razor™Dose Trimming Tool
allows you to trim the puck to the right level for
a consistent extraction.
Select the correct width blade of the Razor™
to match the diameter of your lter basket. The
Razor™has three blades of varying widths: 58mm,
54mm and 50mm.The 58mm and 54mm are
already tted within the Razor™body.The 50mm
is separate.
If you require the 50mm blade, turn the adjustment
dial past #1 until the 54mm blade is fully extended
and able to be pulled from the body.
ADDITIONAL BLADE
54mm 50mm
If you require the 50mm blade, turn the Adjustable
Dial past #1 until the 54mm blade is fully extended
and able to be pulled from the body.
54mm
NOTE
The Adjustable Dial may feel tight as you
continue to wind it towards the end of its travel.
Insert the 50mm blade into the body.Wind the
Adjustable Dial until the blade is retracted past #4.
Press the 50mm and 58mm blades at the same
time, towards the centre of the body until a “click”
sound can be heard.
50mm
'CLICK'
APPLY PRESSURE
AT BOTH ENDS
Adjust the Razor™to the setting in the table below
for your Sage®
espresso machine.This is a starting
point for your dose height.
®
Machine
Size
Height
Model name
starting with “SES9”
Model name
54mm 2.5
After tamping the coee, insert the Razor™into
the lter basket until it rests on the rim of the
basket.The blade of the dosing tool should
penetrate the surface of the tamped coee.
If the blade does not penetrate the surface of
the tamped coee, your coee is under dosed.
Increase the amount of dosed coee by adjusting
the GRIND TIME dial.
Rotate the Razor™back and forth while holding the
portalter on an angle over the knock box to trim o
a little excess coee.