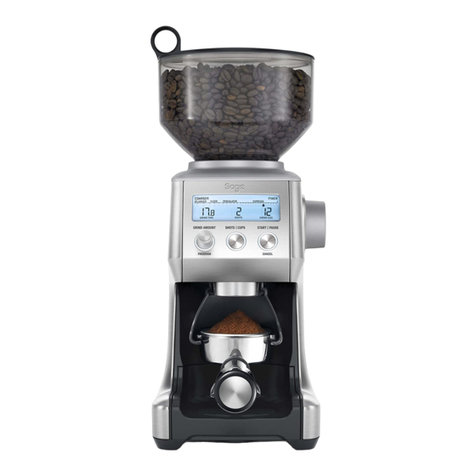
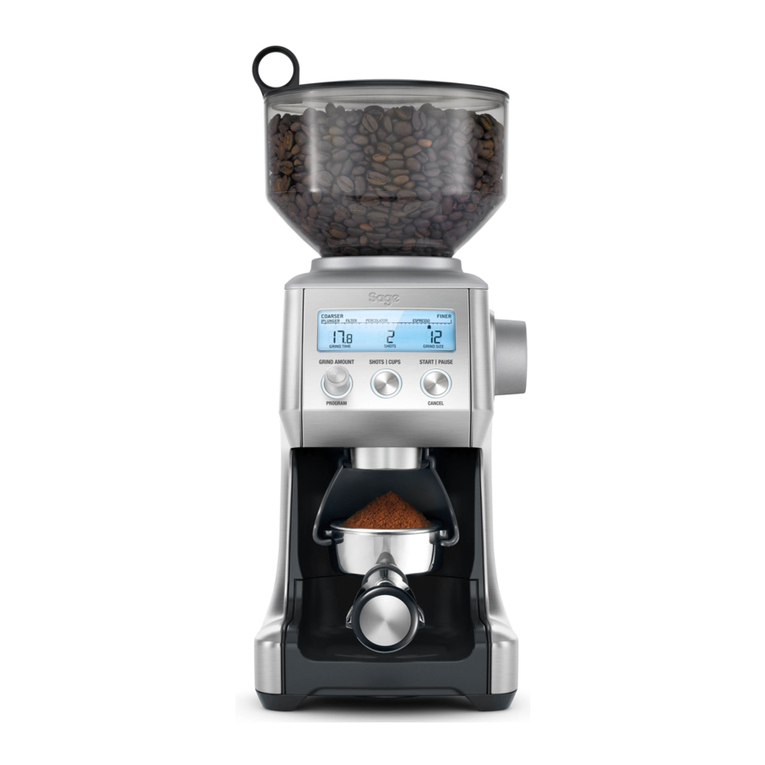
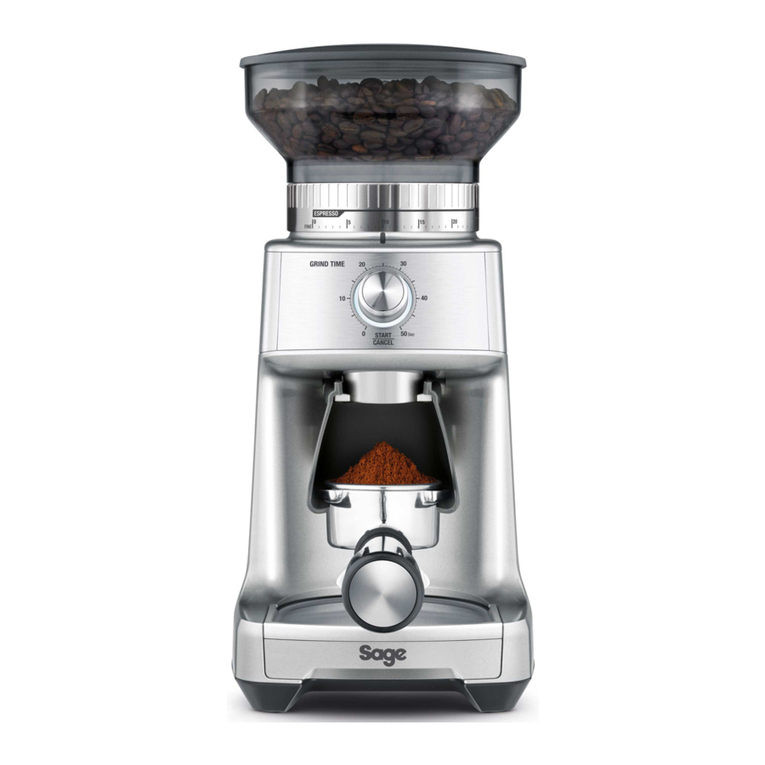
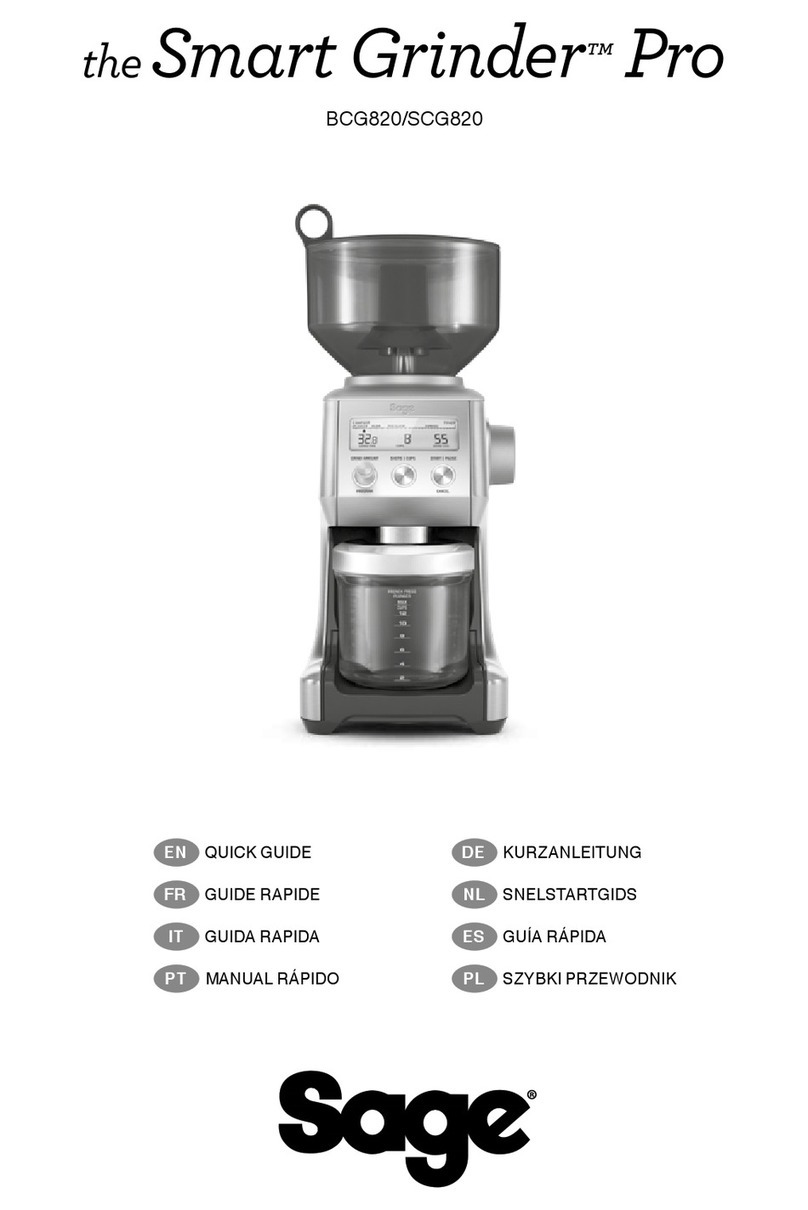
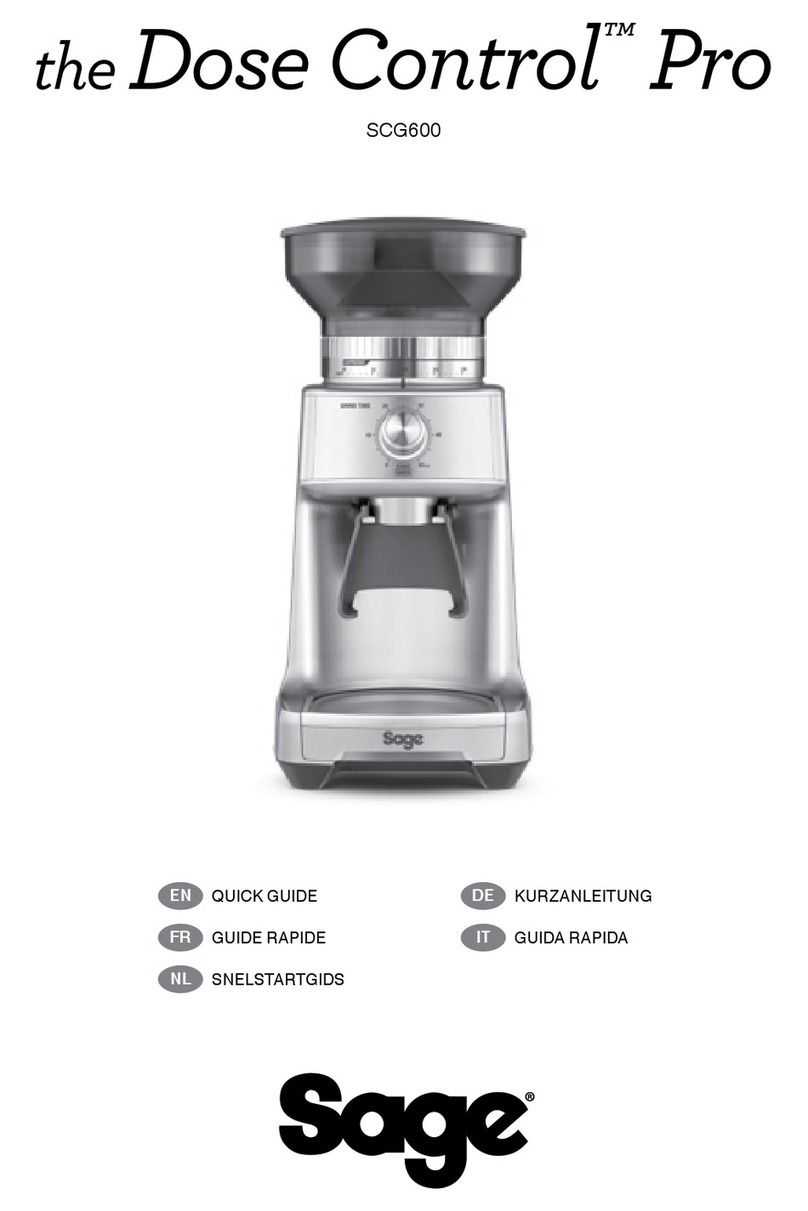
Sage Smart Grinder Pro SCG820 User manual

SCG820
DK BETJENINGSVEJLEDNING
SE INSTRUKSJONSBOK
NO INSTRUKTIONSBOK
FI OHJEKIRJA
the Smart Grinder™Pro

2
OPERATING YOUR NEW APPLIANCECONTENTS
2 Werecommendsafetyrst
5 Know your new appliance
6 Operating your new appliance
11 Care & cleaning
12 Troubleshooting
SAGE®
RECOMMENDS
SAFETY FIRST
At Sage®we are very safety
conscious.We design and
manufacture appliances with
your safety foremost in mind.
In addition, we ask that you
exercise a degree of care
when using any electrical
appliance and adhere to the
following precautions.
IMPORTANT
SAFEGUARDS
READ ALL INSTRUCTIONS
BEFORE USE AND SAVE
FOR FUTURE REFERENCE
• The full information
book is available at
sageappliances.com
• Beforeusingthersttime
ensure your electricity
supply is the same as
shown on the label on the
underside of the appliance.
• Remove and safely discard
any packaging materials
beforerstuse.
• To eliminate a choking hazard
for young children, safely
discard the protective cover
ttedtothepowerplug.
• This appliance is for household
use only. Do not use the
appliance for anything other
than its intended use.Do not
use in moving vehicles or
boats.Do not use outdoors.
Misuse may cause injury.
• Fully unwind the power cord
before operating.
• Position the appliance on a
stable, heat resistant, level, dry
surface away from the edge
and do not operate on or near
a heat source such as a hot
plate, oven or gas hob.
• Do not let the power cord hang
over the edge of a bench or
table, touch hot surfaces or
become knotted.

3
OPERATING YOUR NEW APPLIANCE
• Do not leave the appliance
unattended when in use.
• Always ensure the appliance
is turned OFF, unplugged at
the power outlet and has been
allowed to cool before cleaning,
attempting to move or storing.
• Always turn the appliance to
theoposition,switchoat
the power outlet and unplug
at the power outlet when the
appliance is not in use.
• Do not use the appliance if the
power cord, plug, or appliance
becomes damaged in any way.
If damaged and maintenance
other than cleaning is required
please contact Sage
Customer Service or go
to sageappliances.com
• Any maintenance other
than cleaning should be
performed by an authorised
Sage®service centre.
• Children should not play with
the appliance.
• Cleaning of the appliance
should not be carried out by
children unless they are 8 year
or older and supervised.
• The appliance and it’s
cord should be kept out
of reach of children aged
8 years and younger.
• The installation of a residual
current safety switch is
recommended to provide
additional safety when using
all electrical appliances.
Safety switches with a rated
operating current not more than
30mA are recommended.
Consult an electrician for
professional advice.
• Do not use attachments
other than those provided
with the appliances.
• Do not attempt to operate
the appliance by any
method other than those
described in this booklet.
• Do not move the appliance
whilst in operation.
• Do not touch hot surfaces.
Allow the appliance to cool
down before moving or
cleaning any parts.
• This appliance shall not be
used by children. Keep the
appliance and its cord out of
reach of children.
WE RECOMMEND SAFETY FIRST
4
OPERATING YOUR NEW APPLIANCEWE RECOMMEND SAFETY FIRST
• This appliance can be used by
persons with reduced physical,
sensory or mental capabilities
or a lack of experience and
knowledge, only if they have
been given supervision
or instruction concerning
use of the appliance in a
safe way and understand
the hazards involved.
• Do not operate the grinder
without the hopper lid in position.
Keepngers,hands,hair,
clothing and utensils away from
the hopper during operation.
The symbol shown
indicates that this appliance
should not be disposed of
in normal household waste.
It should be taken to a local
authority waste collection centre
designated for this purpose or to
a dealer providing this service.
For more information, please
contactyourlocalcounciloce.
To protect against electric
shock do not immerse the
power plug, cord or appliance in
water or any liquid
FOR HOUSEHOLD USE ONLY
SAVE THESE INSTRUCTIONS

5
OPERATING YOUR NEW APPLIANCE
C
B
D
E
F
G
H
M
L
O
N
A
K
J
I
Oi
Oii
KNOW YOUR NEW APPLIANCE
A. Bean Hopper Lid
B. Bean Hopper
C. Hardened Stainless Steel Conical Burrs
D. Backlit LCD Screen
E. GRIND AMOUNT/PROGRAM Dial
F. SHOTS/CUPS Button
G. Grind Outlet
H. Grind Tray
I. Grind Size Dial
J. START/PAUSE/CANCEL Button
K. PortalterActivationSwitch
ACCESSORIES
L. PortalterCradle50–54mm
M. PortalterCradle58mm
N. Conical Burr Cleaning Brush
O. Grinds Container.
Oi - Container Cap
Oii - Container Lid
Rating Information
220–240V~50-60Hz165W

6
OPERATING YOUR NEW APPLIANCE
BEFORE FIRST USE
Remove and safely discard all promotional
labels and packing materials attached to
your Sage®product.
Wash hopper, cradles, grind container, container
lid and cleaning brush in warm soapy water and
dry thoroughly. Wipe exterior of grinder with a
soft damp cloth and dry thoroughly. Place grinder
onatlevelsurfaceandplugpowercordinto
230–240VoutletandswitchPower‘ON’.
ENERGY SAVING FEATURE
Thegrinderwillautomaticallyswitchoifnot
used after 5 minutes.
ASSEMBLING YOUR SAGE SMART
GRINDER™PRO
Bean Hopper
Align tabs on the base of the bean hopper
and insert hopper into position.Turn the
bean hopper dial 90° to lock into position.
Fillwithfreshcoeebeansandsecurelid
on top of bean hopper.
GRINDING FOR ESPRESSO
COFFEE
Usesinglewalllterbasketswhengrindingfresh
coeebeans.Usethener1–30settingsinthe
ESPRESSO range.
STEP 1:
Inserttheappropriateportaltercradlesize.Insert
yourportalterintothecradle.
PUSH
50-54mm
58mm
CRADLES
NOTE
Maximum number of shots with the cradle
inserted is 2.
PLUNGER
1 UP TO 12 CUPS
BREW METHOD
GRIND SETTING
GRIND SIZE
AMOUNT
FINE
1-30
1 UP TO 8 SHOTS
ESPRESSO DRIP FILTER
MEDIUM COARSE
46-54
COARSE
55-60
1 UP TO 12 CUPS
PERCOLATOR
31-45
1 UP TO 12 CUPS
MEDIUM
COFFEE CHART
OPERATING YOUR NEW APPLIANCE

7
OPERATING YOUR NEW APPLIANCE
STEP 2:
Selecting your SHOTS/CUPS
Selectthedesiredamountofgroundcoee
required by pressing the SHOTS/CUPS button.
START PAUSE
GRIND AMOUNT SHOTS CUPS
CANCELPROGRAM
Rotate the Grind Amount Dial to adjust the grinding
timetoachievethecorrectamountofcoee.
START PAUSE
GRIND AMOUNT SHOTS CUPS
CANCELPROGRAM
STEP 3:
Select your grind size
For espresso, we recommend selecting Grind Size
setting 12 as a starting point and moving the Grind
SizedialCoarserorFinertoadjusttheowof
espresso as required.
START PAUSE
GRIND AMOUNT SHOTS CUPS
CANCELPROGRAM
NOTE
If the Grind Size Dial is tight, run the grinder
by pressing the START/PAUSE/CANCEL
button while turning the Grind Size Dial.This
willreleasecoeegroundscaughtbetween
the burrs.
GRINDING INTO GRINDS
CONTAINER OR COFFEE FILTER
STEP 1:
Remove cradle by sliding out from under the
grind outlet.
PULL
Slideingrindscontainerwithcapopenorcoee
lterdirectlyundergrindoutlet.
INSERT UNDER
GRIND OUTLET
OPEN CONTAINER
CAP

8
OPERATING YOUR NEW APPLIANCE
NOTE
Programming a custom grind amount/time
only sets it for that particular brew method.
This will not change the other Shots or
Cups settings.
Pause Function
You can pause the grinder during operation
allowingyoutocollapseorsettlethecoee
intheportalter.
• Press and release the
START/PAUSE/CANCEL button to start the
grinding operation.
• During grinding, press the
START/PAUSE/CANCEL button again
to pause the operation for 10 seconds.
• Press again within this time to resume grinding
the remaining dose.
START PAUSE
GRIND AMOUNT SHOTS CUPS
CANCELPROGRAM
PRESS & RELEASE
OPERATING YOUR NEW APPLIANCE
• Selecttherequiredamountofgroundcoee
by pressing the SHOTS/CUPS button.
• Press the START/PAUSE/CANCEL button to
start grinding operation.
START PAUSE
SHOTS CUPS
CANCEL
START PAUSE
SHOTS CUPS
CANCEL
FEATURES OF YOUR SAGE
SMART GRINDER™ PRO
Automatic Grinding
Grinding automatically allows you to grind
hands-free.
• Press and release either the
START/PAUSE/CANCEL button or push
thehandleofyourportalteronce.Thiswill
activate the PORTAFILTER SWITCH.
• Grinding will automatically stop when the
preset amount is dispensed.
START PAUSE PORTAFILTER SWITCH
PRESS & RELEASE
OR
PUSH

9
OPERATING YOUR NEW APPLIANCE
ADJUSTING YOUR GRIND AMOUNT
Increasing the Grind Amount
To increase the grind amount selected, turn the
GRIND AMOUNT dial to the right.
START PAUSE
GRIND AMOUNT SHOTS CUPS
CANCELPROGRAM
Decreasing the Grind Amount
To decrease grind amount selected, turn the
Grind Amount Dial to the left.
NOTE
To RESET the grind amount/time to the default
settings, press and hold the SHOTS/CUPS
button until a long beep sounds.
Program Function
Once you have set your required dose,
you can program this time into the number
of shot(s) currently displayed on the LCD.
Press and hold the PROGRAM button,
grinderwillbeeptwicetoconrm.Only
the shot displayed will be programmed,
all other shots will remain unchanged.
START PAUSE
GRIND AMOUNT SHOTS CUPS
CANCELPROGRAM
PRESS & HOLD
Manual Grinding
Grinding manually allows you to have complete
controloverhowmuchcoeeisdispensed.
• Press and hold either the
START/PAUSE/CANCEL button or push
thehandleofyourportaltertoactivatethe
PORTAFILTER SWITCH for as long as you
require.
• Release START/PAUSE/CANCEL button or
PORTAFILTER SWITCH and grinding will stop.
START PAUSE PORTAFILTER SWITCH
PRESS, HOLD & RELEASE
OR
PUSH

10
OPERATING YOUR NEW APPLIANCE
ADJUSTING CONICAL BURRS
Sometypesofcoeemayrequireawidergrindrangetoachieveanidealextractionorbrew.
A feature of your Smart Grinder™ Pro is the ability to extend this range with an adjustable upper burr.
We recommend making only one adjustment at a time.
13
Hold hopper over container & turn
dial to release beans into container
Align hopper
into position
Run grinder
until empty
Remove hopperUnlock hopper
1 2 3 4 5
Move adjustable
top burr, 1 number,
coarser or finer
Remove wire
handle from both
sides of the burr
Align the number
with the handle
opening
Remove upper
burr
6
8877 9
Insert wire
handle from both
sides of the burr
10
Push upper burr
firmly into
position
11
Lock upper burr
12
Align hopper
into position
AIR TIGHT
CONTAINER
14
Lock hopper
15
Check your
extraction
F
I
N
E
C
O
A
R
S
E
F
I
N
E
C
O
A
R
S
E
4
5
6
7
8
F
I
N
E
C
O
A
R
S
E
F
I
N
E
C
O
A
R
S
E

11
CARE, CLEANING & STORAGE
1. Empty beans from the hopper
and grind out any excess beans
(see below).
2. Unplug power cord from power outlet
before cleaning.
3. Wash the grind container and lid,
bean hopper and lid in warm soapy
water, rinse and dry thoroughly.
4. Wipe and polish exterior of appliance
with a soft damp cloth.
CLEANING CONICAL BURRS
Regular cleaning helps the burrs achieve consistent grinding results which is especially important when
grindingforespressocoee.
13
Hold hopper over container & turn
dial to release beans into container
Align hopper
into position
Run grinder
until empty
Remove hopper
Unlock hopper
1 2 3 4 5
Clean lower
burr with
cleaning brush
Clean upper
burr with
cleaning brush
Clean grind
outlet with
brush
Remove upper
burr
6
8877 9
Push upper
burr firmly into
position
10
Lock upper burr
11
Align hopper
into position
12
Lock hopper
AIR TIGHT
CONTAINER
NOTE
Do not use alkaline or abrasive cleaning
agents, steel wool or scouring pads, as
these can damage the surface.
NOTE
Please do not clean any grinder parts or
accessories in the dishwasher.

12
TROUBLESHOOTING
PROBLEM POSSIBLE CAUSE WHAT TO DO
Grinder does
not start after
pressing START/
PAUSE/CANCEL
button
• Grinder not plugged in.
• Grinder has overheated.
• Bean hopper not attached
correctly.‘PLEASELOCK
HOPPER’ will be displayed
on LCD screen.
• Plug power cord into power outlet.
• Remove power plug from power outlet.
Leave for 20 minutes to cool down
before using again.
• Lock bean hopper into position.
Motor starts but
no ground coee
coming from
grind outlet
• Incorrect button pressed.
• No coeebeans in bean
hopper.
• Grinder/bean hopper
is blocked.
• Press START/PAUSE/CANCEL
or PORTAFILTER SWITCH
to activate.
• Fill bean hopper with fresh
coeebeans.
• Remove bean hopper. Inspect bean
hopper and burrs for blockage.
Replace parts and try again.
Motor starts but
operates with a
loud ‘racket’ noise
• Grinder is blocked with
foreign item or chute
is blocked.
• Moisture clogging grinder
• Remove bean hopper, inspect burrs
and remove any foreign body.
• Clean burrs and chute (refer to Care
& Cleaning on page 11).
• Leave burrs to dry thoroughly before
re-assembling.You can use a hair dryer
to blow air into grinder inlet (lower burr)
to dry.
Unable to lock
bean hopper into
position
• Coeebeansobstructingbean
hopper locking device.
• Removebeanhopper.Clearcoee
beans from top of burrs.Re-lock hopper
into position & try again.
Not enough/too
much coee grind
• Grind amount requires
adjustment.
• Press SHOTS/CUPS button to change
grind amount.
• UseGrindAmountDialtonetunethe
amount‘more’or‘less’.
Portalter overlls
• It is normal for the correct amount
ofcoeetoappearoverlledin
yourportalter.Untampedcoee
has approximately three times
thevolumeoftampedcoee.
Emergency stop?
• Press START/PAUSE/CANCEL button
to stop operation.
• Unplug power cord from power outlet.


14
OPERATING YOUR NEW APPLIANCEINDHOLDSFORTEGNELSE
14 Sikkerhedsanvisninger
17 Oversigt over
the Smart Grinder™ Pro
18 Betjening
23 Rengøring og vedligeholdelse
24 Problemløsning
25 Garanti
25 Service
Hos Sage™ er vi meget
sikkerhedsbevidste. Først
og fremmest designer og
fremstiller vi produkter med
vores kunders sikkerhed i
tankerne. Derudover beder vi
om, at du udviser varsomhed,
når du bruger et elektrisk
apparat og overholder de
følgende forholdsregler.
SIKKERHEDS-
ANVISNINGER
LÆS HELE
BRUGSANVISNINGEN FØR
APPARATET TAGES I BRUG
DEN FØRSTE GANG, OG
GEM DEN TIL SENERE
BRUG.
• En komplet betjeningsvejledning
er tilgængelig på
sageappliances.com
• Fjern al emballage og mærkater
før Sage the Smart Grinder™ Pro
bruges første gang.
• For at undgå en kvælningsfare
blandt små børn skal det
beskyttende omslag på stikket
fjernes og smides ud.
• Betjen ikke Sage the Smart
Grinder™ Pro på anden måde
end den beskrevne i denne folder.
• Før apparatet bruges første gang,
skal du sikre, at din elforsyning er
den samme som vist i bunden af
apparatet. Hvis du har spørgsmål i
den forbindelse, skal du kontakte
dit lokale elselskab.
• Placer ikke Sage the Smart
Grinder™ Pro nær kanten af en
bordplade.Sørgfor,atoveraden
er jævn, ren og fri for vand.
• Spild på bordpladen under eller
omkring apparatet - eller på selve
apparatet - bør fjernes først, før du
fortsætter med at bruge apparatet.
• Apparatet må ikke placeres
på eller i nærheden af et varmt
gasblus, en kogeplade eller med
kontakt til en varm ovn.
• Sage the Smart Grinder™ Pro må
ikkebetjenespåenaøbsbakke.
• Sørg altid for, at Sage the Smart
Grinder™ Pro er korrekt samlet
før brug.
• Apparatet virker ikke, hvis ikke det
er korrekt samlet.

15
OPERATING YOUR NEW APPLIANCE
• Sage the Smart Grinder™ Pro
må ikke tilsluttes en ekstern timer
eller et andet kontrolsystem med
fjernbetjening.
• Sørg altid for, at Sage the Smart
Grinder™ Pro er slukket på
stikkontakten og at stikket er taget
ud, hvis apparatet efterlades uden
opsyn, ikke skal bruges eller hvis
detskalyttes-ogførrengøring,
ved montering, demontering og
når apparatet skal opbevares.
• Brug ikke andet tilbehør end det,
der følger med Sage the Smart
Grinder™ Pro.
• Betjen kun the Sage the
Smart Grinder™ Pro, hvis
bønnebeholderens låg er på plads
ogfastlåst.Holdhænder,nger,
hår, tøj og redskaber væk fra
bønnebeholderen under brug.
• Tændførstkaekværnen,når
bønnebeholderen og låget sidder
korrekt på plads og er fastlåst.
• Brug ikke Sage the Smart
Grinder™ Pro i mere end to
minutter af gangen for at undgå
overophedning. Lad Sage the
Smart Grinder™ Pro køle af
i 20 minutter efter lang tids
anvendelse.
• Lægikkeformaletkaeibønne-
beholderen. Sage the Smart
Grinder™ Pro kan ikke kværne
mad, der er fedtet eller meget
hårdt. Kværnen kan heller ikke
kværne frugt, kerner eller urter til
eksempelvis en karrypasta eller
nøddesmør.
• Hold apparatet rent.
VIGTIGE SIKKERHEDS-
FORANSTALTNINGER
FOR ALLE ELEKTRISKE
APPARATER
• Ledningen skal være viklet helt ud
før brug.
• Sørg for, at ledningen ikke hænger
ud over bordkanten, berører varme
overaderellerviklessammen.
• Apparatet er kun til
husholdningsbrug. Brug ikke
apparatet til andet end det
tiltænkte formål.Brug ikke
apparatet i køretøjer eller i både og
brug det ikke udendørs.
• For at undgå en potentiel fare på
grund af utilsigtede nulstillinger,
må apparatet ikke tilsluttes en
ekstern skifteenhed - såsom en
timer eller en fjernbetjening - eller
forbindes til en enhed, der jævnligt
tændes og slukkes.
• Børn må ikke lege med apparatet.
• Apparatet er ikke beregnet til
brug af personer med nedsatte
fysiske, sensoriske eller mentale
evner, manglende erfaring eller
viden - eller af børn medmindre
de er blevet vejledt og instrueret
i brugen af apparatet af en
SIKKERHEDSANVISNINGER

16
OPERATING YOUR NEW APPLIANCESIKKERHEDSANVISNINGER
person med ansvar for deres
sikkerhed. Apparatet og ledningen
skal opbevares et sted, der er
utilgængeligt for børn.
• Brug ikke apparatet, hvis
ledningen, stikket eller apparatet
er beskadiget på nogen måde.
• Efterlad ikke apparatet
uden opsyn.
• Vedligeholdelse og rengøring
måikkeudføresafbørn–
medmindre de er ældre end
8 år og er under opsyn.
• Maskinen og ledningen skal
opbevares et sted, der er
utilgængeligt for børn under 8 år.
• Det anbefales at inspicere
apparatet jævnligt. Brug ikke
maskinen hvis ledningen, stikket
eller maskinen er beskadiget på
nogen måde.
• Ved beskadiget dele på maskinen
kontaktes butikken, hvor maskinen
er købt eller Sage kundeservice.
• Betjen kun the Sage Smart Grinder
Pro, når bønnebeholderens låg er
på plads og fastlåst.Hold hænder,
ngre,hår,tøjogredskabervækfra
bønnebeholderen under brug.
Symbolet betyder, at
produktet ikke bør smides ud
sammen med almindeligt
husholdningsaald,meni
stedetaeverespåenautoriseret
aaldsplads,dererberegnettil
formålet eller til en forhandler med en
sådan service.Kontakt din
kommune, hvis du har brug for
mere information.
For at beskytte mod elektrisk
stød må kværnens bund, ledningen
og stikket ikke sænkes i vand eller
komme i kontakt med fugt.
APPARATET ER KUN TIL
HUSHOLDNINGSBRUG.

17
OPERATING YOUR NEW APPLIANCE
C
B
D
E
F
G
H
M
L
O
N
A
K
J
I
Oi
Oii
OVERSIGT OVER THE SMART GRINDER™ PRO
A. Låg til bønnebeholder
B. Bønnebeholder
C. Konisk kværn i hærdet, rustfrit stål
D. LCD-skærm med baggrundsbelysning
E. FORMALINGSMÆNGDE/PROGRAM-knap
F. Knap til SHOT/KOPPER
G. Kværnens udløb
H. Bakke
I. Knap til formalingsgrad
J. START/PAUSE/ANNULLER-knap
K. Aktiveringsknaptillterholder
TILBEHØR
L. Holdertil50-54mmlterholder
M. Holdertil58mmlterholder
N. Børste til den koniske kværn
O. Beholdertilmaletkae
Oi-Lukkefunktionpåkaebeholder
Oii-Lågtilkaebeholder
220–240V~50-60Hz165W

18
OPERATING YOUR NEW APPLIANCE
FØR FØRSTE BRUG
Fjern al emballage og mærkater før Sage Smart
Grinder™ Pro bruges første gang.
Vaskbønnebeholderen,kaebeholderen,låget,
holdernetillterhåndtagetogrensebørsteni
varmt sæbevand og tør dem grundigt af. Tør
kværnens yderside af med en fugtig klud.
ENERGIBESPARENDE FUNKTION
Kværnen slukker automatisk efter 5 minutter,
hvis den ikke er i brug.
MONTERING AF DIN SAGE THE
SMART GRINDER™ PRO
Bønnebeholder
Markeringerne nederst på bønnebeholderen skal
være på linje med kværnen og bønnebeholderen
sættes derefter på plads. Drej bønnebeholderen
90grader,sådenerienaåstposition.Fyld
beholderenmedfriskekaebønnerogsætlåget
på plads.Hvis du vil fjerne beholderen, skal den
drejes mod uret og løftes op.
FORMALING TIL ESPRESSO
Brugenlterkurvmedetenkeltlternårdefriske
kaebønnerskalmales.Brugdenere1-30
indstillinger indenfor ESPRESSO-området.
TRIN 1:
Indsæt den korrekte holder under kværnens udløb.
Indsætderefterlterholderen.
PUSH
50-54mm
58mm
CRADLES
BEMÆRK
Du kan maksimalt vælge 2 shots,
når holderen er monteret.
STEMPELKAFFE
1 - 12 KOPPER
BRYGGETYPE
MALINGSGRAD
MALINGSGRAD
BRYGGEMÆNGDE
FINE
1-30
1 - 8 SHOTS
ESPRESSO FILTERKAFFE
MEDIUM / GROV
46-54
GROV
55-60
1 - 12 KOPPER
ESPRESSOKANDE
31-45
1 - 12 KOPPER
MEDIUM
KAFFEBRYGNINGSGUIDE
BETJENING

19
BETJENING
TRIN 2:
Vælg ka emængde ved at trykke på SHOTS/
CUPS-knappen
START PAUSE
GRIND AMOUNT SHOTS CUPS
CANCELPROGRAM
Drej på GRIND AMOUNT-knappen for at
justere formalingstiden.Længere tid vil øge
kaemængdenogmindretidvilmindske
kaemængden
START PAUSE
GRIND AMOUNT SHOTS CUPS
CANCELPROGRAM
TRIN 3:
Vælg malingsgrad
Som udgangspunkt anbefaler vi en formalingsgrad
på 12 for espresso og så kan du justere mellem
degrovereognereindstillingerefterbehov.
Dette bør gøres sammen med indstillingen af
formalingsmængden (doseringen)
START PAUSE
GRIND AMOUNT SHOTS CUPS
CANCELPROGRAM
BEMÆRK
Hvis GRIND SIZE -knappen sidder fast,
skal du tænde for kværnen ved at trykke på
START/PAUSE/CANCEL, mens du drejer
på GRIND SIZE-knappen. Det vil fjerne den
kae,dersidderfastmellemkværnensknive.
MAL NED I KAFFEBEHOLDER
ELLER KAFFEFILTER
TRIN 1:
Fjern holderen under kværnens udløb
PULL
Sætkaelteretellerkaebeholderenmed
åbningen direkte under kværnens udløb.
INSERT UNDER
GRIND OUTLET
OPEN CONTAINER
CAP

20
OPERATING YOUR NEW APPLIANCE
overfyldtilterholderen.Deterhelt
almindeligt.Ikke-stampetkaefyldercirkatre
gangesåmegetsomstampetkae
START PAUSE PORTAFILTER SWITCH
PRESS & RELEASE
OR
PUSH
BEMÆRK
En brugerindstilling af formalingsmængde/tid
vilkunændredenspecikkebryggemetode.
Det vil ikke ændre de andre SHOTS eller
CUPS-indstillinger.
Pausefunktion
Du kan midlertidigt stoppe kværnen, mens den er
igang,sådukanjusterekaenilterholderen.
• Tryk på START/PAUSE/CANCEL-knappen for
at starte kværnen.
• Mens kværnen er i gang skal du trykke på
START/PAUSE/CANCEL-knappen igen for at
holde en 10 sekunders pause.
• Inden der er gået 10 sekunder, skal du trykke
på knappen igen for at starte samme sted,
som kværnen stoppede.
START PAUSE
GRIND AMOUNT SHOTS CUPS
CANCELPROGRAM
PRESS & RELEASE
Programindstilling
BETJENING
• Vælgdenønskedekaemængdevedat
trykke på SHOTS/CUPS-knappen.
• Tryk på START/PAUSE/CANCEL-knappen for
at starte kværnen.
START PAUSE
SHOTS CUPS
CANCEL
START PAUSE
SHOTS CUPS
CANCEL
FUNKTIONER
Automatisk kværn
Automatisk kværn muliggør håndfri maling.
• Tryk på START/PAUSE/CANCEL-knappen
ellerskubéngangtillterholderenshåndtag.
Det vil aktivere PORTAFILTER SWITCH.
• Formalingen stopper automatisk, når den
forudindstillede mængde er malet
• Denkorrektemængdekaekanvirke
Other manuals for Smart Grinder Pro SCG820
2
Table of contents
Languages:
Other Sage Coffee Grinder manuals

Sage
Sage BCG600 User manual

Sage
Sage Smart Grinder Pro BCG820 User manual

Sage
Sage the Dose Control Pro User manual

Sage
Sage Smart Grinder Pro BCG820 User manual

Sage
Sage SCG820 User manual

Sage
Sage the Dose Control Pro User manual

Sage
Sage Smart Grinder Pro User manual

Sage
Sage Dose Control Pro BCG600 User manual

Sage
Sage Dose Control Pro BCG600 User manual

Sage
Sage Smart Grinder Pro SCG820 User manual